1. Introduzzjoni
This manual provides detailed instructions for the setup, operation, and maintenance of your VOCOO Digital Indoor Room Thermometer, Model VCUS6215B01. This device is designed to accurately monitor indoor temperature and humidity, offering a clear display with additional features such as a clock, calendar, and comfort level indicator.

Stampa 1.1: Quddiem view of the VOCOO Digital Indoor Room Thermometer displaying current temperature, humidity, time, date, and comfort level.
2. Karatteristiċi ewlenin
- 5.8'' Extra Large Display with Backlight: Features a large HD LCD screen showing temperature, humidity, comfort indicator, Max & Min records, clock, and calendar. A touch-activated 15-second backlight is available when powered by batteries.
- Home-Use Accuracy & Fast Refresh: Provides temperature readings from 14.2°F to 158°F (-9.9℃ to 70℃) with ±1℃ accuracy, and humidity from 10% to 99% RH with ±5% RH accuracy. Readings refresh every 10 seconds.
- Clear Air Comfort Indicator & Calibration: Displays DRY/COMFORT/WET conditions with a color-coded circle. Includes a calibration feature for fine-tuning accuracy.
- Electric Indoor Thermometer with Battery Backup: Can be powered via USB-C cable (adapter not included) with 3 adjustable brightness levels. Three AAA batteries (included) provide backup power and maintain settings during power outages.
- Date and Clock Feature: Integrated date and clock display for convenience.

Image 2.1: The thermometer's large display is suitable for various indoor environments like baby rooms, kitchens, living rooms, garages, and offices.
3. Kontenut tal-Pakkett
Jekk jogħġbok immarka l-kaxxa għall-oġġetti li ġejjin:
- 1 x VOCOO Digital Indoor Room Thermometer (Model VCUS6215B01)
- 1 x Cable USB-C
- 3 x Batteriji AAA
- 1 x Manwal għall-Utent
Note: A USB power plug is not included. You can use any standard 5V USB power adapter.
4. Setup
4.1 It-Tħaddim tal-Apparat
Your thermometer can be powered in two ways:
- Qawwa USB-C: Connect the provided USB-C cable to the device and plug the other end into a 5V USB power adapter (not included) or a USB port. This provides continuous power and allows for adjustable display brightness.
- Batteriji AAA: Insert the three included AAA batteries into the battery compartment on the back of the device. Batteries serve as a backup power source and allow the device to operate without a power cord, though the display will be dimmer and the backlight will only activate for 15 seconds upon touch.

Image 4.1: Illustration of the thermometer being powered by a USB cable and showing the battery compartment. Different brightness levels are shown when connected to USB power.
4.2 Tqegħid
The thermometer can be placed on a flat surface using its integrated stand or mounted on a wall using the hanging hole.
- For accurate readings, place the device away from direct sunlight, heat sources (like radiators or appliances), and areas with strong drafts.
- Ensure proper air circulation around the device for optimal sensor performance.

Image 4.2: The thermometer features a durable stand for desktop placement and a hanging hole for wall mounting.
5. Istruzzjonijiet Operattivi
5.1 Display Overview
L-iskrin LCD kbir juri l-informazzjoni li ġejja:
- Fuq ix-Xellug: Current Temperature (°C/°F), Max/Min temperature records for the last 24 hours.
- Fuq Lemin: Current Humidity (%), Max/Min humidity records for the last 24 hours.
- T'isfel Xellug: Current Time (12/24hr format) and Date (Year/Month/Day, Day of Week).
- Isfel fil-Lemin: Comfort Level Indicator (DRY, COMFORT, WET).
Image 5.1: The main display showing temperature, humidity, time, date, and comfort zone.
5.2 Button Functions (Back of Device)
The device features several buttons on the back for settings adjustment:
- °C/°F Swiċċ: Agħfas biex taqleb bejn l-unitajiet tat-temperatura Celsius u Fahrenheit.
- Buttuna tal-kalibrazzjoni: Used for temperature and humidity calibration.
- Buttuna '+': Increases digits during setting mode.
- Buttuna '-': Decreases digits during setting mode.
- Gear Icon Button (Settings/Date/Time Set): Press and hold to enter setting mode for time and date. Short press to cycle through 12/24 hour format.

Stampa 5.2: Wara view of the thermometer highlighting the function buttons and air holes for sensor accuracy.
5.3 L-issettjar tal-Ħin u d-Data
- Agħfas u żomm il- Gear Icon Button on the back of the device for 3 seconds to enter time setting mode. The hour digits will flash.
- Uża l- '+' u '-' buttuni biex taġġusta s-siegħa.
- Agħfas il- Gear Icon Button again to confirm the hour and move to minute setting. Adjust minutes using '+' u '-'.
- Kompli agħfas il - Gear Icon Button to cycle through setting Year, Month, and Day. Adjust each value with '+' u '-'.
- After setting the day, press the Gear Icon Button darba oħra biex toħroġ mill-modalità tas-settings.
- To switch between 12-hour and 24-hour time format, short press the Gear Icon Button when not in setting mode.
5.4 Unitajiet tat-Temperatura li Jibdlu (°C/°F)
Agħfas il- Buttuna tal-Iswiċċ °C/°F on the back of the device to toggle between Celsius and Fahrenheit temperature displays.
5.5 Adjusting Display Brightness (USB Powered)
When the device is powered via USB, you can adjust the display brightness:
- Touch the top of the device to cycle through 3 brightness levels (Dim, Medium, Bright).
When powered by batteries only, the display is dimmer to conserve power. Touching the top will activate a brighter backlight for 15 seconds.

Image 5.3: The display brightness can be adjusted to three levels when the device is connected to a USB power source.

Image 5.4: The 15-second soft backlight feature for easy reading in dark conditions when operating on battery power.
5.6 Rekords Massimi/Minimi
The device automatically records the maximum and minimum temperature and humidity values over a 24-hour period. These records are displayed below the current temperature and humidity readings.
- The Max/Min data resets automatically after 00:00 each day.

Image 5.5: The display shows the maximum and minimum temperature and humidity recorded over the past 24 hours.
5.7 Kalibrazzjoni
The device is pre-calibrated for accuracy. However, if you wish to match readings with other instruments, you can use the calibration feature:
- Sib il- Buttuna tal-Kalibrazzjoni fuq wara tal-apparat.
- Refer to the full user manual (physical copy) for detailed steps on how to enter calibration mode and adjust temperature/humidity offsets. This typically involves pressing and holding the calibration button and using the '+' and '-' buttons.

Immaġni 5.6: Sploda view of the thermometer highlighting the accurate sensor and its refresh rate, temperature, and humidity ranges.
6. Indikatur tal-Livell ta' Kumdità
The comfort level indicator provides a quick visual reference for indoor conditions:
- XOTT: Umdità taħt is-30%
- Kumdità: Umdità bejn 30% u 69%
- IMxarrab: Humidity 70% or above
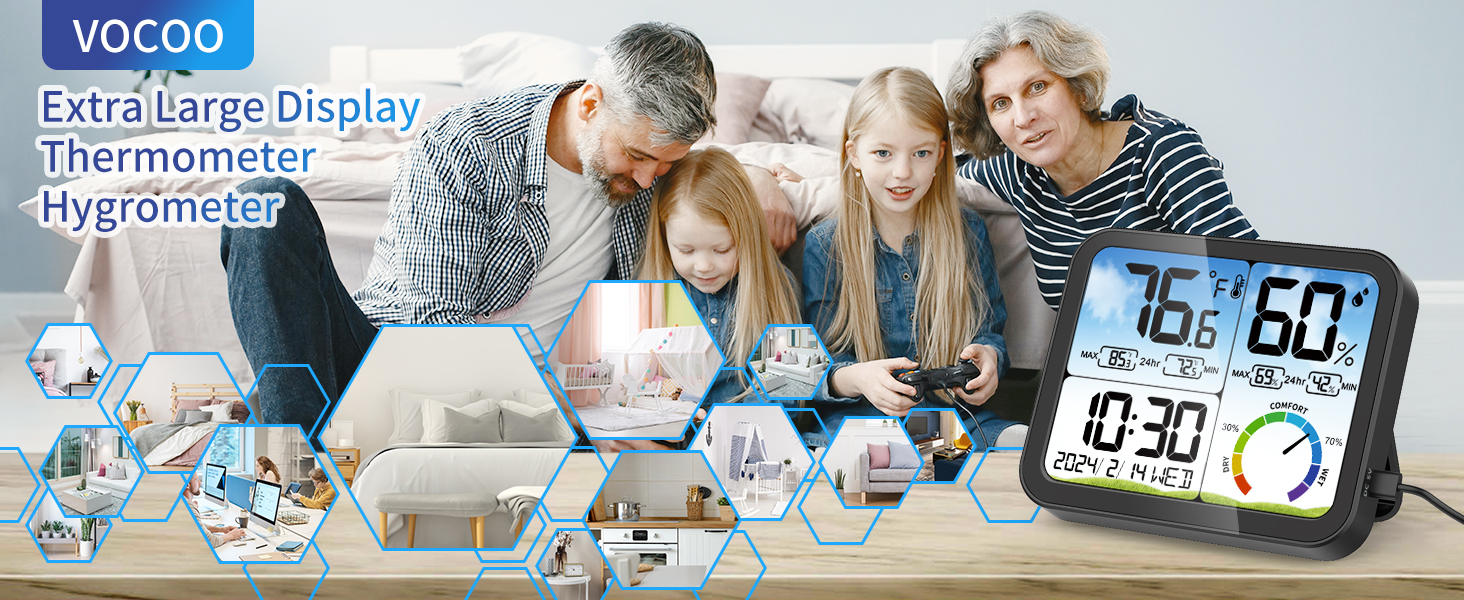
Image 6.1: The comfort level indicator visually represents the indoor air quality based on humidity levels.
7. Speċifikazzjonijiet
| Karatteristika | Dettall |
|---|---|
| Numru tal-Mudell | VCUS6215B01 |
| Dimensjonijiet tal-Prodott | 5.51 x 4.53 x 0.91 pulzieri (14 x 11.5 x 2.3 ċm) |
| Piż tal-oġġett | 14.11 uqija |
| Firxa tat-Temperatura | 14.2°F ~ 158°F (-9.9℃ ~ 70℃) |
| Preċiżjoni tat-Temperatura | ± 1℃ |
| Medda ta 'Umdità | 10% ~ 99% RH |
| Eżattezza Umdità | ±5% RH |
| Riffriskar Rata | Kull 10 sekondi |
| Tip ta 'Wiri | LCD diġitali |
| Sors tal-Enerġija | USB-C (5V) or 3 x AAA Batteries |
| Karatteristiċi Speċjali | Backlit, Fast Refresh, High Accuracy, Large Display, Date & Clock, Max/Min Records, Comfort Indicator, Calibration |
| Materjal ta 'barra | Plastik |
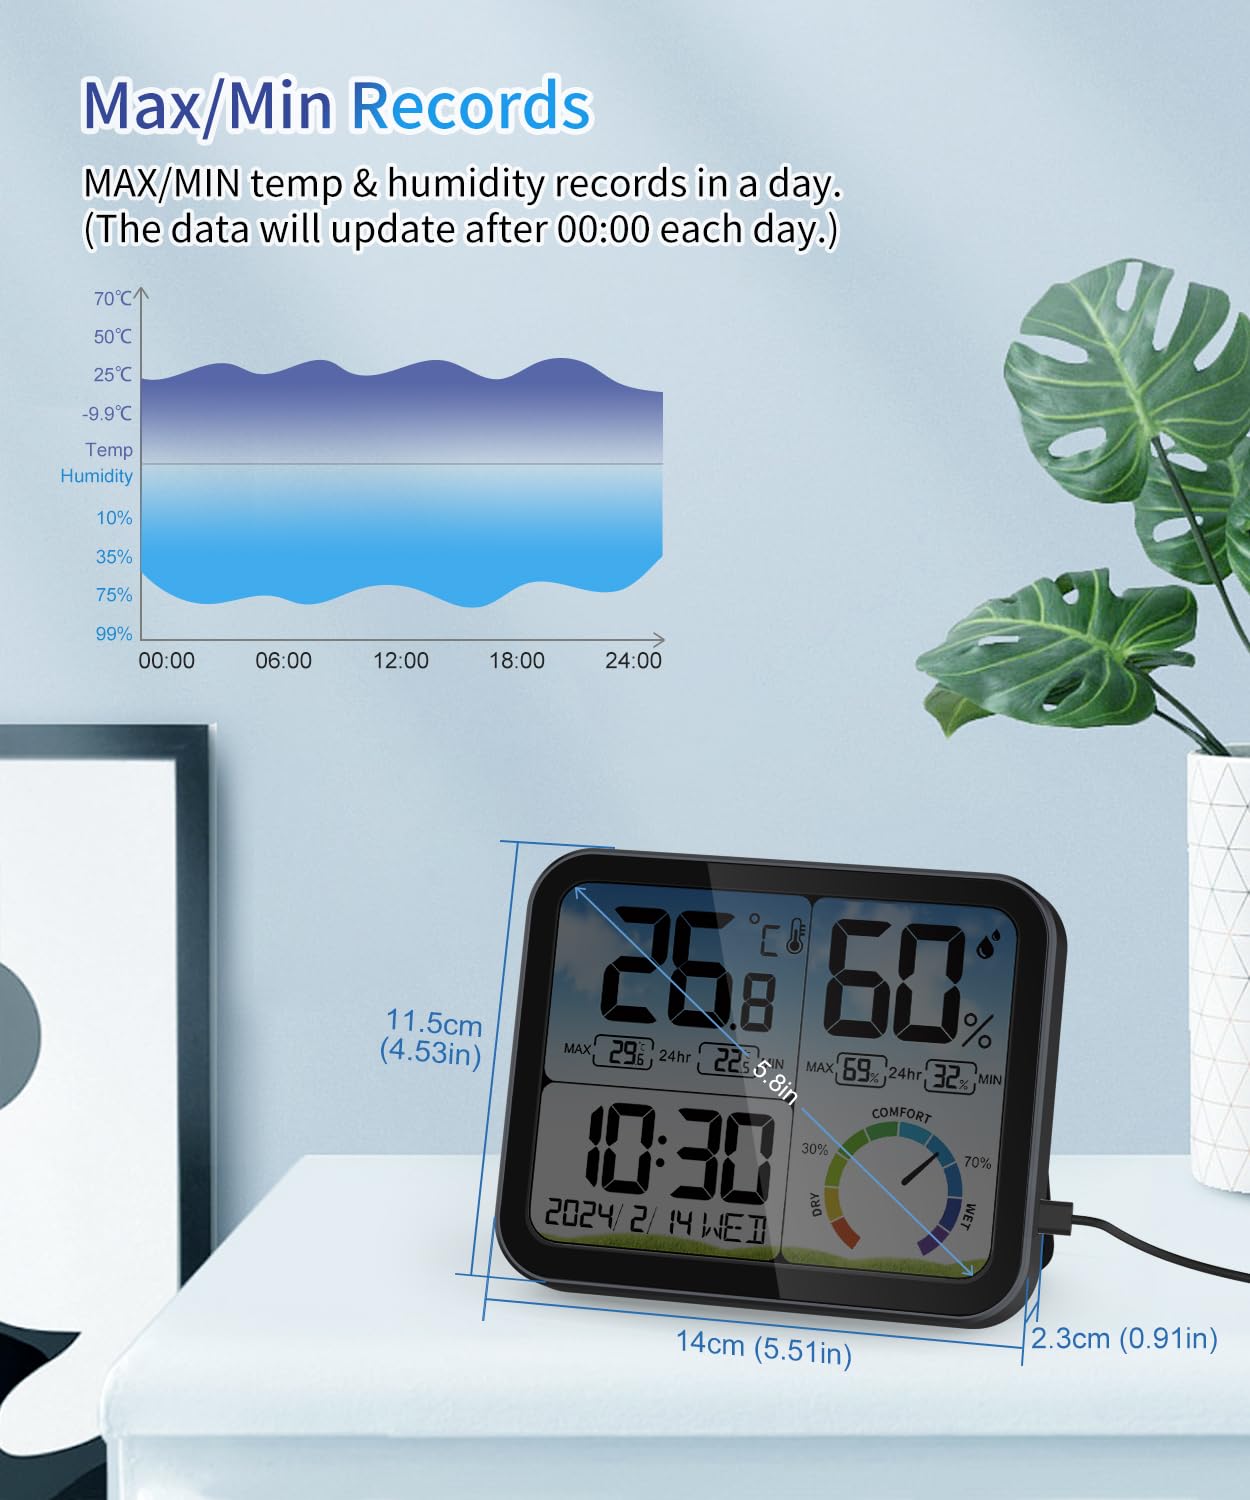
Image 7.1: The thermometer displaying its physical dimensions and Max/Min records.
8. Manutenzjoni
8.1 Tindif
- Imsaħ l-apparat b'ċarruta ratba u niexfa.
- Do not use abrasive cleaners, alcohol, or solvents, as these may damage the display or casing.
8.2 Sostituzzjoni tal-batterija
- When the low battery icon appears on the display, replace the AAA batteries.
- Iftaħ l-għatu tal-kompartiment tal-batterija fuq wara tal-apparat.
- Remove the old batteries and insert three new AAA batteries, ensuring correct polarity (+/-).
- Agħlaq l-għatu tal-kompartiment tal-batterija.

Image 8.1: The display indicating a low battery icon, prompting battery replacement.
9 Issolvi l-problemi
| Problema | Kawża Possibbli | Soluzzjoni |
|---|---|---|
| Display is dim or off (on battery power) | This is normal behavior to conserve battery life. | Touch the top of the device to activate the 15-second backlight. For continuous bright display, connect to USB power. |
| Display shows "LL°F/HH°F" or "LL°C/HH°C" | Temperature is outside the measurable range (below 14.2°F / -9.9°C or above 158°F / 70°C). | Move the device to an environment within the specified temperature range. |
| Inaccurate readings compared to other devices | Environmental factors or minor sensor variance. | Ensure proper placement (away from direct heat/cold/drafts). Use the calibration feature if necessary to fine-tune readings. |
| Time/Date incorrect after power outage | Batteries are not installed or are depleted. | Ensure fresh AAA batteries are installed for backup power. If batteries were depleted, reset the time and date. |
10. Prekawzjonijiet tas-Sigurtà
- Please follow the instructions to operate this product.
- Do not expose the product to extreme weather, dust, moisture, or other harsh environments.
- Żarmax dan il-prodott.
- Do not splash or drizzle liquid on this product.
- When the screen display is not clear, please replace the battery.

Image 10.1: Product packaging detailing parameters and safety cautions.
11. Garanzija u Appoġġ
For any questions, technical support, or warranty inquiries, please contact VOCOO customer service.
Email: support@vocoovip.com
Please have your model number (VCUS6215B01) ready when contacting support.


