1. Prodott Aktarview
The Philco 1012BT-GR is a versatile FM Bluetooth Alarm Clock Radio designed for convenience and functionality. It features a modern black design, a clear digital display, and essential functions including dual alarms, FM radio, Bluetooth connectivity for audio streaming, and a USB port for charging devices or playing music. Its bivolt automatic power supply ensures compatibility with various electrical systems, and an internal battery maintains time settings during power outages.
Karatteristiċi ewlenin:
- FM Stereo Radio for listening to your favorite stations.
- Digital Clock with Dual Alarm functionality for setting two distinct wake-up times.
- Bluetooth Connectivity for wireless audio streaming from smartphones or other compatible devices.
- USB Port for charging mobile devices or playing music from a USB drive.
- LED Display with adjustable brightness for comfortable viewġurnata jew bil-lejl.
- Internal Battery Backup to preserve time settings during power interruptions.
- Automatic Bivolt (110V/220V) operation for broad compatibility.
2. Kontenut tal-Pakkett
Please check your product packaging for the complete list of included items. Typically, the package contains:
- Philco 1012BT-GR Alarm Clock Radio Unit
- Kejbil tal-Enerġija
- Manwal għall-Utent
3. It-Tqassim u l-Kontrolli tal-Prodott
Familiarize yourself with the various parts and controls of your Philco Alarm Clock Radio.
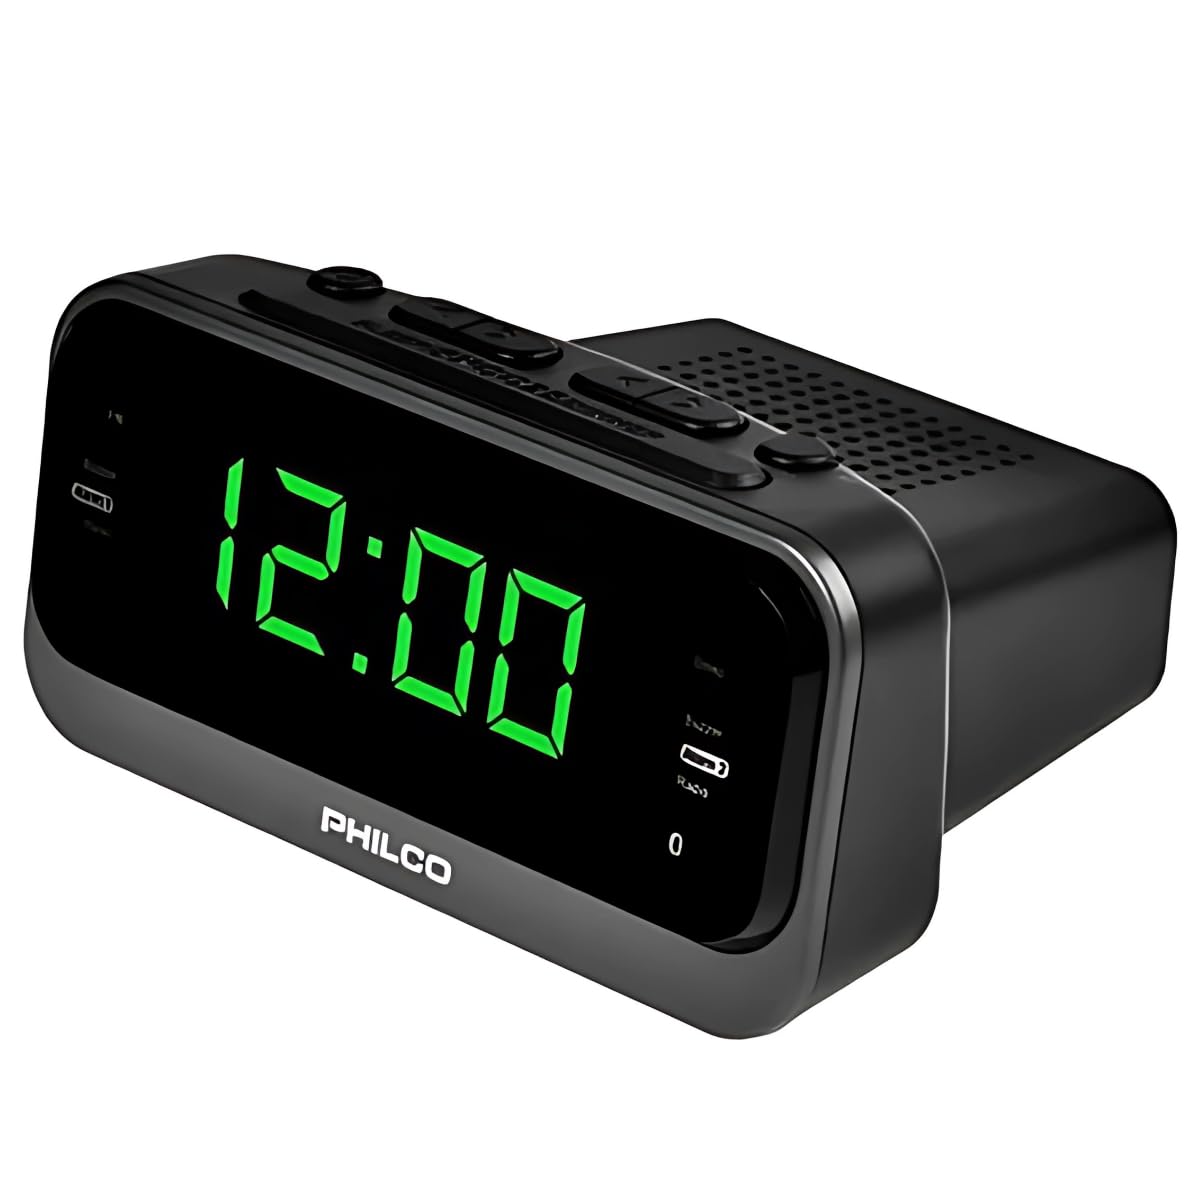
Stampa 1: Quddiem view of the Philco 1012BT-GR Alarm Clock Radio. This image displays the main digital clock, the Philco brand logo, and the control buttons located on the top panel, including buttons for time setting, alarm, radio tuning, and volume.
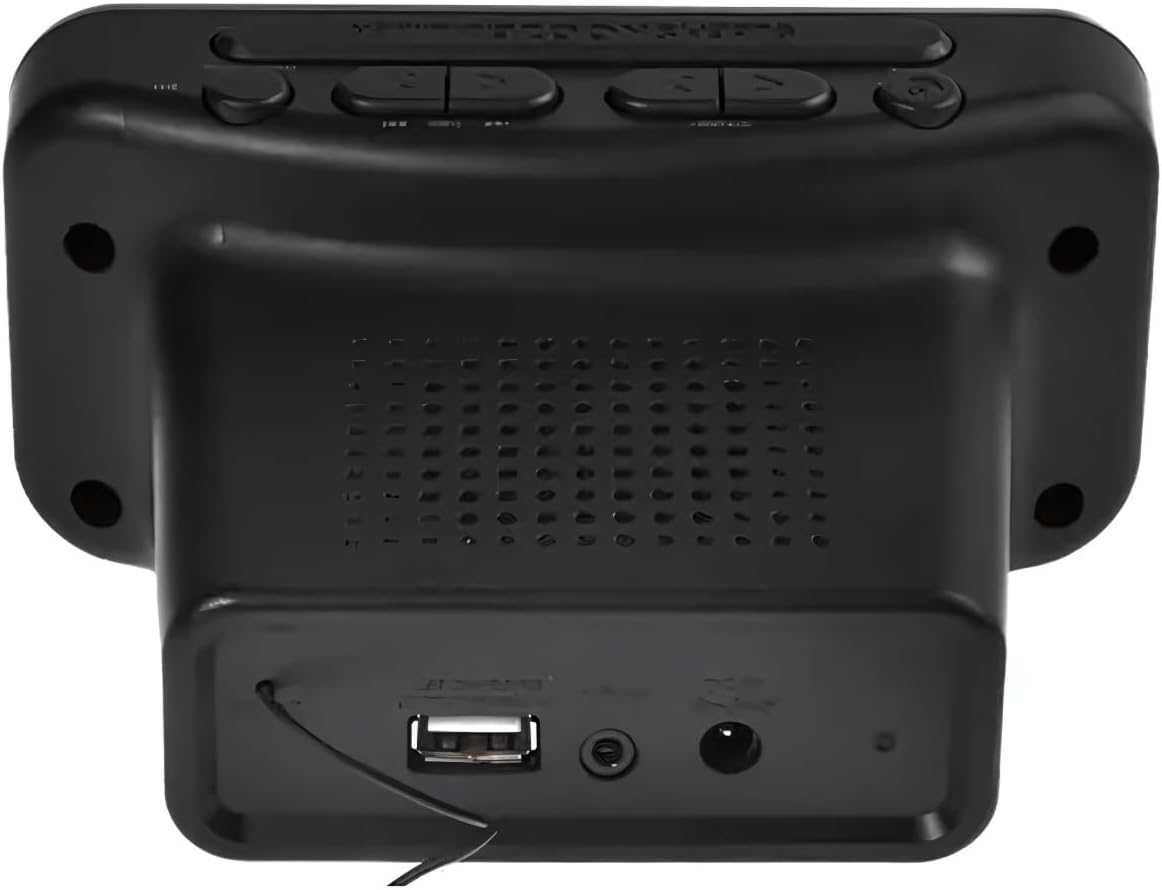
Stampa 2: Wara view of the Philco 1012BT-GR Alarm Clock Radio. This image highlights the rear panel, featuring the USB port for charging or music playback, the DC power input jack, and the integrated speaker grille.
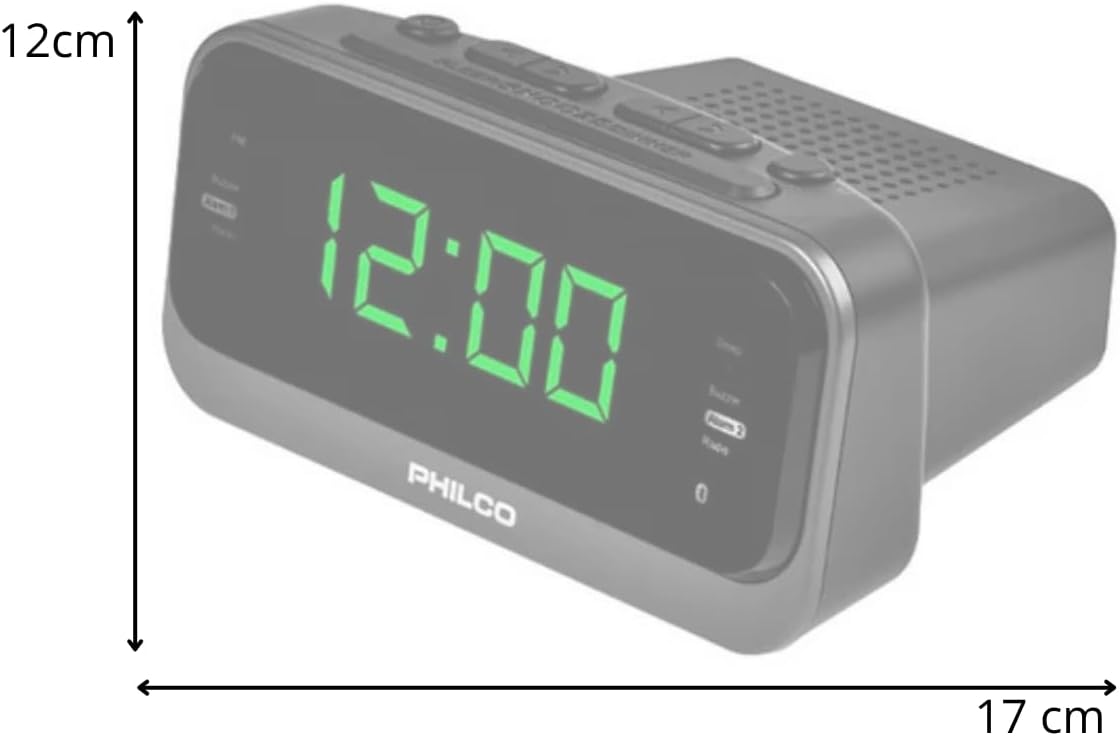
Stampa 3: Ġenb view of the Philco 1012BT-GR Alarm Clock Radio with approximate dimensions. The image indicates a width of 17 cm and a height of 12 cm, providing a visual reference for the product's size.
4. Setup
4.1 Konnessjoni tal-Enerġija
- Ensure the alarm clock radio is placed on a stable, flat surface.
- Connect the power cable to the DC input port on the back of the unit.
- Plug the other end of the power cable into a standard electrical outlet. The unit is bivolt (110V/220V) and will automatically adapt to the voltage.
- The display should illuminate, indicating the unit is powered on.
4.2 Internal Battery Backup
The Philco 1012BT-GR includes an internal battery. This battery is designed to maintain the time and alarm settings in the event of a power outage, ensuring you do not lose your configurations. The unit requires continuous AC power for full operation (display, radio, Bluetooth, USB functions).
5. Istruzzjonijiet Operattivi
5.1 Issettjar tal-Ħin
- Agħfas u żomm il- IL-ĦIN IPPOST button (or equivalent button, refer to physical unit for exact label).
- Uża l- SIEGĦA u MINUTA buttuni biex taġġusta l-ħin attwali.
- Agħfas IL-ĦIN IPPOST għal darb'oħra biex tikkonferma u toħroġ mill-modalità tal-issettjar tal-ħin.
5.2 Issettjar tal-Allarmi (Allarm Doppju)
The unit supports two independent alarms (Alarm 1 and Alarm 2).
- Agħfas u żomm il- ALLARM 1 buttuna.
- Uża l- SIEGĦA u MINUTA buttons to set the desired wake-up time for Alarm 1.
- Agħfas ALLARM 1 again to confirm. You may then select the alarm source (e.g., FM radio or buzzer) and volume.
- Irrepeti l-proċess għal ALLARM 2 bl-użu tal- ALLARM 2 buttuna.
- To activate/deactivate an alarm, briefly press the corresponding ALLARM button until the alarm indicator appears/disappears on the display.
5.3 Funzjoni Snooze
Meta tinstema' allarm, agħfas il-buttuna SNOOZE button (usually a large button on top) to temporarily silence the alarm for a few minutes. The alarm will sound again after the snooze period.
5.4 Tħaddim tar-Radju FM
- Agħfas il- MODALITÀ buttuna biex taqleb għall-modalità tar-radju FM.
- Uża l- INTONA +/- buttuni biex tirranġa stazzjon manwalment.
- Agħfas u żomm INTONA +/- għal skennjar awtomatiku għall-istazzjon disponibbli li jmiss.
- Biex issalva stazzjon, agħfas u żomm il-buttuna Issettjat minn qabel buttuna, imbagħad uża INTONA +/- biex tagħżel numru preset, u agħfas Issettjat minn qabel mill-ġdid biex tikkonferma.
- Uża l- VOLUM +/- buttuni biex taġġusta l-volum tar-radju.
5.5 Tqabbil tal-Bluetooth
- Agħfas il- MODALITÀ button to switch to Bluetooth mode. The display will show "BT" or a Bluetooth icon, and the unit will enter pairing mode.
- Fuq it-tagħmir mobbli tiegħek, ippermetti l-Bluetooth u fittex tagħmir disponibbli.
- Select "Philco 1012BT-GR" (or similar name) from the list of devices.
- Once paired, you can stream audio from your device to the alarm clock radio.
- Use your mobile device or the unit's VOLUM +/- buttons to control playback volume.
5.6 Daqq u Iċċarġjar tal-USB
- For Music Playback: Daħħal flash drive USB li fih awdjo kompatibbli files (e.g., MP3) into the USB port on the back of the unit. Press the MODALITÀ button to select USB mode. The unit will automatically begin playing music.
- For Device Charging: Connect your mobile phone or other compatible device to the USB port using its charging cable. The unit will provide power to charge your device.
5.7 Aġġustament tal-luminożità tal-wiri
To adjust the brightness of the LED display, locate the DIMMER or BRIGHTENZA button (refer to physical unit for exact label) and press it repeatedly to cycle through different brightness levels.
6. Manutenzjoni
6.1 Tindif
- Dejjem aqla 'l-unità mill-iżbokk tad-dawl qabel it-tindif.
- Uża drapp artab u niexef biex timsaħ l-uċuħ ta’ barra.
- Tużax prodotti tat-tindif, xama', jew solventi li joborxu għax jistgħu jagħmlu ħsara lill-finitura.
- Evita li tisprejja likwidi direttament fuq l-unità.
6.2 Ħażna
If storing the unit for an extended period, unplug it and store it in a cool, dry place away from direct sunlight and extreme temperatures.
6.3 Prekawzjonijiet tas-Sigurtà
- Tesponix l-unità għall-ilma jew għal umdità eċċessiva.
- Twaqqafx il-fetħiet tal-ventilazzjoni.
- Tippruvax tiżżarma jew issewwi l-unità int stess. Irreferi għal kull manutenzjoni f'idejn persunal kwalifikat.
- Żomm l-unità 'l bogħod minn sorsi ta' sħana bħal radjaturi, reġistri tas-sħana, stufi, jew apparat ieħor (inkluż amplifiers) li jipproduċu sħana.
7 Issolvi l-problemi
- L-unità ma tixgħelx: Ensure the power cable is securely connected to both the unit and a working electrical outlet.
- Is-settings tal-Ħin/Allarm jintilfu wara li tintefa' l-elettrikutage: The internal battery backup should retain settings. If not, ensure the unit was plugged in for a sufficient period to charge the internal battery.
- No sound from FM radio: Check the volume level. Ensure the unit is in FM mode and tuned to an active station. Extend the FM antenna (if applicable) for better reception.
- Bluetooth device cannot pair: Ensure the unit is in Bluetooth pairing mode. Make sure Bluetooth is enabled on your mobile device and it is within range. Try restarting both devices.
- L-iċċarġjar tal-USB mhux qed jaħdem: Ensure the USB cable is properly connected. Some devices may require more power than the USB port can provide, or the device may already be fully charged.
- USB music playback not working: Kun żgur li l-USB drive huwa fformattjat b'mod korrett u fih awdjo kompatibbli files (e.g., MP3). Try a different USB drive.
- Wiri qawwi wisq/mċajpar: Use the brightness adjustment button (DIMMER) to cycle through different levels.
- Alarm volume too low/high: The alarm volume can be adjusted. Refer to the operating instructions for setting alarm preferences.
- No headphone jack: This model does not feature a headphone output.
8. Speċifikazzjonijiet
| Karatteristika | Speċifikazzjoni |
|---|---|
| Brand | Philco |
| Mudell | 1012BT-GR |
| Kulur | Iswed |
| Voltage | Automatic Bivolt (110V/220V) |
| Funzjonijiet | FM Stereo Radio, Digital Clock, Dual Alarm, Bluetooth, USB (Charging/Music) |
| Wiri | LED bi luminożità aġġustabbli |
| Sors tal-Enerġija | Cable, Internal Battery (for time backup) |
| Approximate Dimensions (W x H x D) | 17 ċm x 12 ċm x 7 ċm |
| Piż approssimattiv | 450g |
9. Garanzija u Appoġġ
9.1 Garanzija tal-Manifattur
Dan il-prodott jiġi ma 'a Garanzija ta' 1-il xahar mill-manifattur mid-data tax-xiri. Jekk jogħġbok żomm il-prova tax-xiri tiegħek għal talbiet ta' garanzija. Il-garanzija tkopri difetti fil-manifattura taħt użu normali. Ma tkoprix ħsara kkawżata minn użu ħażin, inċidenti, modifiki mhux awtorizzati, jew xedd u kedd normali.
9.2 Appoġġ għall-Klijent
For technical assistance, warranty inquiries, or service requests, please contact your retailer or the Philco customer support line. Refer to the product packaging or Philco's official webis-sit għall-aktar informazzjoni ta' kuntatt aġġornata.


