1. Introduzzjoni
This manual provides comprehensive instructions for the installation, operation, and maintenance of your HOSELINK Classic Beige 100ft Automatic Retractable Garden Hose Reel. Designed for convenience and durability, this wall-mounted system features a 1/2-inch UV-stabilized, kink-free hose and an automatic rewind mechanism, making garden watering efficient and effortless.
2. Informazzjoni dwar is-Sigurtà
- Always ensure the hose reel is securely mounted to a stable surface before use.
- Do not attempt to disassemble the hose reel mechanism. Internal springs are under tension.
- Keep children and pets away from the hose during retraction to prevent injury.
- Drain water from the hose and store the unit indoors during freezing temperatures to prevent damage.
- Use only clean water with the hose reel. Do not use with chemicals or hot water.
3. Kontenut tal-Pakkett
Iċċekkja li l-komponenti kollha huma preżenti qabel tibda l-installazzjoni:
- HOSELINK Classic Retractable Garden Hose Reel (100ft, 1/2" hose included)
- Ħitan Mount Bracket
- Mounting Hardware (4 bolts, plastic anchors)
- 8-Mudell Spray Żennuna
- Fittings Quick-Connect
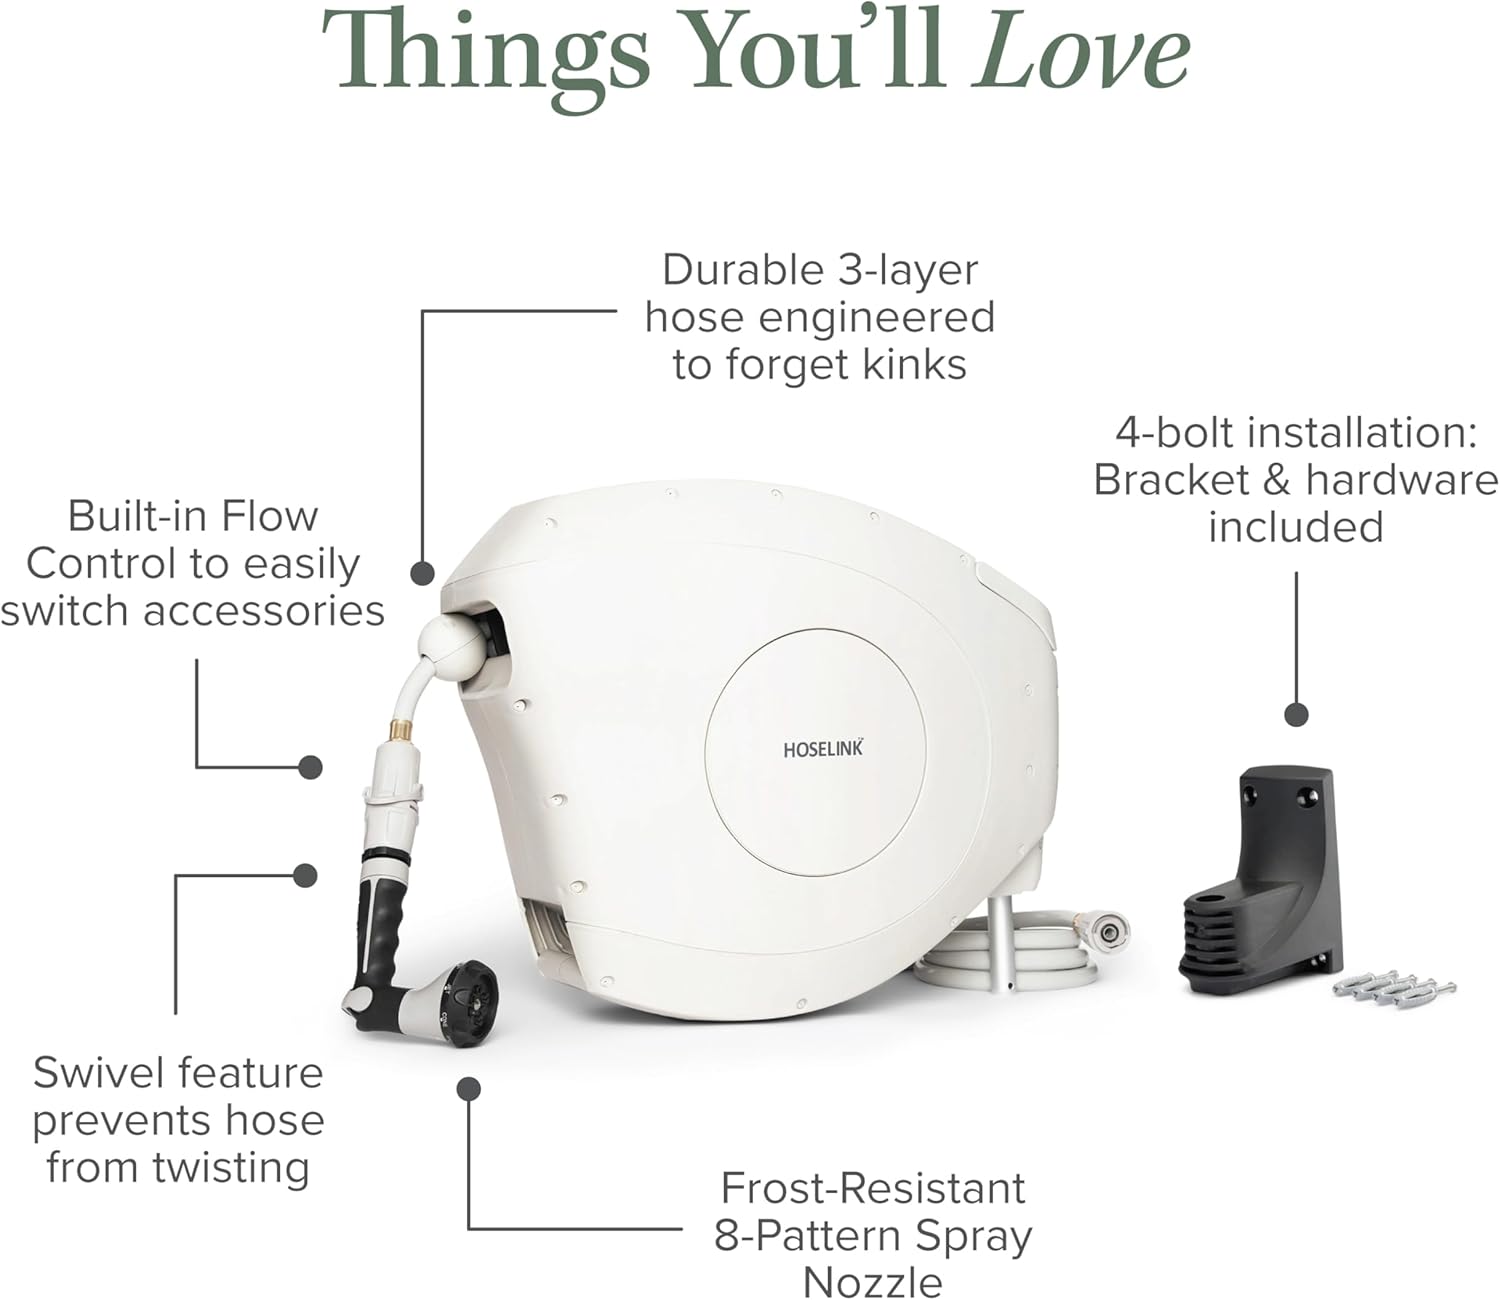
Figure 1: Included components and key features of the hose reel system.
4. Setup u Installazzjoni
The HOSELINK Classic Retractable Garden Hose Reel is designed for wall mounting. Ensure you select a sturdy wall or post capable of supporting the weight of the unit (approximately 30 lbs) plus the weight of water in the hose.
4.1 Għażla ta' Post
- Select a location near your water source.
- Ensure sufficient clearance for the hose reel to swivel 180 degrees.
- Consider mounting at waist height for comfortable operation.

Figure 2: The wall mount bracket requires four bolts for secure installation.
4.2 Immuntar tal-Bracket
- Position the wall mount bracket at the desired height and mark the four drilling points.
- Drill pilot holes suitable for the provided mounting hardware. For masonry, a masonry bit may be required.
- Insert the plastic anchors (if applicable) into the drilled holes.
- Secure the bracket to the wall using the four provided bolts. Ensure it is firmly attached.

Figure 3: The reinforced bracket supports the hose reel, which is UV-stabilized for outdoor use.
4.3 Attaching the Hose Reel
- Carefully lift the hose reel and slide it onto the mounted bracket. It should click securely into place.
- Connect the leader hose (short hose from the reel) to your water tap using the quick-connect fitting.
- Attach the 8-pattern spray nozzle to the end of the main hose using the quick-connect fitting.

Figure 4: Quick-connect fittings and the frost-resistant spray nozzle facilitate easy setup.
5. Istruzzjonijiet Operattivi
5.1 Extending the Hose
- Gently pull the hose from the reel to the desired length.
- The "stop-anywhere" locking mechanism will engage automatically, holding the hose in place. You will hear a clicking sound.
- To release the lock and extend further, pull the hose slightly past the last locking point.
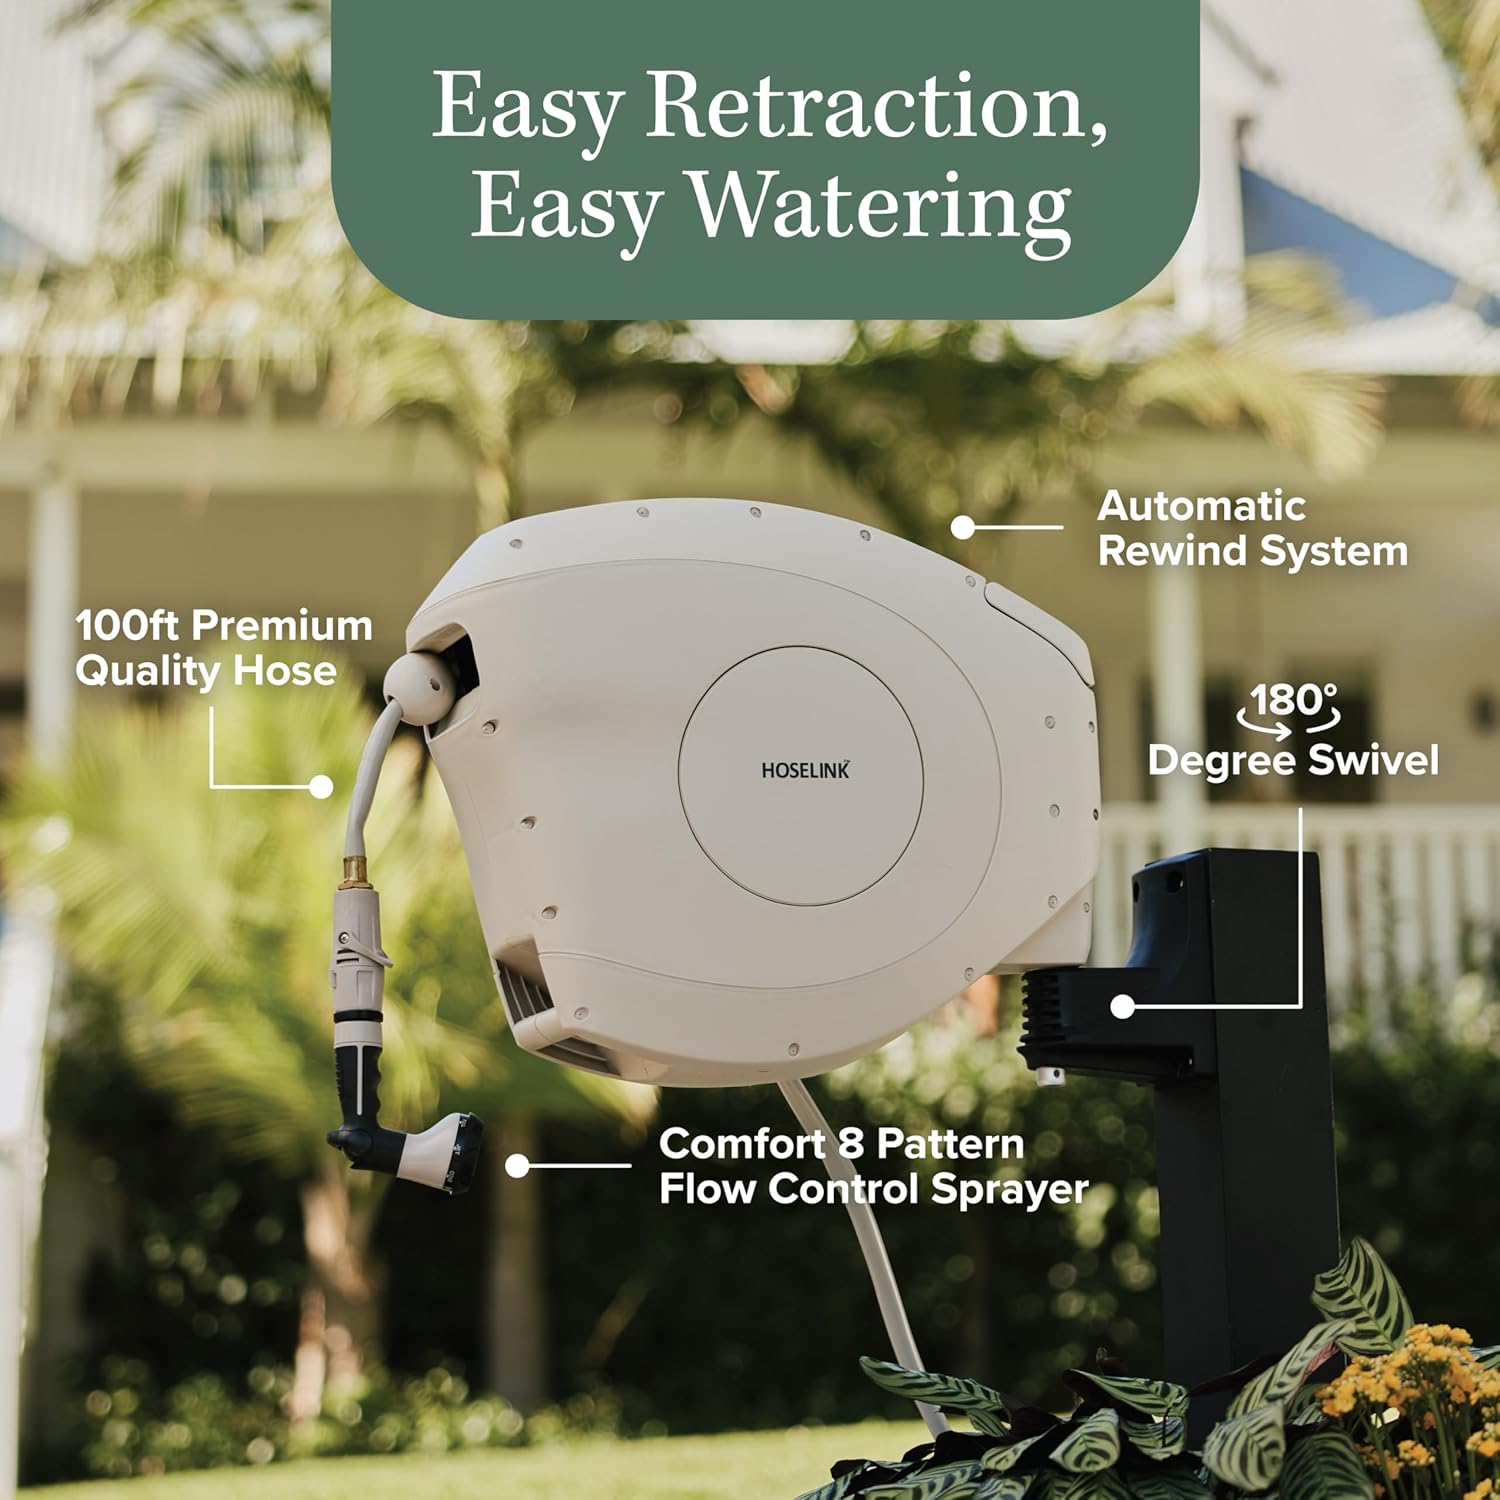
Figure 5: The hose reel features an automatic rewind system and a 180-degree swivel for easy watering.
5.2 Retracting the Hose
- To retract the hose, pull it gently one more time until the locking mechanism disengages.
- Allow the hose to retract slowly and evenly back into the reel. Guide the hose if necessary to prevent tangling.
- The automatic rewind system will coil the hose neatly.

Figure 6: The hose reel provides steady and reliable extension and retraction.
5.3 Using the Spray Nozzle
- The included 8-pattern spray nozzle allows for various watering tasks. Rotate the nozzle head to select your desired spray pattern.
- The nozzle features built-in flow control for adjusting water pressure.
- The swivel feature on the hose connection prevents twisting during use.
6. Manutenzjoni
- Tindif: Wipe down the hose reel and hose with a damp cloth as needed to remove dirt and debris.
- Ħażna tax-Xitwa: Before the first frost, disconnect the hose reel from the water supply. Drain all water from the hose and the reel. Store the entire unit indoors in a frost-free environment to prevent damage from freezing water. The unit is moveable with two carry handles for easy storage.
- Protezzjoni UV: The hose and casing are UV-stabilized to protect against sun damage and extreme weather, but proper storage extends product life.

Figure 7: The hose reel is designed with two carry handles for easy portability and storage.
7 Issolvi l-problemi
| Problema | Kawża Possibbli | Soluzzjoni |
|---|---|---|
| Il-pajp mhux qed jinġibed lura għalkollox jew bla xkiel. | Hose is tangled or obstructed. Insufficient tension. | Pull the hose out completely, then guide it back slowly and evenly. Ensure no kinks or obstructions. If the issue persists, contact customer support. |
| Tnixxija ta' ilma mill-konnessjonijiet. | Konnessjonijiet maħlula jew O-rings bil-ħsara. | Ensure all quick-connect fittings are securely attached. Check O-rings for wear and replace if necessary. |
| L-ebda fluss ta' ilma jew pressjoni baxxa. | Water tap off, hose kinked, or nozzle clogged. | Check that the water tap is fully open. Inspect the hose for kinks. Clean the spray nozzle if it appears clogged. |
8. Speċifikazzjonijiet
| Brand | HOSELINK |
| Numru tal-Mudell | US3330-WG |
| Tul tal-Manka | 100 pied |
| Dijametru tal-Manka | 1/2 pulzier |
| Materjal | Polipropilene |
| Kulur | Beige |
| Dimensjonijiet (L x W x H) | 24 x 10.6 x 19.3 pulzieri |
| Piż tal-oġġett | 30 liri |
| Tip ta' Installazzjoni | Mount Wall |
| Mod ta' Operazzjoni | Automatic Retraction |
| Medda li ddur | 180 grad |

Figure 8: Product dimensions of the HOSELINK Classic Retractable Garden Hose Reel.
9. Garanzija u Appoġġ
The HOSELINK Classic Beige 100ft Automatic Retractable Garden Hose Reel comes with a garanzija ta 'sena, reflecting our commitment to quality. For any questions, technical assistance, or warranty claims, please contact HOSELINK customer service.
HOSELINK provides live, US-based customer service to assist you.

Figura 9: Il-prodott għandu garanzija ta’ 2 snin.


