1. Introduzzjoni
This manual provides detailed instructions for the installation, operation, and maintenance of your MOES WiFi Smart Light Switch (1-Gang). This smart switch is designed to enhance your home lighting control with convenience and smart features.
Karatteristiċi ewlenin:
- Supports both no-neutral wire and with-neutral wire configurations.
- No hub required; connects directly to your 2.4GHz Wi-Fi network.
- Kompatibbli ma' Alexa u Google Assistant għall-kontroll tal-vuċi.
- Kontroll mill-bogħod permezz ta' applikazzjoni għall-ismartphone.
- Timer and scheduling functions for automated lighting.
- Space-saving design fits most standard wall boxes.

Image 1.1: MOES WiFi Smart Light Switch packaging and the 1-gang switch unit.
2. Informazzjoni dwar is-Sigurtà
- Dejjem itfi l-enerġija mis-circuit breaker qabel l-installazzjoni jew il-manutenzjoni.
- Jekk m'intix ċert dwar il-wajers elettriċi, ikkonsulta elettriċista kwalifikat.
- This switch is designed for indoor use only.
- Teċċedix il-klassifikazzjonijiet massimi tat-tagħbija speċifikati fl-ispeċifikazzjonijiet tal-prodott.
3. Gwida għall-Installazzjoni
3.1. Lista ta' Kontroll ta' Qabel l-Installazzjoni
- Ensure your home has a 2.4GHz Wi-Fi network. 5GHz networks are not supported.
- Confirm the existing wiring in your wall box (neutral wire present or not).
- Tools required: Screwdriver, wire strippers, voltagtester.
3.2. Istruzzjonijiet tal-Wiring
The MOES Smart Light Switch supports both neutral wire and no-neutral wire configurations. Please identify your wiring type before proceeding.
3.2.1. No-Neutral Wire Installation
If your wall box does not have a neutral wire, a capacitor (included in the package) is required for proper operation. This capacitor must be connected across the light bulb terminals.
- Itfi l-enerġija: Sib is-circuit breaker tiegħek u itfi l-enerġija lis-swiċċ li qed tissostitwixxi. Ivverifika li l-enerġija hija mitfija b'voltmetru.tagtester.
- Identifika l-wajers: In your wall box, identify the Line (Live) wire, Load wire(s), and Ground wire.
- Connect wires to the switch:
- Connect the Line wire to the 'L' terminal on the smart switch.
- Connect the Load wire(s) to the 'L1' (OUT) terminal. For 1-gang switches, typically only L1 is used.
- Connect the Ground wire to the 'GND' terminal.
- Installa l-Kondensatur: Connect the provided capacitor across the light bulb terminals (between the live and neutral wires at the light fixture). This is crucial for no-neutral setups to ensure stable power to the smart switch.
- Immonta l-iswiċċ: Secure the smart switch into the wall box and attach the faceplate.
- Irrestawra l-qawwa: Ixgħel il-qawwa lura fis-circuit breaker.

Image 3.1: Wiring diagram for no-neutral wire installation, showing capacitor connection.

Image 3.2: Comparison of Neutral + Live Wire and No Neutral Wire diagrams, highlighting the capacitor for no-neutral setups.
3.2.2. With-Neutral Wire Installation
If your wall box has a neutral wire, the installation is straightforward.
- Itfi l-enerġija: Sib is-circuit breaker tiegħek u itfi l-enerġija lis-swiċċ li qed tissostitwixxi. Ivverifika li l-enerġija hija mitfija b'voltmetru.tagtester.
- Identifika l-wajers: In your wall box, identify the Line (Live) wire, Neutral wire, Load wire(s), and Ground wire.
- Connect wires to the switch:
- Connect the Line wire to the 'L' terminal on the smart switch.
- Qabbad il-wajer Newtrali mat-terminal 'N'.
- Connect the Load wire(s) to the 'L1' (OUT) terminal. For 1-gang switches, typically only L1 is used.
- Connect the Ground wire to the 'GND' terminal.
- Immonta l-iswiċċ: Secure the smart switch into the wall box and attach the faceplate.
- Irrestawra l-qawwa: Ixgħel il-qawwa lura fis-circuit breaker.
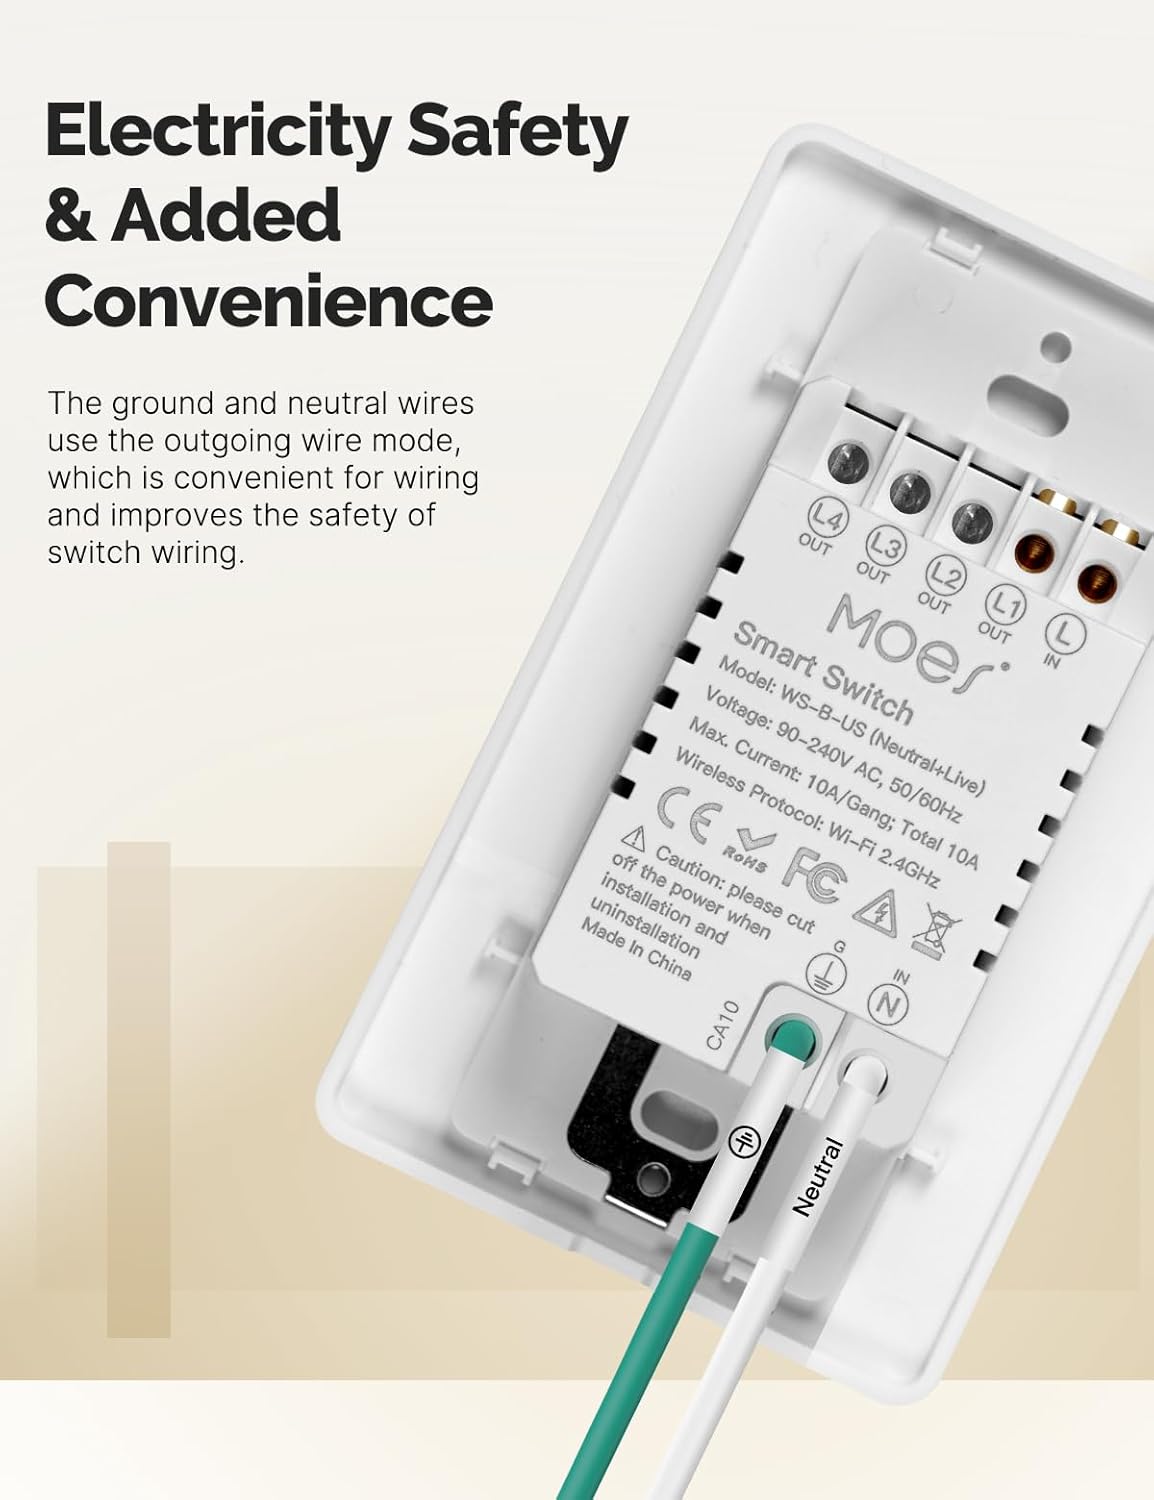
Stampa 3.3: Wara view of the MOES Smart Switch showing wiring terminals for Line, Neutral, Load, and Ground connections.
3.3. Tqabbil tal-App
- Niżżel l-App: Download the "Smart Life" or "MOES" app from your smartphone's app store.
- Reġistrazzjoni/Idħol: Oħloq kont jew idħol fl-app.
- Żid Apparat: Tektek l-ikona '+' fir-rokna ta' fuq tal-lemin tal-app biex iżżid apparat ġdid.
- Agħżel it-Tip ta' Apparat: Choose "Electrical" then "Light Switch" or "Switch (Wi-Fi)".
- Daħħal id-dettalji tal-Wi-Fi: Ensure your phone is connected to a 2.4GHz Wi-Fi network. Enter your Wi-Fi password.
- Mod ta 'tqabbil: The switch should automatically enter pairing mode (indicator light blinking rapidly). If not, press and hold the switch button for 5-10 seconds until it blinks rapidly.
- Tqabbil Komplet: Follow the on-screen instructions in the app to complete the pairing process. Once connected, you can rename the switch.
Video 3.1: A visual guide demonstrating the general installation process for the MOES Smart Light Switch, including wiring and app pairing. (Note: Video may show a multi-gang switch, but principles apply to 1-gang).
4. Istruzzjonijiet Operattivi
4.1. Kontroll manwali
Press the physical button(s) on the switch to turn the connected light(s) on or off. The switch features high-quality buttons for reliable operation.
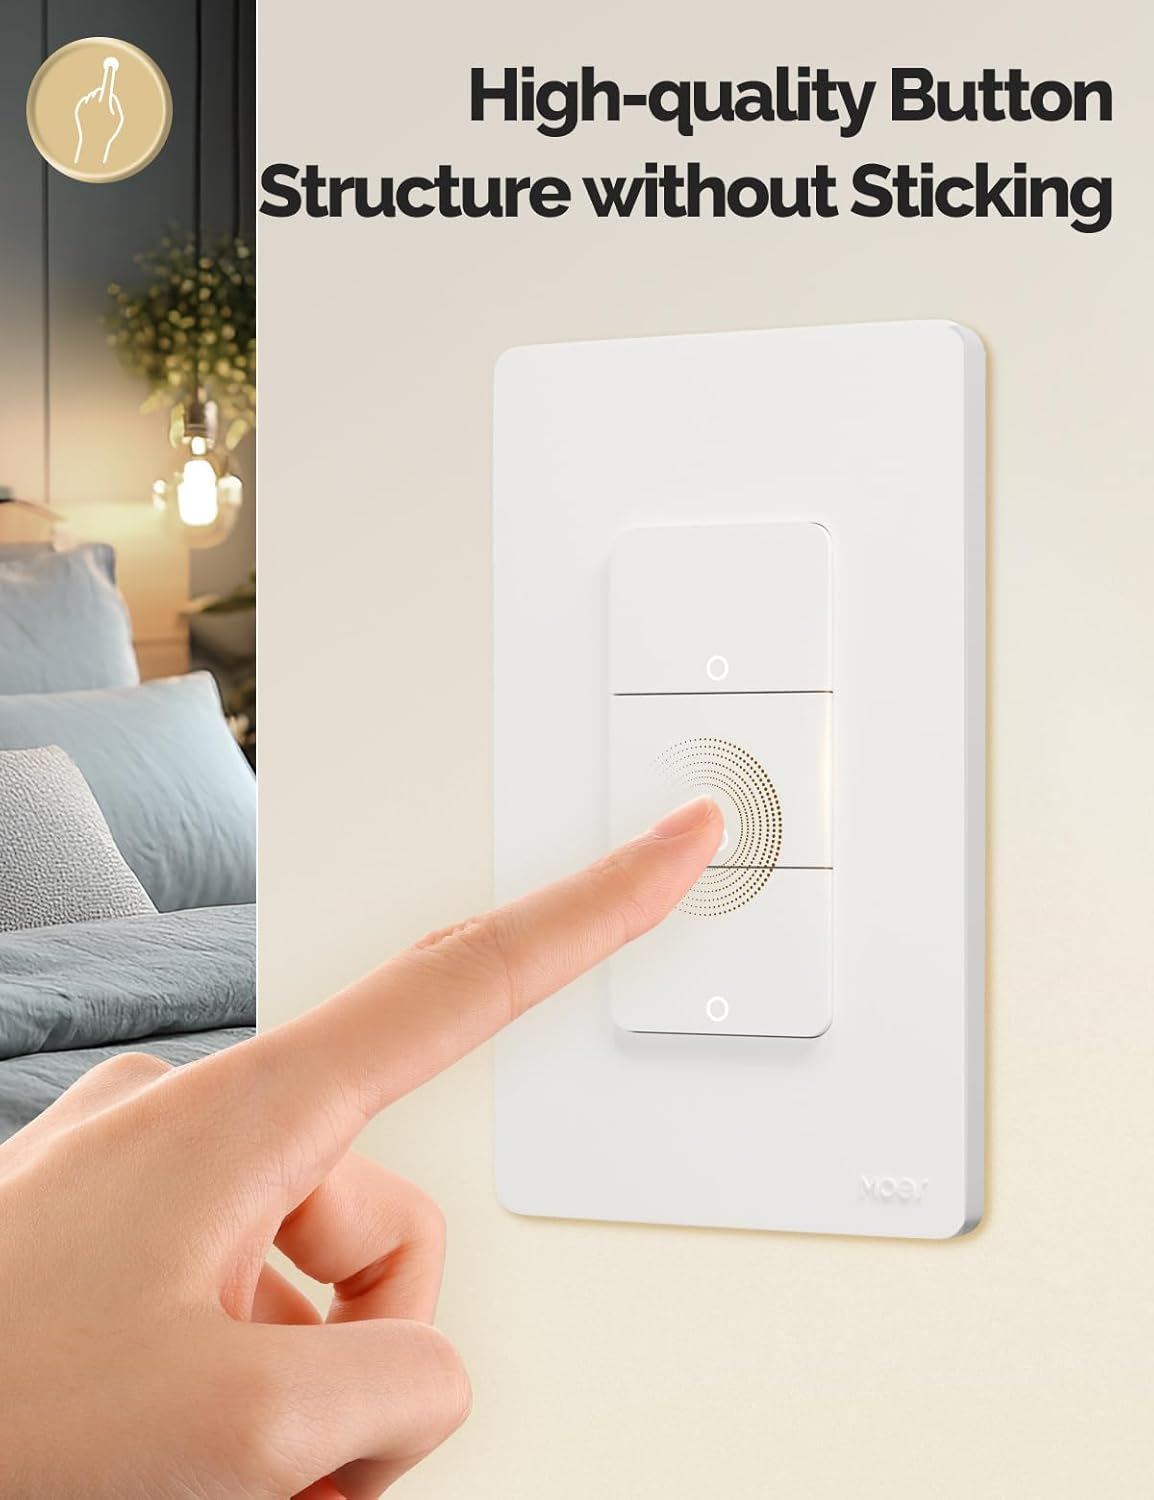
Image 4.1: Close-up of the MOES Smart Switch highlighting its high-quality button design.
4.2. App Control (Remote Control)
Once paired with the app, you can control your lights from anywhere using your smartphone.
- Open the "Smart Life" or "MOES" app.
- Select your smart switch from the device list.
- Tap the on/off icons to control your lights.

Image 4.2: Demonstrates remote control functionality of the smart switch via the mobile application.
4.3. Kontroll tal-Vuċi
The switch is compatible with Amazon Alexa and Google Assistant for hands-free control.
- Kont tal-Kont: In your Alexa or Google Home app, link your "Smart Life" or "MOES" account.
- Skopri Mezzi: Staqsi lill-assistent tal-vuċi tiegħek biex jiskopri apparati ġodda.
- Kmandi bil-vuċi: Use commands like "Alexa, turn on the living room light" or "Hey Google, turn off the bedroom light."

Image 4.3: Setup showing smart speakers (Alexa, Google Home) interacting with the smart switch for voice control.
4.4. Funzjonijiet tat-Tajmer u l-Iskeda
Automate your lighting with customizable timers and schedules through the app.
- Skeda: Set specific times for lights to turn on or off daily or on selected days.
- Countdown: Set a countdown timer for lights to turn off after a set duration.
- Ħin taċ-Ċiklu: Configure lights to cycle on and off at regular intervals.
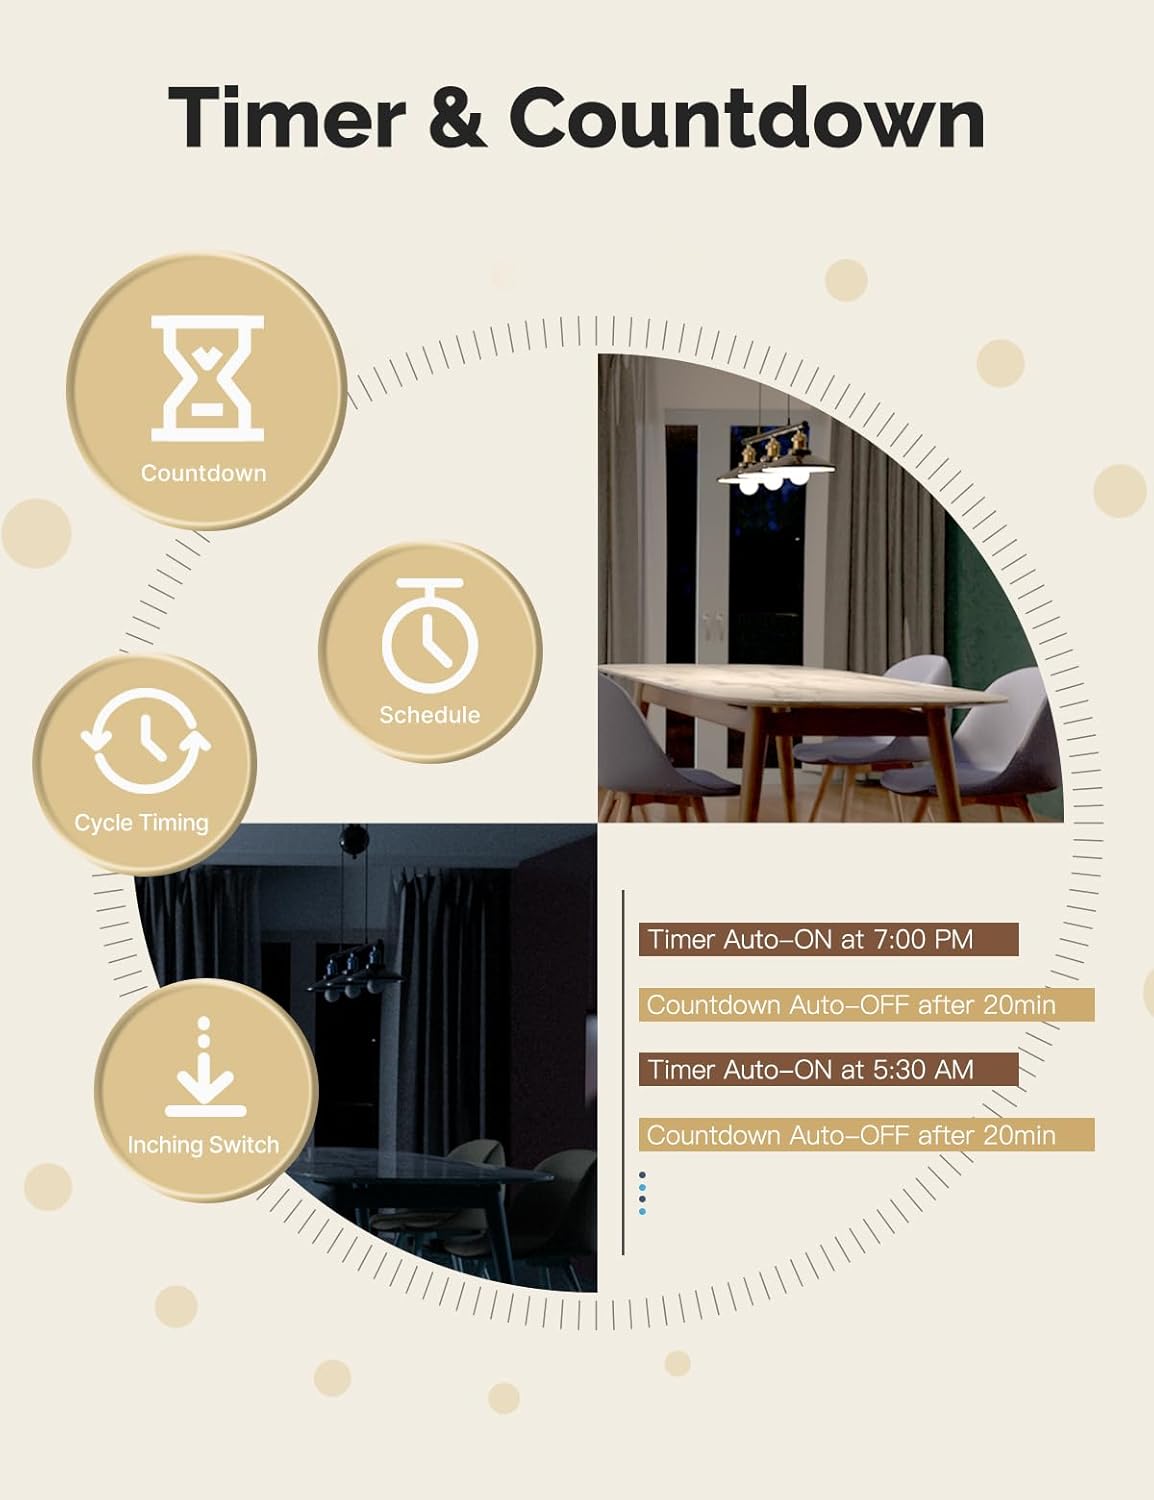
Image 4.4: Visual representation of timer and countdown settings available in the smart home application.
4.5. Indicator Light Mode
The switch features an indicator light that can be configured via the app to show ON/OFF status or switch location in the dark.

Image 4.5: Illustrates different indicator light modes, such as showing ON/OFF status or switch location.
4.6. Relay Status Settings
Ikkonfigura l-imġiba tas-swiċċ wara li tintefa' l-enerġijatage (Power-off, Power-on, or Restart Memory) through the app settings.

Image 4.6: Screenshot of the app interface for configuring relay status settings after a power interruption.
5. Manutenzjoni
- Clean the switch faceplate with a soft, dry cloth. Avoid abrasive cleaners or solvents.
- Iċċekkja regolarment għal aġġornamenti tal-app biex tiżgura prestazzjoni u sigurtà ottimali.
- Ensure your Wi-Fi network is stable and within range of the switch.
6 Issolvi l-problemi
| Problema | Kawża Possibbli | Soluzzjoni |
|---|---|---|
| Switch not responding to app/voice commands. |
|
|
| Lights flicker or do not turn off completely (no-neutral wiring). |
|
|
| Switch gets warm or burns out. |
|
|
| Difficulty with initial installation. |
|
|
7. Speċifikazzjonijiet
| Karatteristika | Dettall |
|---|---|
| Brand | KELLU |
| Mudell | WS-US-L (1-Gang) |
| Mod ta' Operazzjoni | Awtomatiku |
| Tip ta' Kuntatt | Normalment Miftuħ |
| Tip ta' Konnettur | Terminali bil-kamin |
| Terminal | Invita |
| Tip ta 'Ċirkwit | 2-mod |
| Tip ta 'Immuntar | Mount Wall |
| Kuntatt Materjal | Ram |
| Numru ta' Pożizzjonijiet | 1 |
| Metodu ta' Kontroll | App, Remot, Mess, Vuċi |
| Protokoll bla fili | 2.4GHz Wi-Fi |
| Voltage | 90-240V AC, 50/60Hz |
| Max. Current (per gang) | 8A |
| Total Max. Current | 8A |

Image 7.1: Detailed dimensions and technical specifications of the MOES Smart Light Switch.
8. Garanzija u Appoġġ
MOES products are designed for reliability and performance. For warranty information, technical support, or further assistance, please visit the official MOES webis-sit jew ikkuntattja lis-servizz tal-klijenti tagħhom direttament.
Tista' ssib aktar informazzjoni u riżorsi ta' appoġġ fuq Ħanut MOES fuq Amazon.


