1. Introduzzjoni
The Ransanx NerdMiner V2 NMMiner is a compact, energy-efficient device designed for Bitcoin lottery mining and educational exploration of cryptocurrency concepts. Featuring a 2.8-inch touchscreen display and an ESP32-WROOM-32 module, it offers both standalone operation via Wi-Fi and a visual interface for monitoring mining status and other information. This manual provides essential instructions for setting up, operating, and maintaining your NerdMiner V2.
2. X'hemm fil-Kaxxa
Upon unboxing your Ransanx NerdMiner V2, please ensure all the following components are present:
- Bitcoin NerdMiner ESP32 Development Board (with 2.8-inch touchscreen)
- Kejbil tal-Enerġija USB-C
- Stylus for touchscreen interaction
- Assembly hardware (screws, nuts, acrylic casing components)
- Jumper wires (for advanced configurations, if applicable)
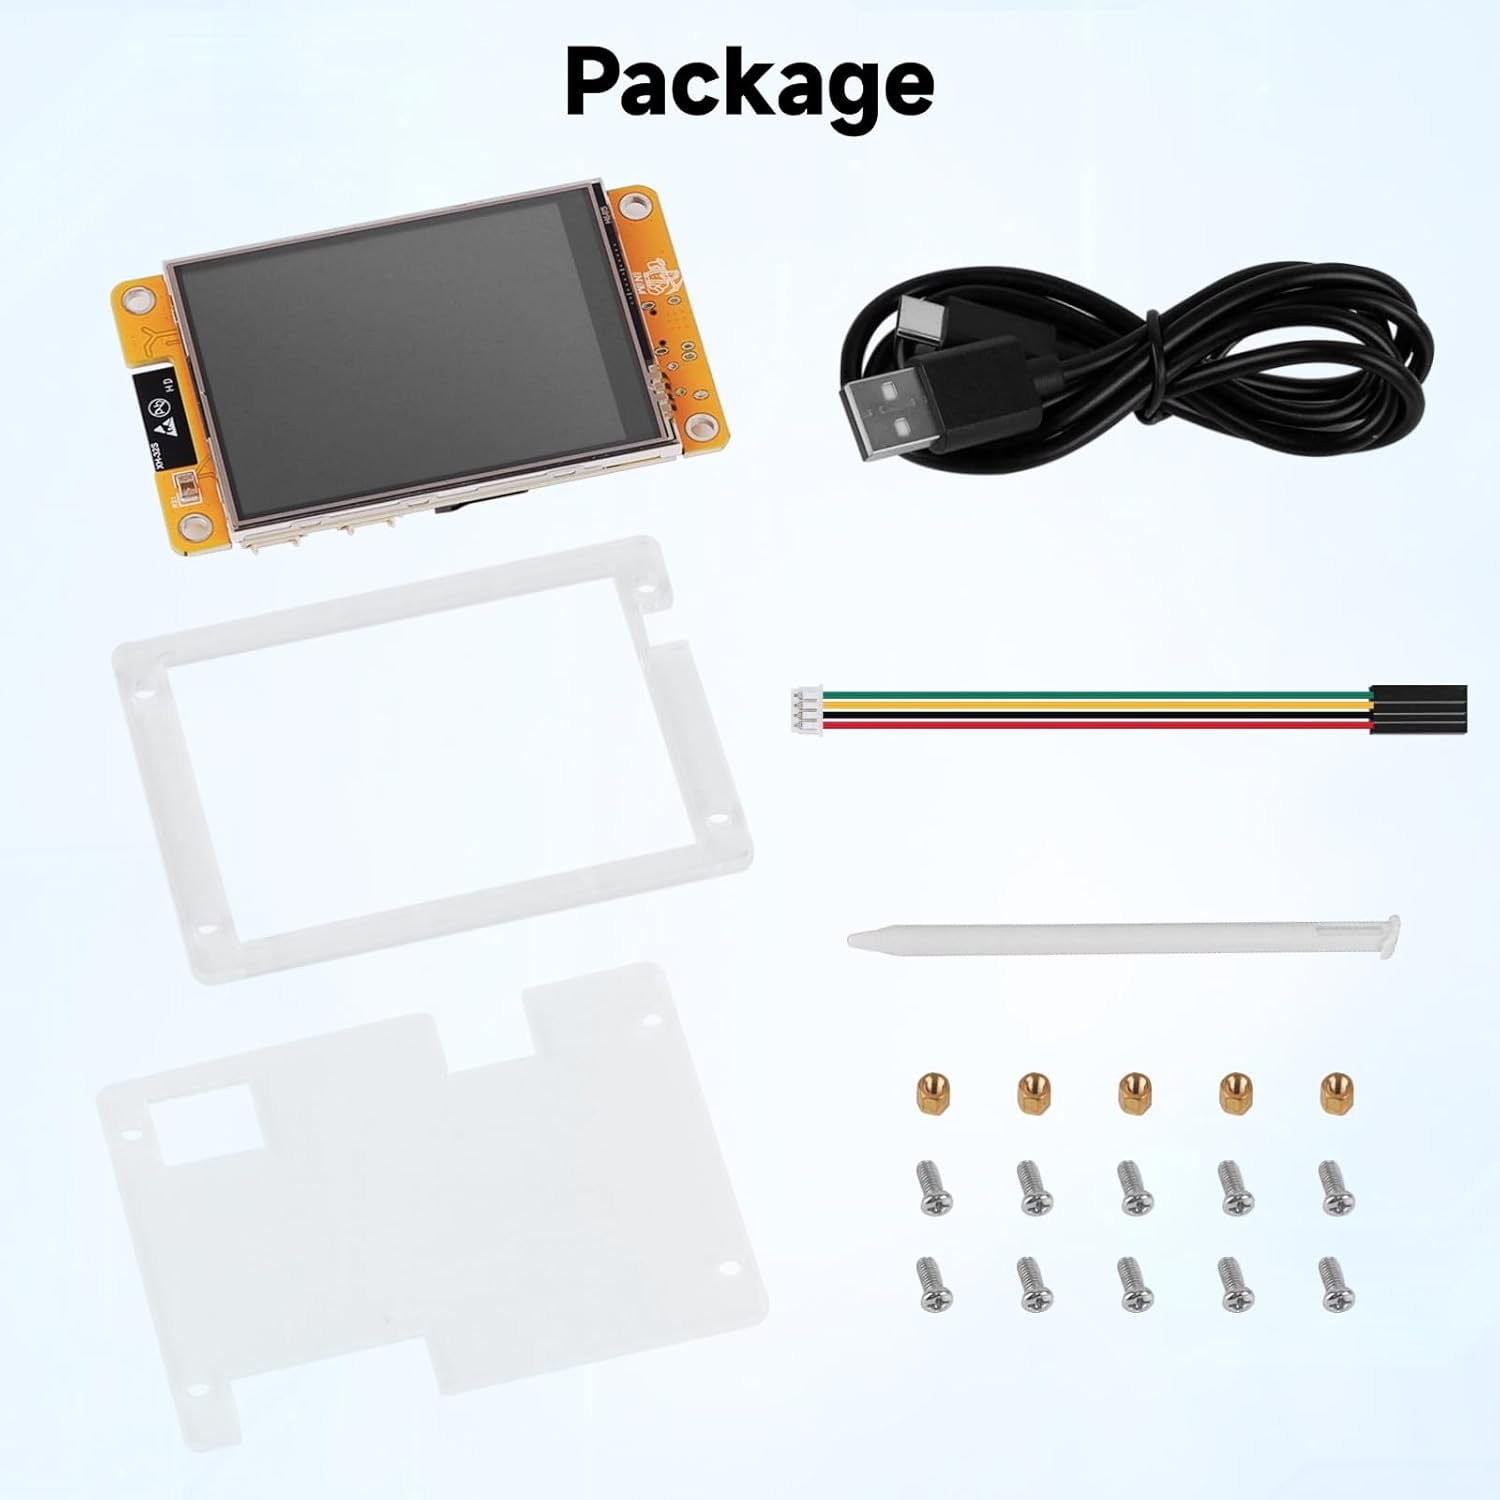
Figure 2.1: Package contents of the NerdMiner V2.
3. Prodott Aktarview
The NerdMiner V2 NMMiner is built around the high-performance ESP32-WROOM-32 module, offering robust connectivity and processing capabilities. Its 2.8-inch intelligent display provides a clear visual interface for all operations.
Karatteristiċi ewlenin:
- Operazzjoni waħedha: Connects directly to Wi-Fi for BTC lottery mining without an external computer.
- Rata Għolja ta' Hash: Optimized firmware achieves up to 1060 KH/s, potentially increasing mining success rates.
- Effiċjenti fl-Enerġija: Low power consumption and minimal heat generation due to ESP32's design.
- Visual Interface: 2.8-inch touchscreen displays mining status, computing power, and power consumption.
- Modi Versatili: Supports solo mining, mining pool modes, and a desktop clock mode with background mining.
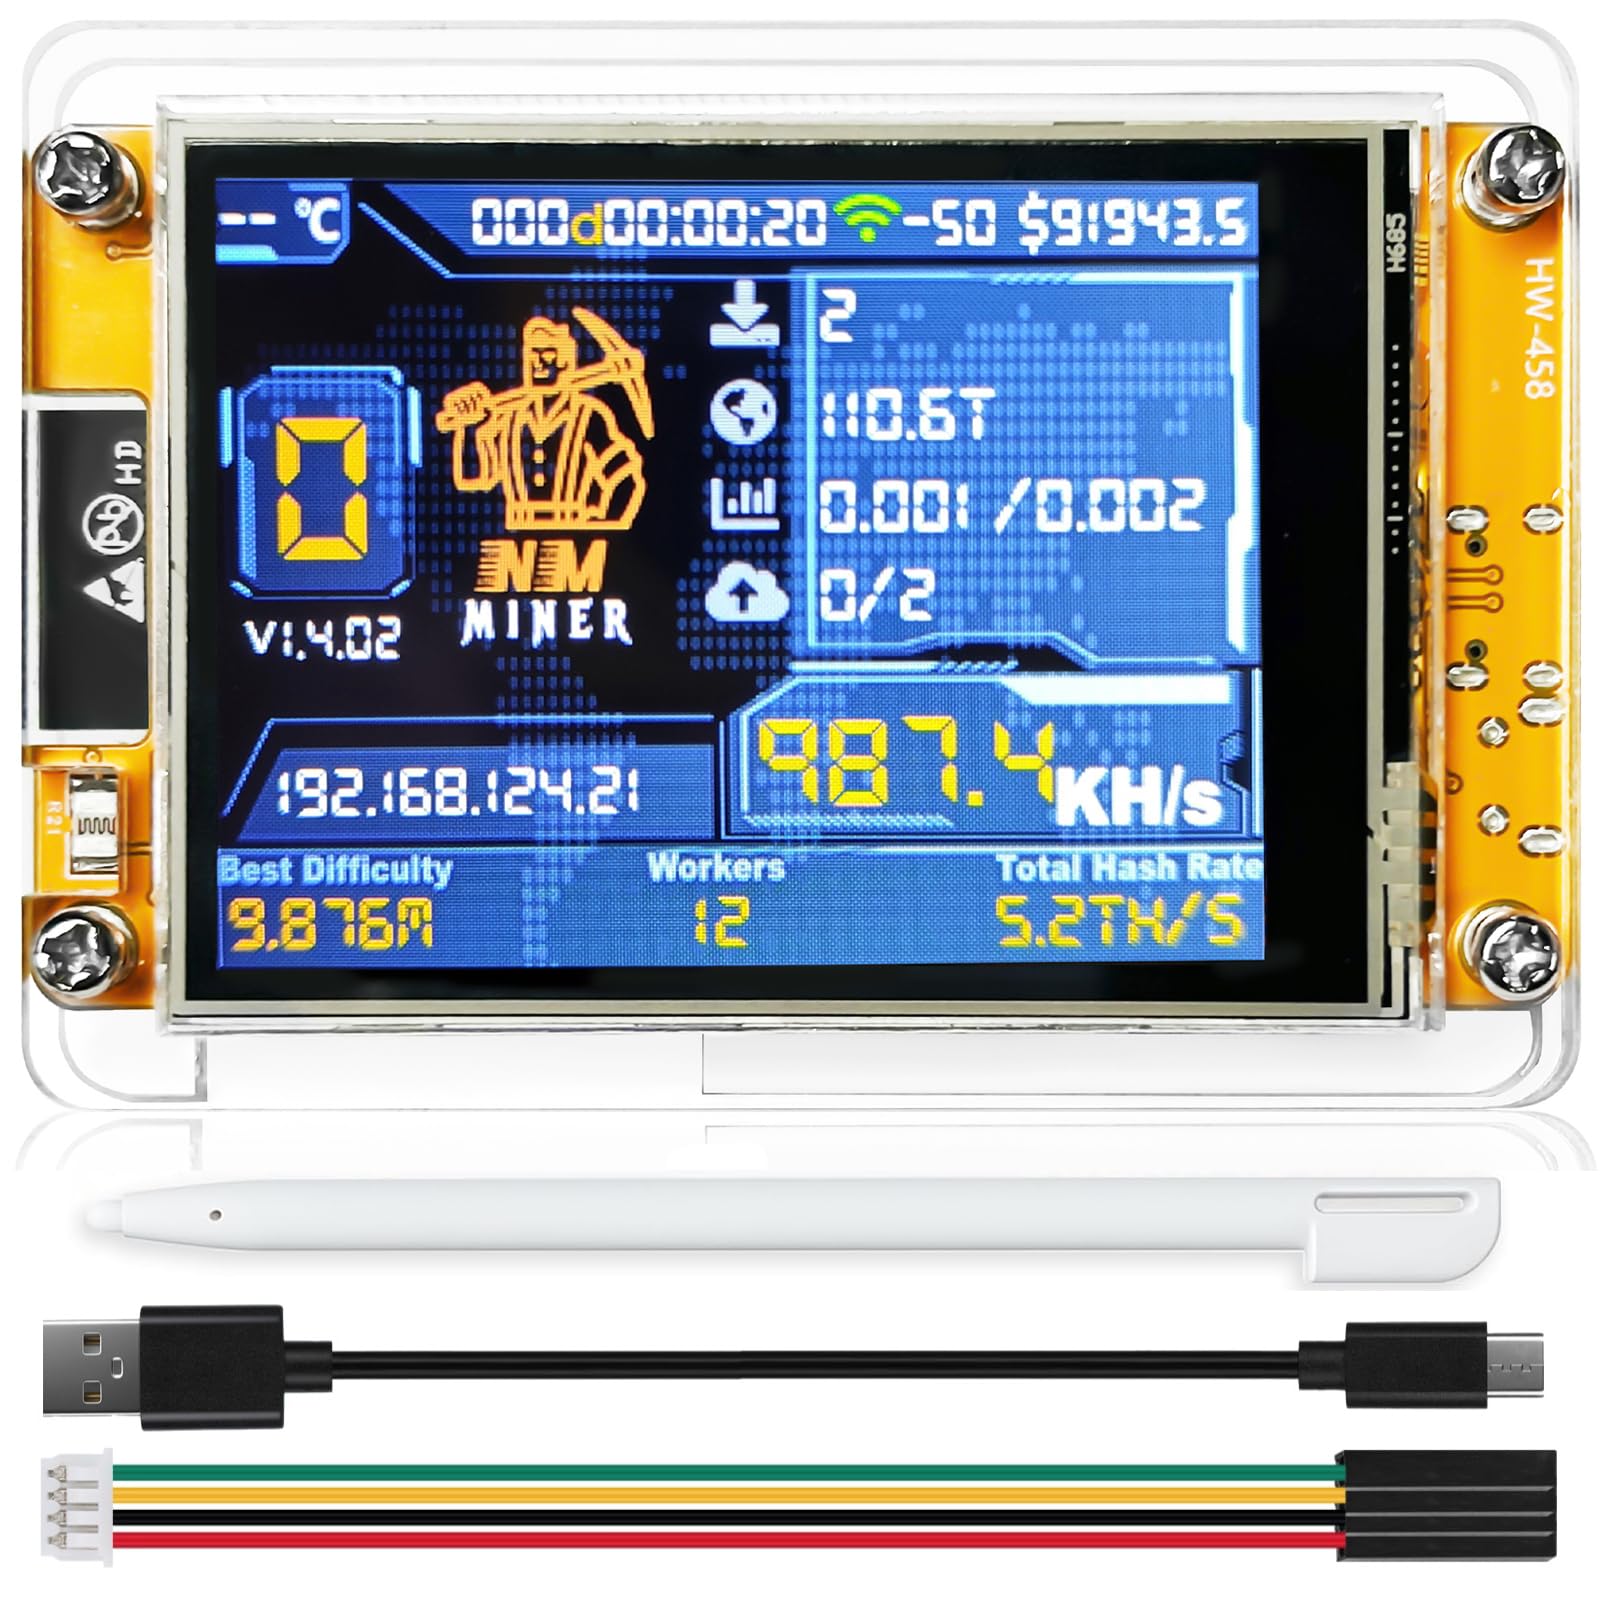
Figure 3.1: NerdMiner V2 Smart Display Interface.

Figure 3.2: High-Performance & Energy-Efficient ESP32-WROOM-32 Master Chip.

Figure 3.3: NerdMiner V2 NMMiner Board Specifications.
4. Istruzzjonijiet ta' Setup
Follow these steps to assemble and configure your NerdMiner V2 NMMiner.
4.1. Assemblea
The NerdMiner V2 typically comes unassembled. Carefully follow the included physical assembly instructions to secure the display board within its acrylic casing using the provided screws and nuts. Ensure all connections are firm but do not overtighten.
4.2. Initial Configuration (First-Time Use)
Upon power-on, the device will attempt to connect to a previously configured Wi-Fi network. If no network is found or connection fails after 15 seconds, it automatically enters configuration mode.
- Qawwa Mixgħul: Connect the device to a 5V power source using the provided USB-C cable.
- Access Point Setup: On your mobile device or PC, search for the free access point named nmap-2.4g (no password required) and connect to it.
- Interface tal-Konfigurazzjoni:
- Apparat mobbli: Inti ser tiġi ridirett awtomatikament lejn il-paġna tal-konfigurazzjoni.
- PC/Desktop: Innaviga lejn http://192.168.4.1 fil tiegħek web browser.
- Daħħal il-Kredenzjali tal-Wi-Fi: On the configuration page, enter your Wi-Fi SSID and password.
- Configure Mining Pool (Optional): Input your primary mining pool details and BTC wallet address. A fallback pool can also be configured.
- Ħlief Settings: Click 'Save' or 'Refresh' to apply your settings. The device will then attempt to connect to your Wi-Fi network and begin mining.

Figure 4.1: Initial Setup - First-Time Configuration.

Figure 4.2: Configuration Interface for Wi-Fi and Mining Settings.
4.3. Firmware Update and Activation
Regularly updating the firmware ensures optimal performance and access to new features. Firmware activation may be required for first-time installations or after certain updates.
- Using NMMiner Flash Tool: Iftaħ il- NMMiner Flash Tool in a Chrome or Edge browser.
- Select Board Model: Choose your specific board model and initiate the firmware update. The tool will automatically download the latest firmware from GitHub and configure flash parameters.
- Firmware Activation (if prompted): After flashing, obtain your license by following the on-screen instructions. Copy the license string into the license code field and click the activation button. A confirmation message will appear upon successful activation.
- Settings Bażiċi: For first-time installations, configure basic settings like Wi-Fi and BTC wallet address using the button controls or the web interface.

Figure 4.3: Using the NMMiner Flash Tool for Firmware Updates.

Figure 4.4: Firmware Activation Step 1 - Obtaining License.

Figure 4.5: Firmware Activation Step 2 - Entering License Code.

Figure 4.6: Firmware Activation Step 3 & 4 - Configuring Basic Settings.
5. Istruzzjonijiet Operattivi
The NerdMiner V2 NMMiner offers various display modes and mining options.
5.1. Modi tal-Wiri
The 2.8-inch touchscreen allows you to switch between different informational displays:
- Mining Status: Shows real-time hash rate, network difficulty, block found status, and other mining-related data.
- Desktop Clock: Displays time and date, with Bitcoin lottery mining running in the background.
- Crypto Price Display: Shows current prices for various cryptocurrencies.
Video 5.1: Demonstration of the Bitcoin Miner Display modes, including mining statistics and cryptocurrency prices.
Video 5.2: A test run of the NerdMiner V2 NMMiner, showcasing its operational display.
5.2. Mining Modes
The device supports both solo mining and traditional mining pool modes, providing flexibility based on user preference.
- Solo Mining: Attempts to find a block independently.
- Mining Pool: Contributes hash power to a pool and shares rewards.
Vidjo 5.3: Fuqview of the DIYmalls NerdMiner V2 NMMiner ESP32 Touchscreen, demonstrating basic functionality and setup.
Video 5.4: A demonstration of the Freenove Touchscreen Display for ESP32, highlighting its visual capabilities.
6. Manutenzjoni
To ensure the longevity and optimal performance of your NerdMiner V2, consider the following maintenance tips:
- Tindif: Imsaħ l-iskrin bil-mod u ċasing with a soft, dry cloth. Avoid abrasive materials or harsh chemicals.
- Aġġornamenti tal-Firmware: Periodically check for and install the latest firmware updates using the NMMiner Flash Tool to benefit from performance improvements and bug fixes.
- Kundizzjonijiet Ambjentali: Operate the device in a cool, dry environment. Avoid extreme temperatures and humidity.
7 Issolvi l-problemi
If you encounter issues with your NerdMiner V2, try the following steps:
- L-Apparat Mhux Jixgħel: Ensure the USB-C cable is securely connected to both the device and a working 5V power source. Try a different cable or power adapter.
- Kwistjonijiet ta' Konnessjoni Wi-Fi: Re-enter configuration mode (as described in Section 4.2) and verify your Wi-Fi SSID and password. Ensure the device is within range of your Wi-Fi router.
- Mining Not Starting/Low Hash Rate: Check your mining pool settings and BTC wallet address for accuracy. Ensure your internet connection is stable. Verify that the firmware is up to date and activated.
- L-Iskrin Ma Jirrispondix: Uża l-istilus provdut għal input preċiż. Jekk l-iskrin jibqa' ma jirrispondix, ipprova erġa' ibda l-apparat.
8. Speċifikazzjonijiet
| Karatteristika | Dettall |
|---|---|
| Brand | Ransanx |
| Isem tal-Mudell | NerdMiner V2 |
| Proċessur | Espressif ESP32-WROOM-32 (Dual-core) |
| Sistema Operattiva | FreeRTOS |
| Wiri | Touchscreen ta' 2.8 pulzieri |
| Konnettività | Wi-Fi, Bluetooth |
| Hash Rate (Max) | 1060 KH/s |
| RAM | LPDDR4 |
| Piż tal-oġġett | 3.2 uqija |
| Dimensjonijiet tal-Pakkett | 9.06 x 6.3 x 1.97 pulzieri |
9. Garanzija u Appoġġ
Għal informazzjoni dwar il-garanzija u appoġġ tekniku, jekk jogħġbok irreferi għall-websajt uffiċjali tal-manifattur. webis-sit jew ikkuntattja s-servizz tal-konsumatur tagħhom. Żomm l-irċevuta tax-xiri tiegħek għal kwalunkwe talba ta’ garanzija.


