1. Introduzzjoni
This manual provides detailed instructions for the installation, adjustment, and maintenance of your maXpeedingrods Coilovers. Please read this manual thoroughly before beginning any work to ensure proper installation and safe operation.
1.1. Kompatibilità tal-Prodott
- For Honda Civic VII DX/EX/GX/HX/LX/Si Coupe (EM2) 2001-2005
- For Honda Civic VII DX/EX/GX/HX/LX/Si Sedan (ES, ET) 2001-2005
NOTE: This product is not compatible with Honda Civic Hybrid models.
2. Informazzjoni dwar is-Sigurtà
Automotive suspension work requires specialized tools and knowledge. Improper installation can lead to serious injury or vehicle damage. If you are not confident in your ability to perform this installation, seek assistance from a qualified professional mechanic.
- Dejjem ilbes tagħmir protettiv personali xieraq, inklużi nuċċalijiet u ingwanti tas-sigurtà.
- Kun żgur li l-vettura tkun appoġġjata sew fuq stands tal-ġakk fuq wiċċ livell qabel tibda x-xogħol. Qatt ma tiddependi biss fuq ġakk.
- Skonnettja l-batterija tal-vettura qabel ma taħdem fuq xi komponenti elettriċi.
- Irreferi għall-manwal tas-servizz tal-vettura tiegħek għal speċifikazzjonijiet u proċeduri speċifiċi tat-torque.
- Do not modify the coilovers or their components.
3. Kontenut tal-Pakkett
Ivverifika li l-komponenti kollha huma preżenti u mhux imħassra qabel ma tipproċedi bl-installazzjoni.

Image 3.1: Complete set of maXpeedingrods coilovers and adjustment wrenches.
- 4 x Coilovers (2 Front, 2 Rear)
- 2 x C-Spanner Wrenches for adjustment
- Additional mounting hardware (washers, bolts, etc.)
4. Karatteristiċi tal-prodott
The maXpeedingrods Coilovers are designed with the following key features:
- Adjustable Ride Height: Allows for 1-3 inches of lowering from stock height, providing a more aggressive stance and improved handling.
- Factory Preset Damping Value: Maintains consistent and predictable handling characteristics, reducing the risk of overloading the suspension system.
- High Tensile Springs: Front springs rated at 10kg/mm (560 lbs/in) and rear springs at 6kg/mm (336 lbs/in). Tested for durability with less than 0.04% distortion after 600,000 continuous cycles. Special surface treatment enhances durability and performance.
- Kostruzzjoni tal-Materjal Premium: Components are made from 6061 aluminum alloy with T6 for increased hardness, high strength, and durability. Features high-quality precision parts.
- Pillow Ball Top Mount: Provides sharp and precise handling.
- Full-Length Dust Boot: Protects the piston shafts from dirt and debris.
- Anodized Shock Body: Features an anti-corrosion coating for extended lifespan.
- Powder-Coated Lower Mount: Offers excellent anti-rust and anti-corrosion performance.
- Upper Spring Seat with Radial Bearing: Contributes to smooth operation and reduced friction.

Image 4.1: Labeled diagram of coilover components.
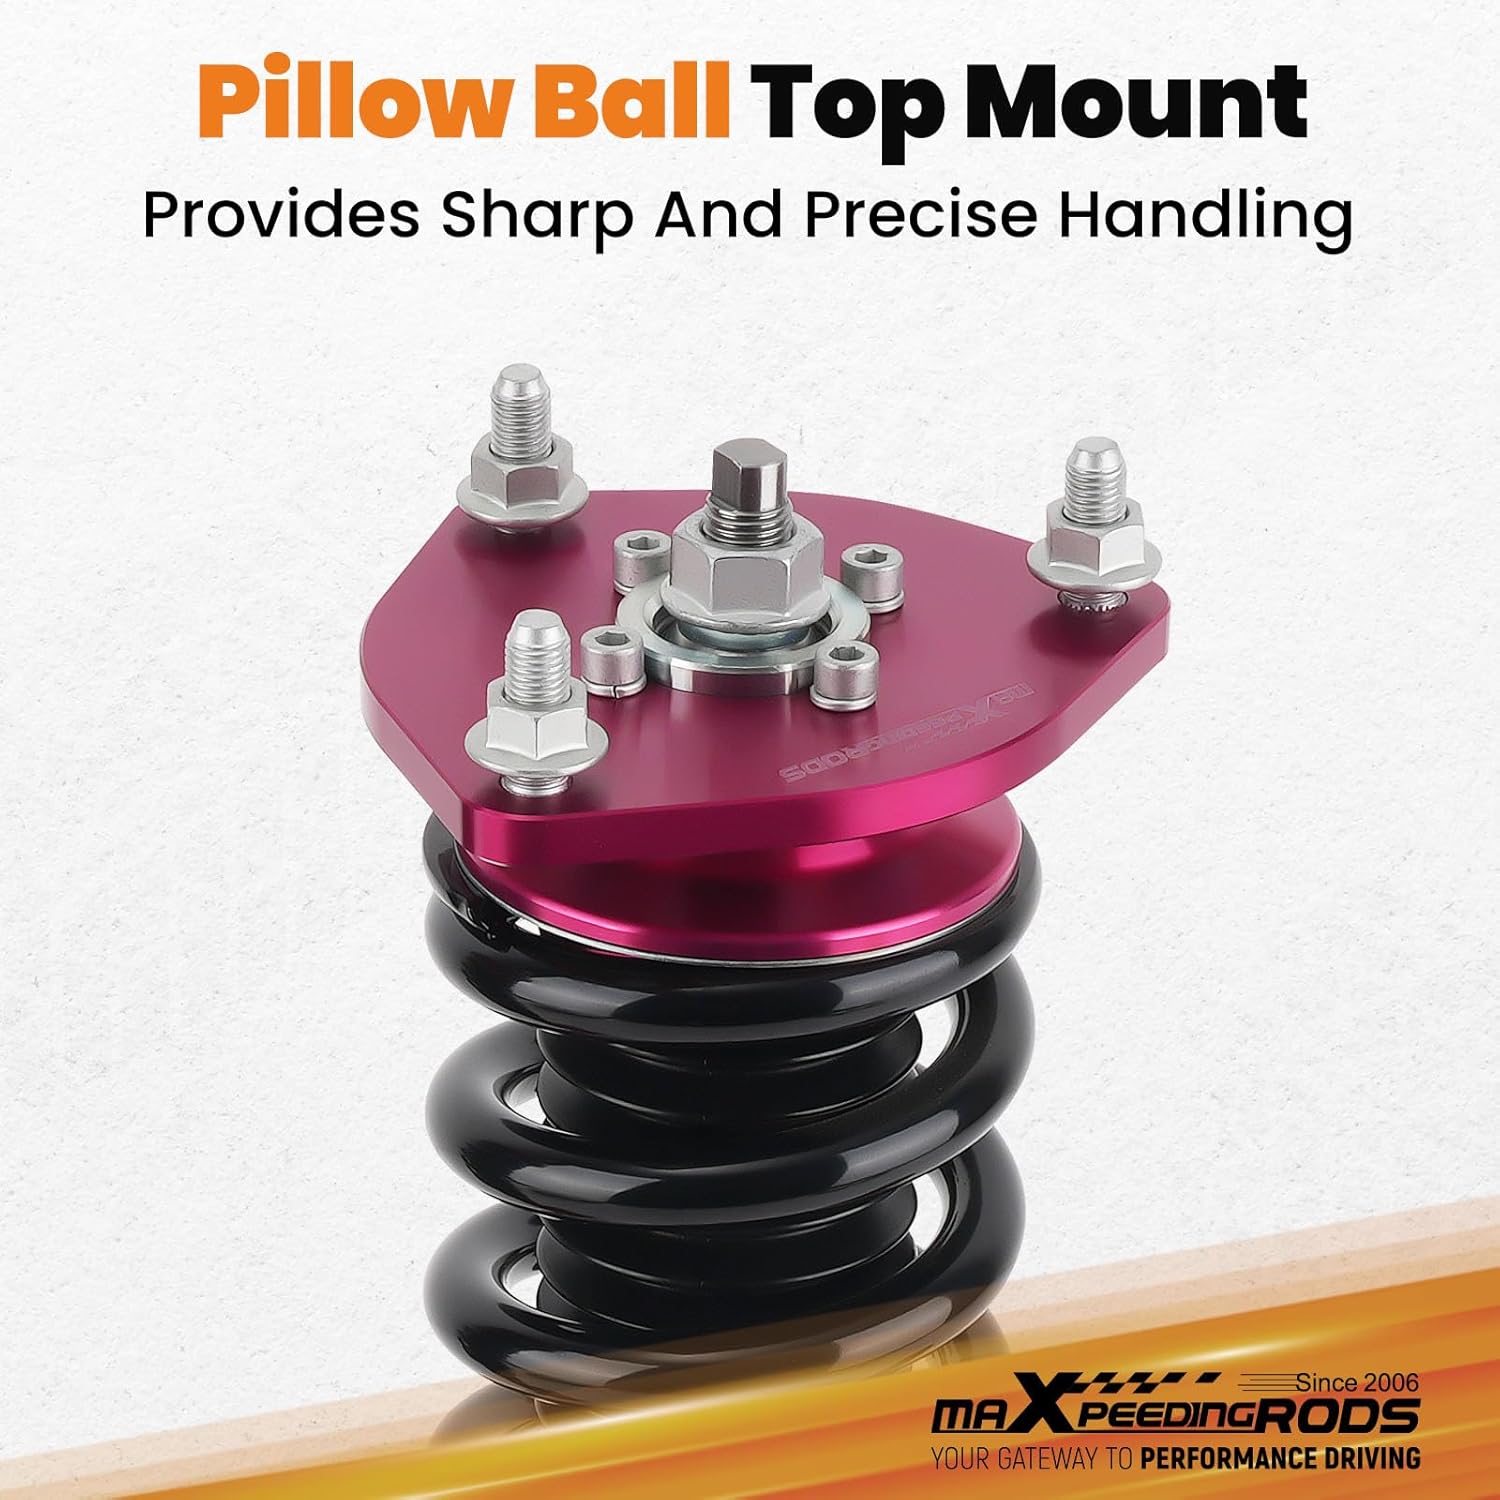
Image 4.2: Pillow Ball Top Mount for enhanced handling.
5. Setup / Installation
This section outlines the general installation process. Specific steps may vary slightly depending on your vehicle's exact configuration. Always consult a professional if unsure.
5.1. Passi ta 'qabel l-installazzjoni
- Safely lift the vehicle and secure it on jack stands.
- Neħħi r-roti.
- Locate and loosen the bolts securing the OEM suspension components.
5.2. Removing OEM Suspension
Carefully remove the original shock absorbers and springs. This may involve disconnecting brake lines, sway bar links, and other components. Ensure no tension remains on the springs before removal.
5.3. Installing maXpeedingrods Coilovers
Install the new coilovers in reverse order of removal. Ensure all bolts are tightened to the manufacturer's recommended torque specifications. Pay close attention to the orientation of the top hats and lower mounts.
Vidjo 5.1: Ġenerali fuqview of coilover manufacturing and installation process.
After installation, reattach all disconnected components, ensuring proper routing of brake lines and sensor wires. Reinstall the wheels and lower the vehicle.
6. Operating / Adjustment
Your maXpeedingrods Coilovers allow for ride height adjustment. Damping is factory preset on this model.
6.1. Ride Height Adjustment
To adjust the ride height:
- Safely lift the vehicle to relieve pressure on the suspension.
- Loosen the lower mount (A) and locking ring (B) using the provided C-spanner wrenches.
- Rotate the coilover body to increase or decrease the threaded distance, thereby changing the ride height.
- Once the desired height is achieved, tighten the lower mount (A) and locking ring (B) securely.

Image 6.1: Visual guide for adjusting coilover ride height.
Video 6.2: Demonstration of coilover height adjustment.
It is recommended to perform a wheel alignment after any significant ride height adjustments.
7. Manutenzjoni
Regular inspection and maintenance will prolong the life and performance of your coilovers.
- Periodically inspect the coilovers for any signs of damage, leaks, or loose components.
- Clean the coilover bodies and threads regularly to prevent dirt and debris buildup, especially after driving in harsh conditions.
- Ensure all locking rings and mounting bolts remain tight.
- Check the condition of the dust boots and replace them if torn or damaged.
8 Issolvi l-problemi
If you experience any issues with your coilovers, consider the following common troubleshooting steps:
- Unusual Noises (clunking, squeaking): Check for loose mounting bolts, worn bushings, or improper spring seating. Ensure all components are properly torqued.
- Għoli tar-Rikba Irregolari: Verify that both left and right coilovers are adjusted to the same height. Measure from the center of the wheel to the fender lip for accuracy.
- Poor Ride Quality: Ensure tire pressures are correct. If the ride is too stiff or bouncy, re-check installation for any binding or incorrect assembly.
- Leaking Shock Absorber: A small amount of oil residue is normal, but significant oil leakage indicates a seal failure. Contact customer support for assistance.
9. Speċifikazzjonijiet
| Speċifikazzjoni | Dettall |
|---|---|
| Numru tal-Mudell | CY87ZN |
| Front Spring Rate | 10 kg/mm (560 lbs/in) |
| Rear Spring Rate | 6 kg/mm (336 lbs/in) |
| Adjustable Ride Height | 1-3 inches lowering (from stock) |
| Damping | Issettjat minn qabel tal-fabbrika |
| Materjal | 6061 Aluminum Alloy with T6 |
| Piż tal-oġġett | 52.9 liri |
| Dimensjonijiet tal-Prodott | 25.31 x 20 x 8.31 pulzieri |
10. Garanzija u Appoġġ
For warranty information, technical support, or any questions regarding your maXpeedingrods Coilovers, please refer to the official maXpeedingrods webis-sit jew ikkuntattja lis-servizz tal-konsumatur tagħhom direttament. Żomm l-irċevuta tax-xiri tiegħek għal talbiet ta' garanzija.
You can visit the maXpeedingrods store for more information: maXpeedingrods Store


