1. Introduzzjoni
This manual provides detailed instructions for the installation, operation, and maintenance of the SainSmart Genmitsu Add-on Z-Axis Assembly Kit. This kit is specifically designed as an upgrade for the PROVerXL 4X4 CNC engraving machine, enhancing its capabilities and overall performance. The add-on Z-axis features a NEMA23 closed-loop stepper motor and a Φ65mm spindle motor holder, compatible with compact or trim routers.
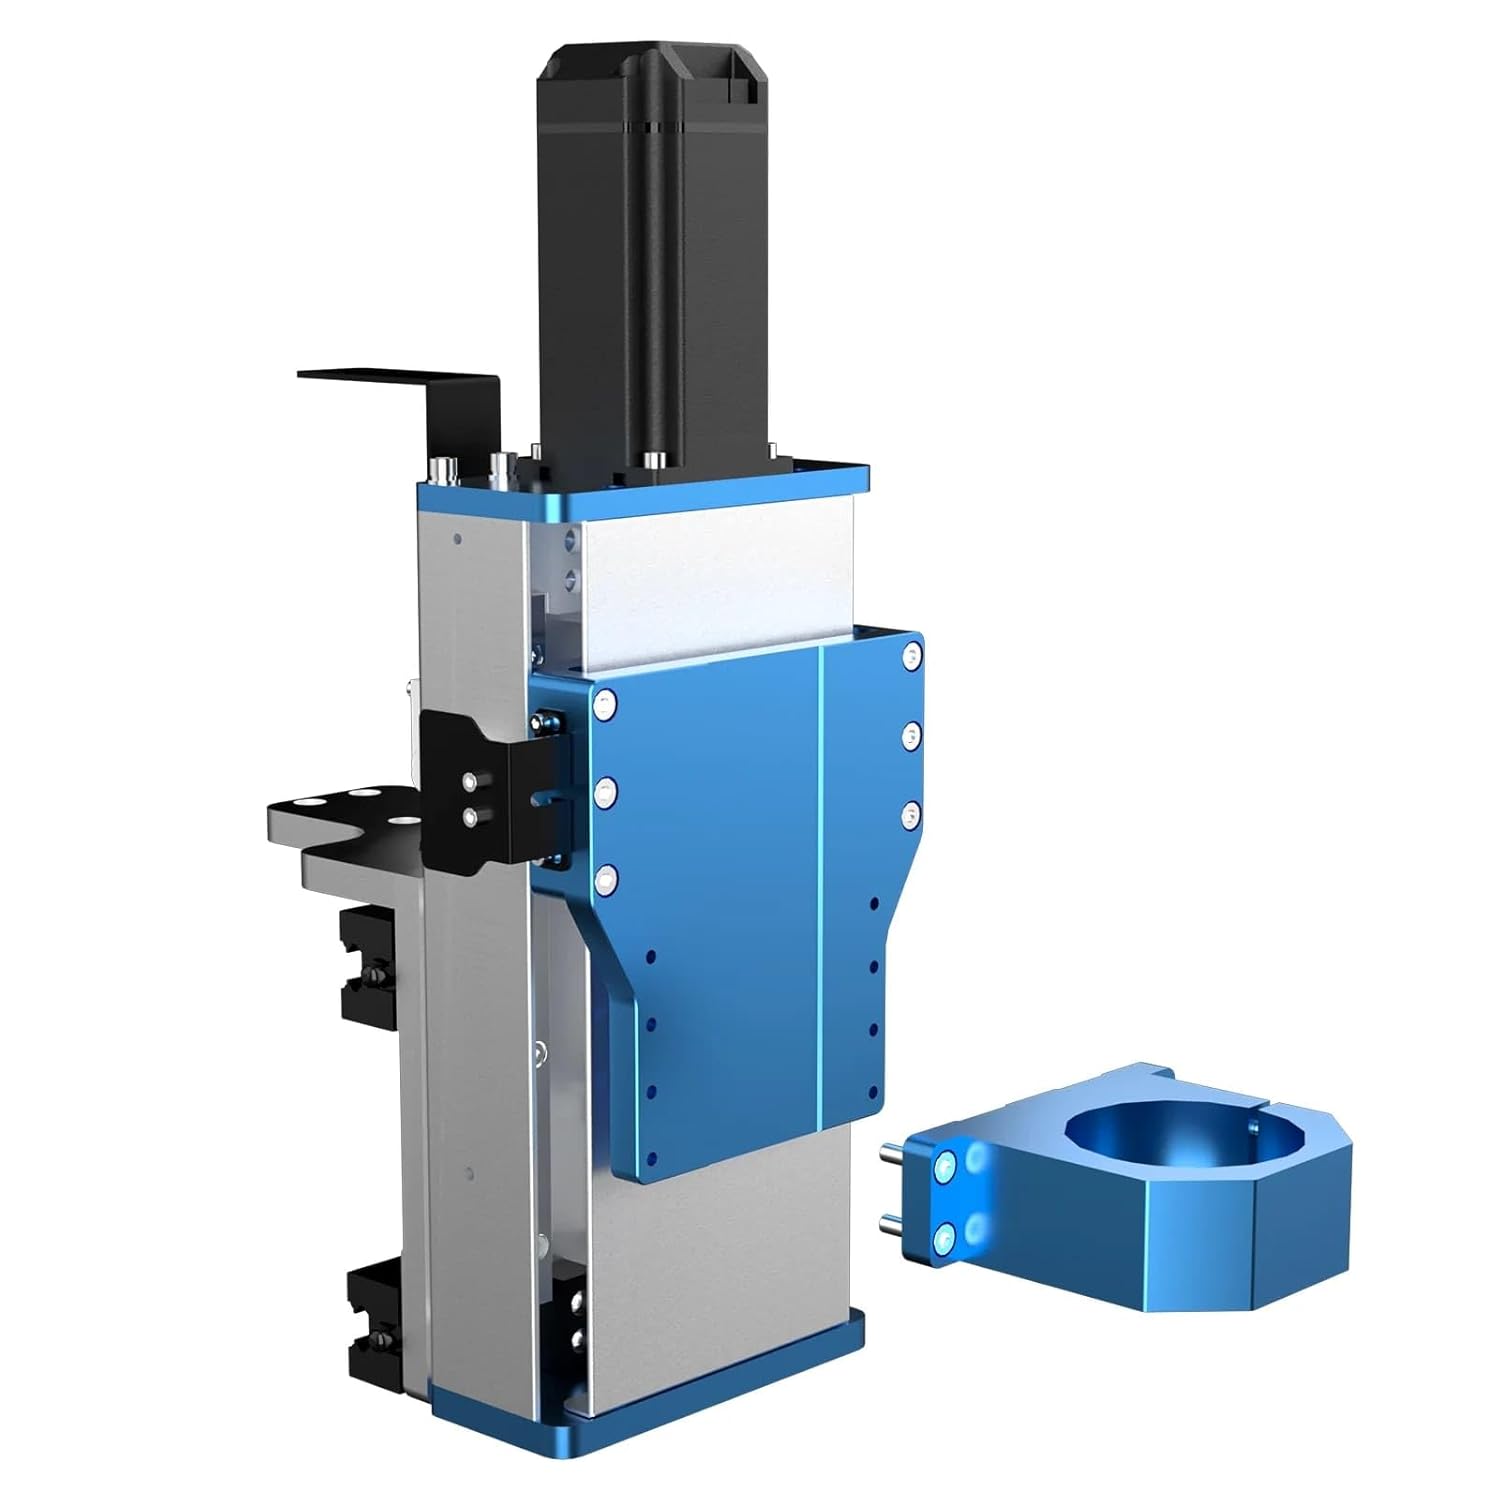
Image 1.1: The SainSmart Genmitsu Add-on Z-Axis Assembly Kit, featuring the main Z-axis module and the separate Φ65mm spindle holder.
2. Kontenut tal-Pakkett
Verify that all components listed below are present in your package before proceeding with installation. If any parts are missing or damaged, please contact customer support.
- Add-on Z-Axis Module (with NEMA23 Closed-Loop Stepper Motor)
- Φ65mm Spindle Holder Mount
- Mounting Hardware (screws, nuts, washers)
- Kejbils ta' Konnessjoni
- Gwida għall-Installazzjoni

Stampa 2.1: Quddiem view of the Z-axis module, showing its robust construction and mounting points.
3. Gwida għall-Installazzjoni
The installation of the add-on Z-axis is designed to be straightforward. Follow these steps carefully to ensure proper setup and functionality.
- Prepare the PROVerXL 4X4 CNC Machine: Ensure the CNC machine is powered off and disconnected from the power source. Clear the work area and remove any existing Z-axis components if you are replacing or adding a second unit.
- Mount the Z-Axis Module: Align the add-on Z-axis module with the designated mounting points on the gantry of your PROVerXL 4X4. Secure it using the provided mounting hardware. Ensure all screws are tightened evenly to prevent misalignment.
- Install the Spindle Holder: Attach the Φ65mm spindle holder mount to the Z-axis module. This holder is designed to accommodate compact or trim routers. Secure it firmly with the appropriate screws.
- Qabbad il-Wiring: Connect the NEMA23 closed-loop stepper motor to the CNC control board using the supplied cables. Refer to your PROVerXL 4X4's main manual for specific port locations and wiring diagrams. Ensure all connections are secure.
- Initial Power-Up and Testing: Reconnect the CNC machine to power and turn it on. Perform initial movement tests for the new Z-axis to confirm proper functionality and smooth travel. Adjust any settings in your CNC control software as required for the additional axis.

Image 3.1: The PROVerXL 4X4 CNC machine configured with two Z-axes, demonstrating the potential for dual project production.
4. Operazzjoni
The add-on Z-axis significantly expands the capabilities of your PROVerXL 4X4 CNC machine. It allows for precise vertical movement of the spindle, crucial for various carving, cutting, and engraving tasks. When operating with two Z-axes, the machine can perform simultaneous operations, effectively doubling productivity for certain projects.
4.1. Dual Project Production
With the add-on Z-axis, the PROVerXL 4X4 can be configured to run two independent projects concurrently. This is particularly beneficial for batch production or when working on multiple smaller items. Ensure your CNC software supports multi-tool or multi-workpiece operations and that toolpaths are correctly generated for each spindle.

Immaġni 4.1: Close-up view highlighting the integration of the add-on Z-axis alongside the primary Z-axis on the PROVerXL 4X4.
4.2. Closed-Loop Motor Precision
The NEMA23 closed-loop stepper motor provides enhanced precision and reliability. Unlike open-loop systems, the closed-loop motor monitors its position through signal feedback, preventing lost steps and ensuring accurate movements even under varying loads. This results in consistent and high-quality machining outcomes.

Image 4.2: Visual representation of the NEMA23 closed-loop stepper motor, emphasizing its precision and power.
5. Manutenzjoni
Regular maintenance ensures the longevity and optimal performance of your add-on Z-axis. Follow these guidelines:
- Tindif: Periodically clean the linear guides and ball screw to remove dust, debris, and machining residue. Use a soft cloth and a suitable cleaning agent.
- Lubrikazzjoni: Apply a thin layer of appropriate lubricant to the linear guides and ball screw as recommended by the manufacturer to ensure smooth operation and prevent wear.
- Spezzjoni: Regularly inspect all mounting hardware and connections for tightness. Vibrations during operation can loosen components over time.
- Kontroll tal-Mutur: Monitor the stepper motor for unusual noises or excessive heat during operation. Ensure proper ventilation around the motor.
6 Issolvi l-problemi
This section addresses common issues you might encounter with the add-on Z-axis.
| Problema | Kawża Possibbli | Soluzzjoni |
|---|---|---|
| Z-axis not moving | Loose cable connection, power issue, software misconfiguration. | Check all cable connections. Verify power supply. Review CNC software settings for Z-axis configuration. |
| Inaccurate Z-axis movement | Loose mounting, debris on linear guides/ball screw, incorrect steps per unit setting. | Ensure Z-axis module is securely mounted. Clean and lubricate linear guides/ball screw. Calibrate steps per unit in CNC software. |
| Is-sħana żejda tal-mutur | Excessive current, insufficient cooling, prolonged heavy load. | Check motor driver current settings. Ensure adequate ventilation. Reduce load or allow for cooling periods. |
7. Speċifikazzjonijiet
Key technical specifications for the SainSmart Genmitsu Add-on Z-Axis Assembly Kit:
- Kompatibilità: PROVerXL 4X4 CNC Machine
- Tip ta' Mutur: NEMA23 Closed-Loop Stepper Motor
- Torque: 3.5 Nm
- Veloċità Massima: Up to 5000mm/min
- Linear Guides: HG-15 Double Linear Guides
- Ball Screw: Φ12mm Ball Screw
- Spindle Holder Diameter: Φ65mm (for compact or trim routers)

Image 7.1: The Z-axis module, illustrating its high-configuration components including the Φ12mm ball screw and dual linear rails.
8. Garanzija u Appoġġ
For warranty information, technical support, or to purchase replacement parts, please visit the official SainSmart webis-sit jew ikkuntattja lid-dipartiment tas-servizz tal-konsumatur tagħhom. Żomm l-irċevuta tax-xiri tiegħek bħala prova tax-xiri għal talbiet ta’ garanzija.
SainSmart Official Websit: www.sainsmart.com


