1. Introduzzjoni
Thank you for choosing the DYONDER Wireless Switch Pro Controller. This controller is designed to enhance your gaming experience across multiple platforms, including Nintendo Switch, Switch Lite, Switch OLED, PC, Android, and iOS devices. It features advanced functionalities such as RGB lighting, Turbo function, adjustable vibration, and precise Hall Effect joysticks.

Stampa 1.1: Quddiem view of the DYONDER Wireless Switch Pro Controller, showcasinid-disinn ergonomiku u t-tqassim tal-buttuni tiegħu.
2. Kontenut tal-Pakkett
- 1 x DYONDER Wireless Switch Pro Controller
- 1 x Cable tal-Iċċarġjar USB-C
- 1 x Manwal għall-Utent
3. It-Tqassim tal-Kontrollur
Familiarize yourself with the buttons and features of your DYONDER controller:
- Sticks Analogiċi tax-Xellug/Lemin: For precise movement and camera control. Features Hall Effect technology for enhanced durability and accuracy.
- D-Pad: Input direzzjonali.
- Buttuni A/B/X/Y: Buttuni ta' azzjoni standard.
- Buttuni tax-Xellug/Lemin: Buttuni fuq l-ispalla.
- Triggers ta' ZL/ZR: Linear triggers for nuanced input, especially in racing games.
- + (Start) / - (Select) Buttons: Buttuni tal-funzjoni tas-sistema.
- Buttuna tad-dar: Jirritorna għall-iskrin ewlieni tas-sistema.
- Buttuna tal-Iscreenshot: Jaqbad screenshots.
- Buttuna Turbo: Activates/deactivates Turbo function.
- Buttuna tal-Modalità Dawl: Jiċċikla bejn il-modi tad-dawl RGB.
- Buttuna tal-Aġġustament tal-Vibrazzjoni: Adjusts vibration intensity (located on the back).
- Port USB-C: Għall-iċċarġjar u l-konnessjoni bil-fili.

Immaġni 3.1: Dettaljata view of key controller components, highlighting the 3D joysticks, Hall triggers, D-pad, and screenshot button.
4. Setup
4.1 Iċċarġjar tal-Kontrollur
Before first use, fully charge the controller. Connect the provided USB-C cable to the controller's charging port and the other end to a USB power source (e.g., Nintendo Switch dock, PC, USB wall adapter). The charging indicator will show the charging status.
- Ħin tal-Iċċarġjar: Madwar 2-3 sigħat.
- Battery Life: Approximately 15-18 hours of gameplay on a full charge.

Image 4.1: The controller charging via USB-C, illustrating its battery capacity and usage duration.
4.2 Connecting to Nintendo Switch/Lite/OLED (Wireless)
- Fuq il-console tan-Nintendo Switch tiegħek, mur fil-Menu HOME.
- Agħżel 'Kontrolluri' > 'Ibdel il-Qabda/Ordni'.
- Press and hold the Home button on the DYONDER controller for 3-5 seconds until the LED indicators start flashing rapidly.
- Ladarba jkun imqabbad, l-LED(s) tal-plejer korrispondenti fuq il-kontrollur se jixegħlu b'mod solidu.
4.3 Connecting to PC (Wireless/Wired)
Konnessjoni bla fili (Bluetooth):
- Kun żgur li l-PC tiegħek għandu l-Bluetooth attivat.
- Go to 'Bluetooth & other devices' settings on your PC.
- Agħżel 'Żid Bluetooth jew apparat ieħor' > 'Bluetooth'.
- Press and hold the Home button on the DYONDER controller for 3-5 seconds until the LED indicators flash rapidly.
- Select the controller from the list of available devices to pair.
Konnessjoni bil-fili:
- Connect the controller to your PC using the USB-C cable.
- The controller should be automatically recognized as a game controller.
4.4 Connecting to Android/iOS (Wireless)
The controller supports Android HID mode and iOS games.
- Ippermetti Bluetooth fuq it-tagħmir Android jew iOS tiegħek.
- Mur fis-settings tal-Bluetooth.
- Press and hold the Home button on the DYONDER controller for 3-5 seconds until the LED indicators flash rapidly.
- Select the controller from the list of available devices to pair.

Image 4.2: Visual representation of the controller's wide compatibility across various gaming platforms.
5. Istruzzjonijiet Operattivi
5.1 Power On/Off
- Qawwa Mixgħul: Press the Home button once.
- Itfi: Press and hold the Home button for 5 seconds. The controller will also power off automatically after 5 minutes of inactivity.
5.2 Modi ta' Dawl RGB
The controller features an embedded RGB strip with 8 colors and 3 lighting modes. Press the dedicated Buttuna tal-Modalità tad-Dawl to cycle through the modes:
- Modalità Strobe: Rapid flashing of colors.
- Mod tan-nifs: Colors fade in and out.
- Modalità Statika: Kulur wieħed u kostanti.
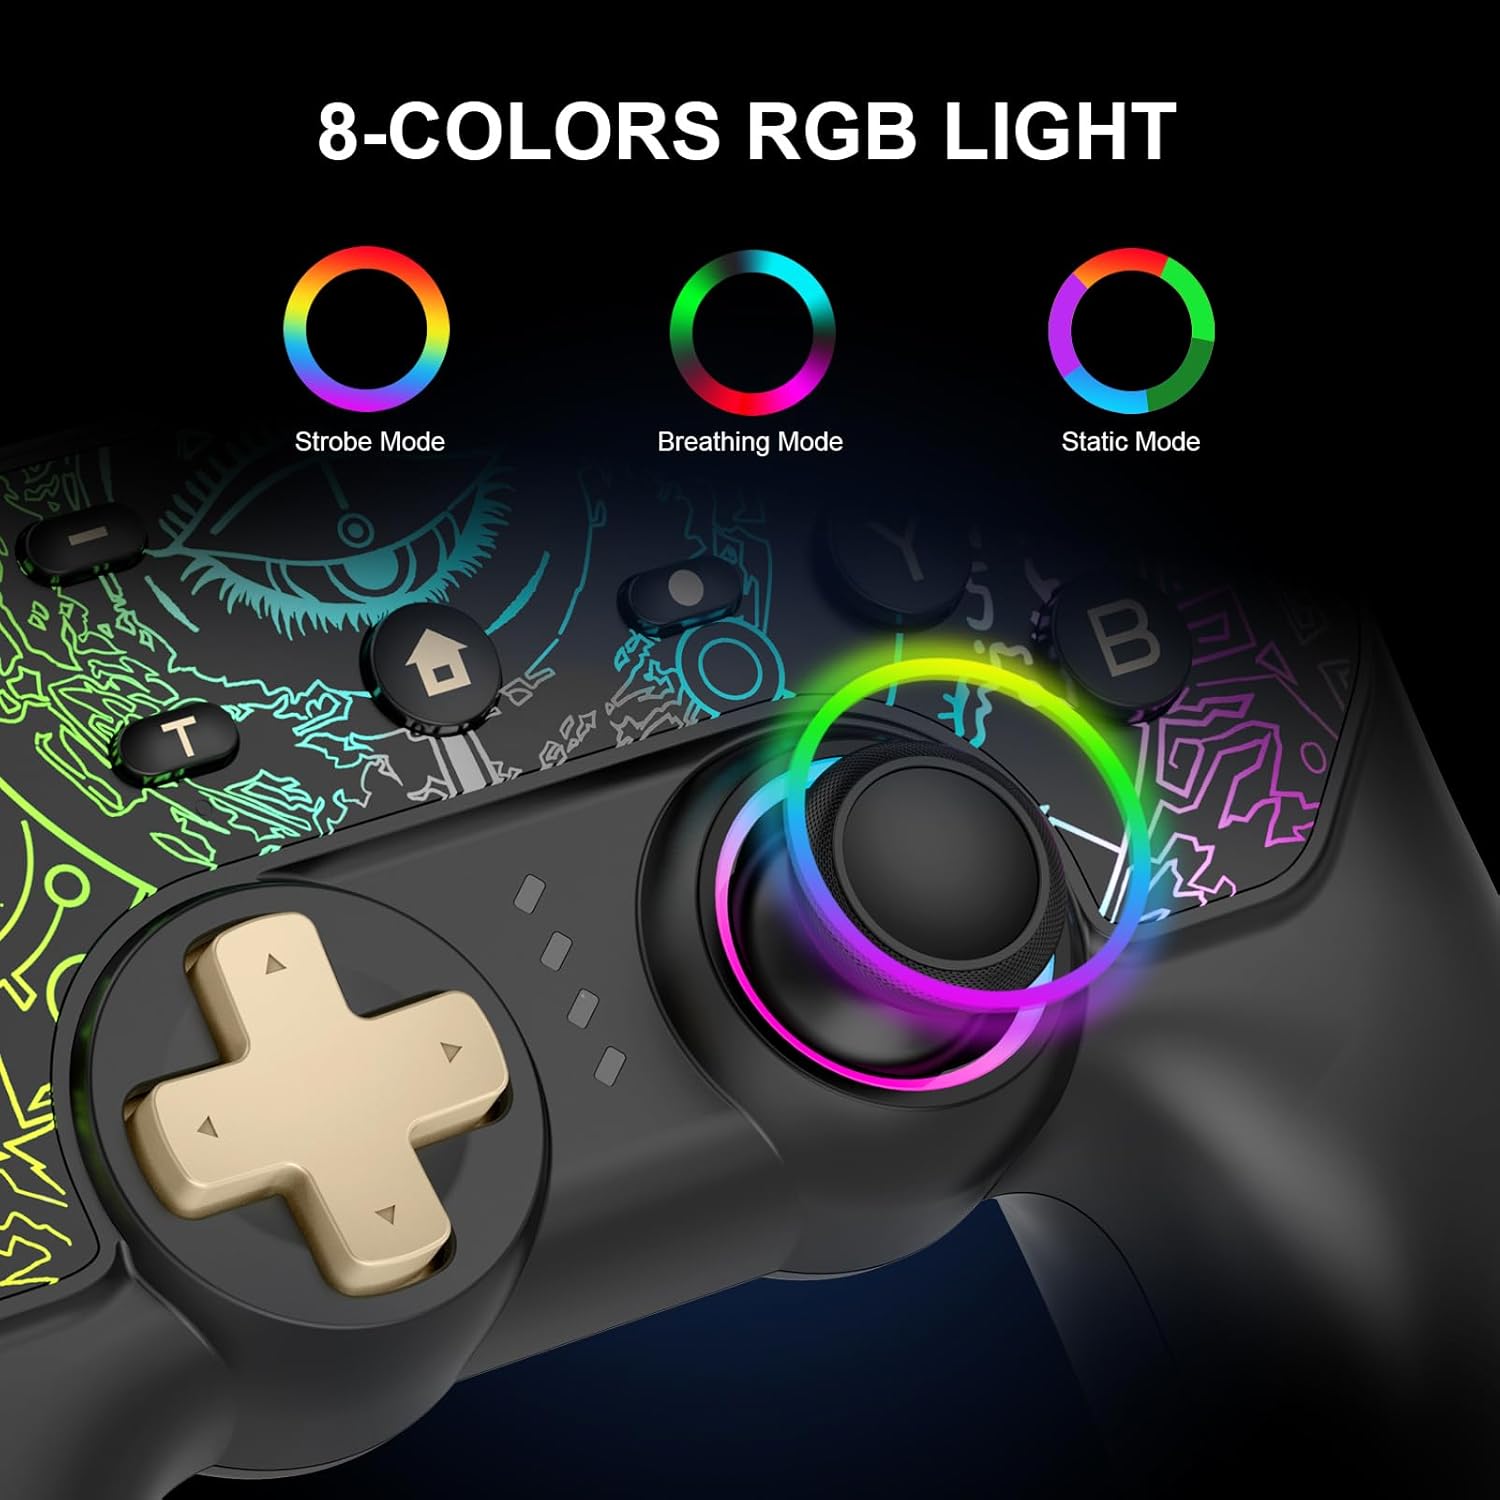
Image 5.1: Illustration of the 8-color RGB lighting and its three distinct modes.

Immaġni 5.2: Oħra view of the RGB lighting, detailing the Breathing, Constant Light, and Flashing modes.
5.3 Funzjoni Turbo
The Turbo function allows for continuous rapid firing of a button. To activate or deactivate:
- Agħfas u żomm il- Buttuna Turbo, then press the desired action button (A/B/X/Y, L/R, ZL/ZR) to set Turbo.
- Repeat the process to deactivate Turbo for that button.
You can also adjust the Turbo speed:
- Agħfas 'T' button + Right Stick Up: Increase Turbo speed.
- Agħfas 'T' button + Right Stick Down: Decrease Turbo speed.
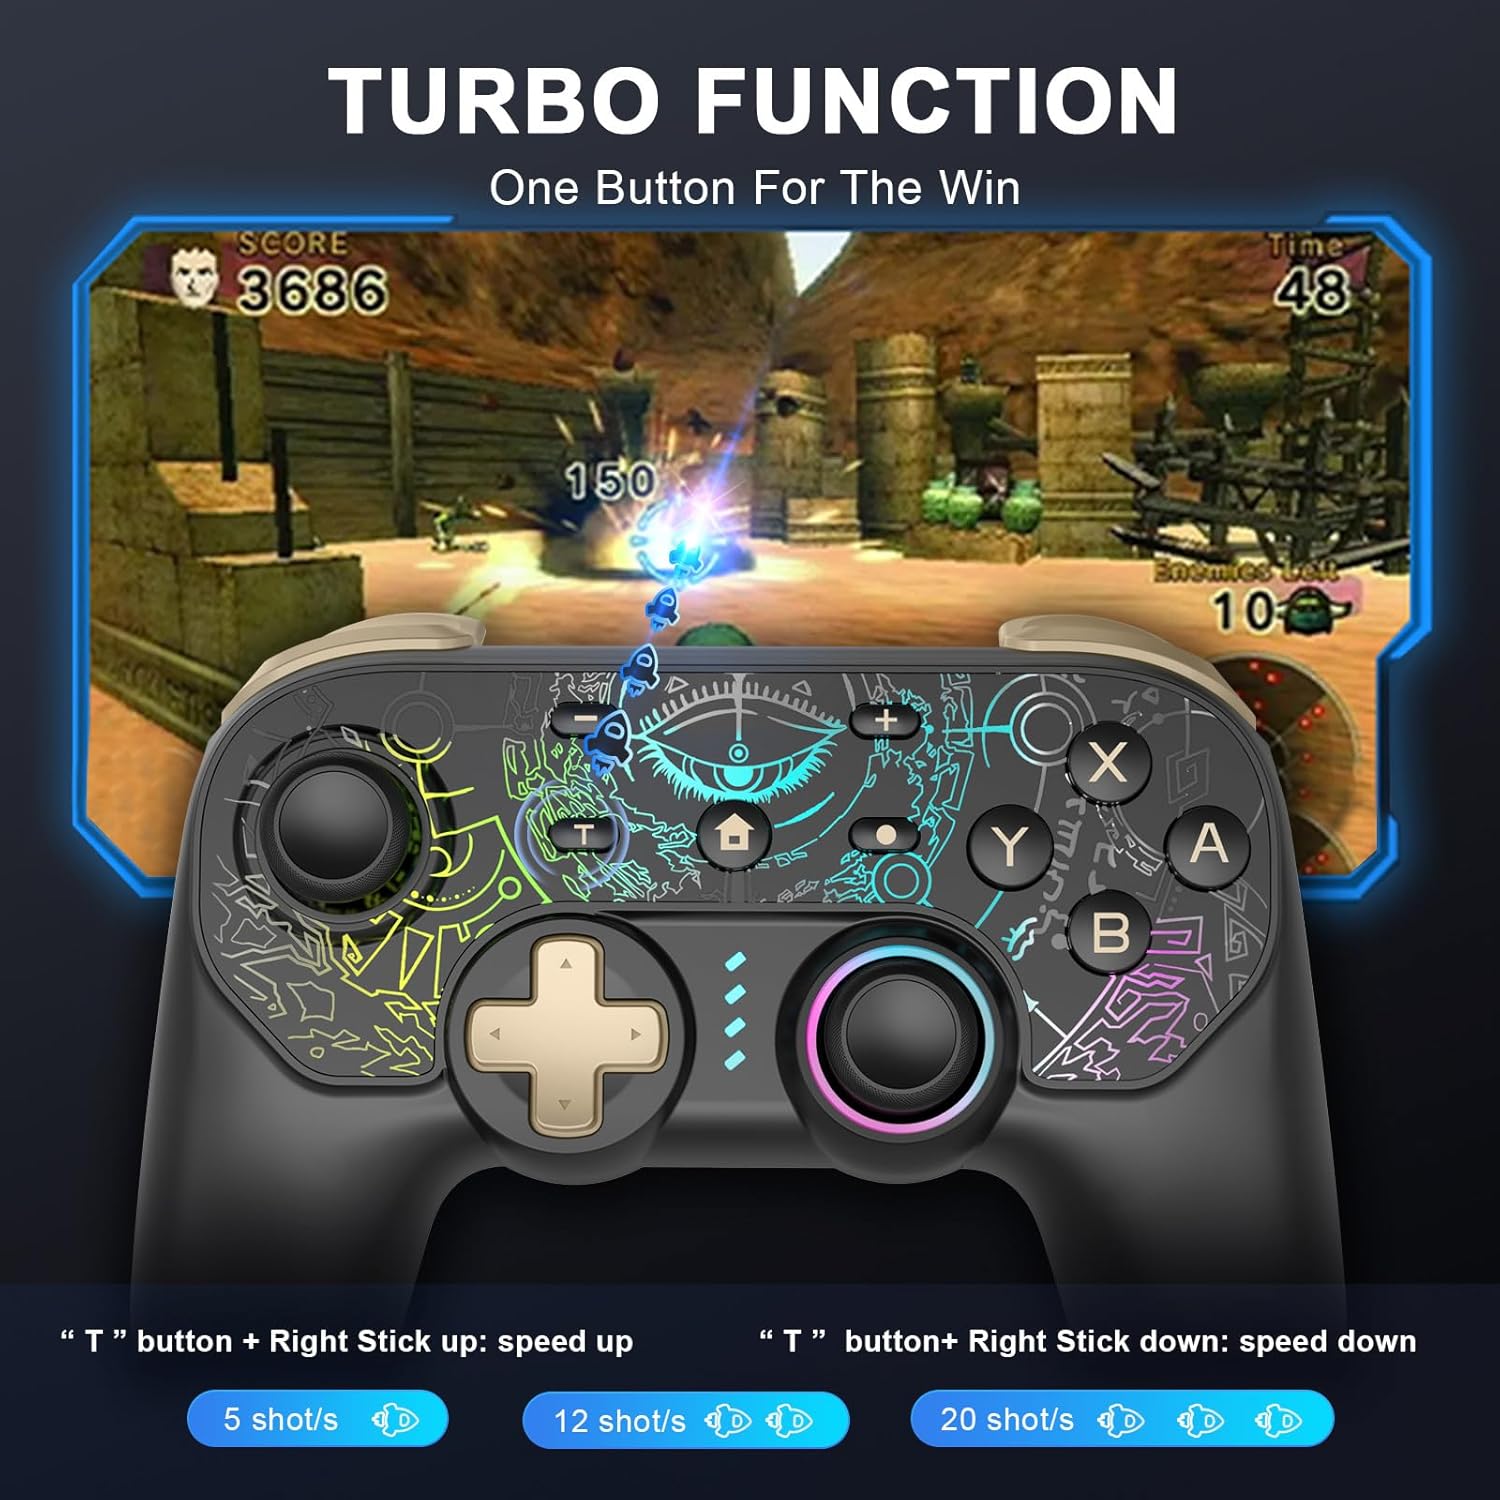
Image 5.3: Visual guide to activating and adjusting the Turbo function for rapid input.
5.4 Aġġustament tal-Vibrazzjoni
The controller features 5 adjustable vibration modes. Use the Buttuna tal-Aġġustament tal-Vibrazzjoni on the back of the controller to cycle through the intensity levels.

Image 5.4: Depiction of the controller's 5-level vibration feedback system.
5.5 Hall Effect Joysticks and Linear Triggers
The controller is equipped with Hall Effect joysticks, which utilize magnetic sensors for enhanced precision and to prevent drift over time. The linear triggers provide accurate input, ranging from weak to strong, ideal for games requiring nuanced control like racing simulations.

Image 5.5: An illustration demonstrating the internal mechanism and benefits of the Hall Effect joystick technology.
5.6 6-Axis Gyro Motion Control
The integrated 6-axis gyroscope allows for precise motion control, enabling intuitive direction and view adjustments in compatible games.
Image 5.6: Visual representation of the 6-axis gyro motion control capability.
5.7 Funzjoni Screenshot
Press the dedicated Screenshot button to capture in-game moments instantly.
6. Manutenzjoni
- Żomm il-kontrollur niexef u 'l bogħod minn temperaturi estremi.
- Naddaf il-kontrollur b'ċarruta ratba u niexfa. Evita li tuża kimiċi ħarxa jew materjali li joborxu.
- Store the controller in a safe place to prevent damage when not in use.
7 Issolvi l-problemi
- Il-kontrollur mhux qed jikkonnettja: Ensure the controller is charged. Try re-pairing the controller by following the connection steps for your specific device. Ensure Bluetooth is enabled on your device.
- Dewmien fl-input jew nuqqas ta' rispons: Ensure the controller is fully charged. Move closer to your device to reduce potential interference. For PC, try a wired connection.
- Buttuni ma jaħdmux: Ensure the controller is properly connected. If specific buttons are unresponsive, contact customer support.
- Il-vibrazzjoni ma taħdimx: Check if vibration is enabled in your game settings. Ensure the vibration intensity is not set to the lowest level on the controller.
- Id-dwal RGB ma jaħdmux: Press the Light Mode button to cycle through modes. Ensure the controller has sufficient battery.
8. Speċifikazzjonijiet
| Karatteristika | Dettall |
|---|---|
| Mudell | B0DKT5Q16N |
| Konnettività | Mingħajr fili (Bluetooth), Bil-fili (USB-C) |
| Kompatibilità | Nintendo Switch/Lite/OLED, PC (Windows 7/8/10), Android (HID mode), iOS |
| Kapaċità tal-batterija | Polimeru tal-litju 1000mAh (inkluż) |
| Ħin tal-Iċċarġjar | 2-3 sigħat |
| Ħin tal-logħob | 15-18 sigħat |
| Karatteristiċi Speċjali | 8-Color RGB Lighting (3 modes), Turbo Function, 5-Level Vibration, Hall Effect Joysticks, 6-Axis Gyro Motion Control, Linear Triggers |
| Piż tal-oġġett | 10.6 uqija |
| Dimensjonijiet tal-Pakkett | 6.5 x 5.12 x 2.64 pulzieri |
9. Garanzija u Appoġġ
DYONDER provides after-sales support for its products. If you encounter any issues or have questions regarding your controller, please contact our professional after-sales team. We are dedicated to ensuring your complete satisfaction.
For assistance, please refer to the contact information provided with your purchase or visit the official DYONDER support websit.
