1. Introduzzjoni
This manual provides detailed instructions for the safe installation, operation, and maintenance of your TWIG Farmhouse Chandelier 6-Light fixture. Designed for dining rooms and kitchen islands, this fixture combines vintage solid wood, matte black metal, and clear cylinder glass shades to create a warm and elegant lighting atmosphere. Please read this manual thoroughly before beginning installation or use.
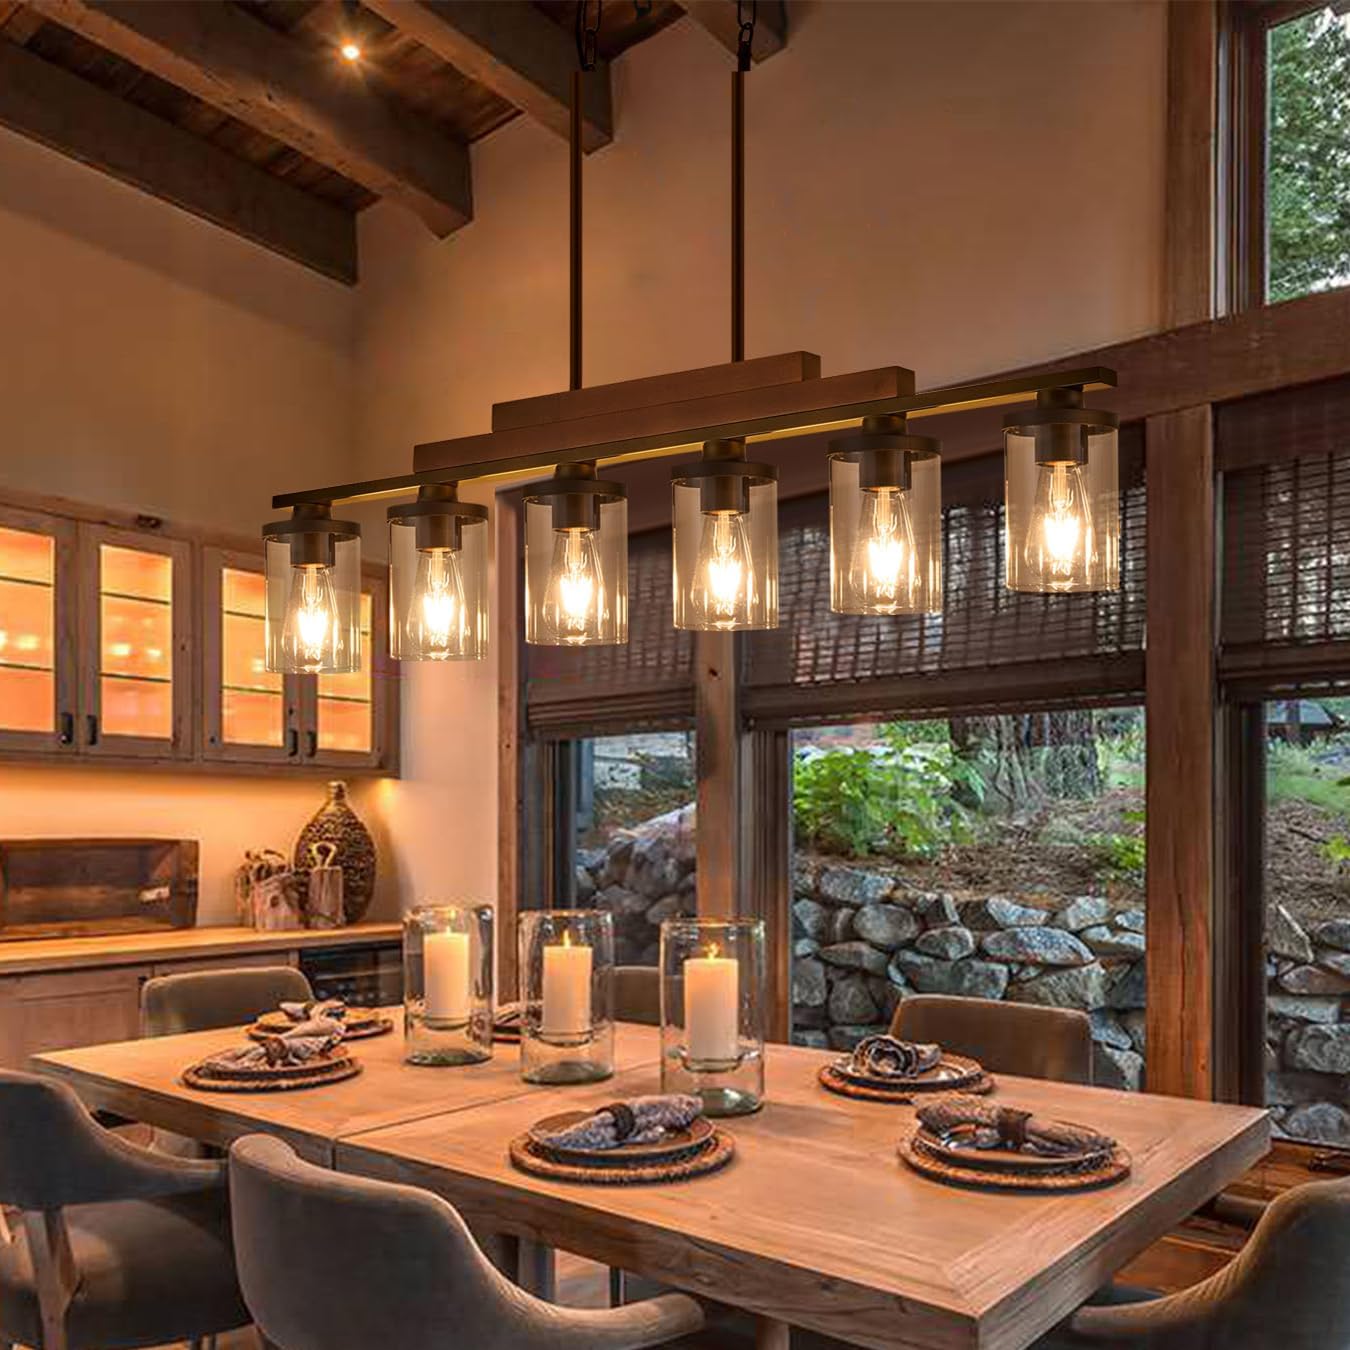
Image 1.1: The TWIG Farmhouse Chandelier 6-Light fixture installed above a dining table, showcasing its rustic design with wood accents and clear glass shades.
2. Informazzjoni dwar is-Sigurtà
- TWISSIJA: Riskju ta' xokk elettriku. Skonnettja l-provvista tal-enerġija mis-circuit breaker jew mill-kaxxa tal-fjużijiet qabel l-installazzjoni jew is-servizz.
- Il-konnessjonijiet elettriċi kollha għandhom ikunu skont il-kodiċijiet lokali, l-ordinanzi, jew il-Kodiċi Elettriku Nazzjonali (NEC). Ikkonsulta elettriċista kwalifikat jekk m'intix familjari mal-installazzjonijiet xierqa tal-wajers elettriċi.
- Taqbiżx il-wat rakkomandattage for bulbs (E26 base, maximum 60W, 40W recommended).
- Immaniġġja l-komponenti tal-ħġieġ b'attenzjoni biex tevita li jinkisru.
- Kun żgur li l-apparat tad-dawl ikun immuntat sew ma' element strutturali tas-saqaf.
- Keep flammable materials away from light bulbs.
- The product is handmade and may have a slight odor upon unboxing due to environmental protective coatings. It is recommended to ventilate the product in an open area for a period before installation.
3. Kontenut tal-Pakkett
Carefully unpack all components and inspect for any damage. Retain all packaging materials until you are satisfied with the product. The fixture is 95% pre-assembled for ease of installation.
- Chandelier main body (pre-assembled with wood beam, metal frame, and glass shades)
- Adjustable suspension rods (various lengths)
- Ceiling canopy with mounting hardware
- Konnetturi tal-wajer
- Manwal ta' struzzjonijiet
- Note: Bulbs are not included.
4. Speċifikazzjonijiet
| Brand | FRUKU |
| Numru tal-Mudell | 2024072304 |
| Dimensions (L x W x Max H) | 42"T x 5"W x 46"Għ |
| Medda ta' Għoli Aġġustabbli | Minimum 23", Maximum 45.7" (as per diagram) |
| Materjal | Ħġieġ, Metall, Injam |
| Kulur | Matte Black (Metal), Clear (Glass), Wood (Antique Painted) |
| Numru ta' Dwal | 6 |
| Bażi tal-Bozza | E26 |
| Max Wattage għal kull Bulb | 60W (40W recommended) |
| Voltage | 120 Volts |
| Tip ta' Installazzjoni | Semi Flush Mount |
| Użu fuq ġewwa/barra | Ġewwa |

Image 4.1: Detailed dimensions of the chandelier and its adjustable suspension rods, indicating a maximum height of 45.7 inches and a minimum of 23 inches.
5. Setup u Installazzjoni
The fixture is 95% assembled. Only a simple assembly and electrical installation are required.
- Pass 1: Ipprepara għall-Installazzjoni
- Itfi l-enerġija fis-circuit breaker jew fil-kaxxa tal-fjusijiet.
- Kun żgur li l-wiċċ tal-immuntar huwa strutturalment sod biex isostni l-piż tal-apparat.
- Step 2: Attach Mounting Bracket
- Waħħal il-bracket tal-immuntar mal-kaxxa tal-junction fis-saqaf billi tuża l-viti pprovduti.
- Step 3: Adjust Suspension Rods
- Determine the desired hanging height. The fixture's height can be adjusted from 23 inches to 45.7 inches using the provided rods.
- Attach the appropriate length of suspension rods to the chandelier body and the ceiling canopy.
- Pass 4: Konnessjoni Elettrika
- Connect the fixture's wires to the house wiring:
- Qabbad il-wajer iswed (live) mill-apparat tad-dawl mal-wajer iswed mill-kaxxa tal-junction.
- Qabbad il-wajer abjad (newtrali) mill-apparat mal-wajer abjad mill-kaxxa tal-junction.
- Connect the ground wire from the fixture to the ground wire from the junction box (or to the green ground screw on the mounting bracket).
- Secure connections with wire connectors.
- Connect the fixture's wires to the house wiring:
- Pass 5: Immonta l-Apparat
- Carefully lift the chandelier and attach the ceiling canopy to the mounting bracket, securing it with the decorative nuts.
- Pass 6: Installa Basal
- Screw E26 base bulbs (not included) into each socket. Do not exceed 60W per bulb; 40W is recommended.

Image 5.1: Installation diagram for the TWIG Farmhouse Chandelier, detailing steps from preparing the electrical box to mounting the fixture.
6. Istruzzjonijiet Operattivi
Once installed and bulbs are in place, restore power at the circuit breaker. The chandelier operates via a standard wall switch (toggle switch type). If connected to a dimmer switch, ensure the bulbs are compatible with dimming functionality.
- Tip ta' bozza: Supports any E26 screw bulbs. Filament, LED, incandescent, and halogen bulbs are compatible.
- Wat Rakkomandattage: 40W per bulb for optimal performance and longevity. Maximum 60W.
7. Manutenzjoni
- Tindif: Disconnect power before cleaning. Use a soft, dry cloth to wipe the metal and wood components. For glass shades, a slightly damp cloth can be used, followed by a dry cloth to prevent water spots. Do not use abrasive cleaners or solvents.
- Sostituzzjoni tal-bozza: Ensure power is off before replacing bulbs. Allow bulbs to cool completely before handling. Screw in new E26 base bulbs, ensuring they do not exceed 60W.
- Sostituzzjoni tad-dell tal-ħġieġ: In case of damage, replacement glass shades (3.94" diameter, 5.51" height) can be purchased separately.
8 Issolvi l-problemi
| Problema | Kawża Possibbli | Soluzzjoni |
|---|---|---|
| Id-dawl ma jixgħelx. |
|
|
| Dwal teptip. |
|
|
| Fixture smells after installation. |
|
|
9. Appoġġ għall-Klijent
For any questions, concerns, or assistance with your TWIG Farmhouse Chandelier, please contact our customer support team. We are committed to providing timely responses and solutions.
- Kuntatt: Please refer to the contact information provided with your purchase or visit the official TWIG websit.
- Ħin ta' Rispons: Aħna nimmiraw li nwieġbu l-mistoqsijiet kollha fi żmien 24 siegħa.


