1. Introduzzjoni
This manual provides detailed instructions for the iTOMA Retro Alarm Clock Model 138. Please read thoroughly before use to ensure proper functionality and to maximize your product experience. This device combines time display, alarm functions, Bluetooth connectivity, and media playback options in a compact, vintagdisinn ispirat-e.
2. Kontenut tal-Pakkett
Malli tiftaħ il-pakkett, ivverifika li l-oġġetti kollha li ġejjin huma inklużi:
- 1 x iTOMA Retro Alarm Clock (Model 138)
- 1 x Kejbil tal-Iċċarġjar tat-Tip Ċ
- 1 x Manwal għall-Utent
Nota: An AC adapter is not included and must be supplied separately for power.
3. Karatteristiċi tal-prodott
The iTOMA Retro Alarm Clock Model 138 offers a range of functionalities:
- Wiri tal-Ħin: Clear LED display with 12/24-hour format options.
- Funzjoni ta' allarm: Multiple alarm settings with adjustable volume (1-16 levels) and a 9-minute snooze feature.
- Modi ta' Allarm: Choose between everyday, weekdays only, or weekends only alarm activation.
- Konnettività Bluetooth: Bluetooth 5.1 for stable wireless audio streaming from compatible devices.
- Daqq tal-Midja: Supports TF (MicroSD) card slot and AUX jack for direct music playback.
- Sejħat mingħajr idejn: Integrated microphone for hands-free phone calls when connected via Bluetooth.
- Kontroll tal-Ħoss: Option to turn off the display and reactivate it by sound (tapping or clapping).
- Il-luminożità tal-wiri: Adjustable display brightness for optimal viewing f'diversi kundizzjonijiet tad-dawl.
- Batterija tal-Memorja: Internal battery to retain time and alarm settings during power outages (not for powering the device).

Figure 1: Key features of the iTOMA Retro Alarm Clock, including Bluetooth, AUX, hands-free calling, and TF card support.
4. Setup
- Konnessjoni tal-Enerġija: Connect the provided Type-C charge cable to the DC 5V port on the back of the alarm clock. Plug the other end of the cable into a compatible USB AC adapter (not included) and then into a power outlet. The display should illuminate.
- Issettjar tal-Ħin Inizjali:
- Press and hold the "TIME" button on the back of the clock for 3 seconds. The year display will start flashing.
- Use the scroll wheel (or +/- buttons if applicable) to adjust the year.
- Press "TIME" again to move to month, then day, then hour, then minute. Adjust each setting using the scroll wheel.
- After setting the minute, press "TIME" one more time to select 12-hour or 24-hour format.
- Press "TIME" again to confirm and exit time setting mode.
- Memory Battery Activation: To ensure settings are saved during power interruptions, locate the memory battery switch on the back of the clock and slide it to the "ON" position.
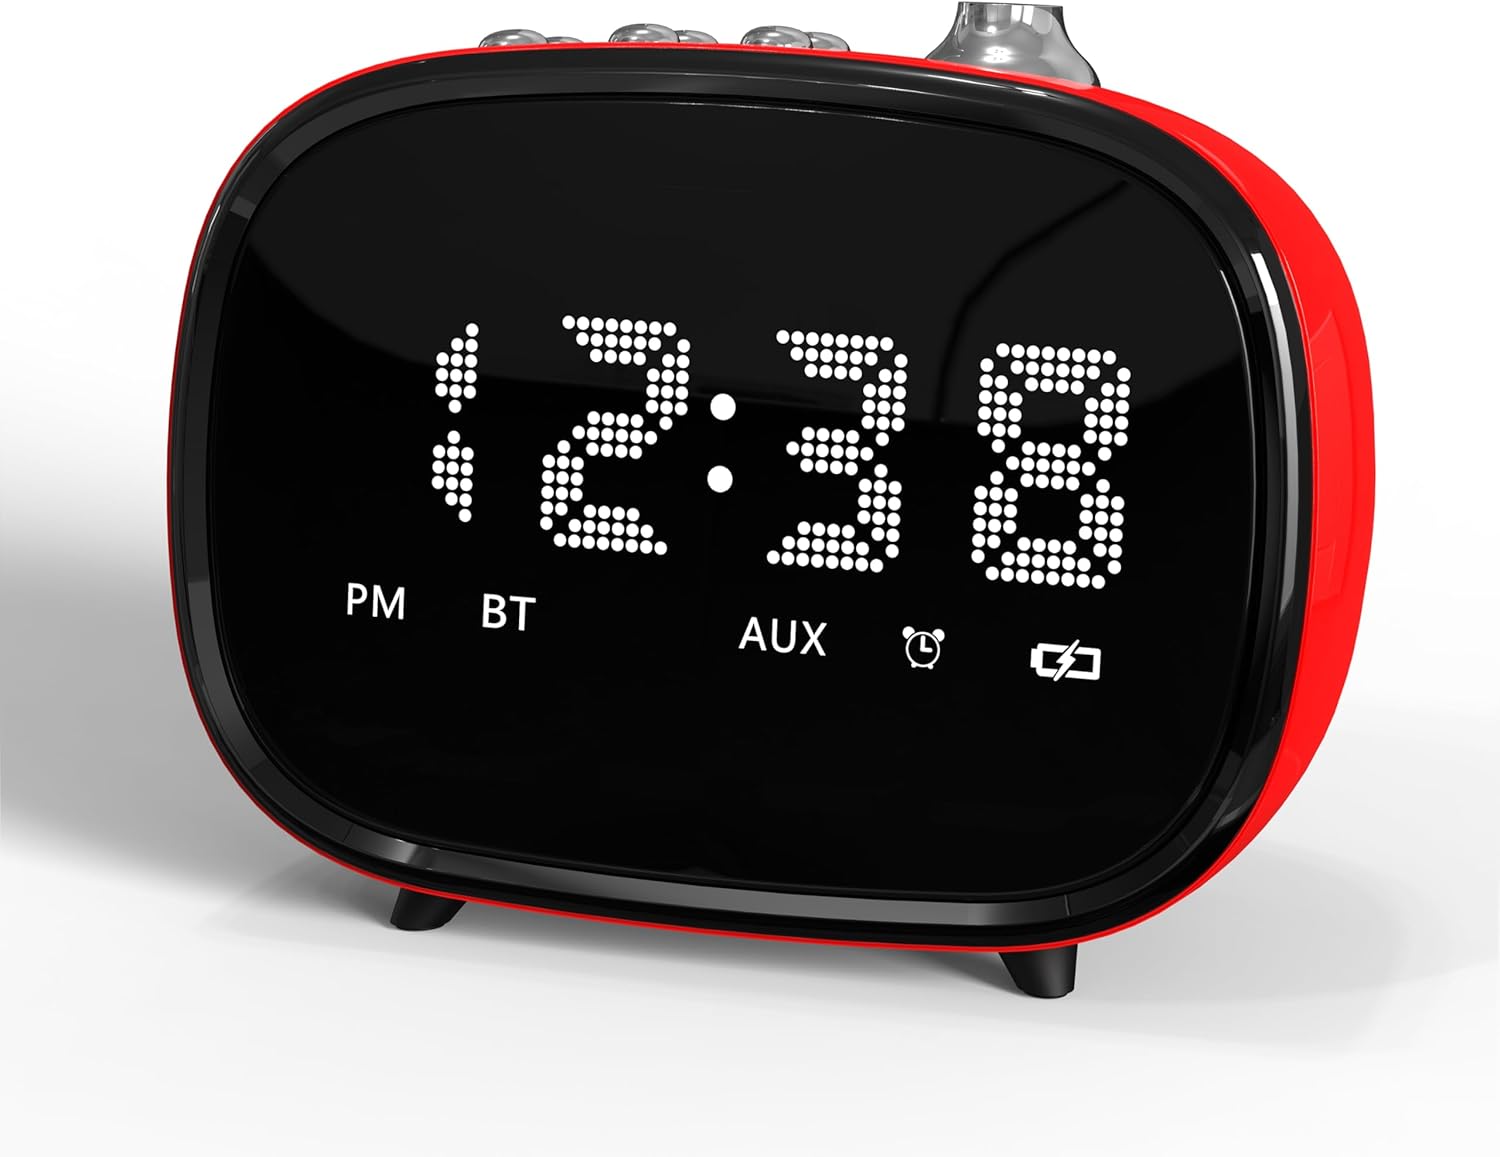
Figura 2: Quddiem view of the iTOMA Retro Alarm Clock, showing the LED time display.
5. Istruzzjonijiet Operattivi
5.1. Issettjar ta 'Allarmi
- Press and hold the "ALARM" button on the back of the clock for 3 seconds. "A1" (Alarm 1) will appear on the display.
- Press "ALARM" repeatedly to cycle through Alarm 1, Alarm 2, and Alarm 3 settings.
- When the desired alarm (e.g., A1) is displayed, use the scroll wheel to set the hour, then press "ALARM" to set the minute.
- After setting the minute, press "ALARM" again to choose the alarm mode:
- "--E": Alarm rings every day.
- "oNE": Alarm rings on weekdays only (Monday-Friday).
- "E": Alarm rings on weekends only (Saturday-Sunday).
- Press "ALARM" again to set the alarm volume (1-16 levels) using the scroll wheel.
- Press "ALARM" one last time to confirm and exit alarm setting.
- To activate/deactivate an alarm, use the corresponding ON/OFF switch on the bottom of the clock.
5.2. Funzjoni Snooze
When an alarm sounds, press the large "SNOOZE" button on the top of the clock to temporarily silence it for 9 minutes. The alarm will sound again after 9 minutes. This can be repeated up to 6 times.

Figure 3: The snooze function allows for an additional 9 minutes of rest after the alarm sounds.
5.3. Tqabbil tal-Bluetooth
- Kun żgur li l-arloġġ tal-allarm huwa mixgħul.
- Attiva l-Bluetooth fuq l-apparat mobbli tiegħek jew sors awdjo ieħor.
- Fittex għal "iTOMA 138" (or similar) in your device's Bluetooth settings.
- Select the device to pair. A confirmation sound will indicate successful pairing.
- You can now stream audio to the alarm clock or use it for hands-free calling.
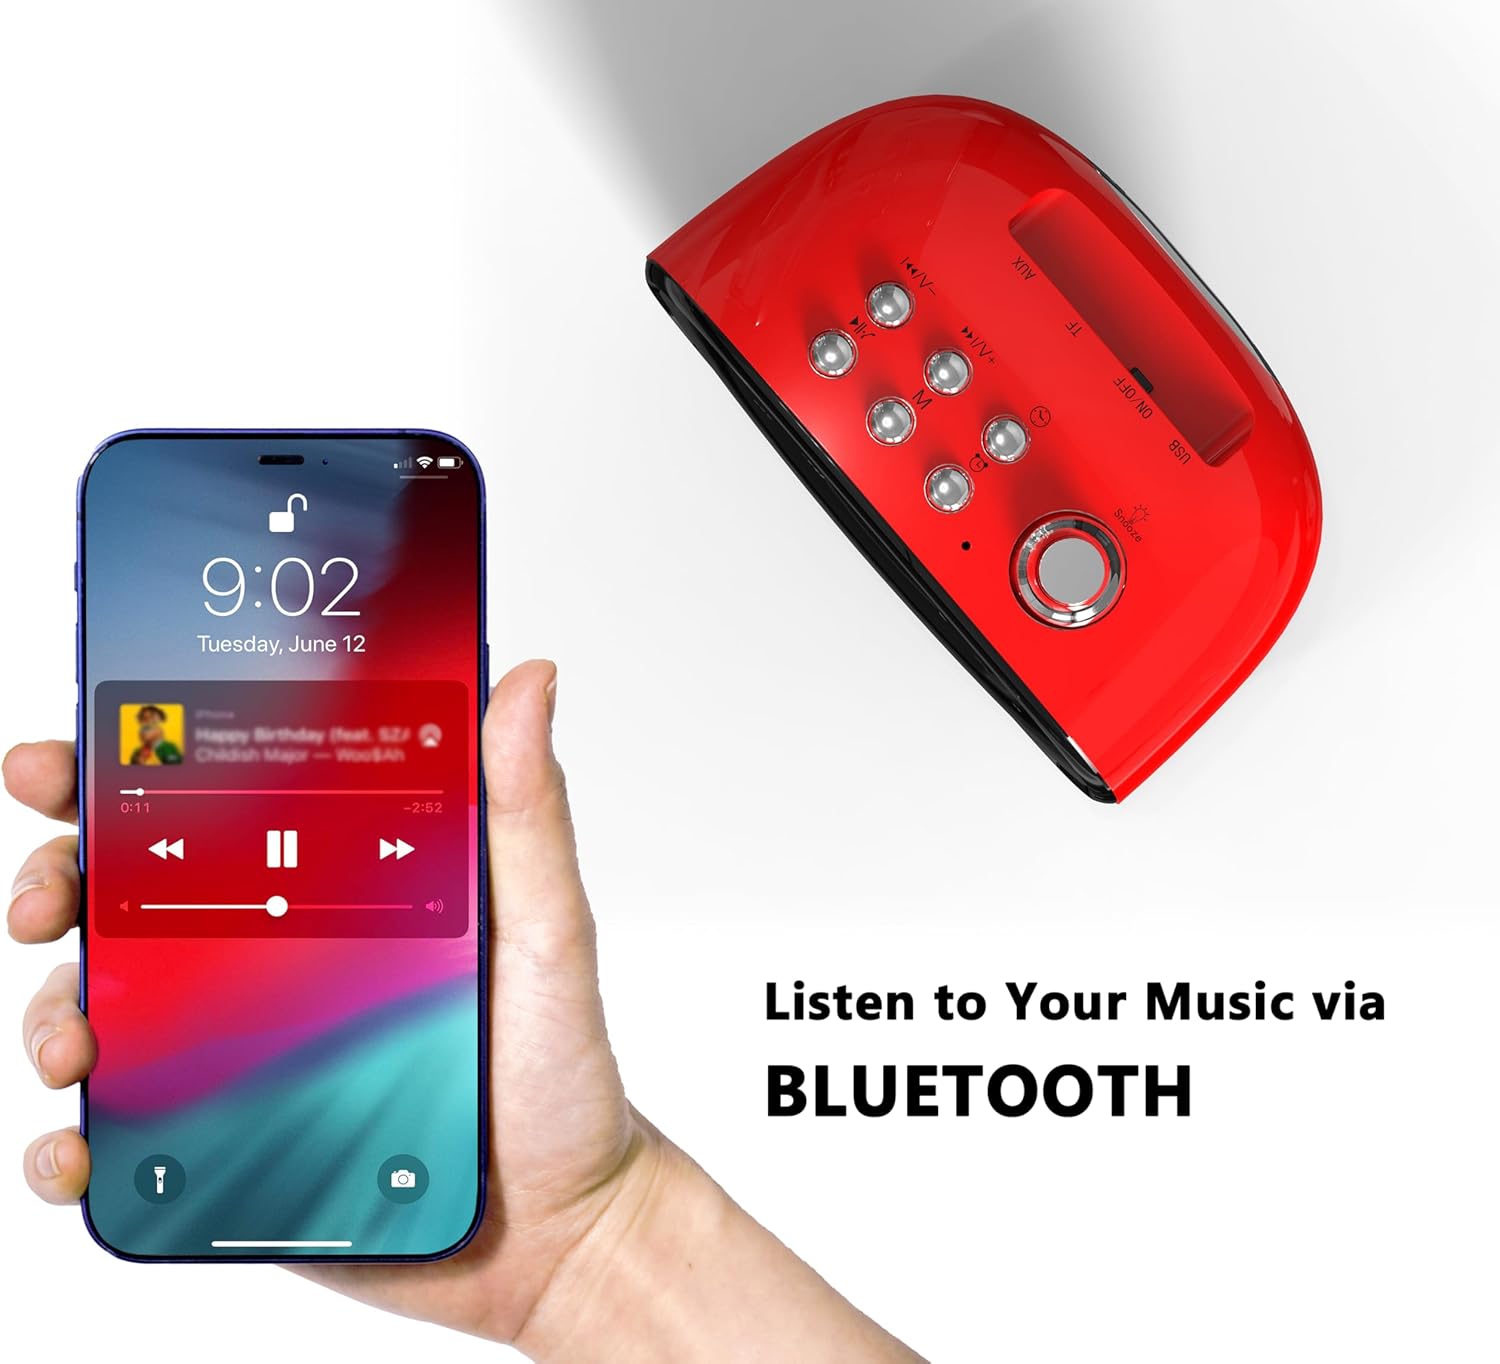
Figure 4: Connect your smartphone via Bluetooth to play music through the alarm clock's speaker.
5.4. TF Card and AUX Playback
- Karta TF: Daħħal kard TF (MicroSD) bl-awdjo files into the designated slot on the back of the clock. The clock should automatically switch to TF card playback mode.
- Jack AUX: Connect an audio device using a 3.5mm AUX cable to the AUX jack on the back of the clock. The clock should automatically switch to AUX input mode.
5.5. Sound Control (Display On/Off)
To enable or disable the sound control feature, use the "SOUND CONTROL" ON/OFF switch on the back of the clock. When "ON", the display will turn off after a few seconds of inactivity. To reactivate the display, simply tap the clock, click a button, or make a sound (e.g., clap your hands).
5.6. Aġġustament tal-luminożità tal-wiri
The display brightness can be adjusted using the dedicated switch on the back of the clock. Slide the switch to your preferred brightness level (Off, Dim, Bright).
6. Manutenzjoni
- Tindif: Uża drapp artab u niexef biex tnaddaf il-wiċċ tal-arloġġ tal-allarm. Evita li tuża prodotti tat-tindif jew solventi li joborxu.
- Pjazzament: Poġġi l-apparat fuq wiċċ stabbli u ċatt 'il bogħod mix-xemx diretta, sorsi ta' sħana, u umdità.
- Qawwa: Always use the provided Type-C cable. Ensure the AC adapter used is compatible (DC 5V).
7 Issolvi l-problemi
- Ebda Wiri/Qawwa: Ensure the Type-C cable is securely connected to both the clock and a working power outlet via a compatible AC adapter.
- Allarm ma Ddoqq: Check if the alarm is activated using the ON/OFF switch on the bottom. Verify the alarm time and mode are correctly set. Ensure the alarm volume is not set to 0.
- Kwistjonijiet ta' Tqabbil tal-Bluetooth: Ensure the clock is not already paired with another device. Turn off and on Bluetooth on your device and the clock, then try pairing again.
- Settings Lost After Power Outage: Ensure the memory battery switch on the back is in the "ON" position.
- Resetting the Clock: If the clock malfunctions or settings are incorrect, locate the "RST" (Reset) button on the back. Use a thin object (like a toothpick) to press and hold the button for a few seconds to reset the device to factory defaults.
8. Speċifikazzjonijiet
| Brand | iTOMA |
| Numru tal-Mudell | 138 |
| Tip ta 'Wiri | LED |
| Sors tal-Enerġija | Type-C cable (AC Adapter not included) |
| Dimensjonijiet tal-Prodott | 4.72"W x 3.74"Għ |
| Piż tal-oġġett | 13.1 uqija |
| Materjal | Acrylonitrile Butadiene Styrene (ABS) |
| Teknoloġija tal-Konnettività | USB-C, Bluetooth 5.1 |

Figure 5: Dimensions of the iTOMA Retro Alarm Clock.
9. Garanzija u Appoġġ
The iTOMA Retro Alarm Clock Model 138 comes with a Garanzija ta 'Jum 365. For any questions, missing accessories, or other issues, please contact iTOMA customer support.
Kuntatt Email: ThreeDucksDirect@outlook.com
Please include your order ID when contacting support for warranty claims.


