1. Introduzzjoni
This manual provides detailed instructions for assembling, operating, and maintaining your ROBOTIME Sakura Journey 3D Wooden Tram Model Kit. This DIY model building toy features intricate wooden pieces, a movable tram, and integrated LED lighting to create a charming diorama scene.

Image 1.1: The fully assembled ROBOTIME Sakura Journey 3D Wooden Tram Model Kit.
2. Informazzjoni dwar is-Sigurtà
- Dan il-prodott fih partijiet żgħar u mhux adattat għal tfal taħt it-3 snin minħabba periklu ta' fgar.
- Is-superviżjoni tal-adulti hija rakkomandata waqt l-assemblaġġ.
- Handle wooden pieces with care to prevent breakage.
- Żomm 'il bogħod minn fjammi miftuħa jew sorsi ta' sħana għolja.
- Do not ingest any parts of the kit.
3. Kontenut tal-Pakkett
Ivverifika li l-komponenti kollha huma preżenti qabel tibda l-assemblaġġ. Il-kit jinkludi:
- Pre-cut wooden sheets for the tram, scenery, and base.
- Komponenti tad-dawl LED.
- Assembly instructions booklet.
- Other small accessories for decoration.

Immaġni 3.1: Fuqview of the kit contents, showing the wooden sheets and instruction manual.
4. Setup u Assemblea
Assembly instructions are included within the kit. Follow the step-by-step diagrams carefully. No glue is typically required for ROBOTIME kits, as pieces are designed to interlock. However, for added stability, a small amount of wood glue may be used on non-moving parts if desired.
4.1 Preparazzjoni
- Clear a well-lit, flat workspace.
- Familiarize yourself with the instruction booklet and identify all parts.
- Have a Type C cable and a 5V charging head ready for the LED lights (not included).
4.2 Passi tal-Assemblea
- Carefully detach each wooden piece from its sheet. Use a craft knife if necessary to ensure clean breaks.
- Follow the numbered steps in the instruction manual to connect the pieces. Pay close attention to the orientation of each part.
- Assemble the tram body, ensuring all internal details and figures are correctly placed.
- Integrate the LED light wiring as indicated in the instructions. Ensure connections are secure.
- Construct the base and surrounding scenery, including the sakura trees and railway crossing.
- Attach the tram to the base, allowing for its movable function.
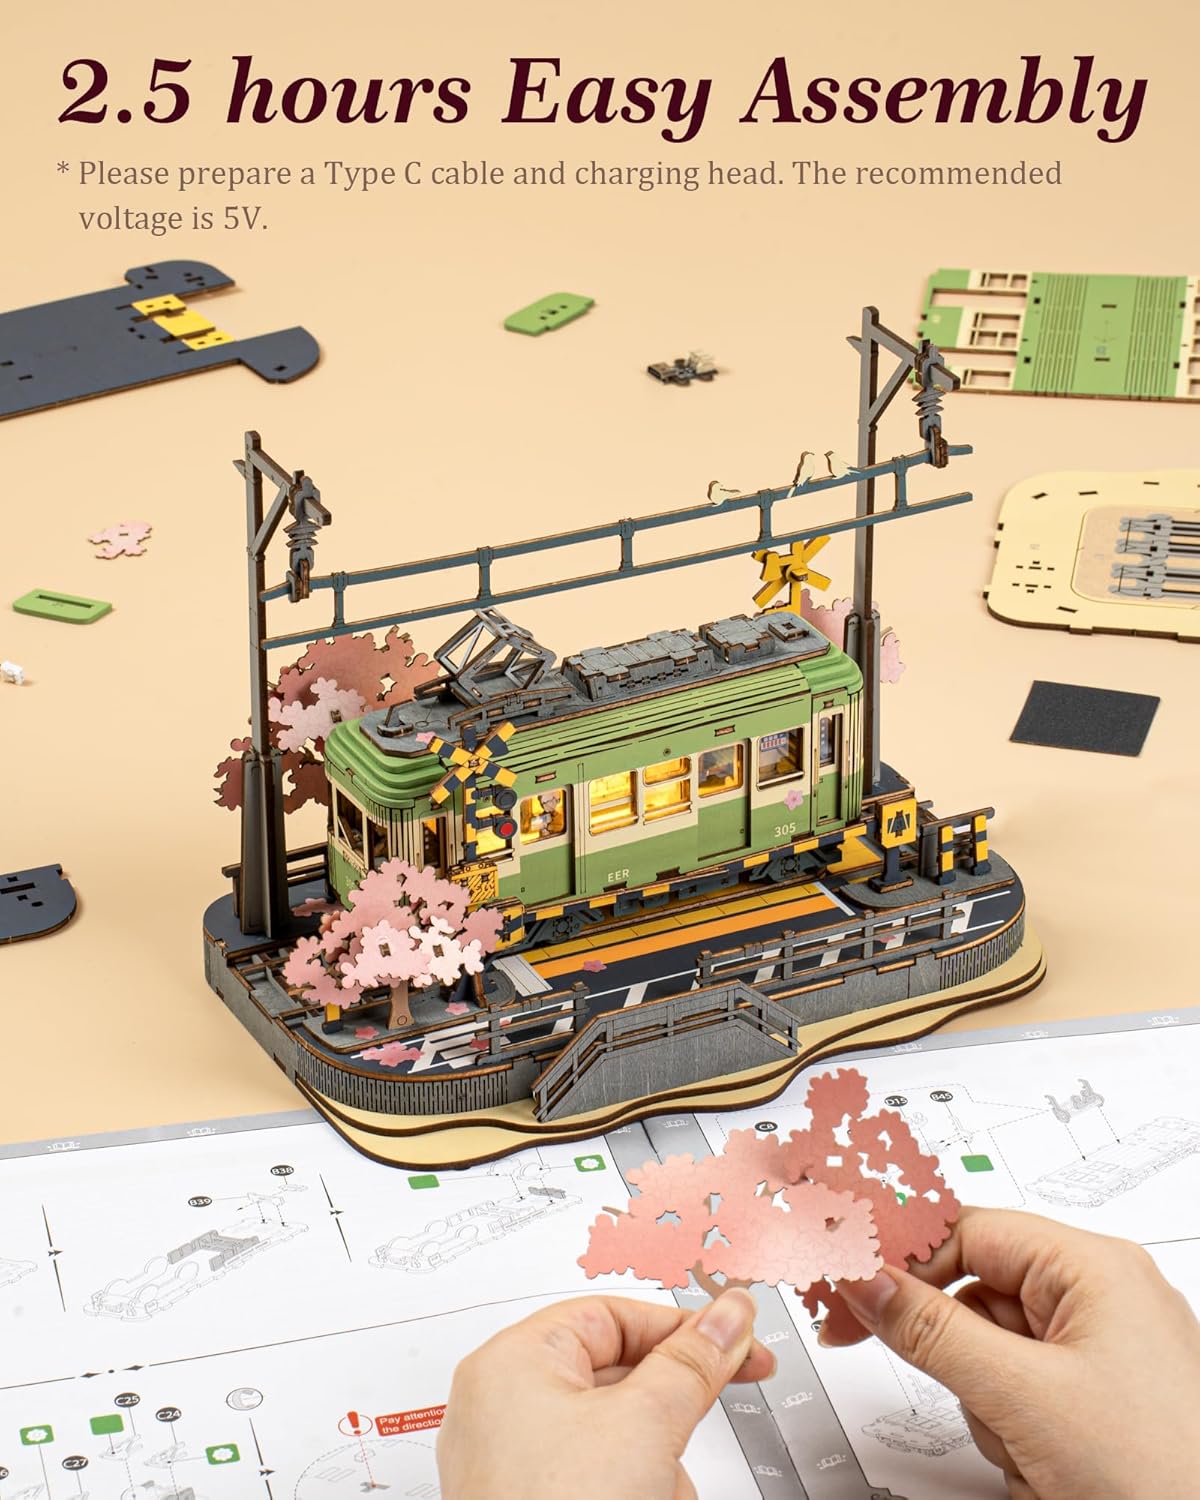
Immaġni 4.1: Eksample of the assembly process, highlighting the detailed wooden components.
Video 4.1: Official ROBOTIME assembly demonstration for the Sakura Tram TGS02 model. This video illustrates the step-by-step construction and highlights key features of the finished product, including the LED lights and movable tram.
5. It-Tħaddim tal-Mudell
5.1 Dawl LED
To activate the LED lights, connect a Type C cable (not included) to the designated port on the model and plug it into a 5V power source. The lights illuminate the interior of the tram, enhancing the diorama's ambiance.

Image 5.1: The model showcasing its LED lights, movable tram, and detailed sakura trees.
5.2 Movable Tram
The tram is designed to be movable along its track on the base. Gently slide the tram back and forth to simulate movement. Avoid excessive force to prevent damage to the wooden components.
6. Manutenzjoni
- Tindif: Use a soft, dry cloth or a small brush to gently remove dust from the model. Avoid using water or cleaning solutions, as they may damage the wood.
- Ħażna: Store the model in a dry environment, away from direct sunlight and extreme temperature changes, to prevent warping or fading of the wood.
- Immaniġġjar: Always handle the model by its base to minimize stress on delicate parts.
7 Issolvi l-problemi
- Broken Pieces: If a wooden piece breaks during assembly, wood glue can be used to repair it. Allow sufficient drying time.
- Dwal LED ma Jaħdmux:
- Ensure the Type C cable is securely connected to both the model and a 5V power source.
- Check if the power source is functional.
- Verify that all internal wiring connections within the model are correctly made as per the instructions.
- Partijiet Mhux Armar: Ensure you are using the correct parts for each step. Some pieces may require gentle pressure to fit, but avoid forcing them to prevent damage. Refer to the instruction diagrams for clarification.
8. Speċifikazzjonijiet
| Karatteristika | Dettall |
|---|---|
| Numru tal-Mudell | RBT-TGS02 |
| Dimensjonijiet tal-Prodott | 9 x 5.5 x 0.04 inches (assembled size will be larger) |
| Piż tal-oġġett | 1.3 liri |
| Età Rakkomandata mill-Manifattur | 0 - 10 years (Note: Product description suggests 'Adults', please refer to packaging for definitive age guidance) |
| Materjal | Injam |
| Dawl | Integrated LED (requires external 5V Type C power source, not included) |

Image 8.1: Visual representation of the assembled model's dimensions.
9. Garanzija u Appoġġ
For information regarding product warranty, returns, or technical support, please refer to the contact details provided on the product packaging or the official ROBOTIME websit. Żomm l-irċevuta tax-xiri tiegħek bħala prova tax-xiri.


