Introduzzjoni
This manual provides comprehensive instructions for the installation, operation, maintenance, and troubleshooting of your suevery 24-inch Curved Gaming Monitor (Model: SV240QC). Please read this manual thoroughly before using the product to ensure proper functionality and to maximize your viewing esperjenza. Żomm dan il-manwal għal referenza futura.
Karatteristiċi tal-Prodott
- Immersive Curved Display: The 24-inch 3000R curved screen is designed to match the natural curvature of the human eye, providing an immersive visual experience. This is complemented by a Full HD (1920x1080) resolution, drawing users into the content.
- Ultra-Smooth Motion: An ultra-high 180Hz refresh rate combined with an ultra-fast 1ms (GTG) gray-to-gray response time, enhanced by FreeSync technology, effectively eliminates screen tearing, stuttering, and ghosting. This ensures seamless transitions in fast-paced games.
- Riproduzzjoni Preċiża tal-Kulur: With 100% sRGB color space coverage and precise reproduction of 16.7 million colors, the VA panel delivers excellent contrast and color layering. This results in vivid and realistic visuals for both gaming and multimedia.
- Flexible Connectivity and Installation: Equipped with DisplayPort (DP) and High-Definition Multimedia Interface (HDMI) ports, the monitor can easily connect to PCs, gaming consoles, laptops, and other devices. It supports VESA wall mounting, allowing for flexible placement in various environments.

Image: The suevery 24-inch Curved Gaming Monitor, showcasing its sleek design and curved screen.
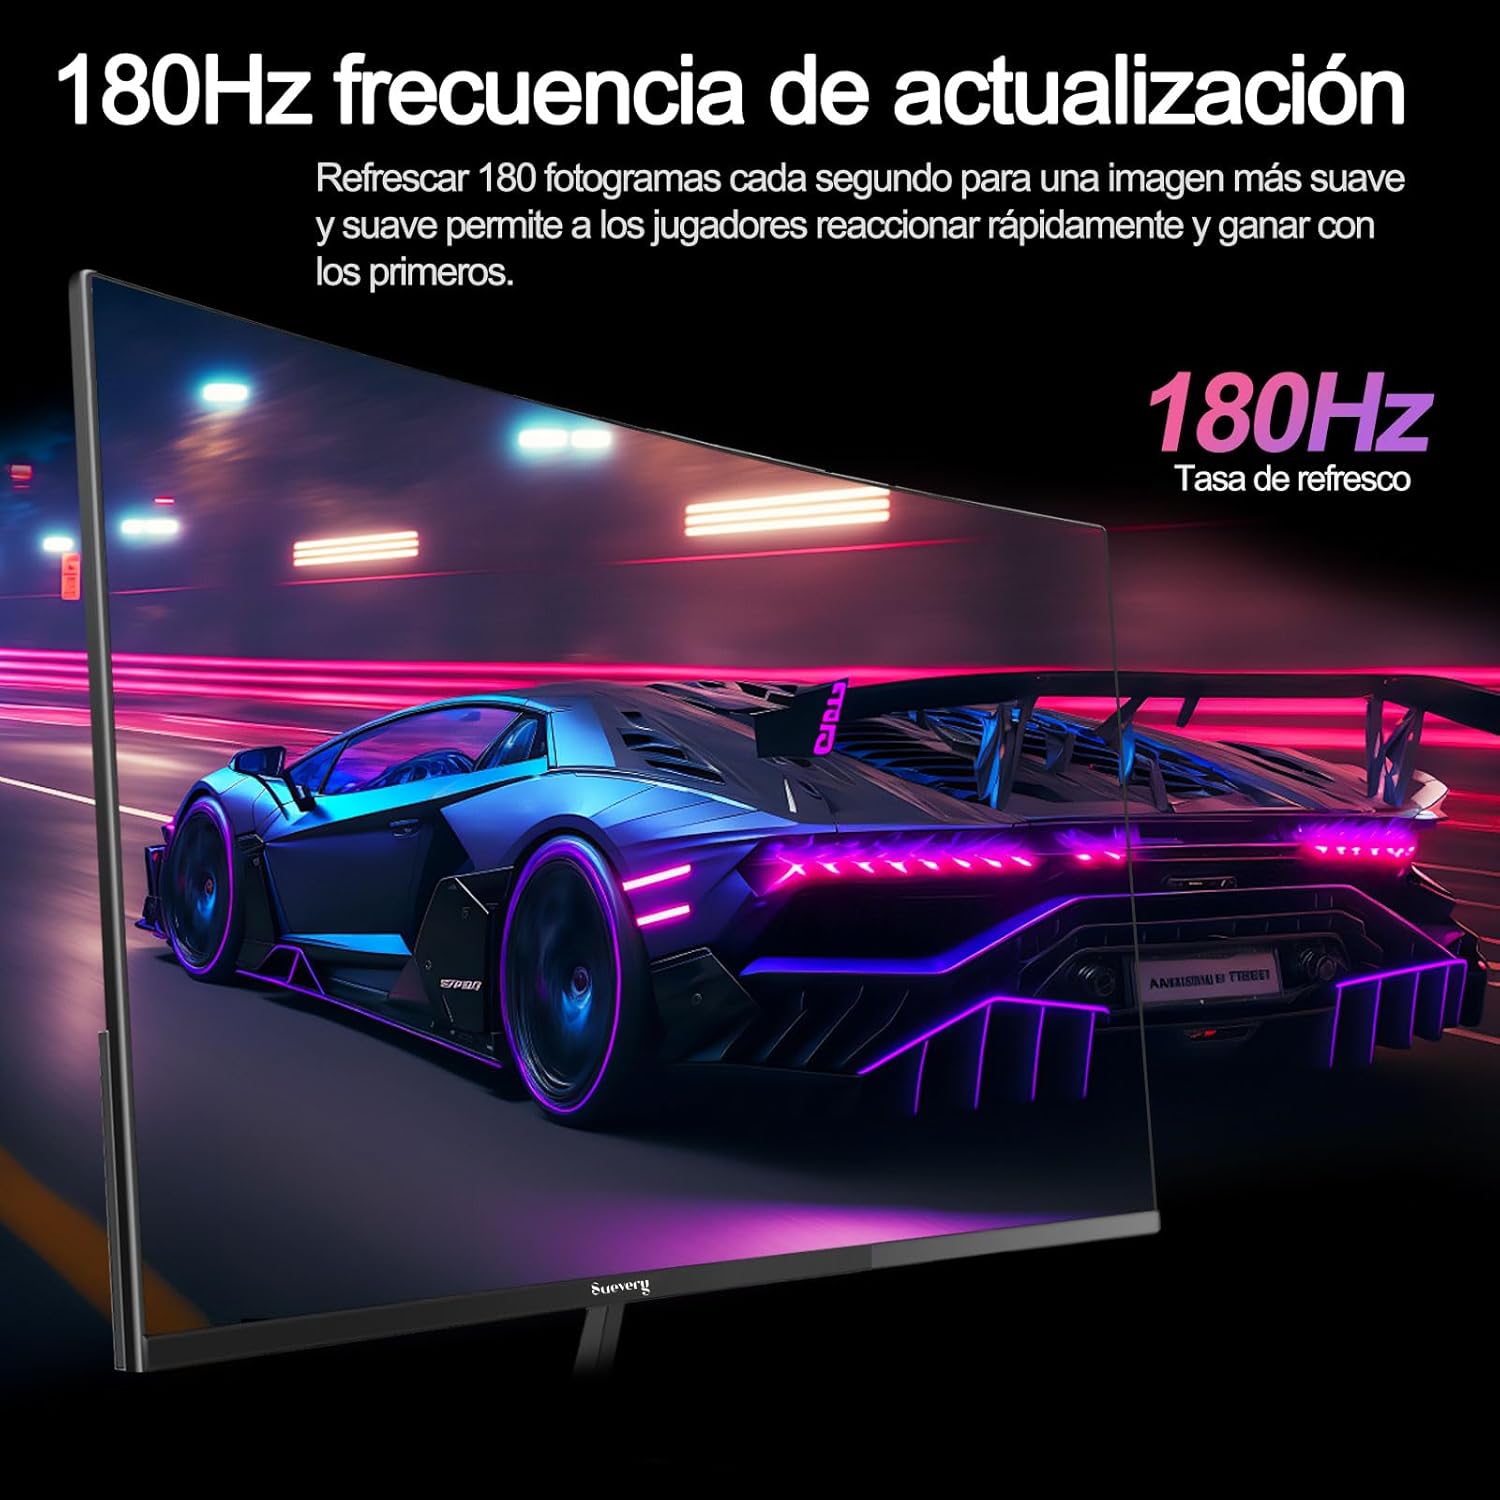
Image: A visual representation highlighting the 180Hz refresh rate, illustrating smooth motion in a racing game scene.

Image: An illustration demonstrating the monitor's wide color gamut (100% sRGB), 3000:1 contrast ratio, and 16.7 million colors for vibrant visuals.

Image: A split-screen comparison showing the visual difference with FreeSync OFF (screen tearing) and FreeSync ON (smooth image) during gameplay.
Setup Istruzzjonijiet
1. Spakkjar u Armar
- Neħħi bir-reqqa l-komponenti kollha mill-imballaġġ.
- Place the monitor panel face down on a soft, clean surface to prevent scratches.
- Attach the stand base to the stand neck, securing it with the provided screws.
- Attach the assembled stand to the back of the monitor panel. Ensure it clicks securely into place or is fastened with screws as per the design.
- Inkella, għall-immuntar VESA, neħħi l-istand u waħħal muntatura kompatibbli mal-VESA (75x75mm) mal-pannell ta' wara tal-monitor.
2. Kejbils tal-Konnessjoni
Refer to the diagram below for port locations.

Image: A diagram illustrating the monitor's rear panel, showing the HDMI, DisplayPort (DP), USB (if applicable), and power input ports, along with VESA mount dimensions (75x75mm).
- Konnessjoni tal-Enerġija: Connect the power adapter to the monitor's power input port, then plug the power cable into a wall outlet.
- Konnessjoni tal-vidjo: Connect one end of an HDMI or DisplayPort cable to the corresponding port on your monitor and the other end to your computer's graphics card or other video source. For optimal performance, especially at 180Hz, a DisplayPort connection is recommended.
- Audio (if applicable): If your monitor has a 3.5mm audio output, you can connect external speakers or headphones.
3. L-Ewwel Tixgħil
- Agħfas il-buttuna tal-qawwa fuq il-monitor. Id-dawl indikatur tal-qawwa għandu jixgħel.
- Turn on your connected computer or video source.
- The monitor should automatically detect the input signal. If not, you may need to manually select the input source using the On-Screen Display (OSD) menu.
Istruzzjonijiet Operattivi
1. Power On/Off
Press the power button, usually located on the back or bottom of the monitor, to turn the monitor on or off.
2. Menu tal-Wiri fuq l-Iskrin (OSD).
The OSD menu allows you to adjust various monitor settings. Access the OSD menu using the joystick or buttons typically found on the back or bottom of the monitor.
- Navigazzjoni: Use the joystick or directional buttons to navigate through the menu options.
- Għażla: Press the joystick or a dedicated button to select an option or confirm a setting.
- Ħruġ: Use the designated 'Exit' button or move the joystick in a specific direction to close the OSD menu.
3. L-aġġustament tas-Settings
Is-settings ewlenin li tista' taġġusta jinkludu:
- Luminożità/Kuntrast: Aġġusta dawn biex jaqblu tiegħek viewambjent.
- Settings tal-Kulur: Immodifika t-temperatura tal-kulur, il-gamma, u l-valuri individwali tal-RGB.
- Sors tad-dħul: Manually select between HDMI and DisplayPort inputs.
- Rata ta' Aġġornar: Ensure your operating system and graphics card settings are configured to utilize the monitor's 180Hz refresh rate.
- FreeSync: Enable FreeSync in the OSD menu and in your graphics card control panel for tear-free gaming.
- Modalità Stampa: Select from preset modes (e.g., Standard, Game, Movie) or customize your own.
Manutenzjoni
1. Tindif tal-Iskrin
- Itfi l-monitor u aqla l-korda tad-dawl.
- Imsaħ l-iskrin bil-mod b'ċarruta ratba u mingħajr ħelu.
- Għal marki iebsa, ħassar bil-modampLaħlaħ id-drapp bl-ilma jew b'prodott speċjalizzat għat-tindif tal-iskrin (tisprejjax direttament fuq l-iskrin).
- Avoid using harsh chemicals, abrasive cleaners, or alcohol-based solutions.
2. Kura Ġenerali
- Żomm il-monitor 'il bogħod mix-xemx diretta, mis-sħana eċċessiva, u mill-umdità.
- Aċċerta ruħek li jkun hemm ventilazzjoni adegwata madwar il-monitor.
- Evita li tpoġġi oġġetti tqal fuq il-monitor jew il-kejbils tiegħu.
Issolvi l-problemi
Jekk tiltaqa' ma' problemi bil-monitor tiegħek, jekk jogħġbok irreferi għall-problemi u s-soluzzjonijiet komuni li ġejjin:
| Problema | Soluzzjoni Possibbli |
|---|---|
| L-ebda immaġni fuq l-iskrin | Ensure the power cable is securely connected and the monitor is turned on. Verify the video cable (HDMI/DP) is properly connected to both the monitor and the computer. Check if the correct input source is selected in the OSD menu. |
| L-immaġni teptip jew instabbli | Check the video cable connection. Ensure your graphics card drivers are up to date. Verify the refresh rate setting in your operating system is set correctly (e.g., 180Hz). Enable FreeSync if supported by your graphics card. |
| Il-kuluri jidhru mhux korretti | Adjust color settings (brightness, contrast, color temperature) in the OSD menu. Reset the monitor to factory default settings. |
| Il-monitor ma jixgħelx | Check the power cable and adapter connections. Try plugging the monitor into a different power outlet. |
Jekk il-problema tippersisti wara li tipprova dawn is-soluzzjonijiet, jekk jogħġbok ikkuntattja l-appoġġ għall-klijenti.
Speċifikazzjonijiet
| Karatteristika | Speċifikazzjoni |
|---|---|
| Brand | suġġeriment |
| Numru tal-Mudell | SV240QC |
| Daqs tal-Iskrin | 24 Pulzier |
| Riżoluzzjoni tal-Wiri | 1920 x 1080 (Full HD) |
| Riffriskar Rata | 180Hz |
| Ħin ta' Rispons | 1ms (GTG) |
| Kurvatura | 3000R |
| Gamut tal-Kulur | 100% sRGB |
| Tip ta' Panel | VA |
| Proporzjon ta' l-aspett | 16:9 |
| Konnettività | 1x HDMI, 1x DisplayPort (DP) |
| Kompatibilità tal-Immonta VESA | 75x75mm |
| Dimensjonijiet tal-Prodott | 59 x 39 x 11 ċm (bl-istand) |
| Piż | 3.5 kg |
Garanzija u Appoġġ
Informazzjoni dwar Garanzija
suevery provides a 12-il xahar garanzija for this monitor, covering manufacturing defects and malfunctions under normal use. Please retain your proof of purchase for warranty claims.
Appoġġ għall-Klijent
If you encounter any damage, failure, or missing parts, or require technical assistance, please do not hesitate to contact suevery customer service. Our support team is available to assist you with any product-related inquiries.
For support, please refer to the contact information provided on the suevery official webis-sit jew il-pjattaforma tax-xiri tiegħek.