1. Introduzzjoni
This manual provides detailed instructions for the installation, operation, and maintenance of your Kolink Unity Solar ARGB Mesh Midi Tower Case. Please read this manual thoroughly before beginning installation to ensure proper setup and safe usage. This case is designed to house standard PC components, offering efficient cooling and customizable ARGB lighting.
2. Informazzjoni dwar is-Sigurtà
- Dejjem skonnettja l-provvista tal-enerġija mis-sokit tal-ħajt qabel ma tinstalla jew tneħħi xi komponenti.
- Immaniġġja l-komponenti kollha b'attenzjoni biex tevita ħsara minn skariku elettrostatiku (ESD). Ikkunsidra li tuża ċinga tal-polz antistatika.
- Avoid placing the case in direct sunlight, near heat sources, or in environments with excessive dust or humidity.
- Do not attempt to modify the case or its components. Unauthorized modifications may void your warranty and pose safety risks.
- Keep small parts, such as screws, away from children.
3. Kontenut tal-Pakkett
Ivverifika li l-oġġetti kollha huma preżenti fil-pakkett:
- Kolink Unity Solar ARGB Mesh Midi Tower Case
- Accessory Box (containing screws, cable ties, and standoffs)
- Manwal għall-Utent (dan id-dokument)
4. Prodott Aktarview
The Kolink Unity Solar ARGB Mesh Midi Tower Case features a mesh front panel for optimal airflow, pre-installed ARGB fans, and a tempered glass side panel to showcase your build.
4.1 Esterni Views

Figura 4.1.1: In-naħa ta' quddiem view of the Kolink Unity Solar ARGB Mesh Midi Tower Case, highlighting the mesh front panel and three illuminated ARGB fans.
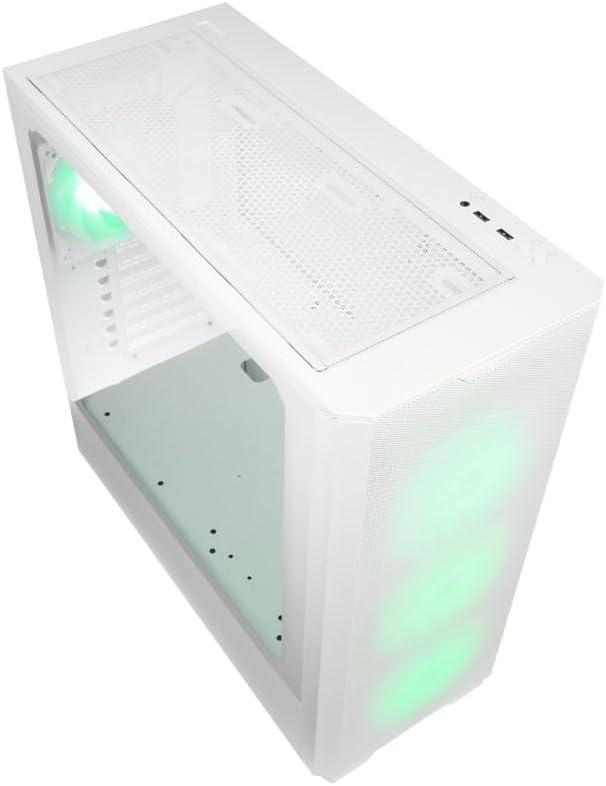
Figura 4.1.2: Fuq view of the case, showing the top mesh panel and front I/O ports.
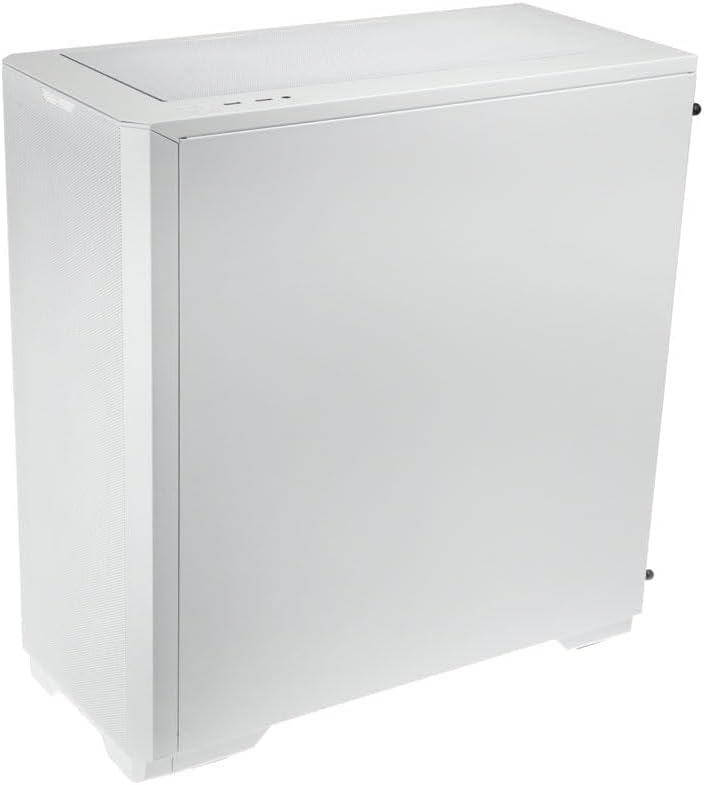
Figura 4.1.3: In-naħa ta' wara view of the case, illustrating the solid right side panel.

Figura 4.1.4: Composite image showing the front, rear, and tempered glass side panel of the case.
4.2 Front I/O Ports

Figura 4.2.1: Close-up of the top-mounted front I/O panel, featuring audio jacks, USB ports, and control buttons.
The front I/O panel typically includes:
- Buttuna tal-Qawwa
- Irrisettja Buttuna
- Portijiet USB 3.0 (x1)
- Portijiet USB 2.0 (x2)
- HD Audio Jacks (Headphone/Microphone)
- ARGB Control Button (for pre-installed fans)
4.3 Tqassim Intern

Figura 4.3.1: Intern view of the case, showing the motherboard tray, front fan mounts, and PSU shroud.

Figura 4.3.2: Another interior view, highlighting the rear fan mount and the spacious main chamber.

Figura 4.3.3: Close-up of the pre-installed ARGB fans at the front of the case.

Figura 4.3.4: View behind the motherboard tray, showing space for cable management and drive mounts.
5. Gwida għas-Setup u l-Installazzjoni
Follow these steps to install your PC components into the Kolink Unity Solar case.
5.1 Tħejjija tal-Każ
- Poġġi l-kaxxa fuq wiċċ ċatt u stabbli.
- Remove the tempered glass side panel by unscrewing the thumbscrews at the rear and carefully pulling it away. Set it aside on a soft, non-abrasive surface.
- Remove the solid right side panel by unscrewing its thumbscrews and sliding it off.
5.2 Installazzjoni tal-Motherboard
- Installa l-ilqugħ tal-I/O (jekk applikabbli) fil-ftuħ ta' wara tal-kaxxa.
- Ensure the correct standoffs are installed for your motherboard form factor (ATX, Micro-ATX, Mini-ITX). Adjust or add standoffs as needed using the provided tools.
- Carefully align your motherboard with the standoffs and I/O shield.
- Waħħal il-motherboard bil-viti pprovduti. Tissikkax iżżejjed.
5.3 Installazzjoni tal-Unità tal-Provvista tal-Enerġija (PSU).
- Sib iż-żona tal-immuntar tal-PSU fil-qiegħ ta' wara tal-kaxxa.
- Slide your PSU into the designated bay from the rear of the case.
- Align the PSU with the screw holes and secure it with the provided screws.
5.4 Storage Drive Installation (HDDs/SSDs)
The case supports multiple storage drives. Refer to the accessory box for specific mounting hardware.
- SSDs ta' 2.5": Mount directly onto the SSD trays located behind the motherboard tray or on the PSU shroud. Secure with screws.
- HDDs ta' 3.5": Install into the drive cage located under the PSU shroud. Slide the drive into the tray and secure it.
5.5 Graphics Card (GPU) and Expansion Card Installation
- Neħħi l-għata meħtieġa tas-slott tal-PCIe minn wara tal-kaxxa.
- Daħħal il-karta grafika tiegħek jew karti ta' espansjoni oħra fis-slots PCIe xierqa fuq il-motherboard tiegħek.
- Secure the cards with the provided screws or retention clips.
5.6 Cable Management and Connections
- Connect all necessary power cables from the PSU to your motherboard, CPU, GPU, and storage drives.
- Connect the front I/O cables (USB, Audio, Power/Reset switches, ARGB control) to their respective headers on the motherboard. Refer to your motherboard manual for header locations.
- Route cables through the cutouts and tie-down points behind the motherboard tray to maintain a clean interior and optimize airflow. Use the included cable ties.
- Ensure the pre-installed ARGB fans are connected to the integrated ARGB controller or directly to an ARGB header on your motherboard (if supported).
6. Tħaddim tad-Dawl ARGB
The Kolink Unity Solar case comes with pre-installed ARGB fans. You can control their lighting effects in two ways:
- Case ARGB Button: Use the dedicated ARGB control button on the front I/O panel to cycle through various lighting modes and colors.
- Softwer tal-Motherboard: If your motherboard has a 3-pin 5V ARGB header and compatible software (e.g., ASUS Aura Sync, MSI Mystic Light, Gigabyte RGB Fusion), you can connect the case's ARGB controller to the motherboard and synchronize lighting effects with other components. Refer to your motherboard manual for instructions on ARGB header connection and software usage.
7. Manutenzjoni
Manutenzjoni regolari tgħin biex tiżgura prestazzjoni ottimali u lonġevità tal-komponenti tal-PC tiegħek.
- Filtri tat-Trab: The case features removable dust filters on the front, top, and bottom. Periodically remove and clean these filters with compressed air or by rinsing them with water (ensure they are completely dry before reinstallation).
- Tindif ta 'ġewwa: Use compressed air to remove dust from inside the case, especially from fan blades, heatsinks, and other components. Perform this cleaning in a well-ventilated area.
- Tindif ta' barra: Imsaħ l-uċuħ ta 'barra b'artab, damp drapp. Evita kimiċi ħarxa jew prodotti tat-tindif li joborxu.
8 Issolvi l-problemi
Jekk tiltaqa' ma' problemi, irreferi għall-passi komuni li ġejjin għas-soluzzjoni tal-problemi:
- PC not powering on: Double-check all power connections from the PSU to the motherboard, CPU, and GPU. Ensure the front panel power switch cable is correctly connected to the motherboard header. Verify the PSU switch is in the 'ON' position.
- Fans not spinning/ARGB not lighting up: Check fan power connections and ARGB connections. Ensure ARGB cables are connected to the correct 3-pin 5V ARGB headers (not 4-pin 12V RGB headers). If using the case controller, ensure it is powered.
- L-ebda output tal-wiri: Ensure your graphics card is properly seated in its PCIe slot and all necessary power cables are connected. Verify your monitor cable is connected to the graphics card, not the motherboard's integrated graphics port (unless you are using integrated graphics).
9. Speċifikazzjonijiet
Key specifications for the Kolink Unity Solar ARGB Mesh Midi Tower Case:
| Karatteristika | Speċifikazzjoni |
|---|---|
| Brand | Qiegħed INĊEJĦEL |
| Isem tal-Mudell | Unity Solar |
| Numru tal-Mudell tal-Oġġett | UNITYSOLARWHT |
| Tip ta' Każ | Torri tan-Nofs |
| Kulur | Abjad |
| Kompatibbiltà tal-motherboard | ATX, Mikro-ATX, Mini-ITX |
| Metodu tat-tkessiħ | Arja |
| Tip ta' Immuntar tal-Provvista tal-Enerġija | Mount tal-qiegħ |
| Numru ta 'USB 2.0 Ports | 2 |
| Portijiet USB totali | 2 (Note: Product description indicates 1x USB 3.0, 2x USB 2.0. Please verify with product packaging.) |
| Total Internal Bays | 4 (Mixed 2.5"/3.5" support) |
| Piż tal-oġġett | 2.2 liri |
10. Garanzija u Appoġġ
For warranty information and technical support, please refer to the official KOLINK webis-sit jew ikkuntattja lill-bejjiegħ tiegħek. Żomm il-prova tax-xiri tiegħek għal talbiet ta' garanzija.


