1. Introduzzjoni
This manual provides detailed instructions for the installation, operation, and maintenance of the SuperATV Spare Tire Carrier, Model STC-P-PROR-01. This carrier is designed for the 2022+ Polaris RZR Pro R and is engineered to securely transport a spare tire up to 35 inches in diameter.
Il-karatteristiċi ewlenin jinkludu:
- Durable powder-coated alloy steel construction.
- No drilling or welding required for installation.
- Heavy-duty clamps for a secure, rattle-free fit.
2. Informazzjoni dwar is-Sigurtà
TWISSIJA:
- Always wear appropriate personal protective equipment, including safety glasses, during installation.
- Ensure the vehicle is parked on a flat, level surface with the transmission in park and the ignition off before beginning any work.
- Do not exceed the maximum recommended tire size of 35 inches.
- Regularly inspect all components and fasteners for wear, damage, or looseness. Tighten as necessary.
- Improper installation or use can lead to serious injury or product damage. If you are unsure about any step, consult a qualified technician.
3. Lista tal-Partijiet
Iċċekkja li l-komponenti kollha huma preżenti qabel tibda l-installazzjoni:
- Spare Tire Carrier Assembly (main bar with tire mount)
- Immuntar Clamps (for roll bar)
- Pinnijiet tal-pern
- Assemblaġġi Strut
- Fasteners (bolts, nuts, washers)

Figura 1: Sploda view of the SuperATV Spare Tire Carrier components. This image displays the main carrier bar, the tire mounting plate, various clamps, bolts, and nuts required for assembly and installation.
4. Għodod Meħtieġa
- 4mm Allen Socket
- 6mm Allen Socket
- Sokit ta '24mm
- Wrench ta '11mm
- Ratchet
- Torque Wrench
- Soft Face Hammer (optional, for minor adjustments)
- Measurement Tool (tape measure)
- Nuċċalijiet tas-Sigurtà
5. Istruzzjonijiet ta 'installazzjoni
5.1. Carrier Assembly
Assemble the main carrier components as shown in the video. Ensure all parts are correctly oriented before tightening.
Video 1: This video demonstrates the initial assembly of a spare tire holder, showing how the main bracket components are fitted together using bolts and nuts. It highlights the correct orientation of parts and the process of securing them.
5.2. Immuntar Clamps to Roll Bar
Align the left side pivot bracket and clamp on the rear roll bar, ensuring the bracket points downwards. Loosely install the four pivot fasteners into the clamp and bracket. Repeat this process for the right side.
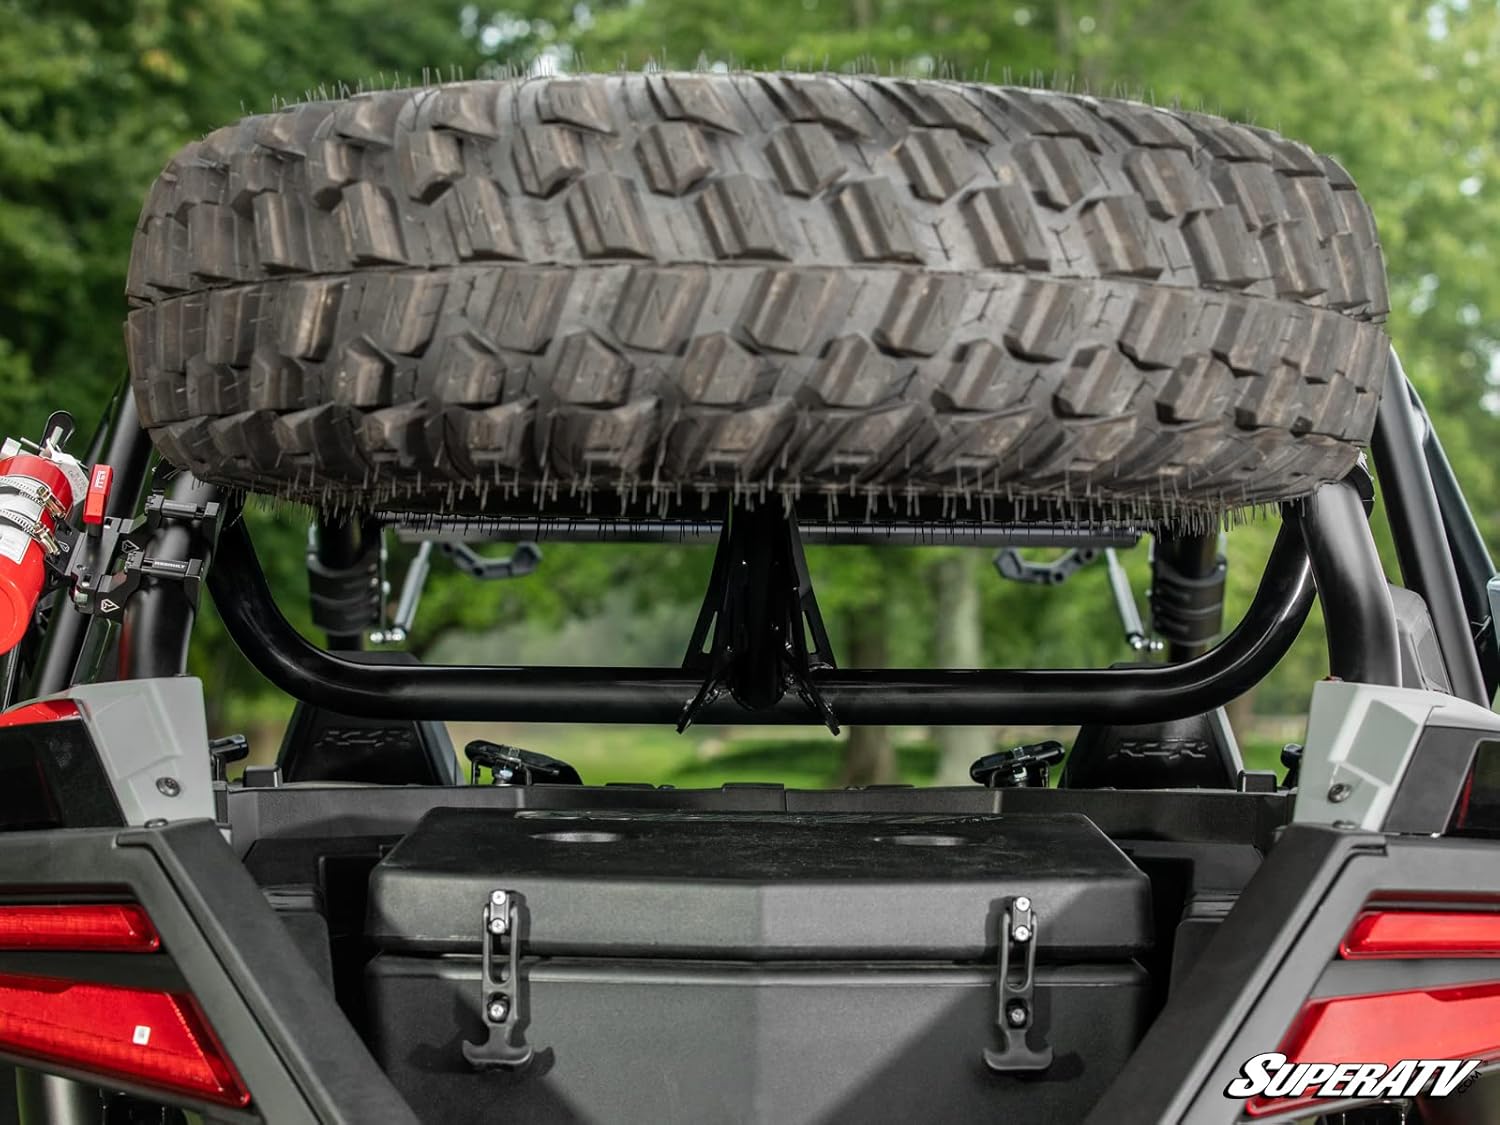
Figura 2: Close-up view of the heavy-duty mounting clamp securely attached to the roll bar of the Polaris RZR Pro R, illustrating the robust connection point for the spare tire carrier.
Recheck the positioning of both brackets to ensure they are evenly spaced across the vehicle and on the roll bars. The pivot bracket assembly should be loose enough to be repositioned with a soft face hammer if needed. Once satisfied with the positioning, torque the pivot bracket fasteners to 60 ft-lbs (81 Nm).
Video 2: This video segment demonstrates the detailed installation of the spare tire rack, including mounting the pivot brackets and clamps onto the vehicle's roll bar. It shows the process of loosely installing fasteners, measuring for correct positioning, and finally torquing the bolts to specification.
5.3. Attaching the Carrier to Clamps
With the aid of an assistant, position the assembled tire carrier into the cargo box and install the included pivot pins into the pivot brackets. The pivot brackets may require minor adjustments to properly align with the tire rack. Install the two strut assemblies on each side of the rack, with the upper stud pointing inward and the lower stud pointing outward. Recheck the bracket positioning once more before final torquing. Torque the clamp fasteners to 9 ft-lbs (12 Nm).

Figure 3: The SuperATV Spare Tire Carrier fully installed on the rear of a Polaris RZR Pro R, ready to hold a spare tire. This image provides an overall view of the product in its operational position.
6. Istruzzjonijiet Operattivi
To load a spare tire, align the tire with the mounting studs on the carrier and slide it into place. Secure the tire using appropriate lug nuts (not included with carrier). To access the cargo area, release the latch mechanism (if applicable for pivoting models) and pivot the carrier upwards. Ensure the carrier is securely latched in the open position before accessing the cargo. When finished, pivot the carrier back down and ensure it is securely latched in the closed position before operating the vehicle.
Vidjo 3: Din il-previżjoni qasiraview video demonstrates the pivoting action of a spare tire carrier, showing how it can be lifted to provide access to the cargo area and then lowered back into position.
7. Manutenzjoni
- Periodically check all mounting bolts and fasteners for tightness. Re-torque to specified values if necessary.
- Inspect the carrier for any signs of wear, cracks, or damage, especially after off-road use.
- Clean the carrier with mild soap and water to remove dirt and debris. Avoid abrasive cleaners that could damage the powder-coated finish.
- Lubricate pivot points with a suitable lubricant to ensure smooth operation.
8 Issolvi l-problemi
- Ħruġ: Carrier feels loose or rattles.
Soluzzjoni: Check all mounting clamps and pivot fasteners. Ensure they are torqued to the specified values. - Ħruġ: Difficulty pivoting the carrier.
Soluzzjoni: Inspect pivot points for obstructions or excessive dirt. Clean and apply a suitable lubricant.
9. Speċifikazzjonijiet
| Numru tal-Mudell: | STC-P-PROR-01 |
| Materjal: | Azzar Liga |
| Tlestija ta' barra: | Azzar miksi bit-trab |
| Kulur: | Tikmix Iswed |
| Piż tal-oġġett: | 19 Liri |
| Dimensjonijiet tal-Prodott: | 46 x 22 x 11 pulzieri |
| Tip ta' Servizz ta' Vettura: | Utility-Terrain-Vehicles |
| Max Tire Size: | Sa 35 pulzier |
10. Garanzija u Appoġġ
For warranty information or technical support, please refer to the official SuperATV webis-sit jew ikkuntattja lis-servizz tal-konsumatur tagħhom direttament. Żomm l-irċevuta tax-xiri tiegħek għal talbiet ta' garanzija.


