1. Introduzzjoni
This manual provides detailed instructions for the installation, operation, and maintenance of your Rosewill FBM-X2-400-HELIX Micro ATX Mini Tower PC Case. This versatile case is designed to accommodate Micro ATX and Mini ITX motherboards, offering a compact yet spacious solution for both office and gaming PC builds. It comes equipped with a pre-installed 400W power supply unit and features excellent airflow design.
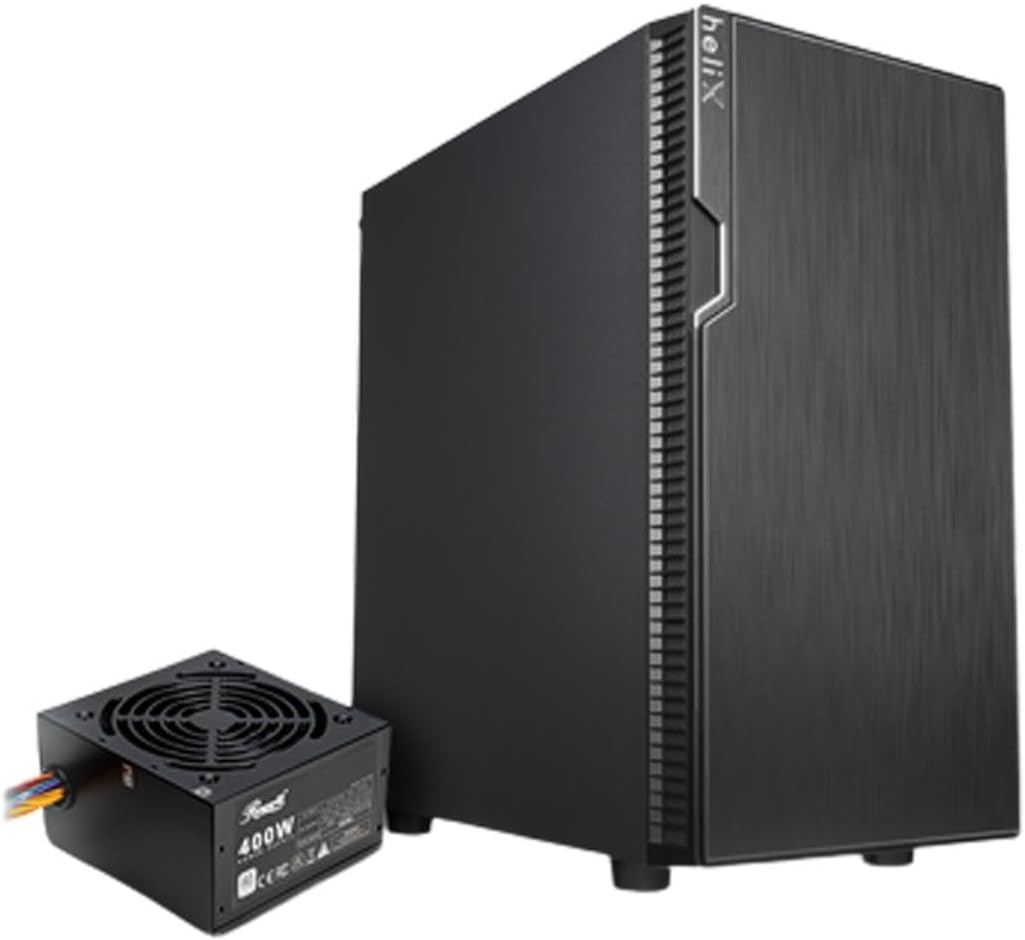
Figure 1: Rosewill FBM-X2-400-HELIX Micro ATX Mini Tower PC Case with included 400W Power Supply Unit.
2. Informazzjoni dwar is-Sigurtà
- Dejjem skonnettja l-provvista tal-enerġija mis-sokit tal-ħajt qabel ma tinstalla jew tagħmel manutenzjoni fuq xi komponenti ġewwa l-kaxxa tal-PC.
- Immaniġġja l-komponenti kollha b'attenzjoni biex tevita ħsara minn skariku elettrostatiku (ESD). Ikkunsidra li tuża ċinga tal-polz antistatika.
- Żomm il-partijiet żgħar u l-viti 'l bogħod mit-tfal.
- Kun żgur li jkun hemm ventilazzjoni xierqa madwar il-kaxxa tal-PC biex tevita li tissaħħan iżżejjed.
- Do not attempt to modify the case or its components, as this may void your warranty and pose safety risks.
3. Karatteristiċi ewlenin
- Disinn Sleek: A versatile, compact, and sturdy steel/plastic mini case suitable for office or gaming PC systems.
- Intern Spazjuż: Features four expansion slots, one internal 3.5" drive bay, and three internal 2.5" drive bays. Supports Micro ATX or Mini ITX motherboards.
- Pre-Installed 400W Power Supply Unit: Includes a CE and FCC certified non-modular 400W PSU for convenience.
- Great Cable Management: Designed for easy organization of internal cables and wires.
- Fluss tal-Arja Eċċellenti: Comes with one pre-installed 120mm fan in the rear. Supports two additional 120mm fans in the front and two 120mm fans on top, or one 240mm radiator in the front.
4. Speċifikazzjonijiet
| Karatteristika | Speċifikazzjoni |
|---|---|
| Brand | Rosewill |
| Isem tal-Mudell | FBM-X2-400-HELIX |
| Tip ta' Każ | Mini-Torri |
| Kompatibbiltà tal-motherboard | Mikro ATX, Mini ITX |
| Pre-Installed PSU | 400W (Non-Modular, CE/FCC Certified) |
| Bajjiet tad-Drajv Esterni | Xejn |
| Bajjiet tad-Drajv Interni ta' 3.5" | 1 |
| Bajjiet tad-Drajv Interni ta' 2.5" | 3 |
| Slots ta 'Espansjoni | 4 |
| Portijiet I / O ta 'quddiem | 2x USB 2.0, 1x USB 3.0, Dħul/Ħruġ tal-Awdjo |
| Fannijiet Installati minn qabel | 1x Fann ta' wara ta' 120mm |
| Appoġġ tal-Fann (Quddiem) | 2x 120mm |
| Appoġġ tal-Fann (Fuq) | 2x 120mm |
| Appoġġ tar-Radjatur (ta' Quddiem) | 1x 240mm |
| Materjal | Azzar Liga, plastik |
| Kulur | Iswed |
| Dimensjonijiet (LxWxH) | 16.75 x 16.65 x 10 pulzieri |
| Piż tal-oġġett | 11.82 liri |
5. Kontenut tal-Pakkett
Jekk jogħġbok iċċekkja l-kontenut tal-pakkett meta tiftaħ il-kaxxa biex tiżgura li l-oġġetti kollha huma preżenti:
- Rosewill FBM-X2-400-HELIX PC Case
- Pre-installed 400W Power Supply Unit
- Kaxxa tal-Aċċessorji (li fiha viti, standoffs, rabtiet tal-kejbil, eċċ.)
- Manwal għall-Utent (dan id-dokument)
6. Setup u Installazzjoni
Follow these steps to assemble your PC within the Rosewill FBM-X2-400-HELIX case.
6.1. Preparazzjoni
- Unpack the PC case and place it on a stable, flat surface.
- Neħħi l-pannelli tal-ġenb billi tneħħi l-viti bil-ponta fuq wara tal-kaxxa.
- Gather all necessary components: motherboard, CPU, RAM, storage drives, graphics card (if applicable), and any additional fans or radiators.

Figure 2: Internal layout of the PC case, highlighting the pre-installed power supply and available drive bays.
6.2. Installazzjoni tal-Motherboard
- Install the CPU, CPU cooler, and RAM onto your Micro ATX or Mini ITX motherboard before placing it into the case.
- Align the motherboard with the standoffs inside the case. Ensure the I/O shield is properly seated in the rear opening.
- Waħħal il-motherboard bil-viti xierqa mill-kit tal-aċċessorji.
6.3. Unità tal-Provvista tal-Enerġija (PSU)
The 400W PSU is pre-installed in the bottom rear section of the case. Connect the necessary power cables to your motherboard (24-pin ATX, 4/8-pin CPU), graphics card (if required), and storage drives.

Figure 3: Included PSU connectors for various components.
6.4. Installazzjoni tad-Drajv tal-Ħażna
The case supports one 3.5" HDD and three 2.5" SSDs/HDDs.
- For 3.5" HDD: Locate the 3.5" drive bay and secure the drive using the provided screws.
- For 2.5" SSD/HDD: Mount the 2.5" drives to the designated mounting points using the provided screws.
- Connect SATA data and power cables to each installed drive.
6.5. Installazzjoni tal-Karta tal-Espansjoni
The case provides four expansion slots for graphics cards or other PCI-E devices.
- Remove the necessary slot covers from the rear of the case.
- Insert your graphics card or other expansion card into the appropriate PCI-E slot on the motherboard.
- Waħħal il-karta b'kamin.
6.6. Ġestjoni tal-Kejbil
Utilize the cable routing cutouts and tie-down points behind the motherboard tray to organize cables. This improves airflow and gives your build a cleaner appearance.
6.7. Konnessjonijiet tal-Panel ta' Quddiem
Connect the front panel cables (USB 2.0, USB 3.0, HD Audio, Power Switch, Reset Switch, Power LED, HDD LED) to the corresponding headers on your motherboard. Refer to your motherboard manual for exact header locations.

Figure 4: Front I/O panel with USB 3.0, USB 2.0, and audio ports.
6.8. Sistema ta 'tkessiħ
The case includes one pre-installed 120mm rear fan. Additional fans or a 240mm AIO radiator can be installed for enhanced cooling.
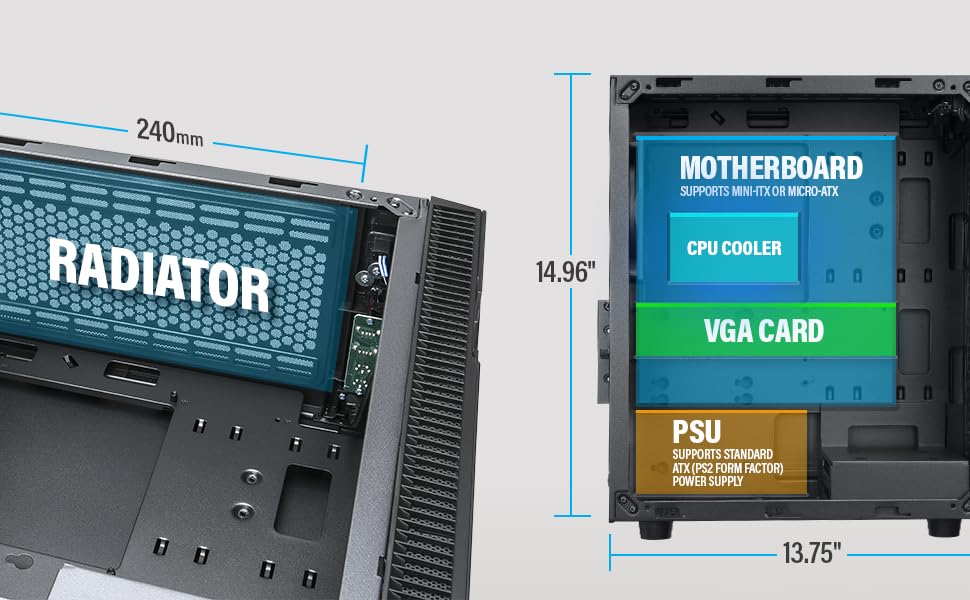
Figure 5: Diagram illustrating component clearance and radiator support.
6.9. Assemblea Finali
- Ladarba l-komponenti kollha jkunu installati u l-kejbils ikunu mmaniġġjati, erġa' waħħal il-pannelli tal-ġenb.
- Qabbad il-monitor, it-tastiera, il-maws, u l-kejbil tal-enerġija tiegħek mal-PC.
6.10. Official Product Video: Installation Overview
Vidjo 1: Overview of the Rosewill Micro ATX Mini Tower Case, including its pre-installed 400W PSU and internal features. This video provides a visual guide to the case's design and component layout.
7. Istruzzjonijiet Operattivi
After completing the setup, you can power on your PC.
- Ensure all external cables (power, monitor, peripherals) are securely connected.
- Press the power button located on the front I/O panel of the case.
- The power LED will illuminate, indicating the system is powered on.
- To shut down, use the operating system's shutdown function or press and hold the power button for a few seconds.
8. Manutenzjoni
Manutenzjoni regolari tgħin biex tiżgura prestazzjoni ottimali u lonġevità tal-komponenti tal-PC tiegħek.
- Filtri tat-Trab: Periodically check and clean any removable dust filters (e.g., front, top, bottom) to maintain good airflow and prevent dust buildup inside the case.
- Tindif Intern: Every few months, open the side panels and use compressed air to gently remove dust from fans, heatsinks, and other components.
- Iċċekkja tal-Cable: Kun żgur li l-kejbils interni kollha jibqgħu konnessi sew u ma jostakolawx il-fluss tal-arja.
9 Issolvi l-problemi
Jekk tiltaqa' ma' problemi, irreferi għall-pariri komuni li ġejjin għas-soluzzjoni tal-problemi:
- Ebda Qawwa: Check if the power cable is securely connected to both the PSU and the wall outlet. Ensure the power switch on the PSU is in the 'ON' position. Verify front panel power switch connection to the motherboard.
- Ebda Display: Ensure your monitor is connected to the graphics card (or motherboard if using integrated graphics) and is powered on. Reseat the graphics card and RAM modules.
- Is-sħana żejda: Check if all case fans and CPU cooler fans are spinning. Ensure dust filters are clean and there is adequate airflow. Verify thermal paste application on the CPU.
- Portijiet USB ma Jaħdmux: Check the front panel USB cable connections to the motherboard. Ensure drivers are installed for your operating system.
10. Garanzija u Appoġġ
For warranty information, technical support, or service inquiries, please refer to the official Rosewill webis-sit jew ikkuntattja lid-dipartiment tas-servizz tal-konsumatur tagħhom. Żomm il-prova tax-xiri tiegħek għal talbiet ta’ garanzija.


