1. Introduzzjoni
Thank you for choosing the MokerLink 8-Port Gigabit PoE Managed Switch. This device is designed to provide reliable and high-performance network connectivity with Power over Ethernet (PoE) capabilities. This manual will guide you through the installation, configuration, and operation of your new switch, ensuring optimal performance and longevity.
2. Kontenut tal-Pakkett
Verify that all items are present and in good condition. If any items are missing or damaged, please contact your vendor.
- MokerLink 8-Port Gigabit PoE Managed Switch
- Adapter tal-Enerġija
- Gwida Quick Start

Image: The MokerLink 8-Port Gigabit PoE Managed Switch, its power adapter, and a quick start guide are shown packaged in a brown cardboard box.
3. Prodott Aktarview
3.1 Karatteristiċi ewlenin
- 8 Portijiet Gigabit: Includes 7 Gigabit PoE Ethernet ports and 1 Gigabit Ethernet Uplink port.
- Qawwa PoE Għolja: Ports 1-7 support IEEE 802.3af/at, with each port providing up to 30W, and a total power supply of 96W.
- L2 Smart Managed: Supports Layer 2 Ethernet configurations such as VLAN, QoS, IGMP, link aggregation, loop protection, port mirroring, port isolation, and bandwidth control.
- Web GUI: Qawwija web-based graphical user interface for managing PoE ports, displaying PSE power supply status, and configuring PoE functions.
- Disinn bla fann: Ensures silent operation, suitable for various environments.
- Djar Durabbli tal-Metall: Provides robust protection and multiple cooling holes for heat dissipation.
- Protezzjoni mis-Sajjetti ta' 4KV: Integrated protection against power surges.
- Immontabbli mal-ħajt: Flexible installation options.

Immaġni: Aktar minnview of the MokerLink 8-Port Gigabit PoE Managed Switch, illustrating its features including IEEE 802.3af/at support, full Gigabit ports, web interface, wall mountable design, 4KV lightning protection, and L2 management capabilities.
3.2 Panew ta 'quddiem u ta' wara
The front panel features 7 PoE Gigabit ports, 1 Gigabit Uplink port, and LED indicators. The rear panel includes the DC power input and a grounding hole.

Immaġni: Dettaljata view of the switch's front and rear panels. The front panel shows 7 Gigabit PoE ports (1-7) and 1 Gigabit Uplink port (8), along with PWR and Port indicators. The rear panel displays the DC input port (48-52V) and a grounding hole. A reset button is also visible on the front.
3.3 Indikaturi LED
- PWR (Indikatur tal-Qawwa): Green light on indicates power is supplied; light off indicates no power.
- Indikatur tal-Port: Green light on indicates link is connected; light off indicates link is off; flashing indicates data transmitting.
4. Setup
4.1 Installazzjoni Fiżika
- Pjazzament: Place the switch on a stable, flat surface or mount it to a wall using appropriate hardware. Ensure adequate ventilation around the device.
- L-ertjar: Connect a grounding wire to the grounding hole on the rear panel of the switch for electrical safety.
- Konnessjoni tal-Enerġija: Connect the provided power adapter to the DC input port on the rear panel and then plug it into a power outlet. The PWR LED should illuminate.
4.2 Konnessjoni tan-Netwerk
- Konnessjoni Uplink: Connect your router or main network device to the Gigabit Uplink port (Port 8) using a standard Ethernet cable.
- Konnessjoni tal-Apparat PoE: Connect your PoE-powered devices (e.g., IP cameras, wireless access points, VoIP phones) to any of the Gigabit PoE ports (Ports 1-7) using Ethernet cables. The switch will automatically detect and provide power to compliant devices.
- Konnessjoni ta' Apparat Mhux PoE: Non-PoE devices can also be connected to Ports 1-7, but they will not receive power.
5. Istruzzjonijiet Operattivi
5.1 Operazzjoni Bażika
Once powered on and connected, the switch operates automatically. Data transmission will occur between connected devices. The port LEDs will indicate link status and activity.
5.2 Remote PoE Device Reboot
The managed features allow you to remotely power cycle PoE devices connected to the switch. This can be useful for troubleshooting or resetting devices without physical access.

Image: A diagram illustrating how to remotely reboot PoE devices. A laptop screen shows a 'PoE Port ON/OFF' interface, connected to the switch. The switch then controls the power to a connected camera, effectively turning it on or off.
6. Configuration (Web GUI)
The MokerLink switch features a powerful web-based management interface for advanced configuration and monitoring.
6.1 Aċċess għall- Web Interface
- Ensure your computer is connected to the same network as the switch.
- Iftaħ a web brawżer (eż., Chrome, Firefox).
- Enter the default IP address: 192.168.2.1 fil-bar tal-indirizz.
- Log in using the default credentials: User Name: admin, Password: admin.
- Għal skopijiet ta' sigurtà, huwa rakkomandat ħafna li l-password awtomatika tinbidel immedjatament wara l-ewwel login.
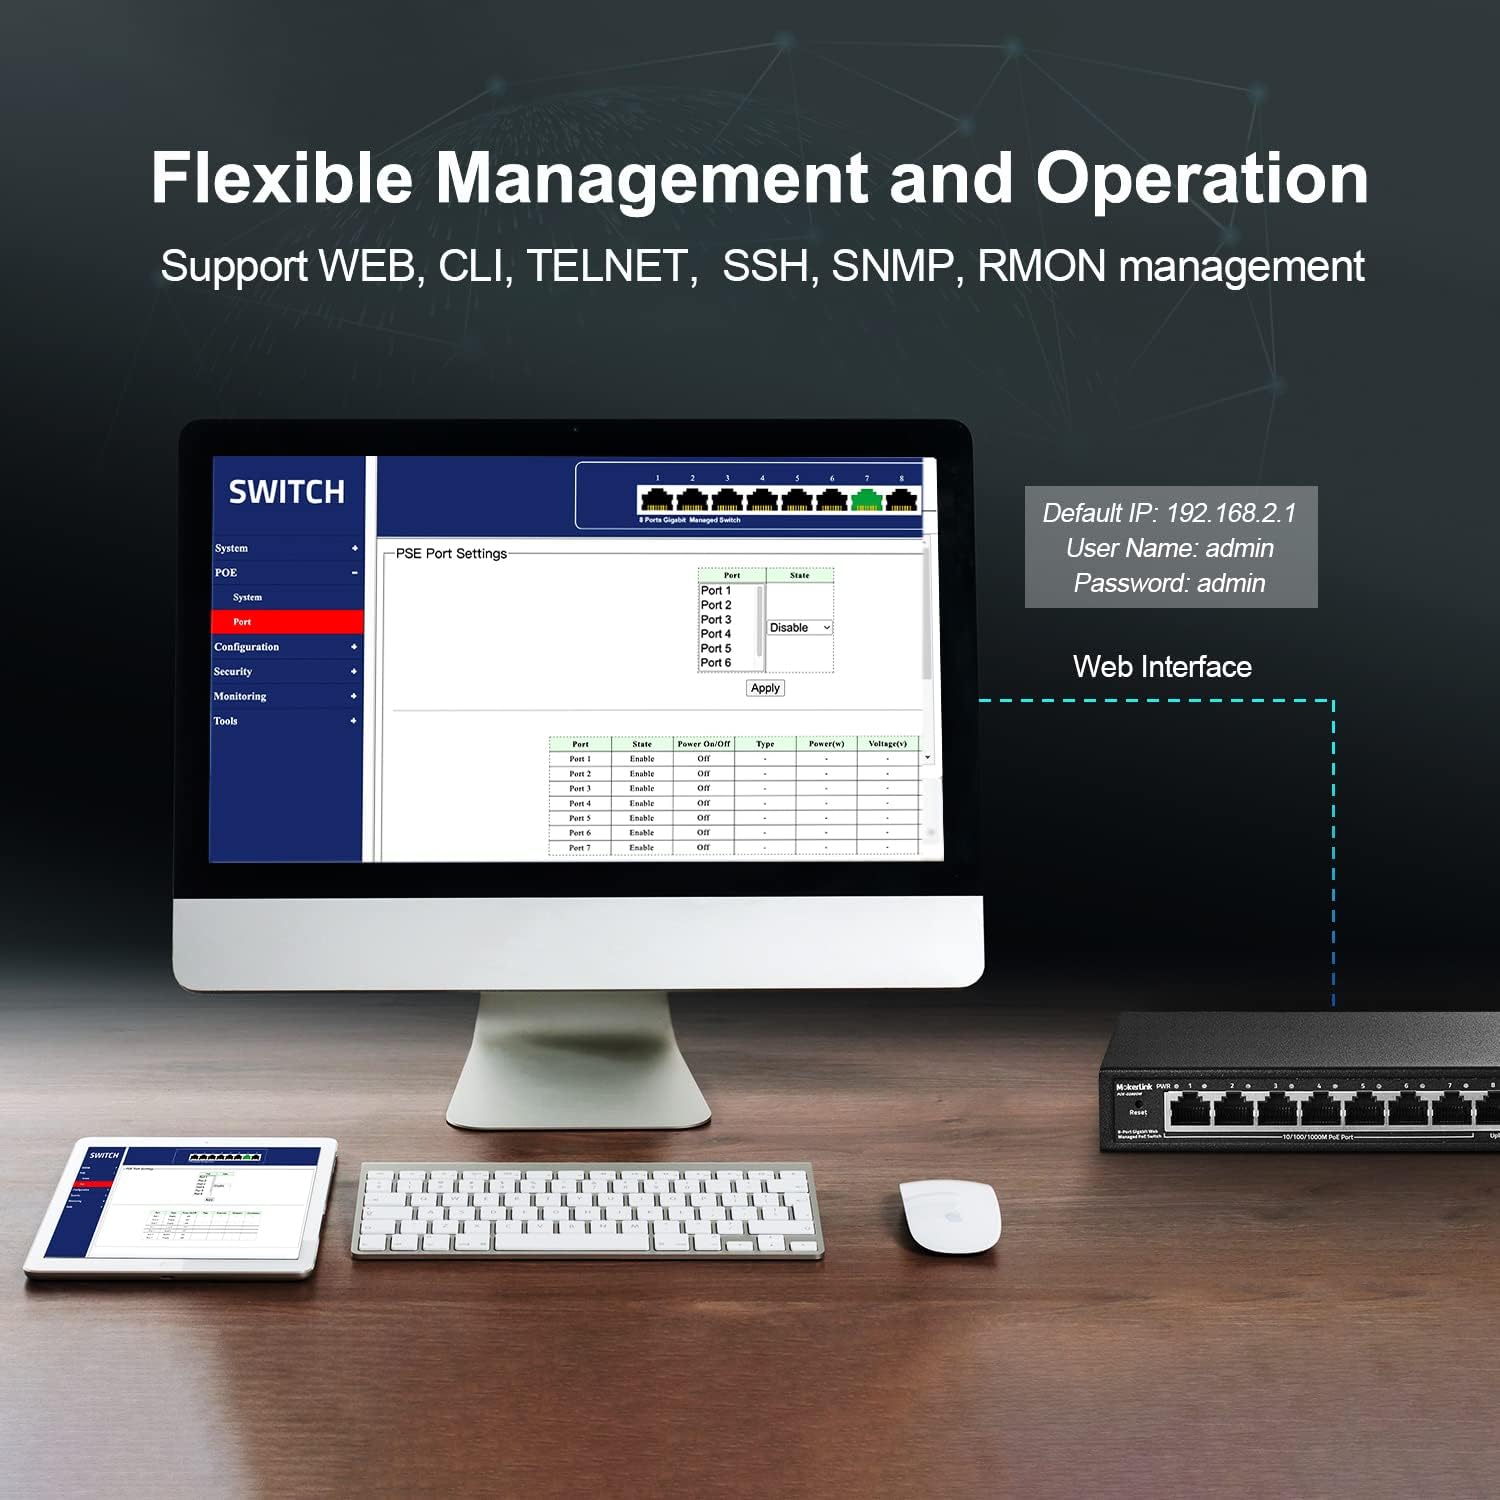
Image: A computer monitor displaying the web-based management interface for the MokerLink switch. The interface shows options for System, PoE, Configuration, Security, Monitoring, and Tools. Default login credentials (IP: 192.168.2.1, User: admin, Password: admin) are also displayed.
6.2 L2 Managed Features
Il- web interface provides access to various Layer 2 management functions:
- VLAN: Create Virtual Local Area Networks to segment network traffic.
- QoS (Kwalità tas-Servizz): Agħti prijorità lit-traffiku tan-netwerk għal applikazzjonijiet kritiċi.
- IGMP: Manage multicast traffic.
- Aggregazzjoni ta' Links (LACP): Għaqqad diversi links fiżiċi f'link loġiku wieħed għal aktar bandwidth u redundanza.
- Loop Protection (RSTP): Evita l-linji tan-netwerk.
- Mirroring tal-Port: Immonitorja t-traffiku tan-netwerk billi tibgħat kopja tal-pakketti minn port għal ieħor.
- Iżolament tal-Port: Isolate ports to prevent communication between them.
- Kontroll tal-Bandwidth: Manage bandwidth usage per port.
- Tabella ta' l-Indirizz MAC: View and manage MAC address entries.
- Xandir il-Kontroll tal-Maltempata: Prevent network performance degradation due to excessive broadcast traffic.
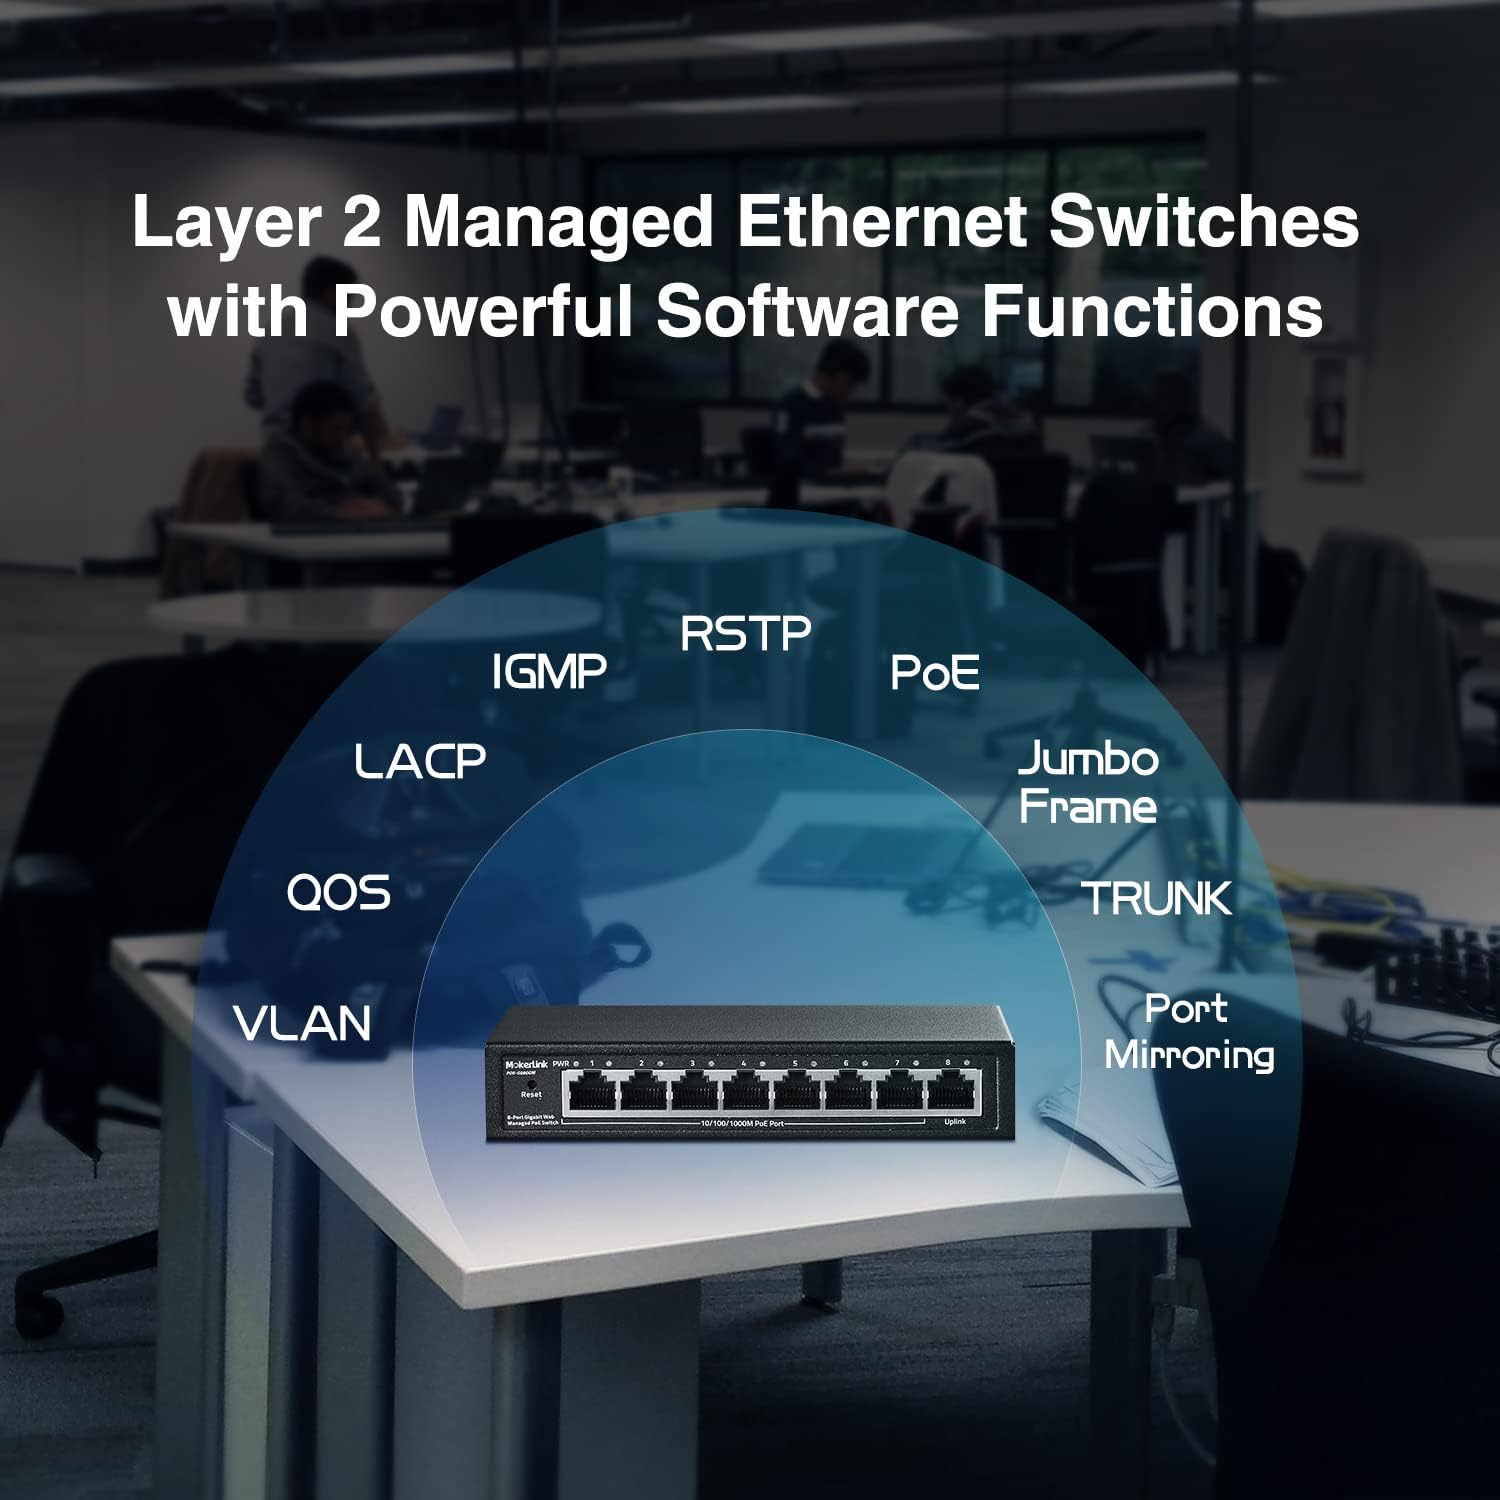
Image: A conceptual diagram showing the various Layer 2 managed features supported by the MokerLink switch, including VLAN, QoS, IGMP, LACP, RSTP, PoE, Jumbo Frame, TRUNK, and Port Mirroring, arranged around an image of the switch.
7. Manutenzjoni
7.1 Tindif
Regularly clean the exterior of the switch with a soft, dry cloth. Do not use liquid or aerosol cleaners, as they may damage the device.
7.2 Aġġornamenti tal-Firmware
Iċċekkja l-uffiċjal ta' MokerLink website periodically for firmware updates. Keeping your device's firmware up-to-date ensures optimal performance, security, and access to new features. Follow the instructions provided with the firmware update package carefully.
7.3 Irrisettja l-Fabbrika
If you encounter persistent issues or forget your login credentials, you can restore the switch to its factory default settings. To perform a factory reset, press and hold the Irrisettja button on the front panel for approximately 5-10 seconds until the LEDs flash, then release. The switch will reboot with default settings.
8 Issolvi l-problemi
- Ebda Qawwa: Ensure the power adapter is securely connected to both the switch and a working power outlet. Check the PWR LED. If it's off, try a different outlet or power adapter.
- L-ebda Link/Attività fuq il-Port: Verify that the Ethernet cable is properly connected to both the switch port and the connected device. Check the cable for damage. Ensure the connected device is powered on and functioning correctly.
- Apparat PoE Mhux Qed Jirċievi l-Enerġija: Confirm that the connected device is IEEE 802.3af/at compliant. Passive 24V PoE and non-PoE devices will not receive power. Check the PoE power budget in the web interface to ensure sufficient power is available.
- Ma nistax naċċessa Web Interface: Ensure your computer's IP address is in the same subnet as the switch's default IP (192.168.2.x, where x is not 1). Verify the physical connection. Try clearing your browser's cache or using a different browser. If the password was changed and forgotten, perform a factory reset.
- Prestazzjoni bil-mod tan-Netwerk: Check for excessive network traffic or loops. Utilize L2 managed features like bandwidth control or loop protection if configured. Ensure all cables are Gigabit-rated.
9. Speċifikazzjonijiet
| Karatteristika | Deskrizzjoni |
|---|---|
| Numru tal-Mudell | 8 Gigabit PoE(Managed) |
| Numru ta' Portijiet | 8 (7 Gigabit PoE, 1 Gigabit Uplink) |
| Standard PoE | IEEE 802.3af / fi |
| Max PoE Power Per Port | 30W |
| Baġit totali tal-Enerġija PoE | 96W |
| Kapaċità tal-Qlib | 16Gbps |
| Rata ta' Trasferiment tad-Data | 16 Gigabits Kull Sekonda |
| Tip ta' Ġestjoni | L2 Smart Managed (Web GUI, VLAN, QoS, IGMP, LACP, etc.) |
| Materjal tal-Każ | Metall |
| Disinn mingħajr Fan | Iva |
| Provvista tal-Enerġija | Adapter tal-Enerġija Esterni (96W) |
| Voltage | 48 Volts |
| Piż tal-oġġett | 1.8 liri |
| Dimensjonijiet tal-Pakkett | 9.76 x 7.64 x 2.44 pulzieri |
10. Garanzija u Appoġġ
MokerLink products come with a standard manufacturer's warranty. For detailed warranty information, technical support, or service inquiries, please refer to the warranty card included in your package or visit the official MokerLink website. You can also contact MokerLink customer service directly for assistance.
MokerLink Official Websit: Visit MokerLink Store on Amazon


