1. Introduzzjoni
This manual provides detailed instructions for the installation, operation, and maintenance of your SilverStone FARA R1 V2 Mid-Tower ATX Case. The FARA R1 V2 is designed for high compatibility and efficient thermal performance, featuring a tempered glass side panel and a perforated mesh front panel for optimal airflow. Please read this manual thoroughly before beginning assembly to ensure proper setup and functionality.

Figure 1: SilverStone FARA R1 V2 Mid-Tower ATX Case (SST-FAR1B-G-V2)
2. Kontenut tal-Pakkett
Ivverifika li l-komponenti kollha huma preżenti fil-pakkett:
- SilverStone FARA R1 V2 Mid-Tower ATX Case
- Kaxxa tal-aċċessorji (viti, standoffs, rabtiet tal-kejbil)
- Manwal għall-Utent (dan id-dokument)
- Pre-installed 120mm rear fan (quantity may vary by model)
3. Speċifikazzjonijiet
| Isem tal-Mudell | FARA R1 V2 |
| Numru tal-Mudell | SST-FAR1B-G-V2 |
| Tip ta' Każ | Torri tan-Nofs |
| Kompatibbiltà tal-motherboard | ATX, Mikro-ATX, Mini-ITX |
| Materjal | Azzar, Ħġieġ ittemprat, plastik |
| Dimensjonijiet (LxWxH) | 15.35 x 8.15 x 17.56 pulzieri (390 x 207 x 446 mm) |
| Piż | 15.92 liri (7.22 kg) |
| Slots ta 'Espansjoni | 7 |
| Portijiet I / O ta 'quddiem | 2x USB 3.0, 1x USB 2.0, 1x Audio Jack (combined) |
| Metodu tat-tkessiħ | Arja |
| Immuntar tal-Provvista tal-Enerġija | Mount tal-qiegħ |
| Max GPU Tul | 340mm (with front fan), 365mm (without front fan) |
| Max CPU Cooler Għoli | 161mm |

Figure 2: Component Compatibility Overview
4. Setup u Installazzjoni
4.1 Tħejjija tal-Każ
- Neħħi l-Panewijiet tal-Ġnub: Unscrew the thumbscrews on the rear of the case to remove the tempered glass side panel and the solid steel side panel.
- Kaxxa tal-Aċċessorji: Locate the accessory box inside the case, which contains all necessary screws, standoffs, and cable ties for installation.

Figura 3: Intern View of the Case
4.2 Installazzjoni tal-Motherboard
- Installa Standoffs: Align the motherboard with the pre-drilled holes in the motherboard tray. Install additional standoffs as required for your specific motherboard form factor (ATX, Micro-ATX, Mini-ITX).
- Motherboard Sikura: Place the motherboard onto the standoffs and secure it with the provided screws.
4.3 Installazzjoni tal-Provvista tal-Enerġija
- Mount PSU: Slide the power supply unit (PSU) into the dedicated compartment at the bottom rear of the case.
- PSU Sikura: Waħħal il-PSU mal-kaxxa bil-viti minn wara.

Figure 4: Rear Panel and PSU Mounting Area
4.4 Installazzjoni tad-Drive tal-Ħażna
- SSDs ta' 2.5": Two 2.5" drive mounts are located behind the motherboard tray. Secure SSDs using the provided screws.
- HDDs ta' 3.5": The drive cage at the bottom of the case supports two 3.5" HDDs. Slide drives into the trays and secure them.

Figure 5: 2.5" SSD Mounting Locations

Figure 6: 3.5" HDD Drive Cage
4.5 Installazzjoni tal-Karta tal-Grafika u l-Karta tal-Espansjoni
- Remove PCI-E Slot Covers: Remove the necessary PCI-E slot covers from the rear of the case. Note that some covers are punch-out type and cannot be reinstalled.
- Installa l-Karta: Insert your graphics card or other expansion cards into the motherboard's PCI-E slots and secure them with screws.
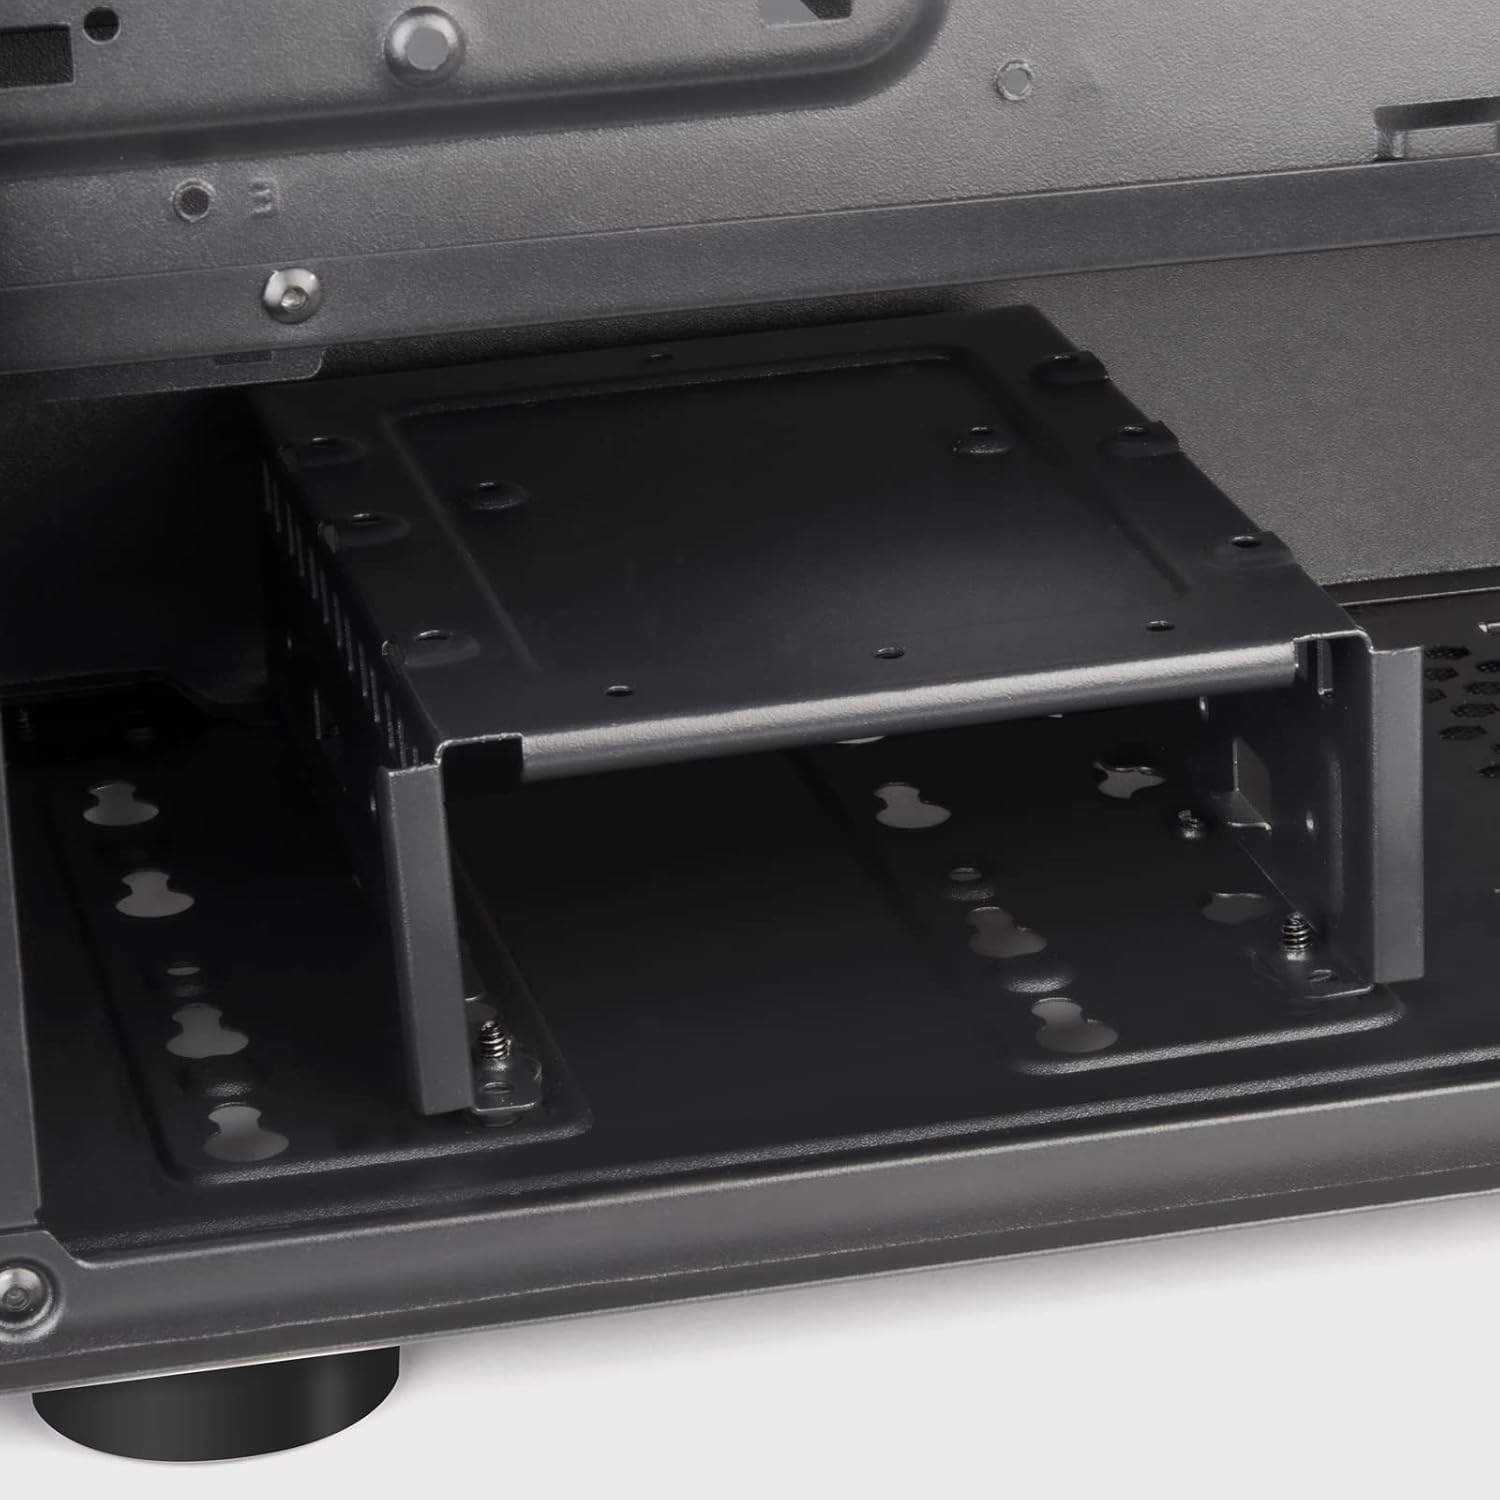
Figure 7: Expansion Slots
4.6 Installazzjoni tal-Fann u r-Radjatur
The FARA R1 V2 supports various fan and radiator configurations for optimal cooling.
- Quddiem: 3 x 120mm or 2 x 140mm fans / 240mm, 280mm, 360mm radiators
- Fuq: 2 x 120mm or 2 x 140mm fans / 240mm, 280mm radiators
- Wara: 1 x 120mm fan (pre-installed)

Figure 8: Fan and Radiator Support

Figure 9: Internal Fan Mount
4.7 Ġestjoni tal-Cable
Uża l-qtugħ tar-rotta tal-kejbils u l-punti ta' rbit wara t-trej tal-motherboard biex torganizza l-kejbils. Dan itejjeb il-fluss tal-arja u l-estetika.
5. It-Tħaddim tal-Kaxxa
Once all components are installed and secured, and the side panels are reattached, your system is ready for operation.
5.1 Pannell tal-I/O ta' Quddiem
Il-pannell tal-I/O ta' quddiem jipprovdi aċċess konvenjenti għall-portijiet essenzjali:
- Buttuna tal-Qawwa: Located at the top right of the front panel.
- Buttuna Irrisettja: Small button below the power button.
- Portijiet USB 3.0 (x2): Għat-trasferiment tad-dejta b'veloċità għolja.
- Port tal-USB 2.0 (x1): Għal apparati USB standard.
- Audio Jack (x1): Combined headphone/microphone port.

Figure 10: Front I/O Panel
5.2 Ottimizzazzjoni tal-Fluss tal-Arja
The FARA R1 V2 features a fully meshed front panel to maximize air intake. Ensure proper fan configuration (intake at front, exhaust at rear/top) for optimal cooling performance.
6. Manutenzjoni
Manutenzjoni regolari tgħin biex tiżgura l-lonġevità u l-prestazzjoni tal-kaxxa tal-PC tiegħek.
- Filtri tat-Trab: The case includes removable dust filters on the top and bottom (for the PSU intake). Regularly remove and clean these filters with water and mild soap, or by vacuuming, to prevent dust buildup and maintain airflow.
- Tindif ta' barra: Imsaħ l-uċuħ ta 'barra b'artab, damp drapp. Evita cleaners li joborxu.
- Tindif ta 'ġewwa: Periodically, with the system powered off and unplugged, use compressed air to remove dust from internal components and fan blades.
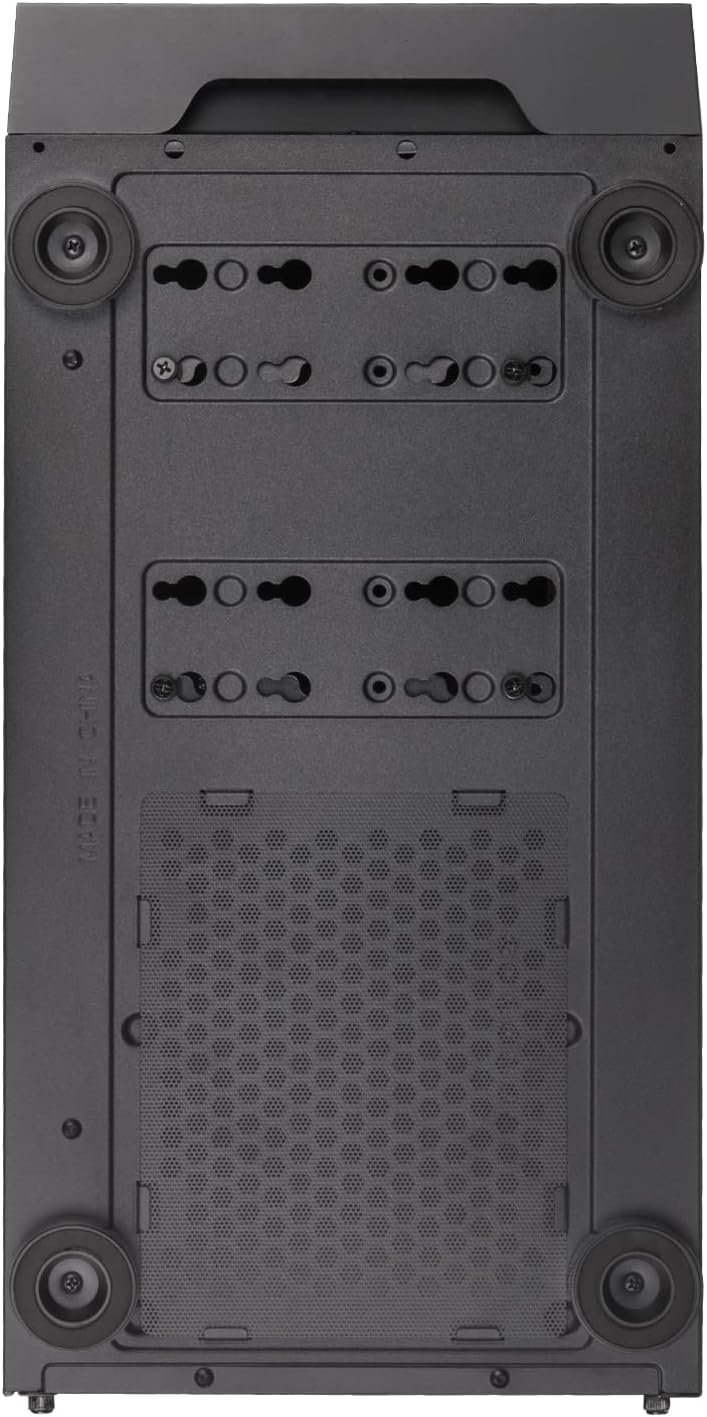
Figure 11: Bottom Dust Filter
7 Issolvi l-problemi
Din it-taqsima tindirizza kwistjonijiet komuni li tista’ tiltaqa’ magħhom.
- Is-Sistema Mhux Tixgħel:
- Kun żgur li l-kejbils tal-enerġija kollha (24-pin ATX, 8-pin CPU, GPU power) huma konnessi sew.
- Iċċekkja li s-swiċċ tal-PSU jinsab fil-pożizzjoni "ON".
- Check that the front panel power button cable is correctly connected to the motherboard's F_PANEL header.
- Fluss tal-Arja Fqir/Tisħin Żejjed:
- Naddaf il-filtri tat-trab u l-komponenti interni kollha.
- Kun żgur li l-fannijiet huma installati fl-orjentazzjoni korretta (daħla/egżost).
- Verify fan cables are properly connected to the motherboard or fan controller.
- Front USB/Audio Ports Not Working:
- Check that the USB 3.0, USB 2.0, and HD Audio cables from the front panel are correctly connected to the corresponding headers on the motherboard.
- Kwistjonijiet tal-Panel tal-Ħġieġ Ittemprat:
- Handle the tempered glass panel with care to prevent damage.
- Ensure thumbscrews are tightened sufficiently but not overtightened.
8. Garanzija u Appoġġ
SilverStone Technology provides a limited warranty for its products. For detailed warranty information, technical support, or to inquire about replacement parts, please visit the official SilverStone websit jew ikkuntattja lid-dipartiment tas-servizz tal-konsumatur tagħhom.
Uffiċjali Websit: www.silverstonetek.com
Jekk jogħġbok żomm il-prova tax-xiri tiegħek għal pretensjonijiet ta' garanzija.


