1. Introduzzjoni
This instruction manual provides detailed guidance for the assembly, operation, and maintenance of your ROBOTIME LC701 Mechanical Wooden Wall Clock Kit. This kit allows you to construct a functional wall clock featuring a gear-driven mechanism, a gravity pendulum, and a precise quartz movement for accurate timekeeping.
The finished clock serves as both a decorative item and a time-telling device, combining intricate mechanical design with aesthetic appeal.
2. Kontenut tal-Pakkett
Before beginning assembly, please verify that all components listed below are present in your kit. The kit contains 231-il biċċa for self-assembly.
- Pre-cut wooden sheets (various parts for clock structure, gears, pendulum)
- Quartz clock movement
- Clock hands
- Strings/threads for pendulum and weights
- Small hardware (screws, nails, hooks)
- Ktejjeb tal-istruzzjonijiet tal-assemblaġġ
- Sanding paper and wax (for lubrication)
Note: One (1) AA battery is required for the quartz movement and is not included in the package. Please prepare this separately.
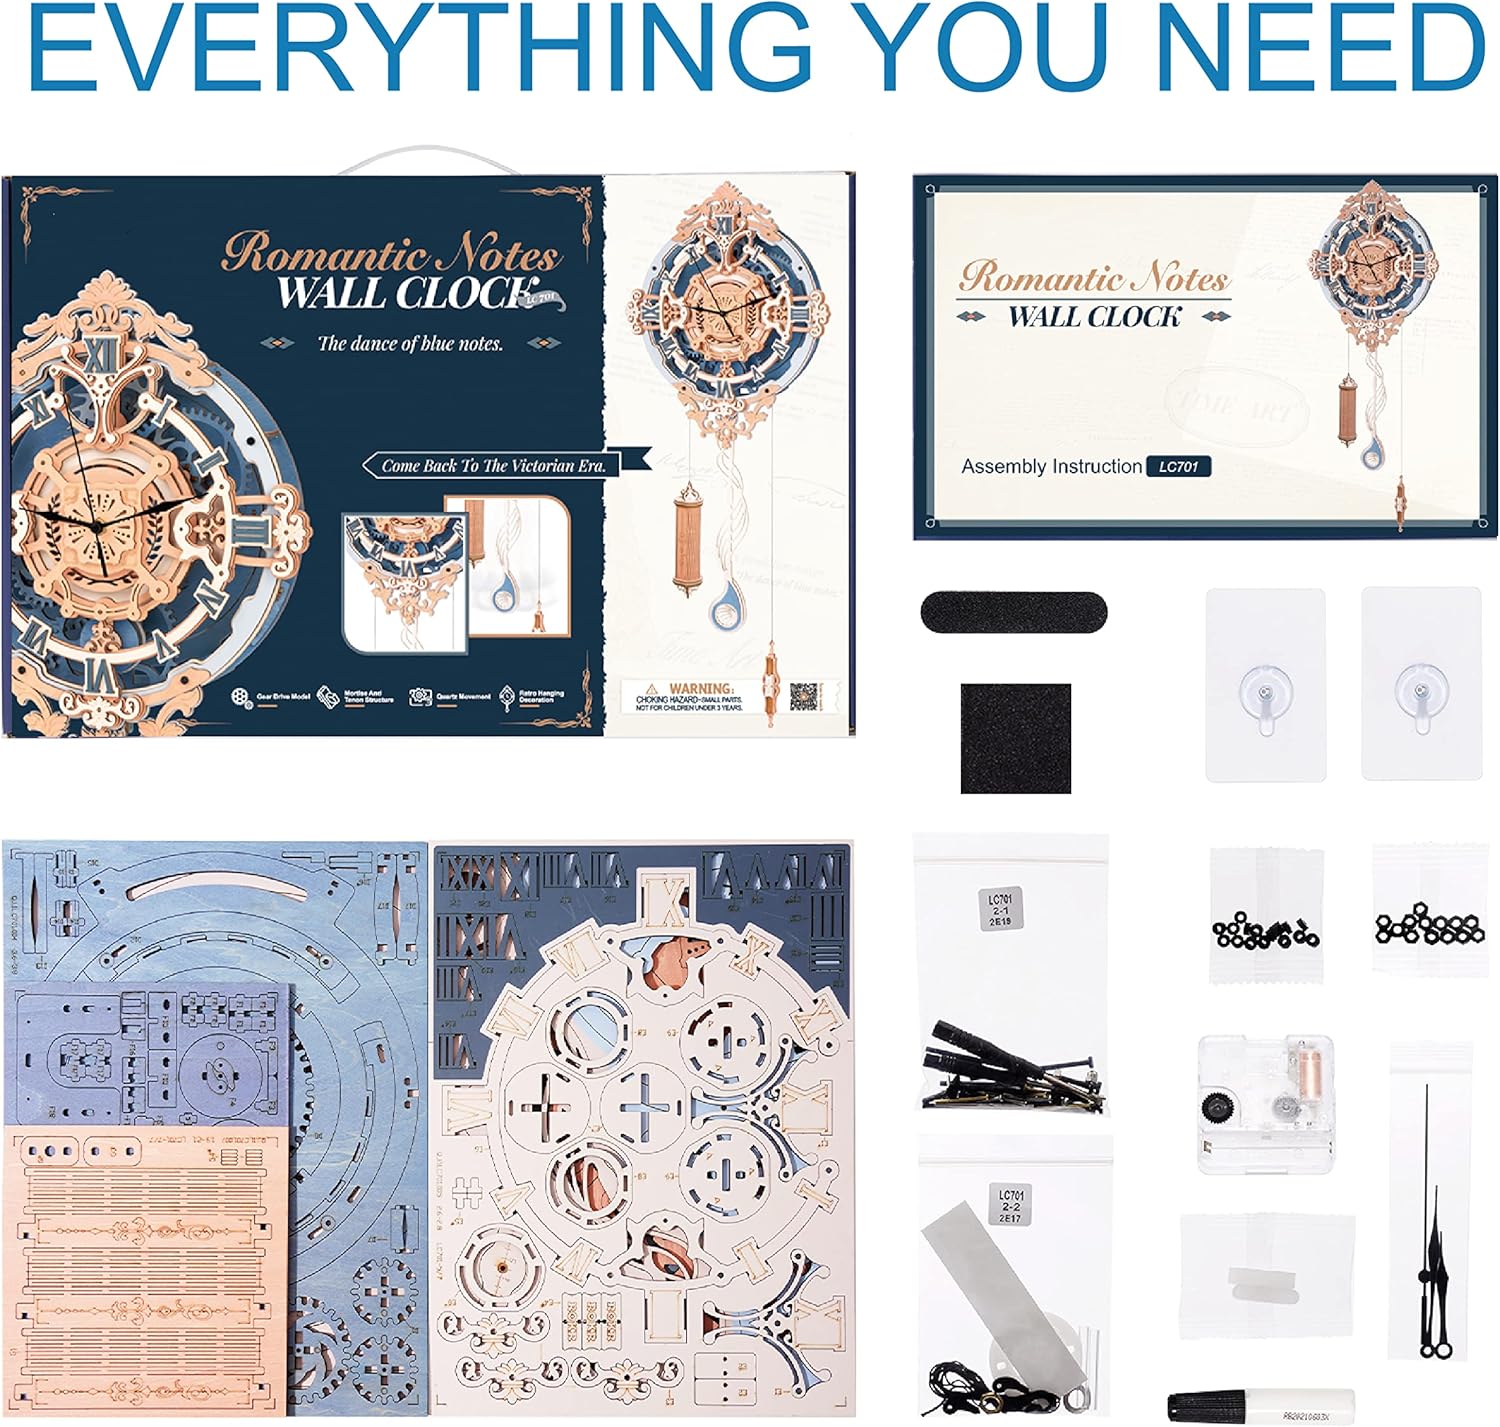
Image: All components included in the ROBOTIME LC701 kit, laid out for inspection.
3. Istruzzjonijiet tal-Assemblea
Follow the detailed step-by-step instructions provided in the included booklet. No glue is typically required for assembly, as parts are designed to interlock. Exercise care when handling delicate wooden pieces.
Passi tal-Assemblea Ġenerali:
- Preparazzjoni: Carefully detach all wooden pieces from their sheets. Use the provided sanding paper to gently smooth any rough edges or burs. Apply wax to the gears and moving parts as instructed to reduce friction and ensure smooth operation.
- Assemblea Strutturali: Begin by assembling the main frame and internal gear mechanisms according to the numerical sequence in the instruction booklet. Pay close attention to the orientation of each piece.
- Quartz Movement Installation: Integrate the quartz clock movement into its designated slot within the clock's structure. Ensure it is securely fitted.
- Pendulum and Weight Assembly: Assemble the gravity pendulum and the clock weight. Attach the strings/threads as shown in the diagrams, ensuring they run freely through the mechanism.
- Irtokki Finali: Attach the clock hands to the quartz movement. Verify all connections are secure and moving parts operate without obstruction.

Immaġni: Dettaljata view of the structural physical assembly process.

Image: Continuing the assembly of the clock's internal layers.

Image: The built-in quartz movement, responsible for accurate timekeeping.

Image: Mounting hardware for securing the clock to a wall.
Assemblea Matulview Vidjow:
Vidjo: Uffiċjal lestview of the ROBOTIME Wooden Wall Clock Kit, demonstrating key assembly steps and features.
4. Istruzzjonijiet Operattivi
Once assembled, your ROBOTIME LC701 clock is ready for operation. The clock features a quartz movement for accurate time display and a gravity-driven pendulum for visual appeal and mechanical engagement.
L-issettjar tal-Ħin:
Insert one (1) AA battery into the quartz movement compartment. Use the small dial on the back of the quartz movement to set the correct time. Avoid moving the clock hands directly, as this may damage the mechanism.
Winding and Starting the Pendulum:
The pendulum mechanism is gravity-driven and requires manual winding. To ensure proper function, follow these steps:
- Fill the Clock Weight: The hollow clock weight needs to be filled with approximately 300-450g of high-density metal parts (e.g., coins, small screws, nuts). Ensure the weight is compact and balanced.
- Pull the Weight: Gently pull the string attached to the clock weight downwards to raise the weight. Hold the clock weight with your hand to prevent sudden drops.
- Adjust for Swing: Once the weight is raised, adjust the horizontal rotary plate and thumb screws on the clock's mechanism to ensure the pendulum can swing freely without obstruction.
- Ibda t-Tbandil: Gently push the pendulum to start its swing. The gears should begin to move, creating the characteristic ticking sound.
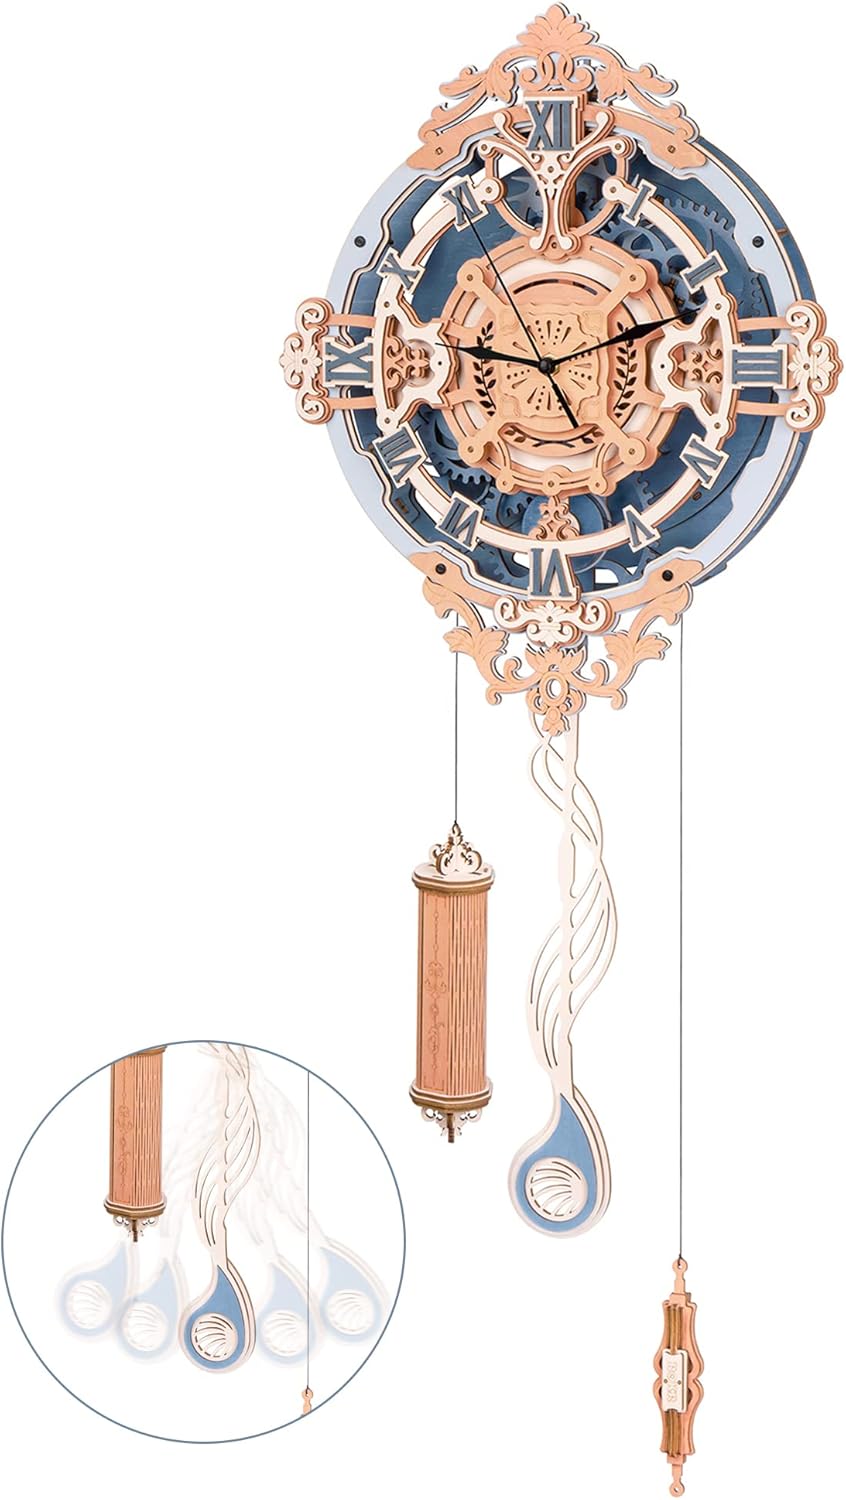
Image: The ROBOTIME LC701 clock, showcasing its intricate design and functional pendulum.

Image: Demonstrating the bi-directional horizontal adjusting mechanism for optimal pendulum swing.
5. Manutenzjoni
Regular maintenance will help preserve the functionality and appearance of your wooden wall clock.
- Tindif: Dust the clock regularly with a soft, dry cloth. Avoid using abrasive cleaners or excessive moisture, which can damage the wood.
- Lubrikazzjoni: Periodically reapply wax or a suitable furniture-grade lubricant to the wooden gears and moving parts to ensure smooth operation and prevent wear. Avoid lubricants containing water or grease that could cause wood swelling.
- Sostituzzjoni tal-batterija: Replace the AA battery in the quartz movement when the clock hands stop moving or timekeeping becomes inaccurate.
- Pendulum String Inspection: Periodically check the strings/threads for any signs of fraying or wear. Replace if necessary to prevent the weight from dropping unexpectedly.
6 Issolvi l-problemi
If you encounter any issues with your ROBOTIME LC701 clock, refer to the table below for common problems and their solutions.
| Problema | Kawża Possibbli | Soluzzjoni |
|---|---|---|
| Pendulum does not swing or stops quickly. | Clock is not level; insufficient lubrication; weight not heavy enough or improperly filled; obstruction in mechanism. | Ensure the clock is perfectly level on the wall. Reapply wax/lubricant to gears. Verify clock weight is filled with 300-450g of dense metal. Check for any parts obstructing the pendulum's path. |
| Clock hands are not moving or time is inaccurate. | Dead or low battery; quartz movement improperly installed; hands obstructed. | Replace the AA battery. Recheck the installation of the quartz movement. Ensure clock hands are not touching each other or the clock face. |
| Gears are stiff or making grinding noises. | Lack of lubrication; burs on wooden parts. | Apply wax or appropriate lubricant to all gear contact points. Gently sand any remaining burs on gear teeth. |
7. Speċifikazzjonijiet
- Ditta: ROBOTIME
- Mudell: LC701
- Materjal: Injam, metall
- Assembly Pieces: 231
- Dimensjonijiet immuntati: 11.7 pulzieri (W) x 25.3 pulzieri (H)
- Sors tal-Enerġija: 1 Batterija AA (mhux inkluża)
- Tip ta' wiri: Analogu
- Modalità ta' Operazzjoni: Mechanical (pendulum), Quartz (timekeeping)
- Età Rakkomandata: 14 snin 'il fuq
8. Garanzija u Appoġġ
ROBOTIME is committed to providing quality products and customer satisfaction. While specific warranty details are not provided in this manual, if you encounter any problems or require assistance with your LC701 Mechanical Wooden Wall Clock Kit, please do not hesitate to contact our customer support. We are dedicated to providing professional after-sales service to ensure your enjoyment of our product.
For support, please refer to the contact information provided with your purchase or visit the official ROBOTIME websit.


