Introduzzjoni
This manual provides essential information for setting up, operating, and maintaining your Focusrite Scarlett Solo 3rd Gen USB Audio Interface Bundle. This comprehensive kit is designed to facilitate high-quality audio recording for vocals, instruments, podcasts, and live streams on Mac and PC platforms.
X'hemm fil-Kaxxa
Your Focusrite Scarlett Solo 3rd Gen USB Audio Interface Bundle includes the following components:
- Focusrite Scarlett Solo (3rd Gen) USB Audio Interface
- LyxPro Cardioid Condenser Studio Microphone (20 Hz–18 kHz, –34 dB ±3 dB, 134 dB SPL, 78 dB S/N, 16 dBA self-noise)
- LyxPro Studio Shockmount
- LyxPro XLR Microphone Cable
- Ivation Metal Height-Adjustable Microphone Stand
- LyxPro Dual-Layer Mesh Pop Filter
- Professional Closed-Back Studio Headphones
- Focusrite Creative Music Production Software Kit (download)
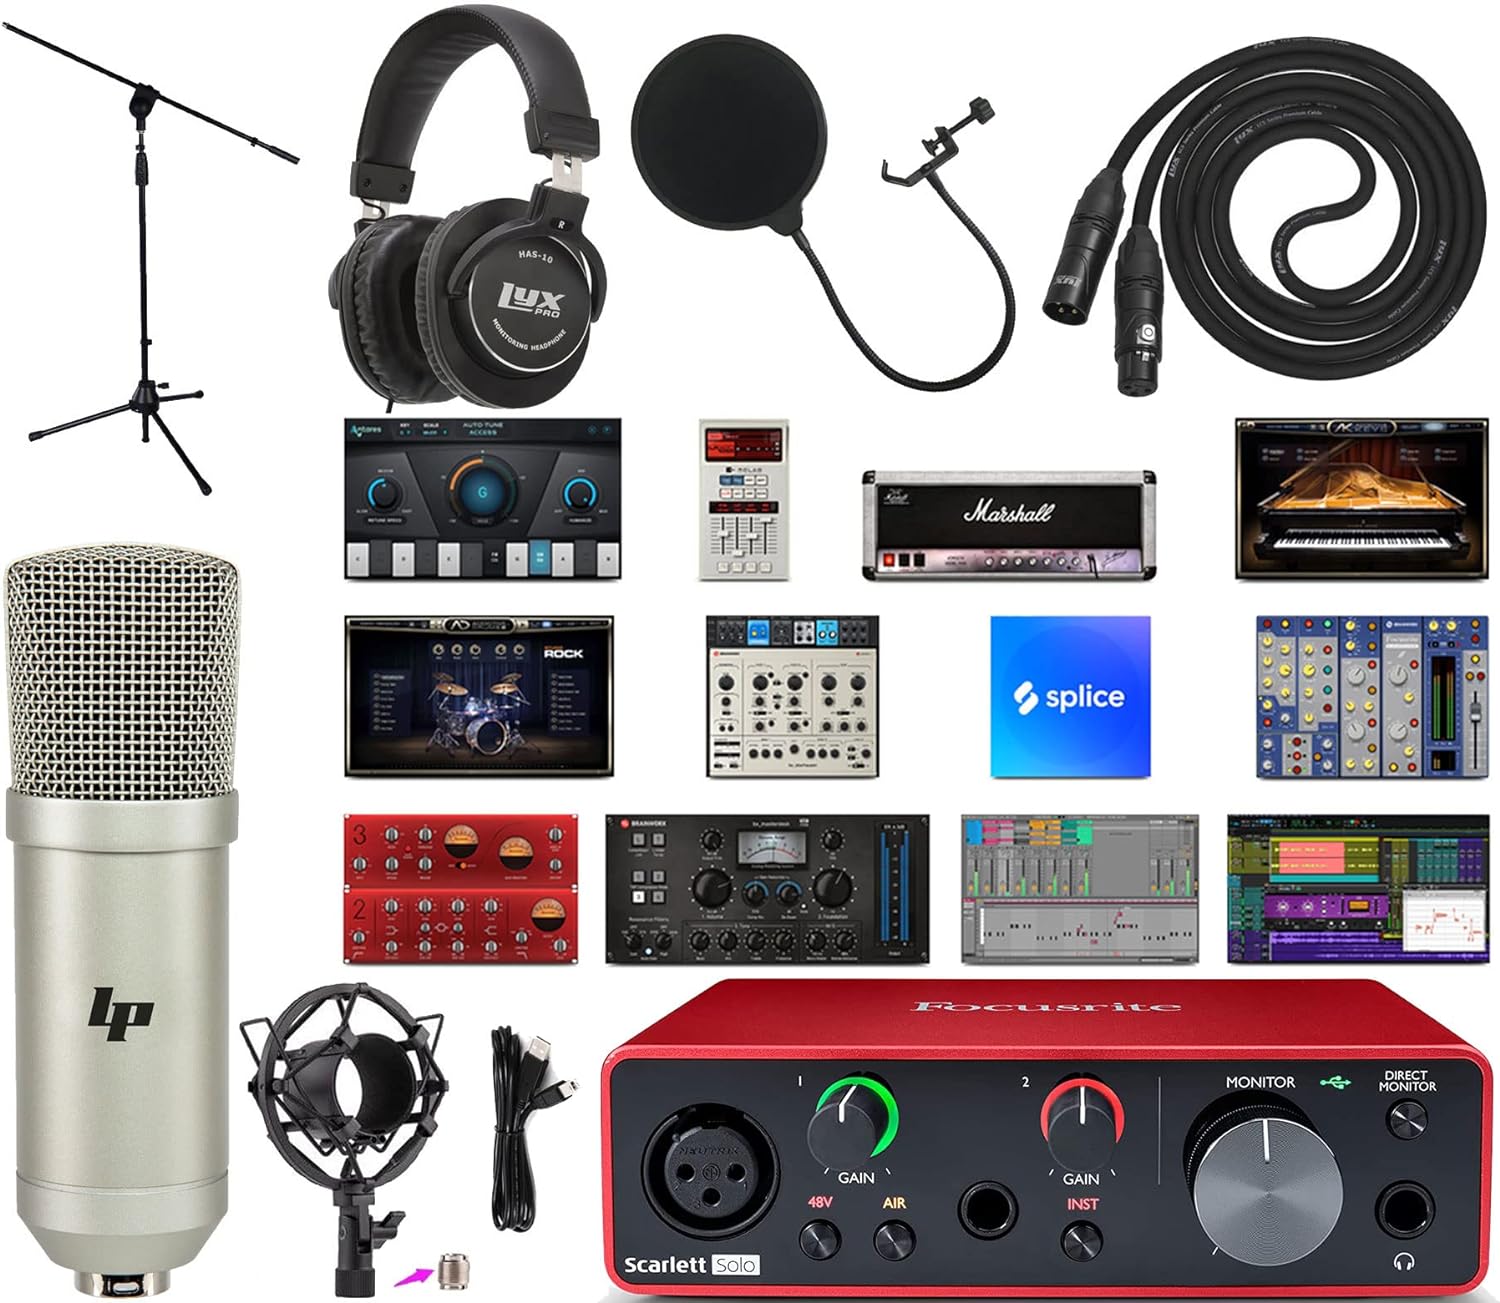
Image: All components included in the Focusrite Scarlett Solo 3rd Gen USB Audio Interface Bundle.
Setup
Follow these steps to set up your audio interface bundle:
- Installazzjoni tas-Softwer: Register your Scarlett Solo to access and download the Focusrite Creative Music Production Software Kit. Install the necessary drivers and software on your Mac or PC.
- Connect the Scarlett Solo: Use the provided USB cable to connect your Scarlett Solo (3rd Gen) to an available USB port on your computer. The device is bus-powered, so no external power adapter is required.
- Setup tal-mikrofonu:
- Assemble the Ivation Metal Height-Adjustable Microphone Stand.
- Attach the LyxPro Studio Shockmount to the microphone stand.
- Carefully place the LyxPro Cardioid Condenser Studio Microphone into the shockmount.
- Attach the LyxPro Dual-Layer Mesh Pop Filter to the microphone stand, positioning it a few inches in front of the microphone.
- Connect the LyxPro XLR Microphone Cable from the microphone to the XLR input on the front of the Scarlett Solo.

Image: LyxPro Cardioid Condenser Microphone mounted in its shockmount.
- Konnessjoni tal-headphone: Plug your Professional Closed-Back Studio Headphones into the headphone output jack on the front of the Scarlett Solo.
- Instrument Connection (Optional): If recording an instrument, connect it to the 1/4-inch instrument input on the front of the Scarlett Solo.

Image: Front panel of the Focusrite Scarlett Solo 3rd Gen, showing inputs and controls.

Image: Rear panel of the Focusrite Scarlett Solo 3rd Gen, showing line outputs and USB port.
Istruzzjonijiet Operattivi
Understanding the controls and features of your Scarlett Solo is crucial for optimal performance.
Scarlett Solo Controls:
- Buttuni tal-GAIN: Adjust the input level for your microphone (Input 1) and instrument (Input 2). The halo LEDs around the knobs indicate signal level: green for good, amber for approaching clipping, and red for clipping.
- 48V (Phantom Power): Press this button to supply 48V phantom power to the XLR input for condenser microphones. Ensure your microphone requires phantom power before activating.
- AIR Mode: Activates Focusrite's 'Air' effect, which emulates the sound of Focusrite's original ISA mic preamps, adding brightness and clarity to vocals and acoustic instruments.
- Pumi tal-MONITOR: Controls the overall output volume to your studio monitors (connected via the rear line outputs).
- Buttuna tal-MONITOR DIRETT: Enables direct monitoring, allowing you to hear your input signal directly through your headphones with zero latency. This is useful for tracking without delay.
- Pum tal-volum tal-headphones: Adjusts the volume for the headphones connected to the front panel.
Użu tal-mikrofonu:
The LyxPro Cardioid Condenser Microphone is designed to capture rich, natural detail. Its cardioid pattern primarily picks up sound from the front, reducing background noise. The shockmount minimizes vibrations, and the pop filter helps eliminate plosive sounds (like 'p' and 'b') for clearer recordings.
Użu tal-headphone:
The Professional Closed-Back Studio Headphones provide isolated monitoring, allowing you to hear your audio clearly without external distractions or sound bleeding into the microphone. Use the dedicated headphone volume knob to adjust listening levels.
Integrazzjoni tas-Software:
Your Scarlett Solo is compatible with various Digital Audio Workstations (DAWs), including Ableton Live Lite and Pro Tools First Creative Pack, which are part of the included software bundle. These programs allow you to record, edit, mix, and master your audio projects.

Image: A user connecting a guitar to the Focusrite Scarlett Solo, demonstrating a typical setup.

Image: A user recording vocals using the microphone and Focusrite Scarlett Solo.
Manutenzjoni
Proper maintenance ensures the longevity and optimal performance of your audio equipment:
- Tindif: Use a soft, dry cloth to clean the surfaces of the Scarlett Solo, microphone, and headphones. Avoid liquid cleaners or abrasive materials.
- Ħażna: Store all components in a dry, dust-free environment when not in use. Protect the microphone from impacts and moisture.
- Kura tal-Cable: Evita li tgħawweġ jew tgħawweġ il-kejbils b'mod qawwi. Aħżenhom pulit biex tevita l-ħsara.
- Aġġornamenti tas-Software: Regularly check the Focusrite website for driver and firmware updates to ensure compatibility and performance.
Issolvi l-problemi
Hawn huma soluzzjonijiet għal kwistjonijiet komuni li tista' tiltaqa' magħhom:
- Ebda Ħsejjes tal-Ħsejjes:
- Check all cable connections (USB, headphones, monitors).
- Ensure the MONITOR and Headphone Volume knobs on the Scarlett Solo are turned up.
- Verify that the Scarlett Solo is selected as the audio input/output device in your computer's sound settings and your DAW.
- No Microphone Input:
- Confirm the XLR cable is securely connected to both the microphone and the Scarlett Solo.
- If using a condenser microphone, ensure 48V phantom power is activated (the 48V button should be lit).
- Adjust the GAIN knob for Input 1.
- Awdjo Mgħawġ:
- Reduce the GAIN knob for the input channel. The halo LEDs should remain green or occasionally amber, avoiding red.
- Check your DAW's input levels to ensure they are not clipping.
- Latency (Delay in Monitoring):
- Press the DIRECT MONITOR button on the Scarlett Solo to enable zero-latency monitoring.
- In your DAW, reduce the buffer size (this may increase CPU load).
Speċifikazzjonijiet
| Karatteristika | Speċifikazzjoni |
|---|---|
| Piż tal-oġġett | 9.33 liri |
| Dimensjonijiet tal-Pakkett | 32 x 14.9 x 6 pulzieri |
| Numru tal-Mudell tal-Oġġett | Solo + Mic Kit |
| Apparati Kompatibbli | Kompjuter Personali |
| Interface tal-Ħardwer | USB |
| Softwer Appoġġjat | Ableton Live Lite, Pro Tools First Creative Pack |
| Sistema Operattiva | Mac (also compatible with Windows) |
| Teknoloġija tal-Konnettività | USB |
| Numru ta 'Kanali | 2 |
Garanzija u Appoġġ
For warranty information and technical support, please refer to the documentation included with your product or visit the official Focusrite website. Online resources often include FAQs, driver downloads, and contact information for customer service.


