L-issettjar tal-Ħin
Use the time setting knob located on the back of the clock to adjust the hour and minute hands. Rotate the knob clockwise or counter-clockwise until the correct time is displayed.
Model: B09JKWDFTT | Brand: ROTH
This manual provides comprehensive instructions for the ROTH Educational Alarm Clock and Stamp Set. Designed to assist children in learning to tell time, this set includes an alarm clock with various features and a complementary stamp set for practice. Please read this manual thoroughly before use to ensure proper operation and safety.

WARNING: CHOKING HAZARD – Small parts. Not suitable for children under 3 years.
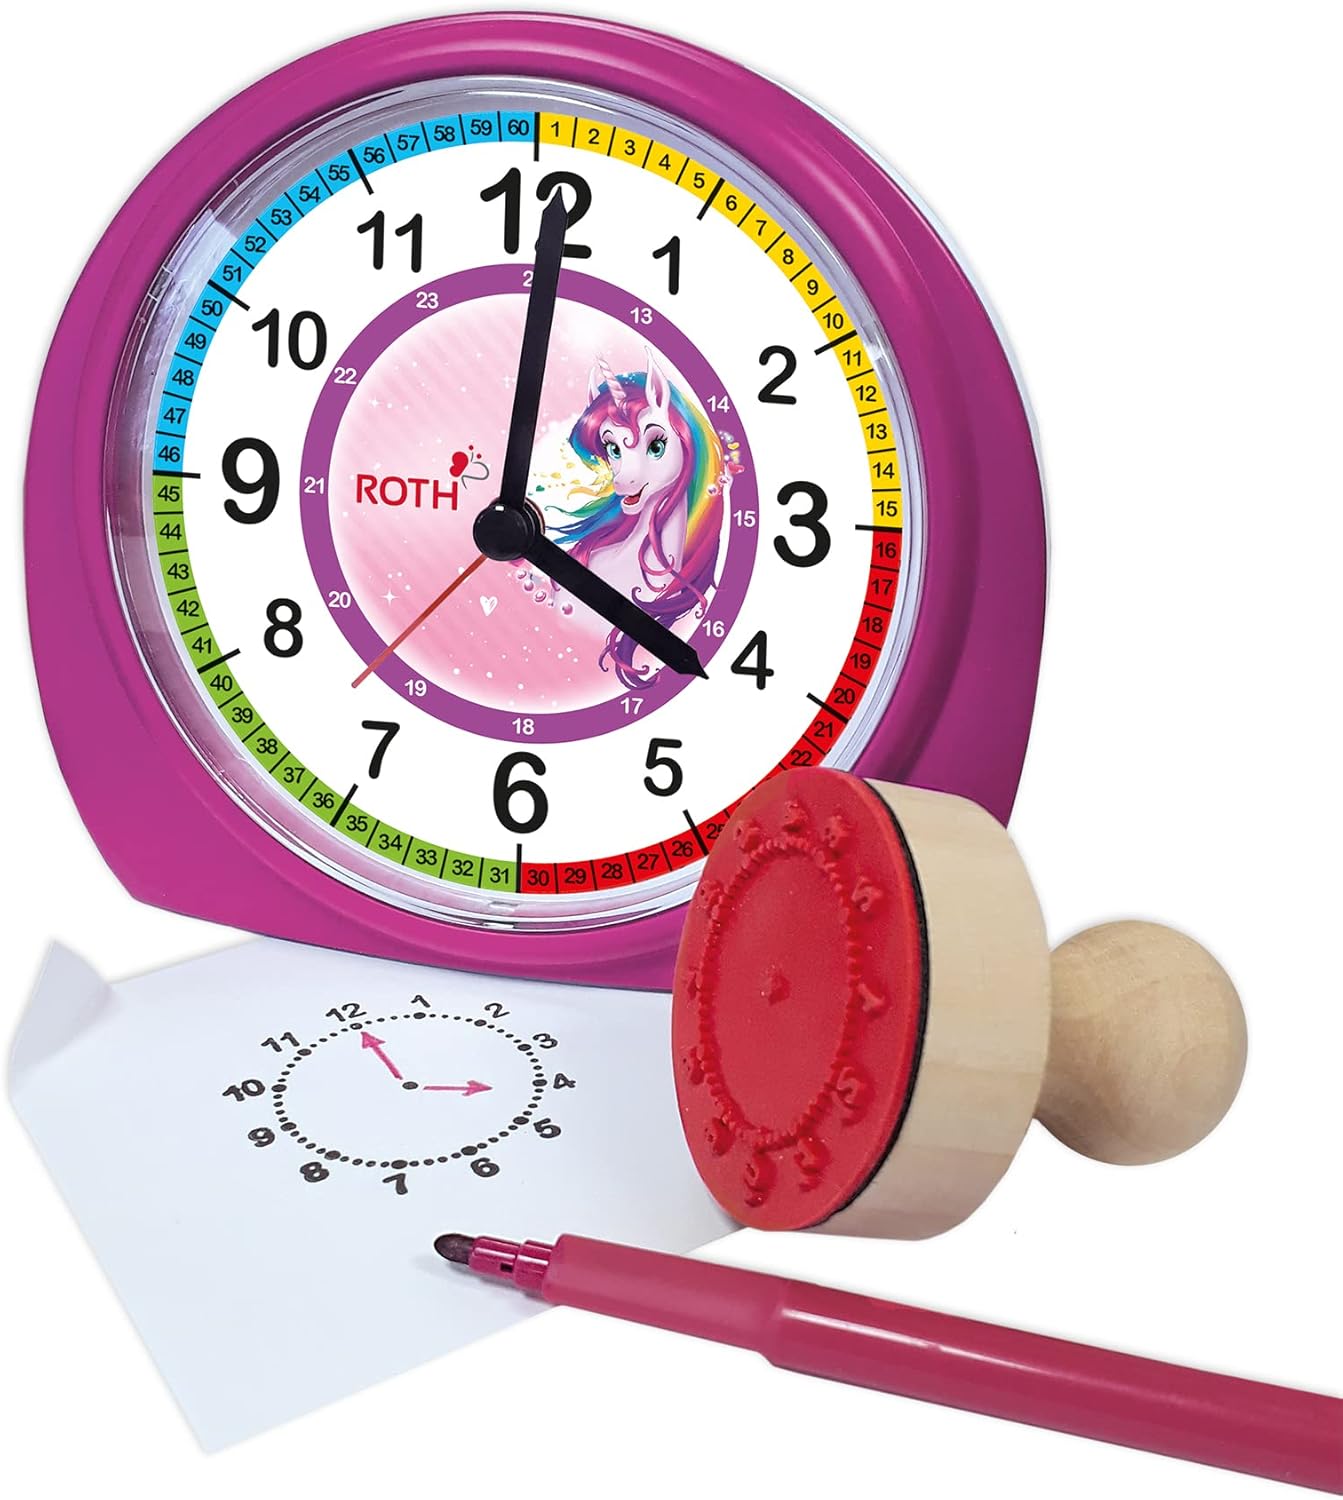
Jekk jogħġbok iċċekkja l-pakkett biex tiżgura li l-oġġetti kollha huma preżenti:

The alarm clock requires 1x AA battery (not included).

Use the time setting knob located on the back of the clock to adjust the hour and minute hands. Rotate the knob clockwise or counter-clockwise until the correct time is displayed.
Use the alarm setting knob, also on the back, to set the desired alarm time. The alarm will sound a beep when the set time is reached. To activate or deactivate the alarm, use the ON/OFF switch located on the side of the clock.

When the alarm sounds, press the large button on the top of the clock to activate the snooze function. The alarm will temporarily stop and sound again after a short interval.
The clock features a backlight for visibility in low-light conditions. Press the backlight button, typically located on the top or side, to illuminate the clock face.
The included wooden stamp and ink pad are designed to help children practice telling time. The stamp creates a clock face outline on paper, allowing children to draw in the hands for various times.

| Problema | Kawża Possibbli | Soluzzjoni |
|---|---|---|
| L-arloġġ mhux jaħdem | Il-batterija mejta jew imdaħħla ħażin. | Replace battery (1x AA) or check polarity. |
| L-allarm ma jiddoqqx | L-allarm mhux attivat jew issettjat ħażin. | Ensure alarm ON/OFF switch is in the 'ON' position and alarm time is set correctly. |
| Backlight ma jaħdimx | Battery low or backlight button not pressed. | Replace battery or press the backlight button firmly. |
| Stamp not making clear impression | Ink pad is dry or stamp not evenly inked. | Ensure ink pad is moist; re-ink stamp evenly. Replace ink pad if necessary. |
| Karatteristika | Dettall |
|---|---|
| Dimensjonijiet tal-Prodott (LxWxH) | 20 x 21.1 x 7.3 ċm |
| Piż tal-oġġett | 350 Gramm |
| Karatteristiċi Speċjali | Snooze, Alarm, Backlight |
| Brand | ROTH |
| Firxa ta' Età (Deskrizzjoni) | Tfal |
| Materjal | Wood (Stamp), Plastic (Clock) |
| Kulur | Roża |
| Sors tal-Enerġija | Mħaddma bil-batterija |
| Tip ta 'batterija | 1x AA (mhux inklużi) |
This product comes with a standard manufacturer's warranty. For specific warranty details, including duration and coverage, please refer to the product packaging or contact ROTH customer support directly. If you encounter any issues or have questions not covered in this manual, please reach out to the retailer or manufacturer for assistance.
For further support, please visit the official ROTH websit jew ikkuntattja lid-dipartiment tas-servizz tal-konsumatur tagħhom.
 |
Roth Touchline SL Valve Module Quick Guide: Installation and Setup Concise guide for installing and setting up the Roth Touchline SL Valve module for heating systems, featuring 'Heat on demand' mode. Includes connection details and interface setup. |
 |
Gwida għall-Installazzjoni tat-Termostat Roth Touchline® SL Gwida komprensiva għall-installazzjoni għat-termostat tal-kamra Roth Touchline® SL u s-sistema ta' tisħin taħt l-art. Tgħallem kif tqabbad, tirreġistra, u tikkonfigura t-termostat tiegħek ma' sensuri u kontrolluri tal-art. |
 |
Gwida għall-Installazzjoni tat-Termostat Roth Touchline SL Gwida komprensiva għall-installazzjoni u s-setup tat-termostati Roth Touchline SL u SL Plus. Tkopri l-immuntar mal-ħajt, il-wajers, il-konnessjoni tas-sensuri, it-tqabbil mal-kontrolluri, il-konfigurazzjoni tas-sensuri tal-art, u funzjonijiet avvanzati. |
 |
Gwida għall-Installazzjoni tas-Sistema ta' Pajpijiet Roth MultiPex® PEX Din il-gwida għall-installazzjoni tipprovdi struzzjonijiet dettaljati għas-sistemi ta' pajpijiet Roth MultiPex® PEX. Tkopri passi essenzjali bħall-qtugħ, it-tgħawwiġ u t-twaħħil tal-pajpijiet, flimkien ma' twissijiet dwar l-użu tas-solvent. Id-dokument jinkludi wkoll dejta teknika komprensiva u lista ta' aċċessorji kompatibbli, ippreżentati bl-Ingliż għal aktar ċarezza. Adattat għal applikazzjonijiet ta' ilma tax-xorb u tisħin ċentrali. |
 |
Gwida għall-Installazzjoni ta' Roth MultiPex®: Pajpijiet u Fittings Gwida komprensiva għall-installazzjoni għas-sistemi ta' pajpijiet Roth MultiPex®, li tkopri t-tqattigħ, it-tgħawwiġ, it-twaħħil, l-assemblaġġ, l-ispeċifikazzjonijiet tekniċi, u l-aċċessorji. Tgħallem kif tinstalla s-soluzzjonijiet tal-plumbing Roth b'mod sigur u effiċjenti. |
 |
Gwida għall-Installazzjoni u t-Tħaddim tat-Termostat tal-Kamra Roth Touchline® PL Din il-gwida tipprovdi struzzjonijiet komprensivi għall-installazzjoni u t-tħaddim tat-termostat tal-kamra mingħajr fili Roth Touchline® PL. Tkopri s-setup, it-tqabbil mal-kontrollur, u spjegazzjonijiet dettaljati tal-funzjonijiet u s-settings tat-termostat. |