1. Introduzzjoni
This manual provides comprehensive instructions for the Tradelux DVB T2 Digital Terrestrial Receiver, model K-002. This device is designed to receive digital terrestrial television broadcasts, supporting Full HD 1080p and HEVC H.265 Main 10 standards. It features a numbered channel list, USB recording capabilities, and a versatile remote control. Please read this manual carefully before operating the device to ensure proper use and to maximize its features.
2. X'inhu Inkluż
Malli tiftaħ il-pakkett, jekk jogħġbok ivverifika li l-komponenti kollha li ġejjin huma preżenti:
- 1x Tradelux DVB T2 Digital Terrestrial Receiver (K-002)
- 1x Remote Control (with 2x AAA batteries included)
- 1x Cable HDMI
- 1x User Manual (in Italian, but this document serves as an English guide)

Image 2.1: Contents of the Tradelux DVB T2 Receiver package, including the receiver unit, remote control, HDMI cable, and batteries.
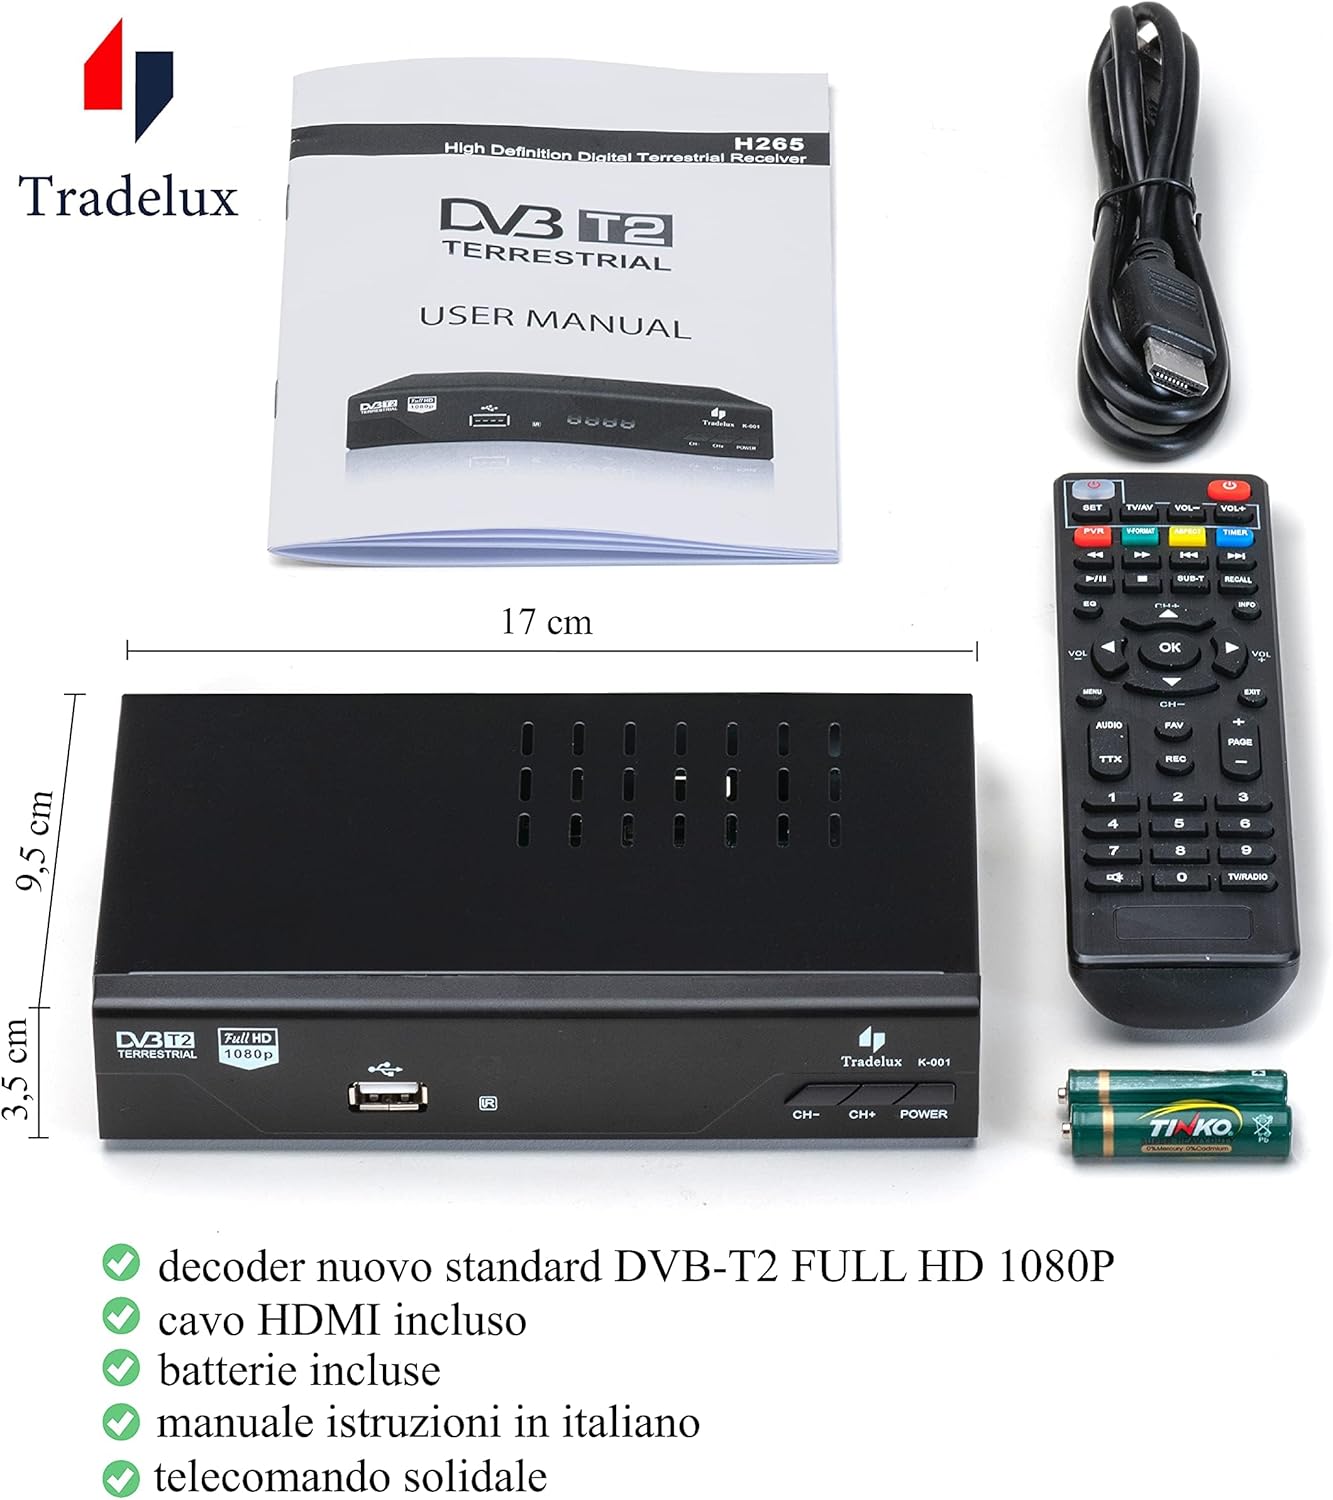
Image 2.2: The Tradelux DVB T2 Receiver K-002, showing its compact dimensions (17 cm x 9.5 cm x 3.5 cm), along with the remote control, HDMI cable, and included batteries.
3. Konfigurazzjoni u Konnessjonijiet
Follow these steps to connect your Tradelux DVB T2 Receiver to your television:
- Konnessjoni tal-Enerġija: Connect the receiver to a power outlet using the provided power cable.
- Konnessjoni tal-antenna: Connect your terrestrial antenna cable to the 'ANT IN' port on the back of the receiver.
- TV Connection (HDMI): Use the included HDMI cable to connect the receiver's HDMI OUT port to an available HDMI IN port on your television.
- TV Connection (SCART - Optional): If your television does not support HDMI, use a SCART cable (not included) to connect the receiver's SCART port to your TV's SCART input.
- USB Device (Optional): For recording or media playback, connect a FAT32 formatted USB drive to the USB port on the front or rear of the receiver.

Immaġni 3.1: Dettaljata view of the rear panel connections of the Tradelux DVB T2 Receiver K-002, showing ANT IN, ANT OUT, S/PDIF Coaxial, HDMI, SCART, and integrated power socket.
Video 3.1: This video demonstrates the physical connection process of the Tradelux DVB T2 Receiver to a television, including antenna and HDMI connections.
4. Initial Setup and Channel Tuning
After connecting the receiver, follow these steps to perform the initial setup and tune channels:
- Qawwa Mixgħul: Turn on your television and the Tradelux DVB T2 Receiver using the red power button on the remote control.
- Agħżel Input: On your TV remote, press the 'Source' or 'Input' button to select the correct HDMI or SCART input where the receiver is connected.
- Menu Aċċess: On the receiver's remote control, press the MENU buttuna.
- Navigate to Search: Use the right arrow button (>) twice to navigate to the "Ricerca" (Search) option.
- Select Automatic Search: Use the down arrow button (v) three times to highlight "Ricerca automatica" (Automatic Search).
- Start Search: Agħfas il- OK button to start the automatic channel search. The receiver will scan and store all available digital terrestrial channels in their traditional numbered positions (e.g., Rai 1, Canale 5).
Video 4.1: This video illustrates the steps for navigating the receiver's menu to perform an automatic channel search.
5. Remote Control Synchronization
The Tradelux DVB T2 Receiver's remote control can be synchronized with your TV remote to control basic TV functions (power, volume). This allows you to use a single remote for both devices.
- Idħol fil-Modalità ta' Tagħlim: On the Tradelux remote, press and hold the SET button (usually located at the top) until the LED indicator lights up steadily.
- Agħżel Funzjoni: Press the button on the Tradelux remote that you wish to program (e.g., TV Power, Volume Up, Volume Down). The LED will blink slowly.
- Sinjal tat-Trażmissjoni: Point your TV's original remote control directly at the Tradelux remote (infrared sensors facing each other) and press the corresponding button on the TV remote (e.g., TV Power).
- Konferma: The LED on the Tradelux remote will blink rapidly three times and then light up steadily, indicating successful learning.
- Repeat for Other Buttons: Repeat steps 2-4 for any other TV functions you wish to program.
- Oħroġ mill-Modalità tat-Tagħlim: Agħfas il- SET button again to exit learning mode. The LED will turn off.
Video 5.1: This video demonstrates the process of synchronizing the Tradelux DVB T2 Receiver remote control with a television remote for integrated control.
6. Karatteristiċi Operattivi
6.1. PVR (Personal Video Recorder) Function
The Tradelux K-002 receiver supports PVR functionality, allowing you to record live TV programs to an external USB storage device (USB stick or external hard drive). Ensure your USB device is formatted to FAT32 for optimal compatibility.
- Reġistrazzjoni Instantanja: Waqt li tkun qed tara programm, agħfas il-buttuna REC buttuna fuq il-kontroll remot biex tibda tirrekordja immedjatament. Agħfas STOP biex itemm ir-reġistrazzjoni.
- Reġistrazzjoni Skedata: Use the EPG (Electronic Program Guide) to schedule recordings. Navigate to the desired program in the EPG and select the record option.
- Aċċess għal Reġistrazzjonijiet: Agħfas il- PVR button on the remote to access your recorded content.
6.2. Daqq tal-Midja
The receiver can play various media files from a connected USB storage device. It supports audio formats such as MP3 and WMA.
- Connect your USB device containing media files to the receiver's USB port.
- Navigate to the Media Player section in the main menu.
- Fittex tiegħek files and select the desired media to play.
7. Manutenzjoni
To ensure the longevity and optimal performance of your Tradelux DVB T2 Receiver, follow these maintenance guidelines:
- Tindif: Uża drapp artab u niexef biex tnaddaf il-barra tar-riċevitur. Tużax prodotti tat-tindif likwidi jew materjali li joborxu.
- Ventilazzjoni: Ensure the receiver is placed in a well-ventilated area to prevent overheating. Avoid covering ventilation slots.
- Itfi: When not in use for extended periods, disconnect the receiver from the power outlet.
8 Issolvi l-problemi
If you encounter issues with your Tradelux DVB T2 Receiver, refer to the following common solutions:
| Problema | Kawża / Soluzzjoni Possibbli |
|---|---|
| No signal / No channels found |
|
| HD channels not visible or poor quality | This often depends on the quality of the HD signal received by your antenna, which might be lower than SD signals. Ensure your antenna is properly aligned and in good condition. |
| Il-kontroll mill-bogħod ma jirrispondix |
|
| Device overheating or channels desynchronizing in hot weather | Ensure the device is placed in a well-ventilated area, away from direct sunlight or heat sources. Avoid stacking other electronics on top of it. |
| Problemi ta' reġistrazzjoni bil-USB | Ensure the USB drive is formatted to FAT32. Some older or very large USB drives might have compatibility issues. |
If these solutions do not resolve your issue, please contact customer support.
9. Speċifikazzjonijiet
| Karatteristika | Dettall |
|---|---|
| Brand | Tradelux |
| Mudell | K-002 |
| Dimensjonijiet tal-Prodott | 17 x 9 x 3 ċm |
| Piż | 275 gramma |
| Sors tal-Enerġija | 2 batteriji AAA (għall-kontroll remot, inklużi) |
| Apparati Kompatibbli | Televiżjoni |
| Karatteristiċi Addizzjonali | MP3 Player |
| Riżoluzzjoni | Full HD ta '1080p |
| Modalità tal-Ħruġ tal-Awdjo | Stereo, Surround |
| Tip ta' Output Awdjo | HDMI, SCART |
| Konfigurazzjoni tas-Surround | 5.1 |
| Portijiet USB totali | 1 |
| Teknoloġija tal-Konnettività | Ethernet (for potential future updates/features, not for internet TV as per product description) |
| Format tal-Midja Appoġġjat | Audio MP3, WMA |
| Kodifikazzjoni tal-vidjo | HEVC Main 10 |
| Kulur | Iswed |
10. Garanzija u Appoġġ
Tradelux is committed to providing excellent customer service. In case of any issues or questions regarding your DVB T2 Receiver, please contact our support team:
- Messaġġi tal-Amazon: Contact us directly through the Amazon messaging system.
- Email: info@imlux.it
Our support team can provide telephone assistance and firmware updates if required. We are here to help you find a solution.


