1. Prodott Aktarview
The 10L0L 4PCS Golf Cart Fender Flares are designed to provide enhanced protection and a refined appearance for your Club Car DS golf cart, specifically models from 1993 and up. These heavy-duty ABS plastic mud guards are engineered to block rocks, mud, and debris, safeguarding your cart's paint from scratches and road damage. The sleek design integrates seamlessly with your golf cart's aesthetics. They feature built-in reflectors for improved visibility and are constructed from UV-treated material to ensure long-lasting performance in various weather conditions.

Figure 1: 10L0L Golf Cart Fender Flares installed on a Club Car DS golf cart.
2. Karatteristiċi tal-prodott
- Exact Fit for Club Car DS (1993 & UP): Exclusively designed for factory-standard Club Car DS golf carts, ensuring perfect alignment with factory bolt holes (no modifications needed). Note: Not compatible with non-OEM bodies.
- Heavy-Duty Protection + Scratch Resistance: Made from high-impact ABS plastic to block rocks, mud, and debris while protecting your cart’s paint from scratches and road damage.
- Enhanced Safety with Built-In Reflectors: Front fender flares feature high-visibility amber reflectors for safer night driving.
- Weatherproof & Long-Lasting: UV-treated material resists fading, cracking, and warping in extreme temperatures (-40°F to 180°F). Ribbed surface improves water drainage for all-weather performance.
- Easy No-Drill Installation: Includes 2 front and 2 rear fender flares with all necessary stainless steel mounting hardware for easy installation on standard golf carts as well as for lifted golf carts with off-road tires (not for modified vehicles).

Figure 2: Integrated amber reflector for enhanced safety.

Figure 3: Detail of the fine-textured matte black finish and precise hole cutting.
3. Kontenut tal-Pakkett
Il-pakkett jinkludi l-komponenti li ġejjin:
- 2 x Front Fender Flares
- 2 x Rear Fender Flares
- Stainless Steel Mounting Hardware (screws, washers)
4. Istruzzjonijiet ta 'installazzjoni
Follow these steps for a straightforward installation:
- Prepare the Golf Cart: Ensure your Club Car DS is clean and parked on a level surface.
- Position the Fender Flare: Align one of the fender flares (front or rear) with the corresponding wheel well on your golf cart. Ensure it sits flush against the body.
- Immarka Punti Drill: Use a marker to mark the locations for drilling through the pre-drilled holes on the fender flare onto the golf cart body.
- Drill Pilota Toqob: Carefully drill pilot holes at the marked locations on the golf cart body. Use a drill bit appropriate for the size of the self-tapping screws.
- Secure the Fender Flare: Place the fender flare back into position. Use the provided stainless steel self-tapping screws and washers to secure the flare to the golf cart body. Tighten securely but do not overtighten to avoid damaging the plastic.
- Repeat for Remaining Flares: Repeat steps 2-5 for the remaining three fender flares.
- Kontroll Finali: Once all flares are installed, ensure they are all securely fastened and properly aligned.
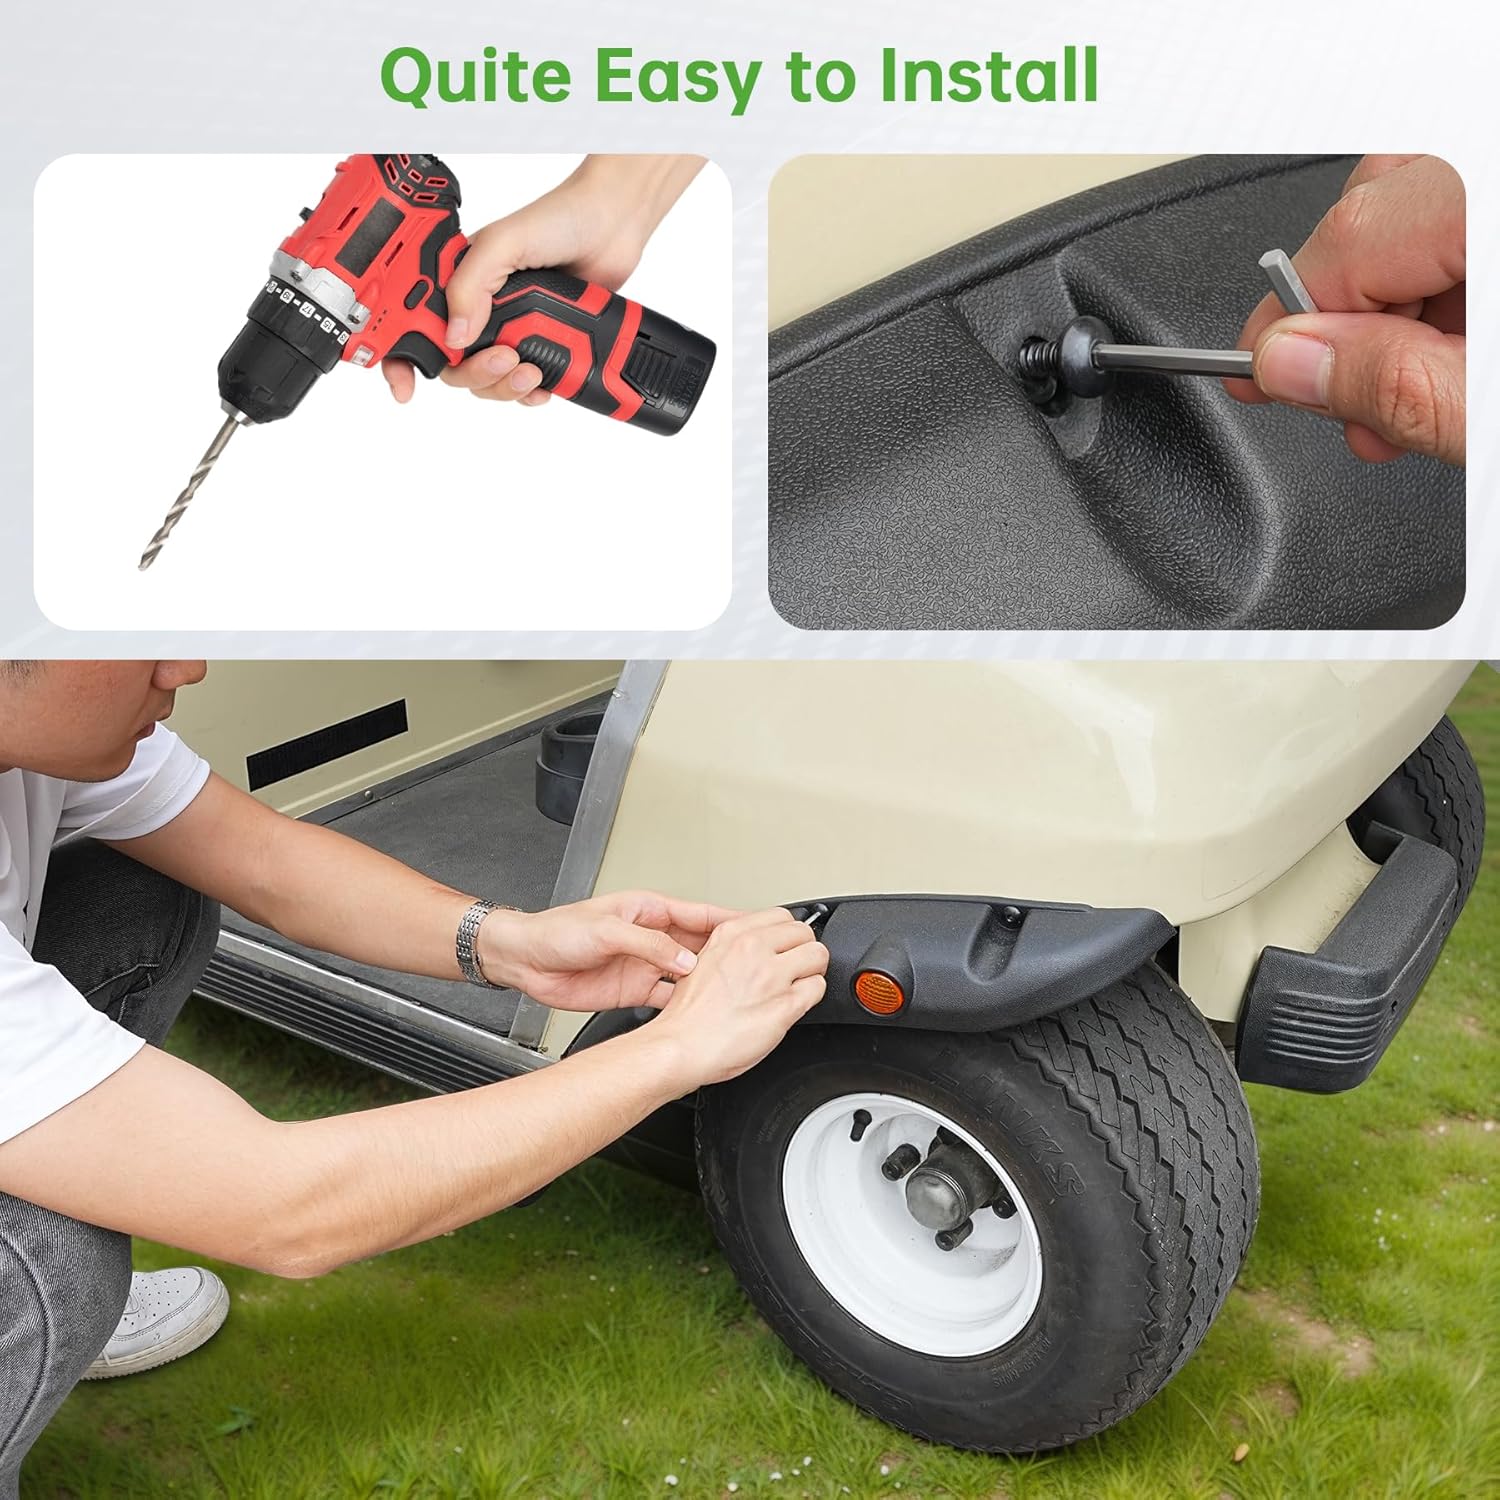
Figure 4: Installation process showing drilling and securing the fender flare.

Figure 5: Easy installation with included hardware.
Vidjows tal-Installazzjoni:
Video 1: Official 10L0L Golf Cart Fender Flares for Club Car DS Installation Guide. This video demonstrates the step-by-step process of installing the fender flares specifically on a Club Car DS model.
Video 2: Generic 10L0L Golf Cart Fender Installation Steps. This video provides a general overview of the installation process for 10L0L fender flares on a golf cart, which can be applied to various models.
5. Tħaddim u Użu
Once installed, the fender flares operate passively by extending the coverage over your golf cart's wheels. Their primary function is to:
- Protect Passengers: Reduce the amount of dirt, water, mud, rocks, and other debris kicked up by the tires, keeping passengers cleaner and safer.
- Protect Vehicle Body: Shield the golf cart's paint and body from scratches and damage caused by flying debris.
- Enhance Aesthetics: Provide a rugged and finished look to your golf cart.

Figure 6: Before and after installation, demonstrating protection from debris.
6. Manutenzjoni
To ensure the longevity and appearance of your 10L0L fender flares:
- Tindif regolari: Wash the fender flares with soap and water regularly to remove accumulated dirt and mud.
- Spezzjona l-Qafliet: Periodically check all mounting screws to ensure they remain tight. Retighten if necessary.
- Protezzjoni UV: While the material is UV-treated, occasional application of a UV protectant spray designed for plastics can further extend their life and prevent fading.
- Evita kimiċi ħorox: Do not use abrasive cleaners or solvents that could damage the ABS plastic material.
7 Issolvi l-problemi
If you encounter any issues during or after installation, consider the following:
- Twaħħil ħażin: Ensure the fender flares are correctly aligned with the factory bolt holes. Slight adjustments may be needed before fully tightening all screws. Verify your golf cart is a standard Club Car DS (1993 & UP) and not a modified vehicle or non-OEM body, as this product is specifically designed for factory specifications.
- Loose Flares: Recheck all screws and ensure they are tightened adequately. Over time, vibrations can cause screws to loosen.
- Reflector Damage: If reflectors are damaged, they can often be replaced. Contact customer support for replacement parts.
8. Speċifikazzjonijiet
| Attribut | Dettall |
|---|---|
| Brand | 10L0L |
| Isem tal-Mudell | For Club Car DS 1993 & UP |
| Numru tal-Parti | 00532-E |
| Materjal | High-Impact ABS Plastic |
| Finish ta 'barra | Matte Black, Stainless Steel (hardware) |
| Piż tal-oġġett | 1.88 Kilogrammi |
| Tip ta 'Servizz tal-Vettura | Golf Cart |
| Pożizzjoni tal-Parti tal-Auto | Quddiem, Wara |
| Fit Tip | Tajjeb Speċifiku tal-Vettura |
| Dimensjonijiet tal-Pakkett tal-Oġġett L x W x H | 31 x 13.5 x 4 pulzieri |
9. Garanzija u Appoġġ
Dan il-prodott jiġi ma 'a Garanzija tal-manifattur ta 'sena. For any questions, technical assistance, or warranty claims, please refer to the contact information provided with your purchase or visit the official 10L0L websit.


