1. Introduzzjoni
This manual provides detailed instructions for installing the SCOSCHE FD0514DDCS Double DIN Premium Installation Solution and Interface. This kit is designed to facilitate the seamless integration of an aftermarket car stereo into your vehicle's dashboard, while retaining important factory features.
Please read all instructions carefully before beginning the installation process. Ensure all components are present and that your vehicle is compatible with this kit.
2. Kontenut tal-Pakkett
Iċċekkja li l-oġġetti kollha elenkati hawn taħt huma inklużi fil-pakkett tiegħek:
- Radio Bezel and Mounting Brackets
- Single DIN Pocket
- Radio Replacement Interface with Steering Wheel Control (SWC) Harness
- Adapter tal-antenna
- Manwal ta' Istruzzjoni
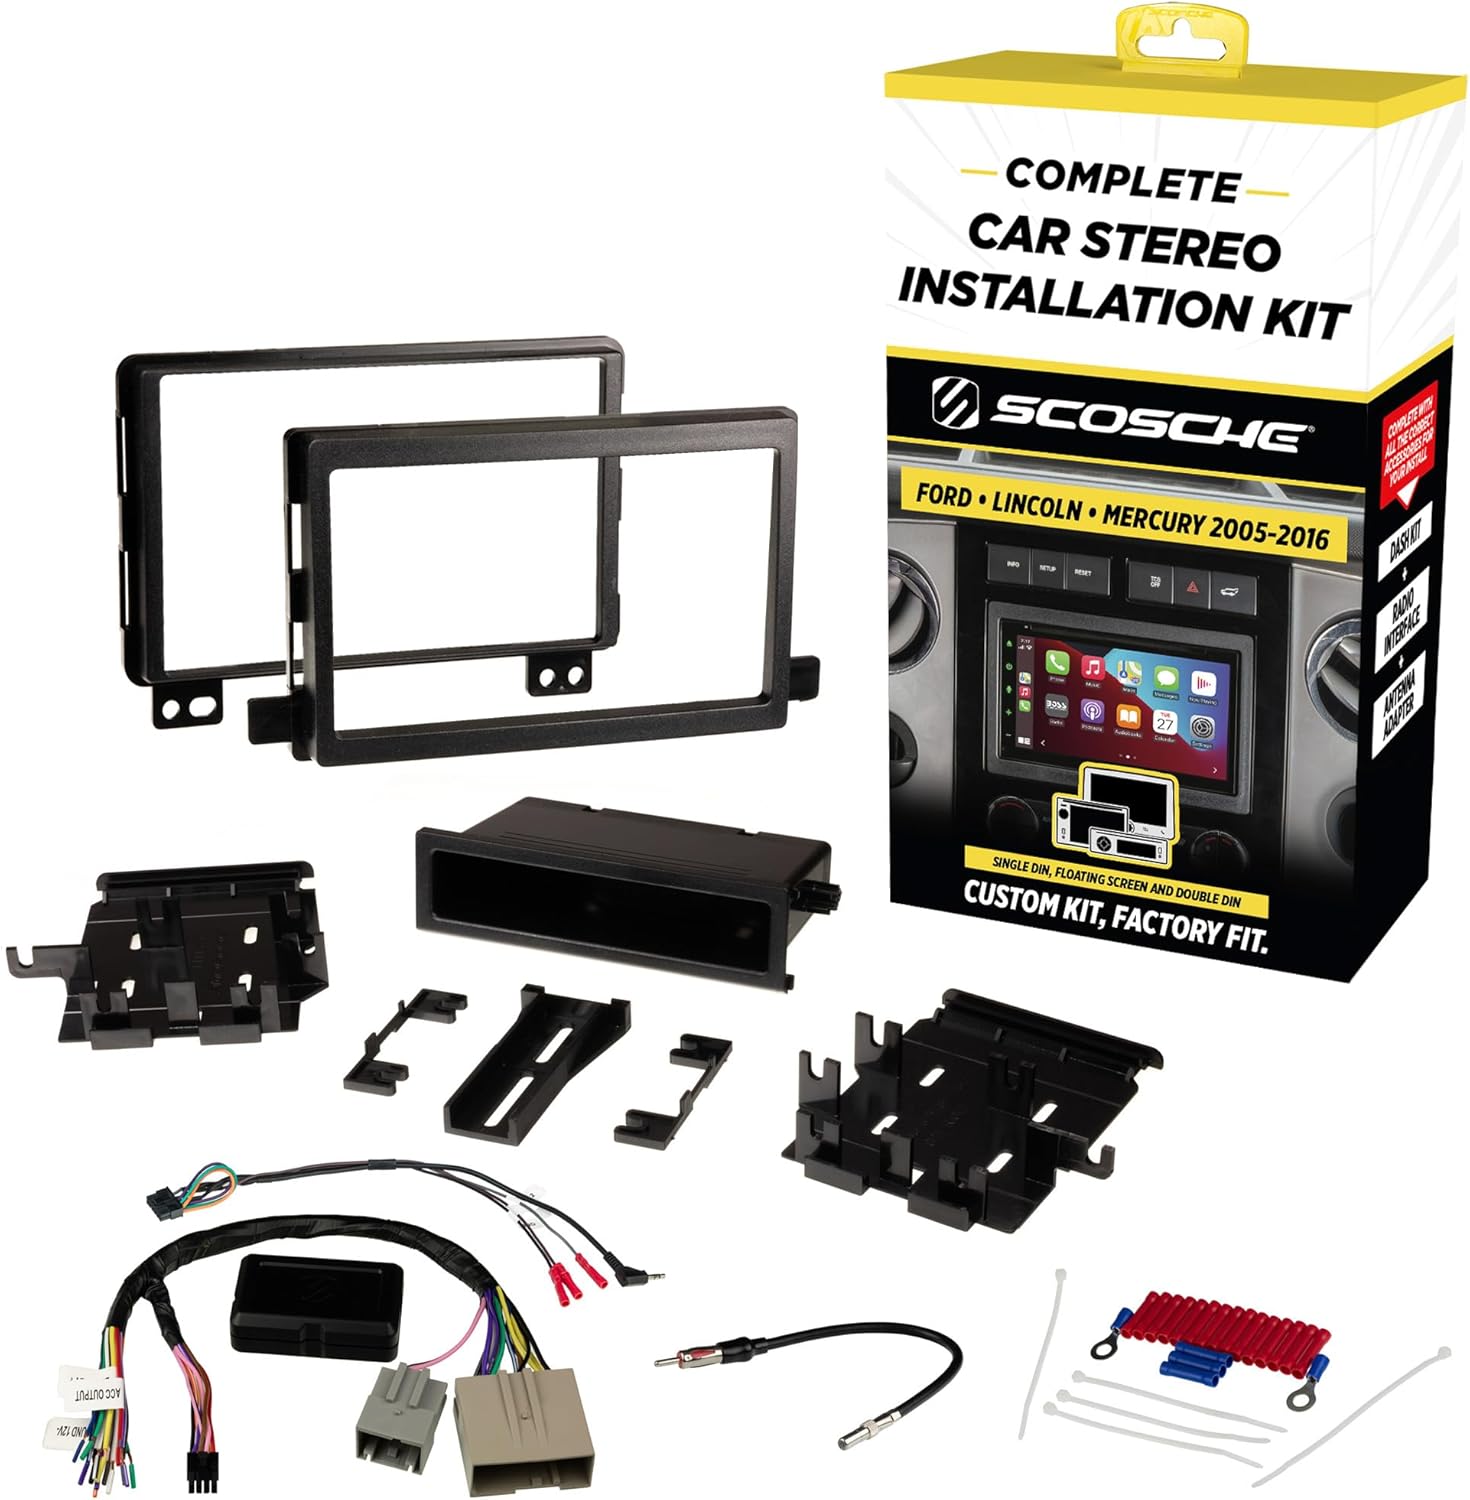
Image: The complete SCOSCHE FD0514DDCS kit, including the dash bezel, mounting brackets, wiring harness, interface module, and antenna adapter.
3. Kompatibilità tal-Vettura
This kit is designed for select 2005-2014 Ford, Lincoln, and Mercury vehicles. Refer to the fit guide image below to confirm your vehicle's compatibility.
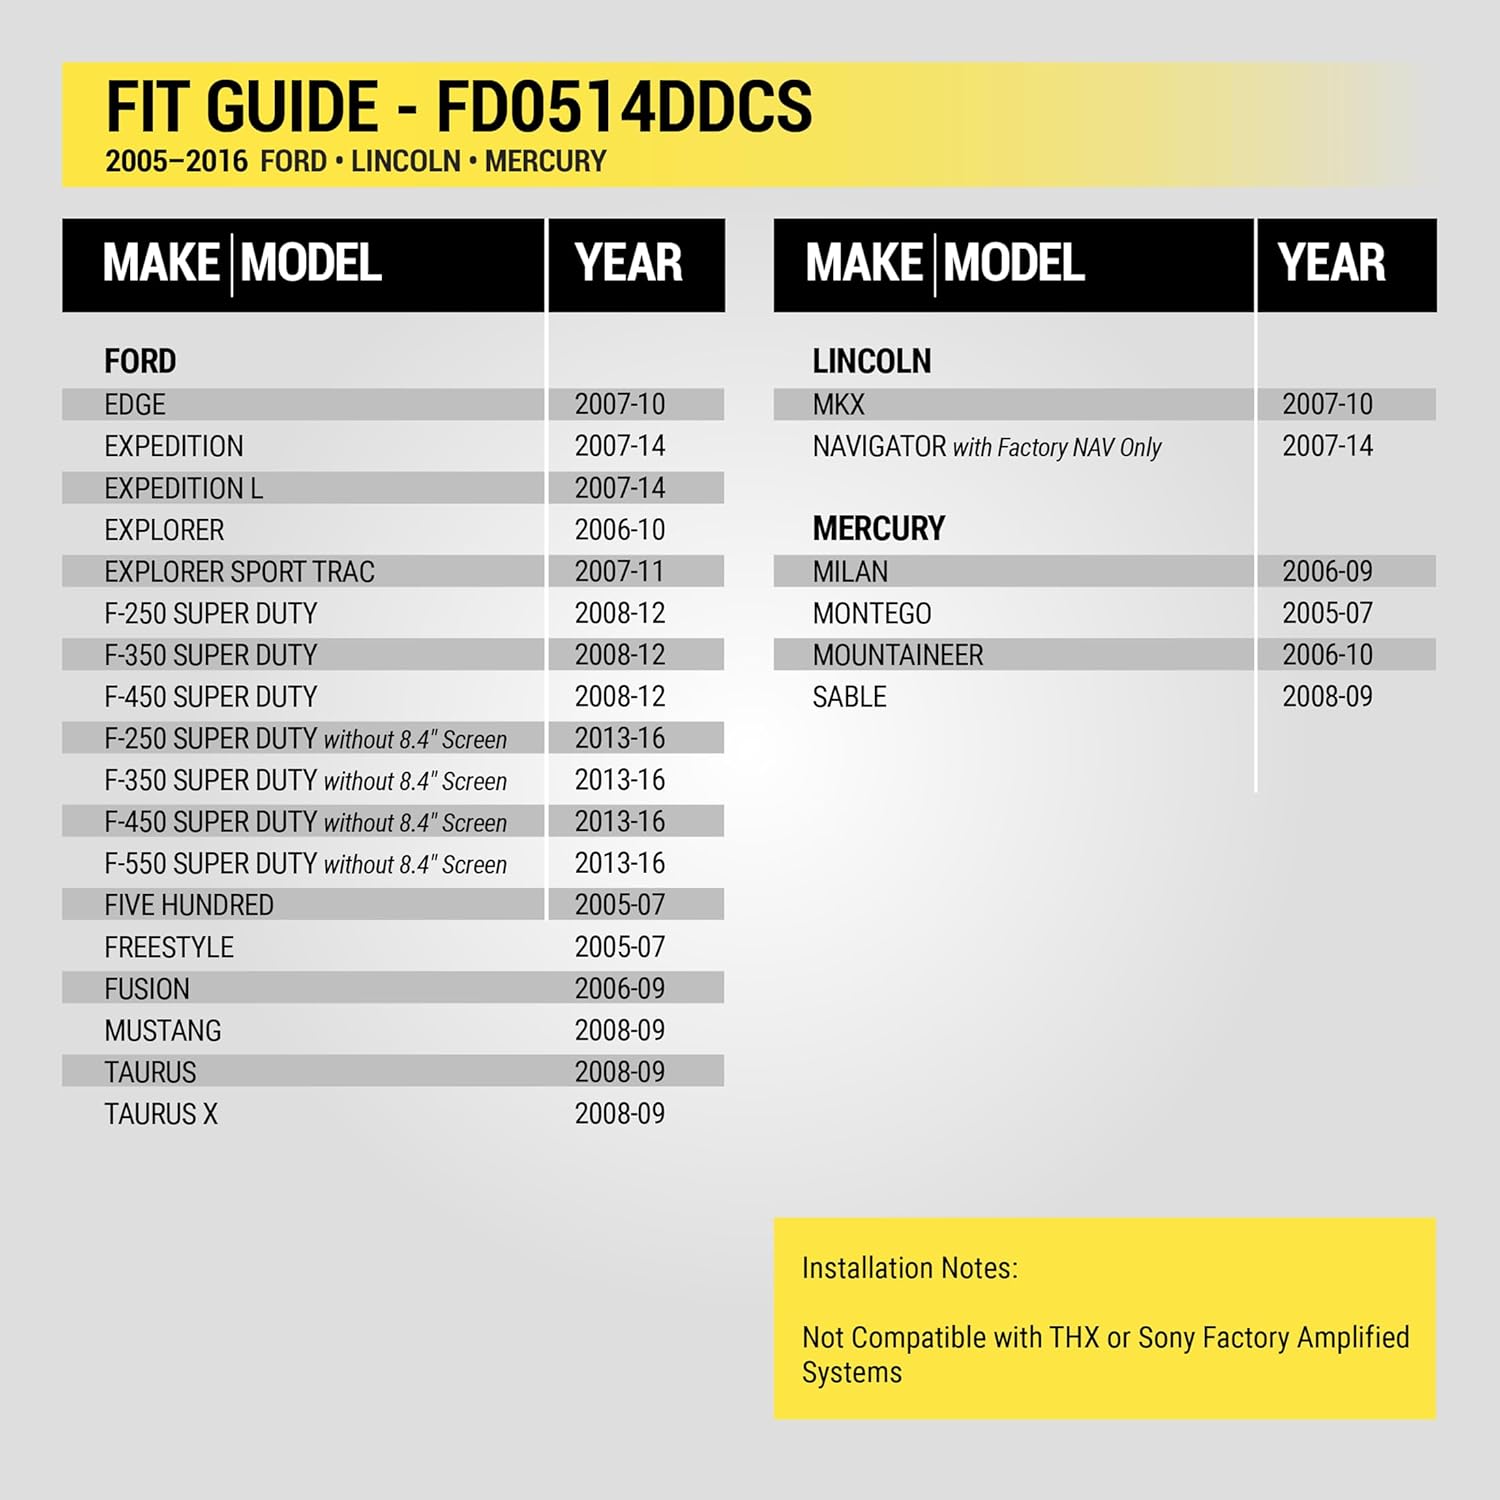
Image: A detailed fit guide table listing compatible Ford, Lincoln, and Mercury models and years for the FD0514DDCS kit.
Noti Importanti dwar il-Kompatibilità:
- Not Compatible with THX or Sony Factory AmpSistemi lifikati.
- Scosche Double DIN Kits fit True Double DIN stereos with a maximum faceplate opening of 96.8mm x 173mm (3-13/16" x 6-13/16"). Some radios labeled as Double DIN may be oversized and require minor trimming of the kit for proper fit.

Image: Illustrates the maximum dimensions for compatible Double DIN stereos and a note about potential trimming for oversized units.
4. Komponenti tal-Prodott Fuqview
4.1 Dash Kit (Radio Bezel and Mounting Brackets)
The dash kit is constructed from automotive-grade ABS plastic with a factory-matched texture. It securely holds your aftermarket stereo in place and provides a clean, integrated look. It accommodates Double DIN radios, Single DIN radios with the included storage pocket, and Floating Screen Radios that have a Single DIN mounting frame.

Image: Shows the individual components of the dash kit, including the main bezel, side mounting brackets, and a single DIN storage pocket.
4.2 Radio Replacement Interface with SWC Harness
This interface allows you to install an aftermarket stereo while retaining important convenience and safety diagnostic features, including steering wheel controls. The wires are color-coded for easy matching with your new stereo's harness.

Image: Displays the radio replacement interface module, the SWC harness, and the antenna adapter, highlighting their factory quality and direct connection.
4.3 EIA Wire Color Code Chart
Il-kodiċijiet tal-kuluri użati fuq dan il-wajers tal-konnettur tal-istereo tal-karozza jikkonformaw mal-istandard tal-EIA (Electronics Industry Association). Dawn il-kuluri jistgħu jvarjaw mill-kodiċijiet tal-wajers li jinsabu fuq l-istereo tiegħek. Dejjem irreferi għall-manwal tas-sid tal-istereo tiegħek għal dettalji speċifiċi tal-wajers qabel ma tagħmel xi konnessjonijiet.
| Kulur tal-Wajer | Funzjoni |
|---|---|
| Isfar | Batterija ta' 12V: Kostanti (+) |
| Aħmar | Batterija ta' 12V: Mixgħula (+) |
| Iswed | Art tax-Chassis (-) |
| Iswed/Abjad | Fabbrika AmpArt tal-Lififier |
| Blu | Qawwa tal-Antenna (Meta t-Tuner ikun Mixgħul) |
| Blu/Abjad | Amplifier Ixgħel |
| Oranġjo | Illuminazzjoni tad-Dashboard 12V |
| Oranġjo/Abjad | Dimmer tad-Dawl tad-Dash 1V-12V |
| Oranġjo/Iswed | Dimmer Ground (Ċirkwit ta' Trigger Negattiv) |
| Kannella | Telefon Mute |
| Abjad | Speaker tax-Xellug (+) |
| Abjad/Iswed | Speaker tax-Xellug (-) |
| Griż | Kelliem ta' quddiem tal-lemin (+) |
| Griż/Iswed | Kelliem ta' quddiem il-lemin (-) |
| Aħdar | Kelliem ta' wara tax-xellug (+) |
| Aħdar/Iswed | Kelliem ta' wara tax-xellug (-) |
| Vjola | Speaker ta' wara tal-lemin (+) |
| Vjola/Iswed | Speaker ta' wara tal-lemin (-) |
Image: A table detailing the Electronics Industry Association (EIA) standard wire color codes and their corresponding functions for car stereo wiring.
5. Istruzzjonijiet ta 'installazzjoni
5.1 Preparazzjoni
- Skonnettja l-batterija: Before starting any electrical work, disconnect the negative terminal of your vehicle's battery to prevent electrical shorts.
- Review Istruzzjonijiet: Carefully read the radio removal instructions provided with your specific vehicle's service manual or the kit's instructions.
- Prepare Dash Kit: Based on your new stereo's size and your vehicle's requirements, break off any unnecessary tabs from the dash kit components.
Video: A demonstration of preparing the dash kit by removing unnecessary tabs and installing the new stereo into the kit's brackets.
5.2 Dash Disassembly and Factory Radio Removal
- Neħħi l-Panelli tat-Trim: Using appropriate panel removal tools, carefully remove the trim panels surrounding your factory stereo.
- Ħoll ir-Radju tal-Fabbrika: Locate and unscrew the mounting screws holding the factory radio in place.
- Skonnettja l-Arnessi: Gently pull out the factory radio and unplug all electrical harnesses and the antenna cable from its rear.
Video: Demonstrates the process of removing the factory stereo, including trim panel removal and disconnecting harnesses.
5.3 Konnessjonijiet tal-Wiring
- Qabbad l-Arnessi: Using splice connectors (or soldering), connect the wires from your new stereo's harness to the provided Scosche vehicle harness, matching colors according to the EIA chart (Section 4.3).
- Interface Module: Connect the Scosche interface module as per its specific instructions. This module manages steering wheel controls and other vehicle-specific features.
- Adapter tal-Antenna: Connect the antenna adapter to the vehicle's factory antenna cable and to your new stereo.
Video: Illustrates the wiring process, including connecting the aftermarket stereo harness to the vehicle harness and the interface module.
Video: Shows the connection of a Double DIN kit with radio wire for Ford/Mercury vehicles, including the wiring harness and antenna adapter.
Video: A guide on installing the radio wiring harness, demonstrating how to connect the new stereo's harness to the vehicle's wiring.
5.4 New Stereo Installation and Final Assembly
- Immuntar Stereo Ġdid: Install your new stereo into the prepared dash kit using the screws provided with your stereo.
- Qabbad mal-Vettura: Plug the assembled stereo and dash kit into the vehicle's factory harnesses.
- Stereo Sikur: Screw the new stereo and dash kit assembly into the dashboard's mounting points.
- Erġa' installa t-Trim: Carefully reattach all removed trim panels, ensuring they snap securely into place.

Image: A double DIN aftermarket radio seamlessly installed into a vehicle's dashboard using the Scosche dash kit.

Image: A floating screen aftermarket radio installed in a vehicle's dashboard, demonstrating the kit's versatility.
6. Operating and Testing
- Erġa' qabbad il-batterija: Erġa' qabbad it-terminal negattiv tal-batterija tal-vettura tiegħek.
- Funzjonijiet tat-test: Turn on your vehicle and test all functions of your new stereo, including audio, radio reception, steering wheel controls, and any other connected accessories.
Video: Shows the final steps of installation, including reconnecting the battery and testing the new radio's functions.
7 Issolvi l-problemi
- Ebda Qawwa għall-Stereo: Check battery connections, ensure the red (switched) and yellow (constant) power wires are correctly connected and receiving power. Verify all fuses.
- Ebda Ħsejjes: Confirm all speaker wires are correctly connected to the stereo and vehicle harness. Check amplifier turn-on wire if applicable.
- Kontrolli tal-Istering Wheel Mhux Jaħdmu: Ensure the interface module is correctly connected and programmed (if required by your stereo/interface model). Refer to the interface's specific instructions.
- Radio Does Not Fit: Double-check the dimensions of your aftermarket radio against the kit's specifications (96.8mm x 173mm max faceplate opening). Minor trimming of the dash kit may be required for some oversized radios.
- Kwistjonijiet Intermittenti: Recheck all wiring connections for secure and proper insulation. Ensure no wires are pinched or shorting.
8. Speċifikazzjonijiet
- Ditta: Scosche
- Numru tal-Mudell: FD0514DDCS
- Materjal: Plastik
- Dimensjonijiet tal-oġġett (L x W x H): 2.75 x 8.5 x 16.25 pulzieri
- Piż tal-oġġett: 15.7 uqija
- Tip ta' Konnettur: RCA, 3.5mm Jack, ISO (for interface)
- Kompatibilità: Select 2005-2014 Ford, Lincoln, Mercury vehicles (refer to Section 3 for details)
9. Garanzija u Appoġġ
The SCOSCHE FD0514DDCS kit is backed by Scosche's Limited Lifetime Warranty. For technical assistance or warranty claims, please contact Scosche customer support. Lifetime technical support is available to assist with any installation or product-related questions.
For further information, visit the official Scosche websit jew ikkuntattja lid-dipartiment tas-servizz tal-konsumatur tagħhom.


