Introduzzjoni
This manual provides comprehensive instructions for the assembly, operation, and maintenance of your RAIJINTEK NYX PRO Showcase Big-Tower chassis. Please read this manual thoroughly before beginning installation to ensure proper setup and safe usage. This chassis is designed for high-performance PC builds, offering extensive compatibility and a unique aesthetic.
Informazzjoni dwar is-Sigurtà
Dejjem osserva l-prekawzjonijiet tas-sigurtà li ġejjin:
- Ensure all power is disconnected from components before installation or maintenance.
- Immaniġġja l-pannelli tal-ħġieġ ittemprat b'attenzjoni biex tevita li jinkisru.
- Wear anti-static wrist straps when handling sensitive electronic components.
- Żomm partijiet żgħar u għodda 'l bogħod mit-tfal.
- Do not attempt to modify the chassis structure.
Kontenut tal-Pakkett
Verify that all components are present before proceeding with assembly:
- RAIJINTEK NYX PRO Showcase Big-Tower Chassis
- Kaxxa tal-Aċċessorji (viti, standoffs, rabtiet tal-kejbil, eċċ.)
- Manwal għall-Utent (dan id-dokument)

Image: The RAIJINTEK NYX PRO Showcase Big-Tower chassis in white, showcasing its unique open-frame design and tempered glass panels.
Speċifikazzjonijiet
| Karatteristika | Dettall |
|---|---|
| Isem tal-Mudell | NYX PRO (0R20B00183) |
| Tip ta' Każ | Big-Tower / Showcase |
| Materjal | Ħġieġ ittemprat, Azzar |
| Kulur | White (Blanc) |
| Dimensjonijiet tal-Prodott (L x W x H) | 59.5 x 26.5 x 65.8 ċm |
| Piż tal-oġġett | 14.17 kg |
| Kompatibbiltà tal-motherboard | Extended ATX, ATX, Micro-ATX, Mini-ITX |
| Metodu tat-tkessiħ | Water, Air (supports various fan sizes up to 120mm) |
| Użu Rakkomandat | Gaming PC Builds |
Setup u Installazzjoni
Follow these steps for proper assembly of your PC components within the NYX PRO chassis.
1. Tħejjija tax-Chassis
Carefully unbox the chassis and place it on a stable, flat surface. Identify the various access points and removable panels.
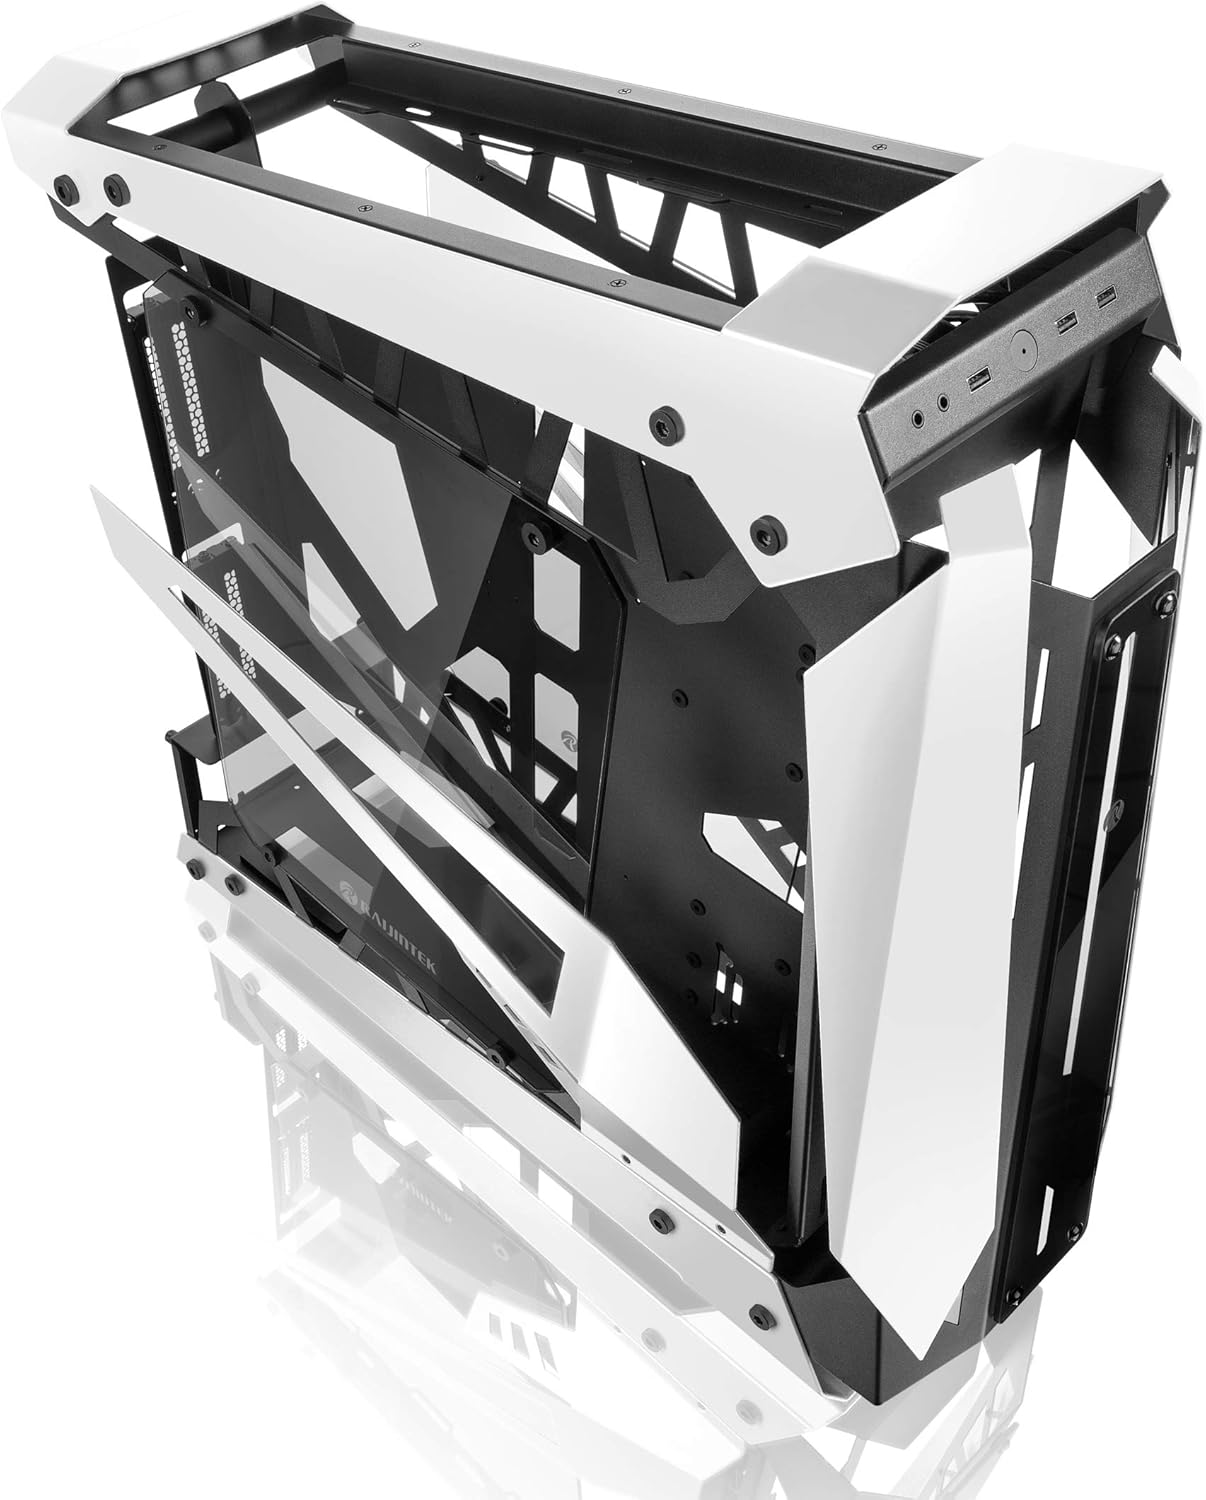
Image: The RAIJINTEK NYX PRO chassis with its top and front panels opened, revealing the internal structure and component mounting areas.
2. Installazzjoni tal-Motherboard
- Install the necessary motherboard standoffs into the motherboard tray according to your motherboard's form factor (E-ATX, ATX, Micro-ATX, Mini-ITX).
- Poġġi l-motherboard bir-reqqa fuq l-istandoffs, billi tallinja t-toqob tal-viti.
- Waħħal il-motherboard bil-viti pprovduti.

Immaġni: Interna view of the RAIJINTEK NYX PRO chassis, showing the spacious interior for motherboard and component installation.
3. Installazzjoni tal-Unità tal-Provvista tal-Enerġija (PSU)
Locate the PSU mounting area, typically at the rear or bottom of the chassis. Secure the PSU with screws.
4. Installazzjoni tad-Drajv tal-Ħażna
The NYX PRO supports multiple storage drives. Identify the 2.5" and 3.5" drive bays and secure your SSDs/HDDs using the provided mounting hardware.
5. Installazzjoni tal-Karta tal-Grafika (GPU)
Insert your graphics card into the appropriate PCIe slot on the motherboard. Secure it with the retention mechanism and screws. Note the vertical GPU mounting option for showcase builds.

Image: The RAIJINTEK NYX PRO chassis showcasing installed components with RGB lighting, highlighting the open design and visibility of internal parts.
6. Cooling System Installation (Fans/Radiators)
Install case fans or liquid cooling radiators in the designated mounting points. Ensure proper airflow direction for optimal cooling.
7. Ġestjoni tal-Kejbil
Utilize the cable routing cutouts and tie-down points to manage cables neatly. This improves airflow and aesthetics.

Immaġni: Naħa waħda view of the RAIJINTEK NYX PRO chassis, emphasizing its angular design and the large tempered glass side panel.
8. Konnessjonijiet I/O ta 'quddiem
Connect the front panel USB, audio, power, and reset headers to the corresponding pins on your motherboard.
Istruzzjonijiet Operattivi
Once all components are installed and secured, and all cables are connected:
- Connect your monitor, keyboard, mouse, and other peripherals to the appropriate ports on your motherboard and graphics card.
- Qabbad il-kejbil tal-enerġija mal-PSU u ma' sokit tal-ħajt.
- Flip the power switch on the PSU to the "ON" position.
- Press the power button on the front panel of the chassis to power on your system.

Immaġni: Close-up view of the front I/O ports on the RAIJINTEK NYX PRO chassis, including USB and audio jacks.
Manutenzjoni
Regular maintenance helps ensure the longevity and optimal performance of your PC and chassis.
- Tindif tat-Trab: Periodically clean dust filters and internal components using compressed air or a soft brush. Ensure the system is powered off and unplugged before cleaning.
- Kura tal-Ħġieġ ittemprat: Naddaf il-pannelli tal-ħġieġ ittemprat b'ċarruta ratba u mingħajr suf u b'prodott tat-tindif tal-ħġieġ li ma jobrox. Evita kimiċi ħarxa.
- Verifika tal-Ġestjoni tal-Kejbils: Occasionally check cable routing to ensure no cables are obstructing airflow or fan blades.
Issolvi l-problemi
Jekk tiltaqa' ma' problemi, ikkunsidra l-passi komuni li ġejjin għas-soluzzjoni tal-problemi:
- Is-Sistema Mhux Tixgħel:
- Iċċekkja jekk is-swiċċ tal-PSU huwiex fil-pożizzjoni "ON".
- Kun żgur li l-kejbil tal-enerġija huwa konness sew kemm mal-PSU kif ukoll mas-sokit tal-ħajt.
- Ivverifika li l-header tal-buttuna tal-enerġija tal-pannell ta' quddiem huwa konness sew mal-motherboard.
- Confirm all internal power cables (24-pin ATX, CPU, GPU) are firmly seated.
- L-ebda Output tal-Wiri:
- Ensure your monitor is connected to the graphics card (not the motherboard's integrated graphics, unless you are using integrated graphics).
- Erġa' poġġi l-karta grafika fl-islott PCIe tagħha.
- Iċċekkja l-għażla tal-input tal-monitor.
- Is-sħana żejda:
- Ensure all case fans are spinning and oriented correctly for airflow.
- Clean dust from fans and radiators.
- Iċċekkja li l-apparat li jkessaħ is-CPU jkun imwaħħal sew u jagħmel kuntatt tajjeb mas-CPU.
Garanzija u Appoġġ
For warranty information and technical support, please refer to the official Raijintek webis-sit jew ikkuntattja lid-dipartiment tas-servizz tal-konsumatur tagħhom. Żomm il-prova tax-xiri tiegħek għal talbiet ta’ garanzija.
Official Raijintek Websit: www.rajintek.com


