Introduzzjoni
This manual provides essential instructions for the installation, operation, and maintenance of your Swann Master-Series 4K HD 8 Camera 8 Channel NVR Security System, model SWNVK-876808-US. This system is designed to provide high-definition surveillance for your property, featuring 4K resolution cameras and an 8-channel Network Video Recorder (NVR) for reliable recording and monitoring.
Please read this manual thoroughly before setting up and using your security system to ensure proper functionality and to maximize its performance and longevity.
X'hemm fil-Kaxxa
Carefully unpack all components and verify that you have received all items listed below. If any items are missing or damaged, please contact Swann customer support.
- Swann 8-Channel Network Video Recorder (NVR)
- 8 x 4K HD Security Cameras
- Kejbils Ethernet (għall-konnessjoni tal-kamera)
- Power Adapters (for NVR and cameras)
- Ġurdien USB
- Viti u Plakek tal-Immuntar
- Security Warning Stickers
- Cable HDMI
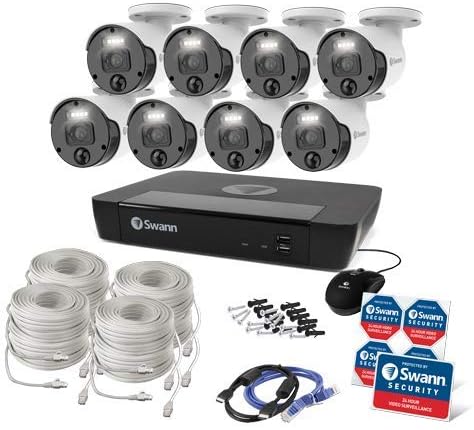
Figura 1: Complete contents of the Swann Master-Series 4K HD 8 Camera 8 Channel NVR Security System kit, including the NVR, eight cameras, various cables, a USB mouse, and security stickers.

Figura 2: The Swann Network Video Recorder (NVR) unit, which serves as the central recording and management hub for the security system.
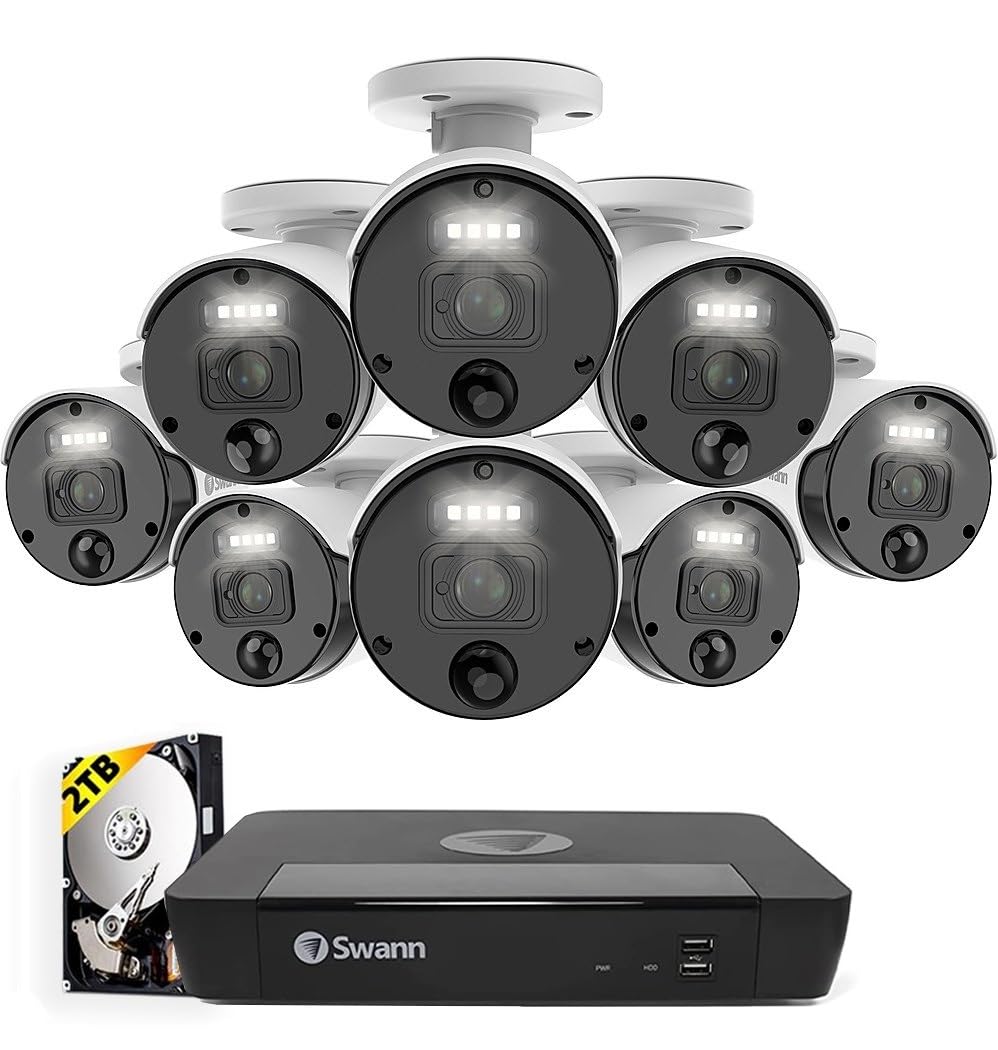
Figura 3: The Swann Master-Series NVR unit shown with eight 4K HD security cameras, illustrating the core components of the surveillance system.
Setup
1. Konnessjoni tal-NVR
- Connect to a Monitor: Use the provided HDMI cable to connect the NVR's HDMI output port to a monitor or TV.
- Qabbad il-Maws USB: Plug the USB mouse into one of the USB ports on the NVR.
- Qabbad man-Netwerk: Connect an Ethernet cable from the NVR's LAN port to your router or network switch for internet access and remote viewkapaċitajiet.
- Qabbad l-Enerġija: Plug the NVR's power adapter into the DC IN port and then into a power outlet. The NVR will power on automatically.
2. Installazzjoni tal-Kamera
- Kameras tal-Immuntar: Choose suitable locations for your cameras, ensuring they have a clear field of view and are protected from direct weather exposure. Use the provided screws and plugs to securely mount each camera.
- Qabbad il-Kameras mal-NVR: Connect each camera to an available Ethernet port on the NVR using the provided Ethernet cables. The NVR will automatically detect and power the cameras (Power over Ethernet - PoE).
3. Konfigurazzjoni Inizjali
- Wizard tal-Konfigurazzjoni għall-Ewwel Darba: Upon first power-up, the NVR will display a setup wizard on the connected monitor. Follow the on-screen prompts to configure basic settings such as language, date/time, and network settings.
- Issettja l-Password tal-Amministratur: Create a strong, unique password for the administrator account. This is crucial for system security.
- Inizjalizzazzjoni tal-Hard Drive: The wizard may prompt you to initialize the hard drive. Confirm to prepare it for recording.
It-tħaddim tas-Sistema
Live View
Wara s-setup inizjali, l-NVR se juri l-istampi live view mill-kameras kollha konnessi fuq il-monitor. Tista' taqleb bejn kamera waħda view, grilja b'ħafna kameras view, and sequence view using the NVR's interface and mouse.
Reġistrazzjoni
- Reġistrazzjoni Kontinwa: The system is typically configured for continuous recording by default.
- Reġistrazzjoni ta 'Sejbien tal-Moviment: Configure specific cameras to record only when motion is detected within their field of view. Adjust sensitivity and detection zones as needed.
- Reġistrazzjoni Skedata: Set specific times for recording, allowing for customized surveillance schedules.
Daqq
Access the playback menu on the NVR to review irreġistrat footage. You can search by date, time, and event type (e.g., motion detection). Use the timeline and controls to navigate through recordings.
Remote Access (Swann Security App)
Għal remoti viewing and management, download the official Swann Security app on your smartphone or tablet. Follow the in-app instructions to pair your NVR system. This allows you to view live feeds, play back recordings, and receive alerts from anywhere with an internet connection.
Manutenzjoni
- Tindif tal-Kamera: Naddaf il-lentijiet tal-kamera perjodikament b'drapp artab u damp drapp biex tiżgura kwalità ta' immaġni ċara. Evita prodotti tat-tindif li joborxu.
- NVR Ventilation: Ensure the NVR unit has adequate ventilation to prevent overheating. Keep vents clear of obstructions.
- Aġġornamenti tal-Firmware: Regularly check for and install firmware updates for your NVR and cameras. Updates often include security enhancements and new features. Refer to the Swann support websit għall-aħħar firmware.
- Ġestjoni tal-Hard Drive: The NVR's hard drive will automatically overwrite the oldest footage when it becomes full. Ensure your recording settings (e.g., continuous, motion detection) align with your storage needs.
- Sigurtà tal-Password: Change your administrator password periodically and use strong, unique passwords to protect your system from unauthorized access.
Issolvi l-problemi
No Video Display on Monitor
- Check if the NVR is powered on and its power adapter is securely connected.
- Verify the HDMI cable connection between the NVR and the monitor.
- Ensure the monitor is set to the correct input source (e.g., HDMI 1).
Cameras Not Showing Live View / No Recording
- Check that each camera is securely connected to the NVR's Ethernet port.
- Ensure the Ethernet cables are not damaged.
- Verify that the NVR's hard drive is initialized and has sufficient space.
- Check camera settings within the NVR interface to ensure they are enabled and configured for recording.
Kwistjonijiet ta' Aċċess Remot
- Ensure the NVR is connected to your router and has an active internet connection.
- Verify your smartphone or tablet has an active internet connection.
- Confirm that the NVR is correctly paired with the Swann Security app.
- Check your router's firewall settings; some may block NVR access.
Viżjoni bil-lejl Mhux Taħdem
- Ensure there are no obstructions directly in front of the camera lens blocking the infrared (IR) LEDs.
- Check camera settings to ensure night vision (IR) is enabled.
- Verify the camera is receiving adequate power.
Speċifikazzjonijiet
| Karatteristika | Speċifikazzjoni |
|---|---|
| Brand | Swann |
| Numru tal-Mudell | SWNVK-876808-US |
| Teknoloġija tal-Konnettività | Wired (Ethernet/PoE) |
| Riżoluzzjoni tal-Qbid tal-Vidjo | 2160p (4K Ultra HD) |
| Karatteristika Speċjali | Viżjoni bil-lejl |
| Numru ta 'Kanali | 8 |
| Sors tal-Enerġija | Corded Elettriku |
| Dimensjonijiet tal-NVR (T x W x G) | 10 x 2 x 2.7 pulzieri |
| Apparati Kompatibbli | Swann IP Cameras |
| Teknoloġija tad-Dawl Baxx | Viżjoni bil-lejl |
| Frame Rata | 15, 24, 30 fps (variable by resolution/settings) |
| Modalità ta' Reġistrazzjoni | Continuous, Event (Motion Detection), Scheduled |
| Input tal-Vidjo | Ethernet (for IP Cameras) |
| Piż tal-oġġett | 21.2 liri (pakkett totali) |
| UPC | 840236127788 |
Note: While the provided data listed 'BNC' for Video Input, this NVR system primarily uses Ethernet for IP cameras. Please refer to the product packaging or Swann's official webis-sit għall-aktar speċifikazzjonijiet preċiżi u aġġornati.
Garanzija u Appoġġ
Your Swann Master-Series 4K HD 8 Camera 8 Channel NVR Security System is covered by a manufacturer's warranty. For specific warranty terms, duration, and conditions, please refer to the warranty card included with your product or visit the official Swann websit.
For technical support, troubleshooting assistance, or to access the latest software and firmware updates, please visit the Swann support portal on their official websit. Tista' ssib ukoll informazzjoni ta' kuntatt għas-servizz tal-konsumatur hemmhekk.


