1. Introduzzjoni
This manual provides detailed instructions for the installation, operation, and maintenance of your ZEBRONICS H81 LGA 1150 Socket Motherboard. Designed for Intel Core i7/i5/i3 processors, this ATX motherboard supports DDR3 memory and features an Intel H81 Chipset. Please read this manual thoroughly before proceeding with installation to ensure proper functionality and to prevent damage.

Immaġni 1: Prinċipali view of the ZEBRONICS H81 LGA 1150 Motherboard, showcasinit-tqassim u l-komponenti tiegħu.
2. Speċifikazzjonijiet
The following table outlines the key technical specifications of the ZEBRONICS H81 Motherboard:
| Karatteristika | Deskrizzjoni |
|---|---|
| Appoġġ għall-Proċessur | Intel Core i7/i5/i3 processors (LGA 1150 Socket) |
| Chipset | Intel H81 |
| Appoġġ tal-Memorja | 2 x DDR3 dual-channel slots, 1066/1333/1600MHz, Max 32GB |
| LAN | Realtek 8105E 100/1000 Mbps |
| Awdjo | Realtek 662, 3x Audio Jacks for 6 channel HD Audio |
| Portijiet tal-Panew ta' Dahar | 1x USB Mouse/Keyboard, 1x VGA, 1x HDMI, 2x USB 3.0, 2x USB 2.0, 1x LAN, 3x Audio Jacks |
| Konnetturi Abbord | Front panel, Speaker, Front panel audio, USB 2.0, 4x SATA, 4-pin CPU fan, SYS fan, 24-pin ATX power, 4-pin ATX 12V power, Clear CMOS header |
| Slots ta 'Espansjoni | 1 x Slott PCI Express x16 |
| Fattur tal-Formola | ATX |
| Dimensjonijiet | 21.3 x 5.7 x 26.8 ċm |
| Piż | 560 g |

Image 2: Visual representation of key features including H81 Chipset, DDR3 support, LGA 1150 socket, HDMI, 5.1 Audio, 100/1000 LAN, 4 SATA ports, and PCIe slot.
3. Gwida ta' Setup
Segwi dawn il-passi għall-installazzjoni xierqa tal-motherboard tiegħek u l-komponenti tagħha:
- Preparazzjoni: Ensure your computer case is compatible with the ATX form factor. Gather necessary tools including a screwdriver, thermal paste, and anti-static wrist strap.
- Installa s-CPU: Open the CPU socket lever. Carefully align the CPU with the socket (match the golden triangle on the CPU with the triangle on the socket) and gently place it in. Close the lever to secure the CPU. Apply a thin, even layer of thermal paste to the CPU's heat spreader.
- Installa l-Cooler tas-CPU: Mount the CPU cooler according to its manufacturer's instructions, ensuring good contact with the CPU and proper fan orientation. Connect the CPU fan cable to the 4-pin CPU fan connector on the motherboard.
- Installa r-RAM: Open the clips on both ends of the DDR3 memory slots. Align the RAM modules with the slots, ensuring the notch on the module matches the key in the slot. Press down firmly on both ends until the clips snap into place.
- Immuntar tal-Motherboard: Install the I/O shield into the rear opening of your computer case. Carefully place the motherboard into the case, aligning the screw holes with the standoffs. Secure the motherboard with screws.
- Qabbad l-Enerġija: Connect the 24-pin ATX main power connector and the 4-pin ATX 12V CPU power connector from your power supply to the corresponding ports on the motherboard.
- Qabbad l-Apparati tal-Ħażna: Use SATA cables to connect your hard drives or SSDs to the SATA ports on the motherboard. Connect the power cables from your power supply to these devices.
- Qabbad il-Kejbils tal-Panel ta' Quddiem: Connect the power switch, reset switch, HDD LED, power LED, and front panel audio/USB cables from your case to the respective headers on the motherboard. Refer to the motherboard diagram for correct pin assignments.
- Installa l-Kards tal-Espansjoni (Mhux obbligatorju): If installing a graphics card or other PCI Express cards, insert them into the appropriate slots and secure them with a screw.
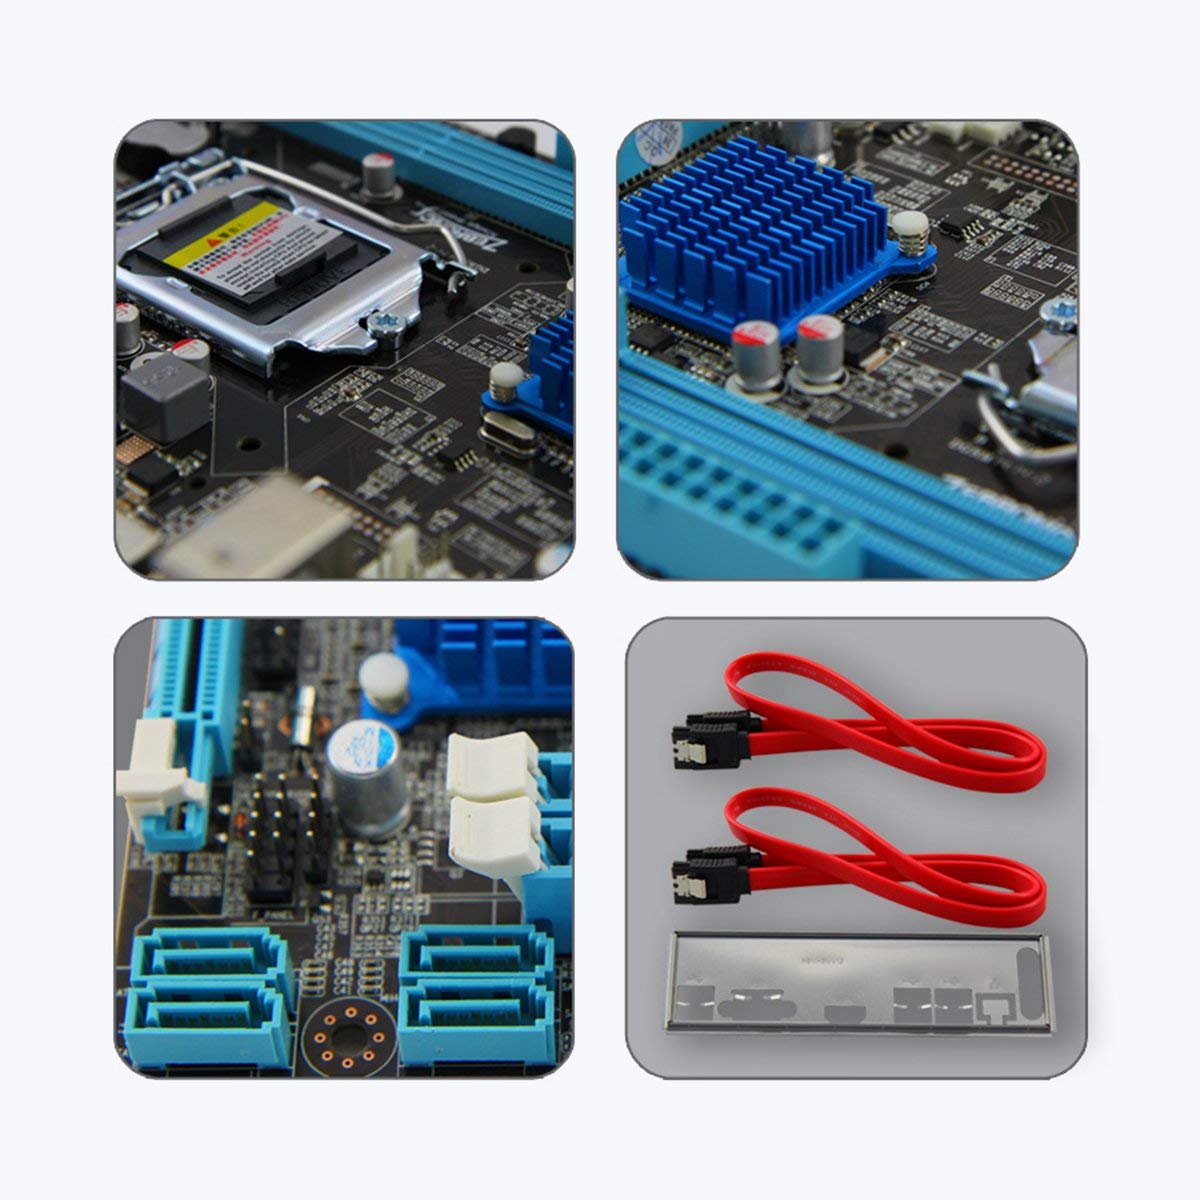
Immaġni 3: Mill-qrib views of motherboard components such as the CPU socket, chipset heatsink, SATA ports, and included accessories like SATA cables and the I/O shield.
4. Istruzzjonijiet Operattivi
Once all components are installed and connected, you can power on your system:
- Qawwa Inizjali Mixgħula: After ensuring all connections are secure, connect your monitor, keyboard, and mouse. Plug in the power cord and press the power button on your computer case.
- Konfigurazzjoni tal-BIOS/UEFI: During startup, repeatedly press the designated key (usually DEL or F2) to enter the BIOS/UEFI setup utility. Here you can configure boot order, system time, and other advanced settings. Save changes and exit to continue booting.
- Installazzjoni tas-Sistema Operattiva: Daħħal il-midja tal-installazzjoni tas-sistema operattiva tiegħek (USB drive jew DVD) u segwi l-istruzzjonijiet fuq l-iskrin biex tinstalla l-OS.
- Installazzjoni tas-sewwieq: After OS installation, install the necessary drivers for your motherboard (chipset, LAN, audio, graphics) from the included driver CD or the ZEBRONICS websit.
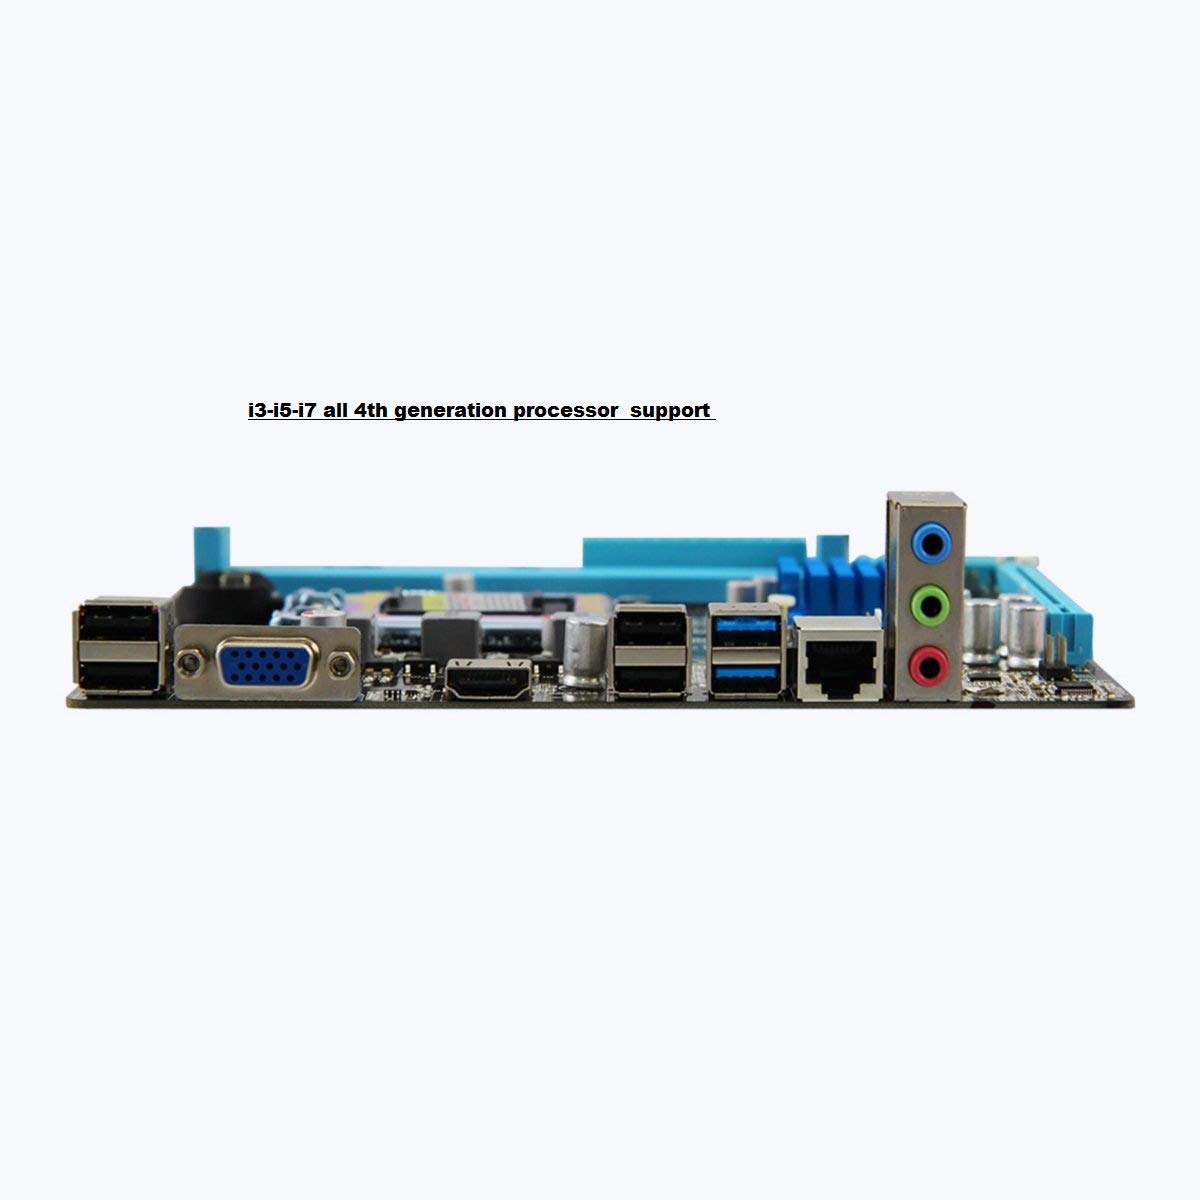
Image 4: Rear I/O panel of the ZEBRONICS H81 Motherboard, showing ports for USB, VGA, HDMI, LAN, and audio.
5. Manutenzjoni
Manutenzjoni regolari tgħin biex tiżgura l-lonġevità u l-prestazzjoni ottimali tal-motherboard tiegħek:
- Tneħħija tat-Trab: Naddaf it-trab minn ġewwa l-kaxxa tal-kompjuter tiegħek perjodikament, speċjalment mill-heatsinks u l-fannijiet, bl-użu ta' arja kkompressata. Kun żgur li s-sistema tkun mitfija u skonnettjata qabel ma tnaddafha.
- Aġġornamenti tas-sewwieq: Keep your motherboard drivers (chipset, LAN, audio) updated to the latest versions available from the ZEBRONICS official website to ensure compatibility and performance.
- Aġġornamenti tal-BIOS/UEFI: Only update the BIOS/UEFI if necessary, following the instructions provided by ZEBRONICS carefully. Incorrect BIOS updates can render your motherboard inoperable.
- Ġestjoni tal-Kejbil: Kun żgur li l-kejbils interni huma mqiegħda pulit biex itejbu l-fluss tal-arja u jipprevjenu l-interferenza.
6 Issolvi l-problemi
Jekk tiltaqa' ma' problemi bil-motherboard tiegħek, irreferi għall-passi komuni li ġejjin għas-soluzzjoni tal-problemi:
- Ebda Qawwa/Ebda Boot:
- Check all power connections (24-pin ATX, 4-pin ATX 12V, CPU fan).
- Ensure the power supply is switched on and functioning.
- Ivverifika l-konnessjoni tas-swiċċ tal-enerġija tal-pannell ta' quddiem.
- Try clearing the CMOS (refer to the Clear CMOS header on the motherboard).
- Ebda Display:
- Ensure the monitor is connected to the correct video output (VGA or HDMI on the motherboard, or dedicated graphics card).
- Reseat the RAM modules. Try booting with only one RAM module.
- If using a dedicated graphics card, ensure it is properly seated and powered.
- Instabbiltà/Ħsarat tas-Sistema:
- Check for overheating. Ensure CPU cooler is properly installed and fans are spinning.
- Mexxi għodod dijanjostiċi tal-memorja biex tivverifika l-integrità tar-RAM.
- Update motherboard drivers and BIOS/UEFI.
- Peripheral Issues (USB, LAN, Audio):
- Ensure drivers for these components are installed and up to date.
- Check physical connections of cables and devices.
- Test with different peripherals to isolate the issue.
7. Garanzija u Appoġġ
Your ZEBRONICS H81 Motherboard comes with a garanzija ta 'sena provided by CORE COMPUTERS. Please retain your proof of purchase for warranty claims.
For technical support, driver downloads, or further assistance, please visit the official ZEBRONICS support websit jew ikkuntattja lis-servizz tal-konsumatur tagħhom.


