1. Introduzzjoni
This manual provides detailed instructions for the setup, operation, and maintenance of your visiPower H885 8MP Trail Camera. Please read this manual thoroughly before using the camera to ensure optimal performance and longevity.
The visiPower H885 is a high-performance trail camera designed for capturing wildlife images and videos. It features an 8-megapixel sensor, 2.4-inch TFT LCD, infrared flash for night vision, and three PIR sensors for motion detection. Its waterproof design ensures reliable operation in various outdoor conditions.
2. Kontenut tal-Pakkett
Ivverifika li l-oġġetti kollha huma preżenti fil-pakkett tiegħek:
- visiPower H885 Trail Camera
- Cable USB
- AV Cable
- Ċinga tal-Immuntar
- Bracket u Viti għall-Immuntar mal-Ħajt
- Manwal għall-Utent (dan id-dokument)

Image: Contents of the visiPower H885 Trail Camera package.
3. Camera Matulview

Immaġni: Quddiem view of the visiPower H885 Trail Camera.

Immaġni: Ġenb view of the visiPower H885 Trail Camera.
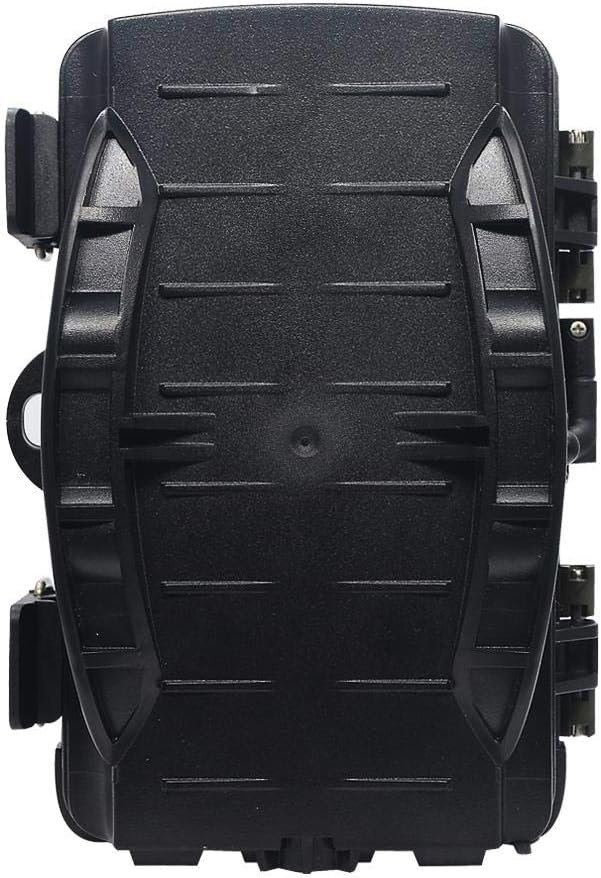
Immaġni: Wara view of the visiPower H885 Trail Camera.
4. Setup
4.1. Installazzjoni tal-batterija
- Open the camera's housing by releasing the side latches.
- Sib il-kompartiment tal-batterija.
- Daħħal 8 batteriji AA, filwaqt li tiżgura polarità korretta (+/-).
- Agħlaq il-kompartiment tal-batterija sew.
Nota: The camera also supports an external 6V/1.5A power source and is compatible with solar batteries (sold separately).
4.2. Installazzjoni tal-Kard SD
- With the camera powered off, locate the SD card slot.
- Insert a TF (Micro SD) card (up to 32GB) into the slot until it clicks into place.
- To remove, press the card gently until it springs out.
Importanti: Format the SD card using the camera's menu settings before first use to ensure compatibility.
4.3. Immuntar tal-Kamera
The camera can be mounted using the included strap or wall mount bracket.
- Strap Mounting: Thread the mounting strap through the slots on the back of the camera and secure it around a tree or pole.
- Muntaġġ tal-ħajt: Use the provided screws and wall anchors to attach the bracket to a flat surface. Then, attach the camera to the bracket.
Position the camera to cover the desired area, ensuring no obstructions block the PIR sensors or lens.
5. It-tħaddim tal-Kamera
5.1. Tixgħil / Mitfi
Locate the power switch inside the camera housing. Switch it to the "ON" position to power on the camera. Switch to "OFF" to power off.
5.2. Modi Operattivi
The camera typically operates in three modes:
- MITFI: Il-kamera hija mitfija.
- SETUP: Allows access to the menu for configuring settings, viewing images/videos, and manually taking photos/videos.
- ON (Active): The camera is armed and will capture images or videos based on motion detection and configured settings. The LCD screen will turn off after a few seconds to conserve power.
5.3. Settings tal-Menu
In SETUP mode, use the navigation buttons to access and adjust settings on the 2.4-inch TFT LCD. Common settings include:
- Modalità: Photo, Video, or Photo + Video.
- Riżoluzzjoni tar-Ritratti: 16MP, 12MP, 8MP, 5MP.
- Riżoluzzjoni tal-vidjo: 1080p (25fps), 720p (30fps).
- Sensittività PIR: High, Medium, Low.
- Intervall ta' Trigger: Time delay between detections.
- Time Lapse: For capturing images at set intervals.
- Data/Ħin: Issettja d-data u l-ħin kurrenti.
- Format SD Card: Ħassar id-dejta kollha fuq il-karta SD.
- Qbid bla tarf: On/Off (Loop recording).

Image: Camera displaying captured content on its LCD screen.
5.4. Qbid ta' Stampi u Vidjows
Once settings are configured, switch the camera to the "ON" position. The camera will enter active mode and begin monitoring for motion. When motion is detected by the PIR sensors, the camera will trigger and capture photos or videos according to your settings.

Image: Illustration of the camera's 20-meter detection range.
6. Manutenzjoni
- Tindif: Use a soft, dry cloth to clean the camera lens and PIR sensors. Avoid abrasive materials or harsh chemicals.
- Sostituzzjoni tal-batterija: Ibdel il-batteriji kollha meta jidher l-indikatur ta’ batterija baxxa jew meta l-prestazzjoni tiddegrada.
- Ġestjoni tal-Karta SD: Regularly check the SD card capacity and transfer important files to a computer. Format the card periodically.
- Ħażna: Meta ma tkunx qed tuża l-kamera għal perjodi twal, neħħi l-batteriji u aħżenha f'post frisk u niexef.
7 Issolvi l-problemi
- Il-kamera ma tixgħelx:
- Kun żgur li l-batteriji huma mdaħħla b'mod korrett bil-polarità xierqa.
- Check if batteries are fully charged or replace them.
- Verify the power switch is in the "ON" or "SETUP" position.
- Camera not capturing images/videos:
- Check if the SD card is inserted correctly and has sufficient free space.
- Ifformattja l-karta SD.
- Adjust PIR sensitivity settings.
- Ensure the camera is in "ON" mode, not "SETUP".
- Kwalità fqira tal-immaġni/vidjow:
- Naddaf il-lenti tal-kamera.
- Check resolution settings in the menu.
- Ensure adequate lighting for daytime shots; for night shots, ensure objects are within IR flash range.
- False triggers:
- Reduce PIR sensitivity.
- Avoid placing the camera near heat sources or moving branches that could trigger the sensor.
8. Speċifikazzjonijiet
| Karatteristika | Dettall |
|---|---|
| Riżoluzzjoni tal-Immaġni Ftit | 8MP (Effective), 16MP/12MP/5MP selectable |
| Riżoluzzjoni tal-vidjo | 1080p @ 25fps, 720p @ 30fps |
| Wiri | TFT LCD ta '2.4 pulzieri |
| Sensuri PIR | 3 PIR sensors (Main PIR 60°, Side PIRs for 120° total sensing angle) |
| Distanza tal-Flash IR | Sa 20 metri (65 pied) |
| Trigger Veloċità | 0.6 seconds (Pre-boot 0.2 seconds) |
| Reżistenza għall-Ilma | IP56 Waterproof |
| Memorja | Supports TF (Micro SD) card up to 32GB |
| Sors tal-Enerġija | 8x AA batteries; External 6V/1.5A DC; Supports solar battery (optional) |
| Ħin ta' Standby | Sa 12 xhur |
| Awdjo | Mikrofonu u kelliem inkorporati |
| Angolu tal-Lenti | 108 grad |
| Format tal-Qbid tal-Vidjo | MPEG-4 |
| UPC | 614024391237 |
9. Garanzija u Appoġġ
For warranty information and technical support, please refer to the documentation provided at the time of purchase or contact visiPower customer service. Keep your purchase receipt as proof of purchase.
For further assistance, visit the official visiPower webis-sit jew ikkuntattja lit-tim ta' appoġġ tagħhom direttament.

