Introduzzjoni
This manual provides detailed instructions for the installation, operation, and maintenance of your GIGABYTE GA-A320M-H AMD AM4 motherboard. This motherboard is designed to support AMD Ryzen 3000, 2000, and 1000 series processors, as well as Athlon processors with Radeon Vega Graphics and 7th Gen A-series/Athlon X4 processors. It features a Hybrid Digital VRM Solution, NVMe PCIe 3.0 x4 M.2 slot, and Realtek GbE LAN. Please read this manual thoroughly before proceeding with installation to ensure proper setup and functionality.

Figura 1: GIGABYTE GA-A320M-H Motherboard and its retail packaging. This image provides an overview of the product as it appears when unboxed.
Karatteristiċi Ewlenin
- Appoġġ għall-proċessur: Compatible with AMD 3rd Gen Ryzen, 2nd Gen Ryzen, 1st Gen Ryzen, 2nd Gen Ryzen with Radeon Vega Graphics, 1st Gen Ryzen with Radeon Vega Graphics, Athlon with Radeon Vega Graphics, 7th Gen A-series, and Athlon X4 Processors.
- Memorja: Features Dual Channel Non-ECC Unbuffered DDR4 memory support with 2 DIMM slots, supporting up to 32GB RAM.
- Kunsinna tal-Enerġija: Equipped with a Hybrid Digital VRM Solution utilizing Low RDS(on) MOSFETs for stable power delivery.
- Ħażna: Includes an Ultra-Fast NVMe PCIe 3.0 x4 & SATA Mode M.2 slot for high-speed storage devices.
- Tkessiħ: Smart Fan 5 technology with 5 temperature sensors and 2 hybrid fan headers for optimized cooling control.
- Konnettività: Realtek GbE LAN with cFosSpeed internet accelerator software for improved network performance.
Setup u Installazzjoni
Before beginning installation, ensure your system is powered off and disconnected from the mains. Handle the motherboard by its edges to avoid static discharge.
1. Motherboard Overview

Figura 2: Minn fuq għal isfel view of the GIGABYTE GA-A320M-H motherboard, highlighting the CPU socket, DIMM slots, PCIe slots, and M.2 slot. This perspective is useful for identifying component locations during installation.
Familiarize yourself with the layout of the motherboard, including the CPU socket (AM4), DDR4 DIMM slots, PCIe expansion slots, M.2 slot, SATA ports, and various headers for front panel connections.
2. Installazzjoni tas-CPU
- Sib is-sokit tas-CPU AM4 fuq il-motherboard.
- Erfa' l-lieva tat-tagħbija fuq il-ġenb tas-sokit.
- Carefully align the triangular mark on your AMD processor with the corresponding mark on the socket.
- Gently place the CPU into the socket without forcing it. It should sit flush.
- Baxxi l-lieva tat-tagħbija biex twaħħal is-CPU f'postha.
3. Installazzjoni tas-CPU Cooler
Follow the instructions provided with your specific CPU cooler. Ensure thermal paste is applied correctly between the CPU and the cooler's base. Connect the CPU fan cable to the "CPU_FAN" header on the motherboard.
4. Installazzjoni tar-RAM (Memorja)
- Iftaħ il-klipps fuq iż-żewġt itruf tas-slots tad-DDR4 DIMM.
- Allinja l-islott fuq il-modulu tal-memorja DDR4 maċ-ċavetta fl-islott tad-DIMM.
- Agħfas sew 'l isfel fuq iż-żewġt itruf tal-modulu tal-memorja sakemm il-klipps jidħlu f'posthom.
- For dual-channel operation, refer to the motherboard manual for recommended slot population (typically slots 1 and 2, or 2 and 4).
5. Installazzjoni tal-SSD M.2
- Sib l-islot M.2 fuq il-motherboard.
- Neħħi l-kamin M.2 u l-istandoff mill-motherboard.
- Daħħal l-M.2 SSD fl-islott f'angolu ta' 30 grad.
- Gently push the SSD down and secure it with the screw and standoff.
6. Graphics Card (PCIe) Installation
- Open the retention clip on the PCIe x16 slot.
- Align your graphics card with the slot and press down firmly until it is fully seated and the retention clip snaps shut.
- Secure the graphics card to your PC case with a screw.
- Qabbad kwalunkwe kejbil tal-enerġija PCIe meħtieġ mill-provvista tal-enerġija tiegħek mal-karta grafika.
7. Konnessjonijiet tal-Enerġija
- Qabbad il-konnettur ewlieni tal-enerġija ATX ta' 24 pin mill-provvista tal-enerġija tiegħek mal-header korrispondenti fuq il-motherboard.
- Connect the 8-pin (or 4-pin) ATX 12V CPU power connector to the header near the CPU socket.
8. Il-Pannell ta' Quddiem u l-Konnessjonijiet tal-I/O

Figura 3: Rear I/O panel of the GIGABYTE GA-A320M-H motherboard, showing various ports including USB, LAN, audio, HDMI, and DVI. This panel is where external devices connect.
Connect the front panel cables from your PC case (Power Switch, Reset Switch, HDD LED, Power LED) to the corresponding headers on the motherboard. Also connect USB 2.0/3.0 headers and audio headers. Refer to the detailed pinout diagram in the full GIGABYTE manual for precise connections.
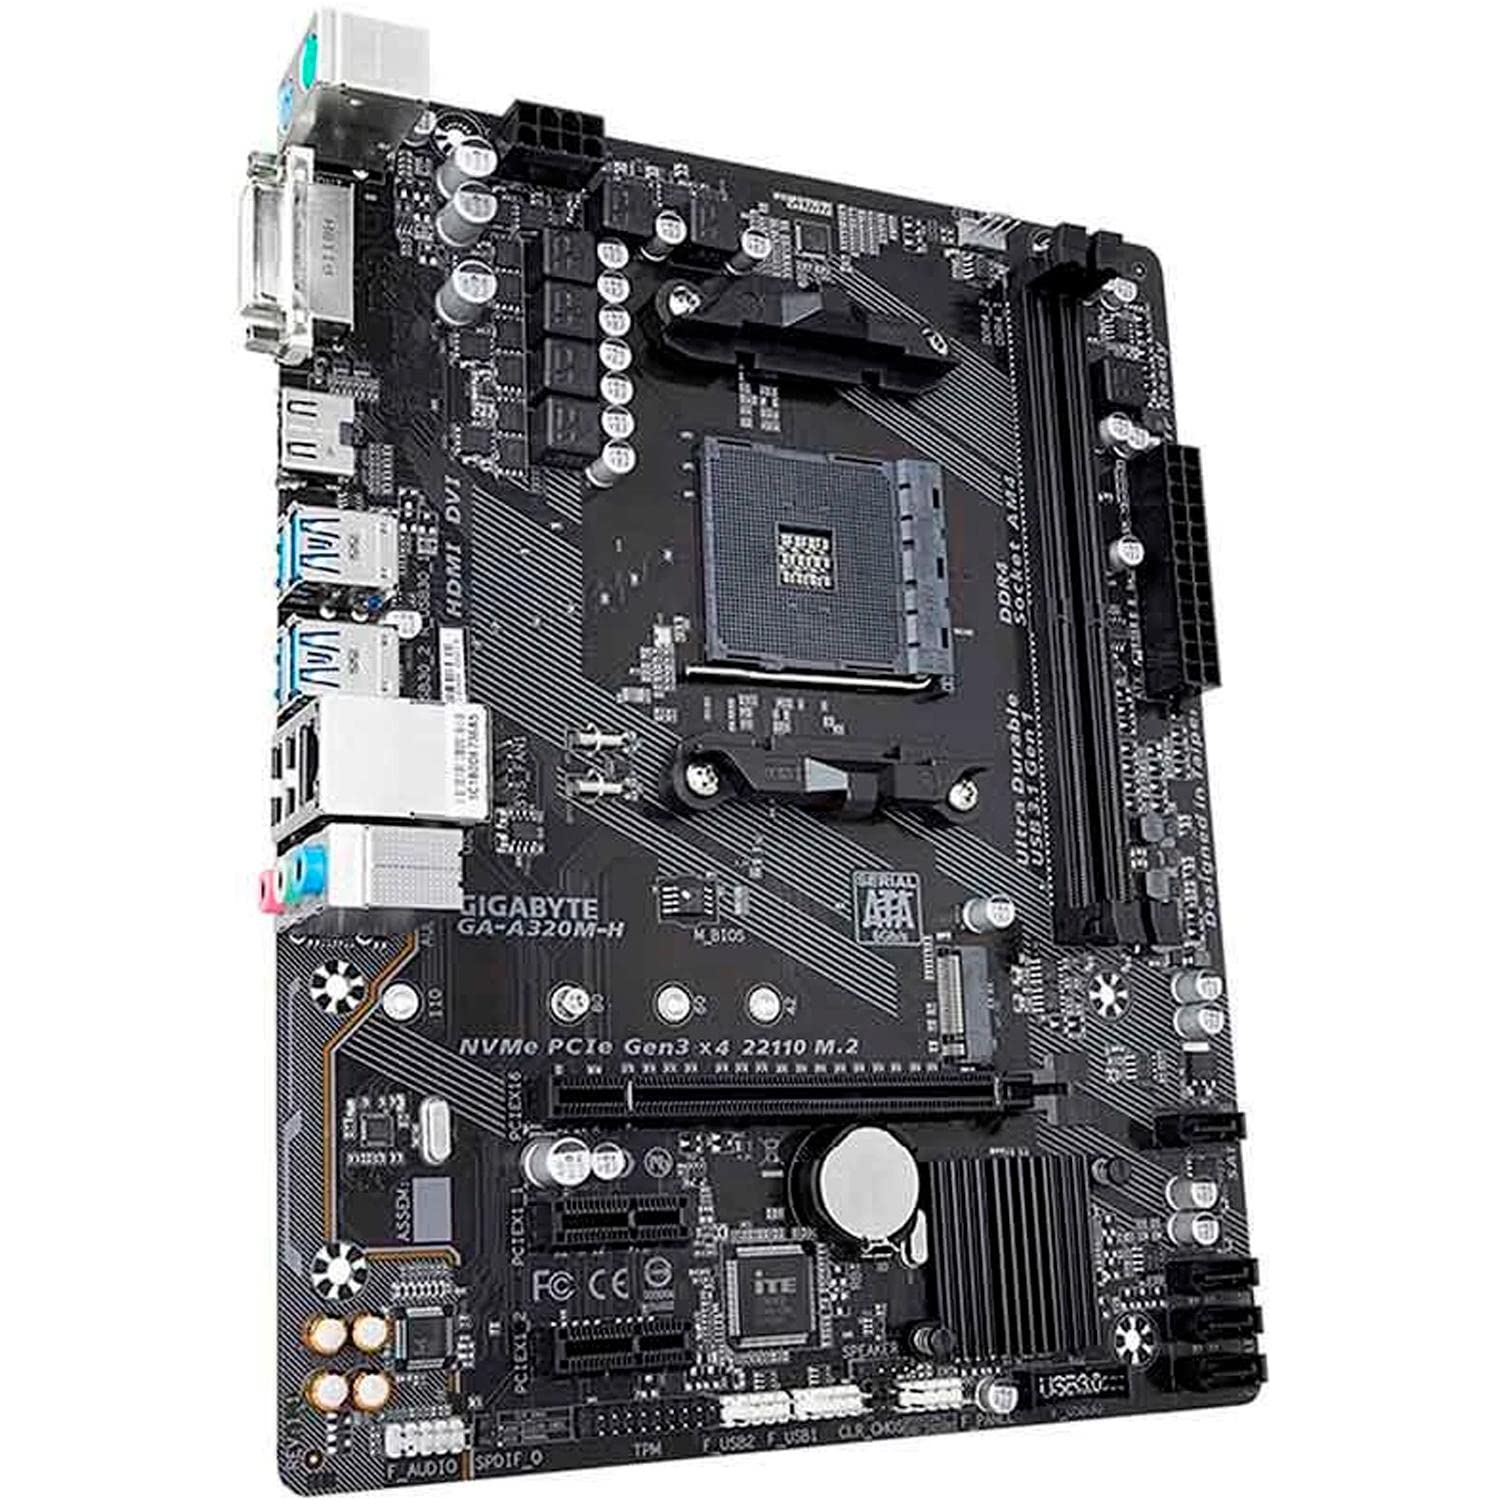
Figura 4: Angolat view of the GIGABYTE GA-A320M-H motherboard, showcasing the various ports and connectors, including the M.2 slot and rear I/O. This view helps in visualizing component placement.
Istruzzjonijiet Operattivi
1. L-Ibbutjar Inizjali u s-Setup tal-BIOS/UEFI
- Wara li l-komponenti kollha jkunu installati u konnessi, ixgħel is-sistema tiegħek.
- Agħfas il- DEL Agħfas iċ-ċavetta ripetutament waqt l-istartjar biex tidħol fl-utilità tas-setup tal-BIOS/UEFI.
- Configure boot order, enable XMP for memory (if applicable), and set other system preferences. Save changes and exit.
2. Installazzjoni tas-Sistema Operattiva u s-Sewwieq
- Daħħal il-midja tal-installazzjoni tas-sistema operattiva tiegħek (USB drive jew DVD).
- Segwi l-istruzzjonijiet fuq l-iskrin biex tinstalla s-sistema operattiva tiegħek.
- Once the OS is installed, install the latest drivers for your motherboard chipset, LAN, audio, and any other integrated components from the GIGABYTE webis-sit jew is-CD/USB tas-sewwieq ipprovdut.
Manutenzjoni
- Tneħħija tat-Trab: Regularly clean your PC case and motherboard components using compressed air to prevent dust buildup, which can affect cooling and performance. Ensure the system is powered off and unplugged before cleaning.
- Aġġornamenti tal-BIOS/UEFI: Iċċekkja l-GIGABYTE perjodikament website for BIOS/UEFI updates. Updates can improve system stability, compatibility, and performance. Follow the instructions provided by GIGABYTE carefully when performing a BIOS update.
Issolvi l-problemi
Jekk tiltaqa' ma' problemi, ikkunsidra l-passi komuni li ġejjin għas-soluzzjoni tal-problemi:
- Ebda Display:
- Kun żgur li l-kejbils tal-monitor huma konnessi sew mal-karta grafika jew mal-motherboard (jekk qed tuża grafika integrata).
- Ivverifika li l-karta grafika tkun imdaħħla sew fl-islott tal-PCIe tagħha u li kwalunkwe kejbil tal-enerġija meħtieġ ikun imqabbad.
- Ipprova erġa' poġġi l-moduli tar-RAM f'posthom.
- System Won't Boot:
- Iċċekkja l-konnessjonijiet kollha tal-enerġija (24-pin ATX, 8-pin CPU, enerġija PCIe).
- Kun żgur li s-CPU u r-RAM huma installati b'mod korrett.
- CMOS ċar (irreferi għall-manwal tal-motherboard għall-post tal-jumper jew il-metodu tat-tneħħija tal-batterija).
- Periferali Mhux Rilevat:
- Verify the device is properly connected.
- Install or update relevant drivers.
- Check BIOS/UEFI settings to ensure the port or device is enabled.
- Instabbiltà/Ħsarat tas-Sistema:
- Kun żgur li s-sewwieqa kollha huma aġġornati.
- Iċċekkja t-temperaturi tas-CPU u l-GPU.
- Mexxi għodod dijanjostiċi tal-memorja biex tiċċekkja għal żbalji fir-RAM.
- Consider updating the BIOS/UEFI.
Speċifikazzjonijiet
| Karatteristika | Dettall |
|---|---|
| Brand | GIGABYTE |
| Mudell | GA-A320M-H |
| Socket tas-CPU | Sokit AM4 |
| Proċessuri Kompatibbli | AMD 1st, 2nd, 3rd Generation Ryzen, AMD A-Series, AMD Athlon |
| Chipset | AMD A320 |
| Teknoloġija tal-Memorja RAM | DDR4 |
| Slots tal-Memorja | 2 x DDR4 DIMM slots |
| Kapaċità Massima tar-RAM | 32 GB |
| Interface tal-Kard Grafika | PCI Express |
| Interface tal-Ħażna | NVMe PCIe 3.0 x4 M.2, SATA 6Gb/s |
| LAN | Realtek GbE LAN |
| Portijiet USB | Total 4 (Rear I/O, plus internal headers) |
| Dimensjonijiet tal-Prodott | 24.4 x 19.5 x 0.5 ċm |
| Piż tal-oġġett | 100 g |
Appoġġ u Garanzija
Appoġġ Tekniku
For further technical assistance, driver downloads, or BIOS updates, please visit the official GIGABYTE support websit: Appoġġ GIGABYTE
Garanzija tal-Prodott
This GIGABYTE motherboard is covered by a manufacturer's warranty. Please refer to the warranty card included with your product or visit the GIGABYTE websit għal termini u kundizzjonijiet dettaljati tal-garanzija speċifiċi għar-reġjun tiegħek. Żomm il-prova tax-xiri tiegħek għal talbiet ta' garanzija.


