1. Introduzzjoni
Grazzi tax-xiriasing the WulaWindy Digital Mirror Surface Alarm Clock. This device features a large LED display, dual USB charging ports, adjustable brightness, and a snooze function. Please read this manual carefully to ensure proper use and maintenance of your alarm clock.
2. Informazzjoni dwar is-Sigurtà
- Tesponix l-apparat għal temperaturi estremi, dawl tax-xemx dirett, jew umdità għolja.
- Evita li twaqqa’ jew tissuġġetta l-apparat għal impatti qawwija.
- Uża biss l-adapter tal-enerġija speċifikat.
- Żomm fejn ma jintlaħaqx mit-tfal.
- Tippruvax tiżżarma jew issewwi l-apparat int stess. Ikkuntattja persunal tas-servizz kwalifikat.
3. Kontenut tal-Pakkett
- WulaWindy Digital Mirror Surface Alarm Clock
- Adapter tal-Enerġija
- Manwal għall-Utent
4. Prodott Aktarview
Familiarize yourself with the alarm clock's components and controls.

Immaġni: Fuqview of the alarm clock, highlighting the SNOOZE, MODE, UP, DOWN buttons on top, the dimmer control on the side, and the input port, USB ports, and battery compartment on the back. Dimensions are also indicated.
- Wiri ta' Quddiem: Large LED time display with mirror surface.
- Buttuni ta' Fuq: SNOOZE, MODE, UP, DOWN.
- In-naħa: Dimmer Control knob.
- Dahar: Power Input port, Dual USB charging ports, Battery Compartment.
5. Setup
5.1 Konnessjoni tal-Enerġija
Connect the provided power adapter to the 'Input port' on the back of the alarm clock and plug it into a standard wall outlet. The display will light up.
5.2 Battery Installation (Optional Backup)
For time memory backup during power outages, install 3 AAA batteries (not included) into the 'Battery Jar' compartment on the back of the clock. The clock will not operate solely on battery power; batteries are for backup only.
6. Istruzzjonijiet Operattivi
6.1 Issettjar tal-Ħin
- Press and hold the 'MODE' button until the hour digits begin to flash.
- Use the 'UP' and 'DOWN' buttons to adjust the hour.
- Press 'MODE' again to switch to minute adjustment.
- Use the 'UP' and 'DOWN' buttons to adjust the minutes.
- Press 'MODE' once more to confirm and exit time setting.
6.2 Issettjar tal-Allarm
- Press the 'MODE' button once to enter alarm setting mode. The 'AL' indicator will appear.
- Press and hold 'MODE' until the alarm hour digits flash.
- Use the 'UP' and 'DOWN' buttons to set the desired alarm hour.
- Press 'MODE' again to switch to alarm minute adjustment.
- Use the 'UP' and 'DOWN' buttons to set the desired alarm minutes.
- Press 'MODE' to confirm. The 'AL' indicator will remain lit, indicating the alarm is active.
- To deactivate the alarm, press the 'MODE' button until the 'AL' indicator disappears.

Image: The WulaWindy Digital Mirror Surface Alarm Clock showing the time, demonstrating its clear display and mirror functionality.
6.3 Funzjoni Snooze
When the alarm sounds, press the 'SNOOZE' button to temporarily silence the alarm. The alarm will sound again after a set snooze interval (typically 5-10 minutes). To turn off the alarm completely, press any other button.
6.4 Display Brightness (Dimmer)
Rotate the 'DIMMER CONTROL' knob located on the side of the clock to adjust the display brightness. This allows you to customize the light intensity to your preference, preventing it from being too bright at night.
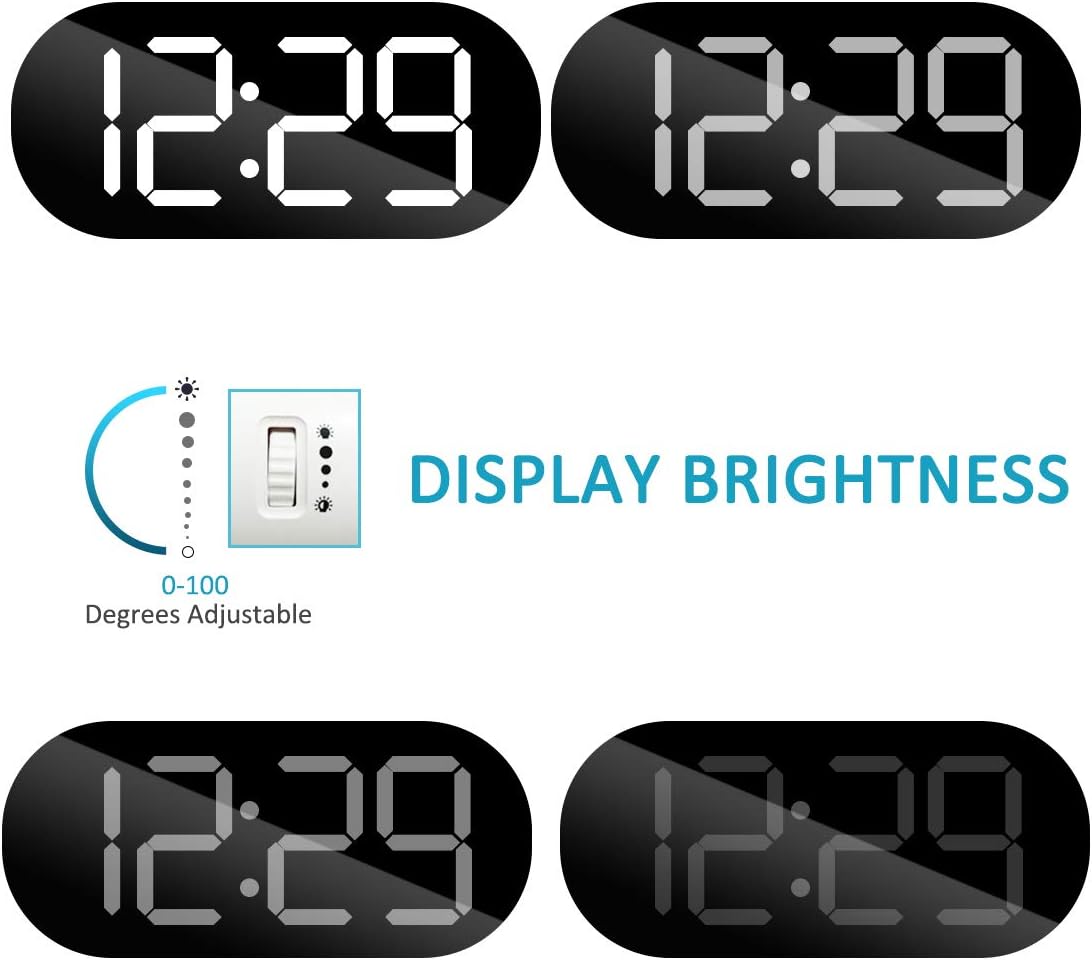
Image: Visual representation of the dimmer function, illustrating the adjustable brightness levels from 0 to 100 degrees.
6.5 Dual USB Charging Ports
The alarm clock features two USB charging ports on the back. You can use these ports to charge your mobile phones or other smart devices simultaneously. Note: USB charging cables are not included.

Image: The alarm clock with two smartphones plugged into its dual USB charging ports, demonstrating its charging capability.
7. Manutenzjoni
- Clean the mirror surface and body with a soft, dry cloth.
- Tużax tindif jew solventi li joborxu.
- Kun żgur li l-apparat ikun splaggjat qabel it-tindif.
8 Issolvi l-problemi
- Clock not displaying: Ensure the power adapter is securely connected to both the clock and a working power outlet. Check if backup batteries are installed correctly.
- L-allarm ma ħossx: Verify that the alarm is set and the 'AL' indicator is visible on the display. Ensure the volume is not set to minimum (if applicable).
- USB ports not charging: Confirm the clock is powered on. Check if the USB cables are properly connected to both the device and the clock. Ensure the device being charged is compatible.
- Wiri qawwi wisq/mċajpar: Adjust the 'DIMMER CONTROL' knob on the side of the clock.
9. Speċifikazzjonijiet
| Brand | WulaWindy |
| Mudell | B07RNLNTRD |
| Kulur | Abjad |
| Tip ta 'Wiri | LED diġitali |
| Karatteristiċi Speċjali | Adjustable Brightness, Alarm, Snooze, Dual USB Charger |
| Dimensjonijiet tal-Prodott | 6.7"W x 6.89"Għ |
| Sors tal-Enerġija | Corded Electric (Battery Powered for backup) |
| Rekwiżit tal-batterija | 3 batteriji AAA (mhux inklużi) |
| Materjal | Acrylonitrile Butadiene Styrene |
10. Garanzija u Appoġġ
For warranty information or technical support, please refer to the product packaging or contact WulaWindy customer service directly. Keep your purchase receipt for proof of purchase.