1. Introduzzjoni
Welcome to the instruction manual for your new SWIFT SW350T Trinocular Compound Lab Microscope. This powerful and versatile instrument is designed for detailed observation of specimen slides, making it ideal for clinical instruction, scientific research, and educational purposes. With its advanced features, including a Siedentopf head, wide-field eyepieces, and camera compatibility, the SW350T provides exceptional clarity and performance. Please read this manual thoroughly to ensure proper setup, operation, and maintenance of your microscope.

Figure 1: The SWIFT SW350T Trinocular Compound Lab Microscope, showcasing its robust design and key optical components.
2. Prodott Aktarview u Komponenti
Familiarize yourself with the various parts of your SWIFT SW350T microscope. Understanding each component's function is crucial for effective operation.

Figure 2: Detailed diagram illustrating the main components of the SWIFT SW350T microscope.
Komponenti Ewlenin:
- Siedentopf Head: Fully rotatable for shared viewing, equipped with trinocular port for camera attachments.
- Eyepieces: Interchangeable wide-field 10X and 25X glass eyepieces, ergonomically tilted at 30 degrees.
- Revolving Nosepiece: Holds 4 DIN Achromatic objective lenses (4X, 10X, 40X, 100X Oil).
- Lentijiet Għan: Provide magnification levels of 40X, 100X, 250X, 400X, 1000X, 2500X.
- S mekkanikutage: Double-layered with a secure slide holder for precise specimen positioning.
- Kondensatur Abbe: Illuminates slide specimens from below, with adjustable brightness.
- Coarse and Fine Adjustment Knobs: For precise focusing.
- Sors tad-Dawl LED: Brilliant and adjustable illumination.
- Port tal-Kamera: Dedicated port for connecting microscope cameras (not included).
3. Istruzzjonijiet ta' Setup
Follow these steps to set up your microscope for the first time.
- Spakkjar: Carefully remove all components from the packaging. Retain the original packaging for future storage or transport.
- Pjazzament: Place the microscope on a stable, level surface away from direct sunlight, excessive dust, and vibrations.
- Head Installation: Gently attach the Siedentopf head to the microscope body. Secure it with the set screw, ensuring it is firmly in place but not overtightened.
- Eyepiece Insertion: Insert the desired wide-field eyepieces (10X or 25X) into the eyepiece tubes on the Siedentopf head.
- Objective Lens Installation: Ensure the objective lenses are securely screwed into the revolving nosepiece. The 4X objective should be aligned with the light path for initial setup.
- Konnessjoni tal-Enerġija: Connect the power cord to the microscope's power input and then to a standard electrical outlet (110 Volts AC).

Figure 3: The SWIFT SW350T microscope along with its power cord, additional eyepieces, and other accessories, ready for setup.
4. Operating Your Microscope
4.1 Powering On and Illumination
Locate the power switch on the base of the microscope and turn it on. Adjust the brightness of the LED illumination using the dimming handwheel to achieve optimal viewing conditions for your specimen.
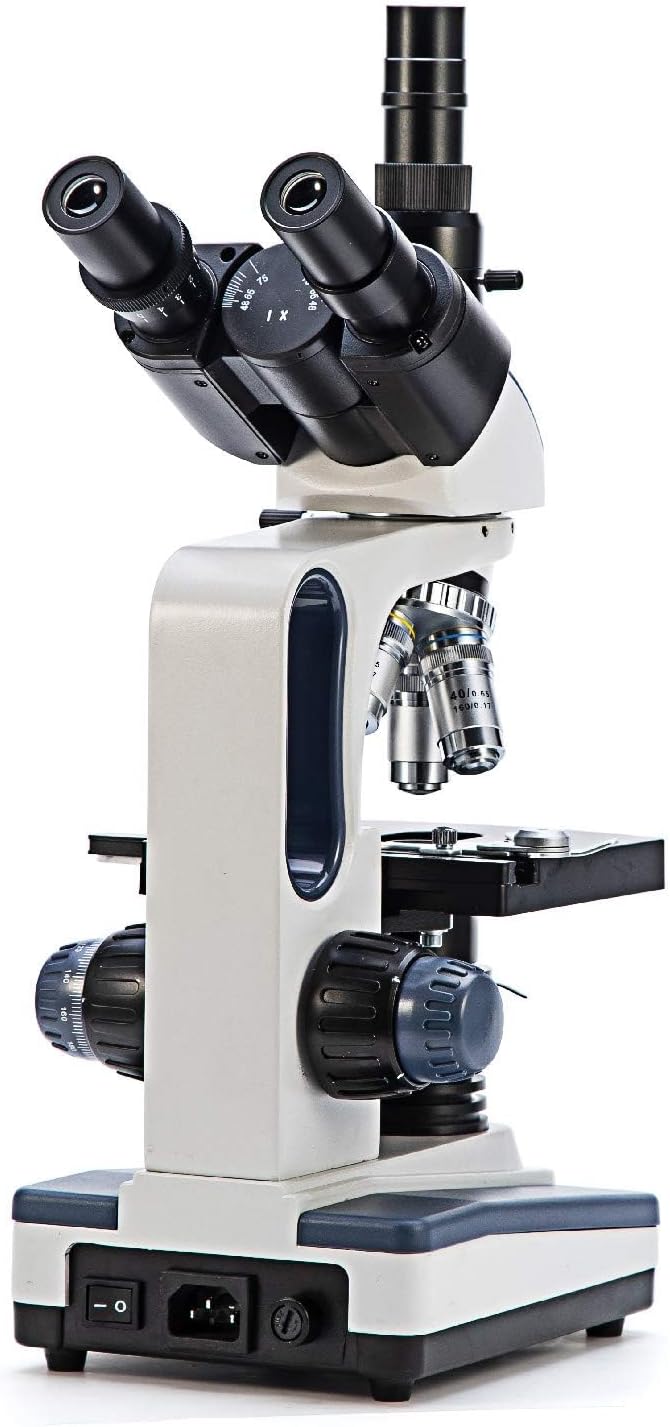
Figura 4: Wara view of the microscope, highlighting the power input and switch for operation.
4.2 Placing a Specimen Slide
Place your prepared specimen slide onto the mechanical stage. Use the slide holder clips to secure the slide in place.

Figura 5: Close-up view tal-mekkanika stage, showing the slide holder and X-Y translational axis controls.
4.3 Aġġustament tal-Ingrandiment
Rotate the revolving nosepiece to select the desired objective lens. Start with the lowest magnification (4X or 10X) for initial viewing and then gradually increase as needed. The total magnification is calculated by multiplying the eyepiece magnification by the objective lens magnification.
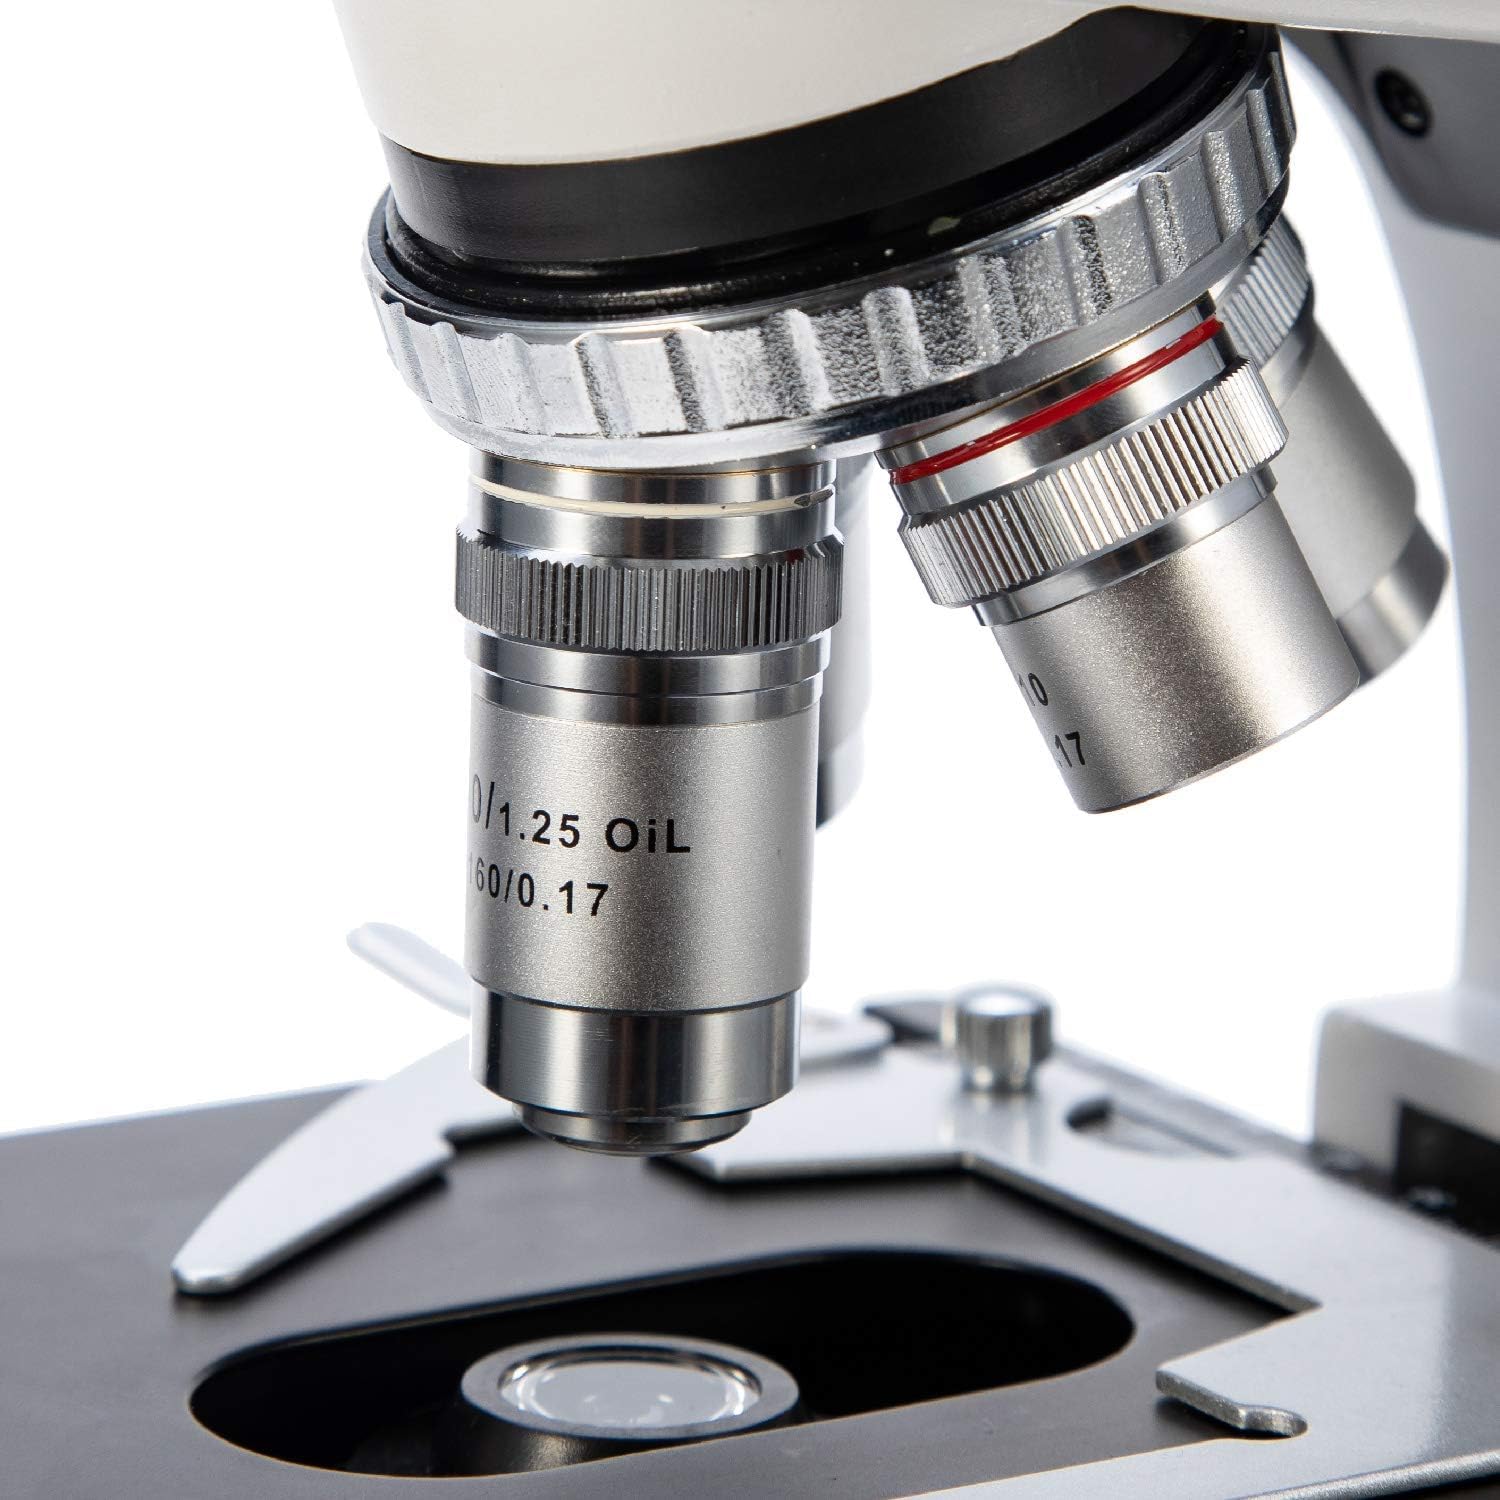
Figura 6: Dettaljata view of the objective lenses mounted on the revolving nosepiece.
4.4 Iffukar
Use the coarse adjustment knob for large focus changes, typically with lower magnification objectives. Once the image is roughly in focus, use the fine adjustment knob for precise focusing, especially at higher magnifications.
4.5 Using the Abbe Condenser
The Abbe condenser, located beneath the stage, helps to concentrate and direct light through the specimen. Adjust its height and the iris diaphragm to control contrast and resolution. For optimal viewing, the condenser should be raised close to the stage for higher magnifications and lowered for lower magnifications.

Figure 7: Close-up of the Abbe condenser and the light source beneath the mechanical stage.
4.6 Using the Trinocular Port (Camera Compatibility)
The SW350T features a dedicated trinocular port for attaching microscope cameras (sold separately). This allows for digital imaging, live streaming, and recording of your observations. To use, simply insert your compatible microscope camera into the trinocular port and follow the camera's specific instructions for setup and software installation.

Figura 8: Close-up view of the trinocular head, showing the dedicated camera port for digital imaging.
5. Manutenzjoni u Kura
Proper maintenance will extend the life and performance of your microscope.
- Ottika tat-Tindif: Use only specialized lens cleaning paper and optical cleaning solution for objective lenses and eyepieces. Gently wipe in a circular motion from the center outwards. Avoid touching optical surfaces with bare hands.
- Tindif tal-Korp: Wipe the microscope body with a soft, damp drapp. Tużax kimiċi ħarxa jew tindif li joborxu.
- Ħażna: When not in use, cover the microscope with the provided dust cover to protect it from dust and debris. Store in a cool, dry place.
- Immaniġġjar: Always carry the microscope by its arm and base. Avoid sudden movements or impacts.
- Oil Immersion (100X Objective): If using the 100X oil immersion objective, ensure to clean off immersion oil immediately after use to prevent damage to the lens.
6. Gwida għas-soluzzjoni tal-problemi
Irreferi għat-tabella t'hawn taħt għal kwistjonijiet komuni u s-soluzzjonijiet tagħhom.
| Problema | Kawża Possibbli | Soluzzjoni |
|---|---|---|
| Ebda illuminazzjoni | Power switch off, power cord disconnected, brightness knob set to minimum. | Turn on power switch, check power cord connection, increase brightness. |
| Image blurry or out of focus | Incorrect focus adjustment, slide upside down, objective lens not fully engaged. | Adjust coarse and fine focus, ensure slide is correctly oriented, rotate nosepiece until objective clicks into place. |
| Dark or uneven field of view | Condenser not adjusted correctly, iris diaphragm closed too much, objective lens dirty. | Adjust condenser height, open iris diaphragm, clean objective lens. |
| Dust or spots visible in image | Dust on eyepiece, objective, or slide. | Clean eyepieces, objectives, and slide using appropriate cleaning methods. |
7. Speċifikazzjonijiet Tekniċi
Detailed specifications for the SWIFT SW350T microscope.
| Karatteristika | Speċifikazzjoni |
|---|---|
| Brand | SWIFT |
| Numru tal-Mudell | EF12021 |
| Ingrandiment Massimu | 2500X |
| Eyepieces | Wide-Field 10X and 25X |
| Lentijiet Oġġettivi | 4 DIN Achromatic (4X, 10X, 40X, 100X Oil) |
| Tip ta' Kap | Siedentopf Trinocular, 30-degree inclined, 360-degree rotatable |
| Stage | Double-layered Mechanical Stage |
| Kondensatur | Abbe Condenser with Iris Diaphragm |
| Tip ta' Sors tad-Dawl | LED, adjustable brightness |
| Provvista tal-Enerġija | 110 Volts (AC) |
| Materjal | Metall |
| Kulur | Iswed, Fidda, Abjad |
| Piż tal-oġġett | 7.81 libbra (3.55 Kilogrammi) |
| Dimensjonijiet tal-Pakkett | 18.35 x 12.8 x 9.09 pulzieri |
| Apparati Kompatibbli | Laptop, Personal Computer (via camera port) |
| Data L-Ewwel Disponibbli | 29 ta’ Jannar, 2019 |
| Manifattur | NJEDU |
8. Garanzija u Appoġġ
8.1 Informazzjoni dwar Garanzija
Your SWIFT SW350T microscope is covered by a manufacturer's warranty. Please refer to the official SWIFT website or the included warranty card for specific terms and conditions regarding coverage and duration.
8.2 Aktar Appoġġ
For more detailed information, advanced techniques, or specific inquiries, please consult the comprehensive User Guide PDF available online: SWIFT SW350T User Guide (PDF). You may also visit the official SWIFT store on Amazon for additional resources and product information.


