1. Introduzzjoni
This manual provides essential information for the safe and efficient operation, maintenance, and troubleshooting of your STEALTH SAA-110T 10-Gallon High-Pressure Air Tank. Please read this manual thoroughly before initial use and retain it for future reference.
The STEALTH SAA-110T is an auxiliary air tank designed for portability and ease of use. It holds up to 10 gallons of portable air at a maximum pressure of 225 PSI, suitable for various pneumatic tools. It features multiple quick couplers for enhanced work efficiency.

Figura 1: Quddiem view of the STEALTH SAA-110T 10-Gallon High-Pressure Air Tank.
2. Informazzjoni dwar is-Sigurtà
TWISSIJA: Jekk ma ssegwix dawn l-istruzzjonijiet ta’ sigurtà, dan jista’ jirriżulta fi korriment serju jew ħsara lill-proprjetà.
- Always wear appropriate personal protective equipment, including eye protection, when operating or maintaining the air tank.
- Do not exceed the maximum operating pressure of 225 PSI. Over-pressurizing the tank can cause it to rupture.
- Never move the air tank while it is pressurized. Depressurize the tank before transport.
- Before each use, inspect the tank for any signs of damage, corrosion, or leaks. Do not use a damaged tank.
- Ensure all connections are secure and leak-free before pressurizing the tank.
- Do not modify the air tank or its components. Use only genuine replacement parts.
- Keep children and unauthorized personnel away from the air tank during operation.
- Always drain moisture from the tank after each use to prevent corrosion and extend service life.
- This product is an air tank, not an air compressor. It requires an external air compressor for filling.
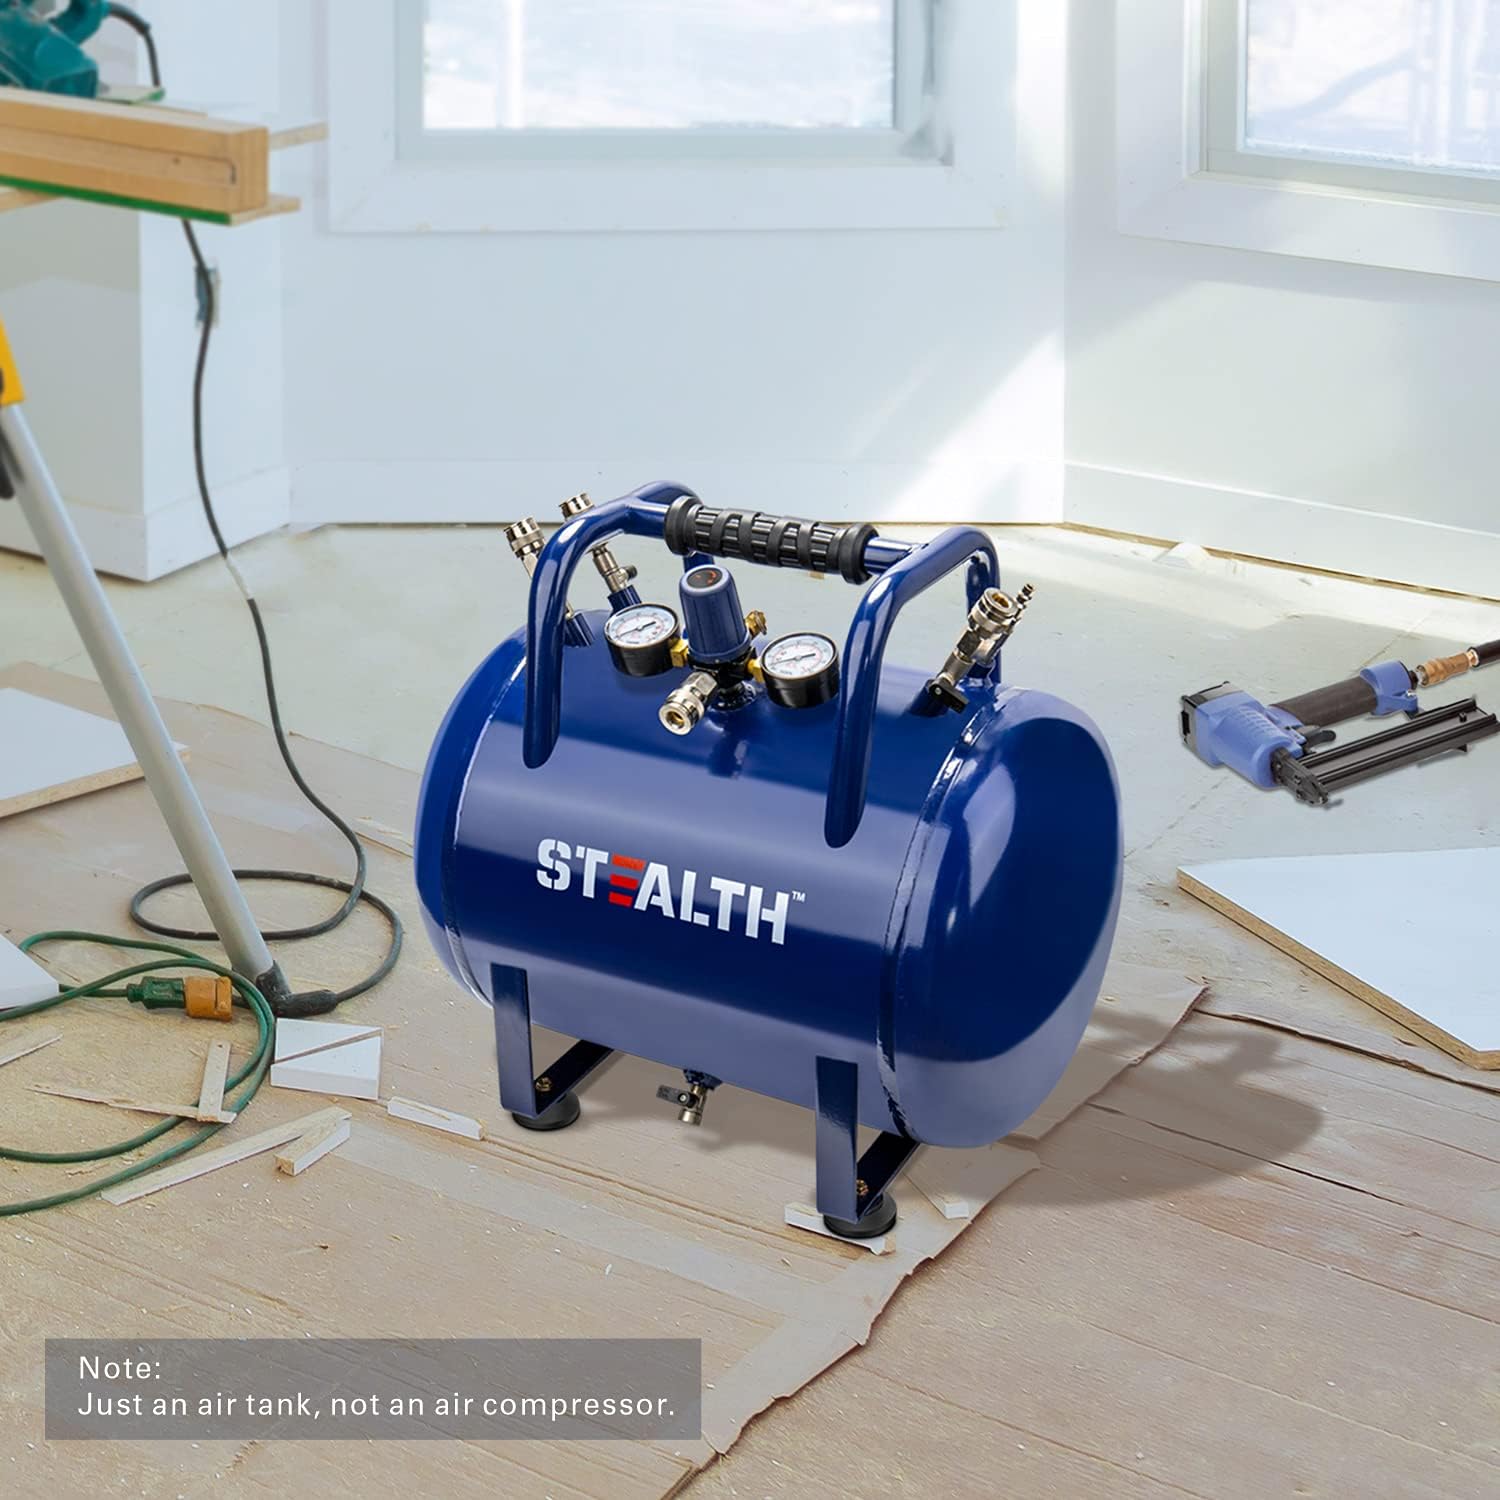
Figure 2: The SAA-110T Air Tank in a typical use environment. Note: This is an air tank, not an air compressor.
3. Komponenti tal-Prodott
Familiarize yourself with the various parts of your STEALTH SAA-110T Air Tank:

Figure 3: Labeled diagram of the SAA-110T Air Tank components.
- Quick Coupler (1, 6, 7, 10): Connection points for air hoses and pneumatic tools. The SAA-110T includes 5 quick couplers.
- Air Cock (2): Valve to control air flow to the quick couplers.
- Safety Valve (3): Automatically releases pressure if it exceeds a safe limit. Do not tamper b'dan il-valv.
- Tank Gauge (4): Displays the internal pressure of the air tank.
- Handle Grip (5): Ergonomic, rubber-reinforced handle for comfortable transport.
- Tool Gauge (8): Displays the regulated output pressure for connected tools.
- Pressure Regulator (9): Adjusts the output air pressure to suit specific tool requirements.
- Tank (11): The main pressure vessel, constructed from Q235B Steel.
- Rubber Pad (12): Non-slip pads on the base for increased stability.
- Drain Valve (13): Located at the bottom of the tank to release condensed moisture.
4. Setup
- Spakkjar: Carefully remove the air tank from its packaging. Inspect for any shipping damage.
- Spezzjoni Inizjali: Before first use, visually inspect all components, connections, and gauges for any signs of damage or loose parts. Ensure the drain valve is closed.
- Pjazzament: Place the air tank on a stable, level surface. The rubber pads on the base provide stability.
- Connecting to an Air Compressor: Connect your air compressor's output hose to one of the quick couplers on the STEALTH SAA-110T. Ensure the connection is secure.
- Mili tat-Tank: Turn on your air compressor and allow it to fill the SAA-110T tank. Monitor the Tank Gauge (4) to ensure the pressure does not exceed 225 PSI. Once the desired pressure is reached, turn off the compressor and disconnect the hose.
5. Istruzzjonijiet Operattivi
- Għodda ta' Konnessjoni: Attach your pneumatic tool's air hose to one of the available quick couplers (1, 6, 7, 10). Ensure the connection is firm.
- Aġġustament tal-Pressjoni tal-Ħruġ: Use the Pressure Regulator (9) to adjust the air pressure delivered to your tools. Turn the knob clockwise to increase pressure and counter-clockwise to decrease it. Monitor the Tool Gauge (8) for the output pressure reading.
- Using Multiple Tools: The SAA-110T is equipped with 5 quick couplers, allowing multiple tools to be connected simultaneously. Adjust the pressure regulator as needed for the specific tool in use.
- Tnaqqis fil-pressjoni: When finished, disconnect tools. To fully depressurize the tank, open the Air Cock (2) or slowly open the drain valve (13) until all air has escaped.

Figure 4: The SAA-110T Air Tank in use with a pneumatic tool in a construction environment.
6. Manutenzjoni
Regular maintenance ensures the longevity and safe operation of your air tank.
- Ixxotta l-Umdità: After each use, or at least daily, open the Drain Valve (13) at the bottom of the tank to release any accumulated moisture. This prevents internal corrosion.
- Spezzjona għal Tnixxijiet: Periodically check all connections, hoses, and the tank body for air leaks. A soapy water solution can be applied to connections to identify bubbles indicating a leak. Tighten connections or replace seals as necessary.
- Barra Nadif: Keep the exterior of the tank clean and free from dirt and debris.
- Ħażna: Store the air tank in a clean, dry environment. Ensure it is fully depressurized before storing for extended periods.
7 Issolvi l-problemi
| Problema | Kawża Possibbli | Soluzzjoni |
|---|---|---|
| Air tank loses pressure quickly | Konnessjonijiet sfużi jew siġilli bil-ħsara | Check all quick couplers, gauges, and the drain valve for leaks using soapy water. Tighten connections or replace faulty components. |
| Pressure regulator not adjusting output | Regulator malfunction or debris | Ensure the tank is pressurized. If the issue persists, the regulator may need cleaning or replacement. |
| Safety valve activates frequently | Pressjoni żejda | Ensure the air compressor's output pressure is set below the tank's maximum (225 PSI). Do not overfill the tank. |
| Excessive moisture in air lines | Moisture not drained from tank | Regularly open the drain valve to release condensed water. |
8. Speċifikazzjonijiet
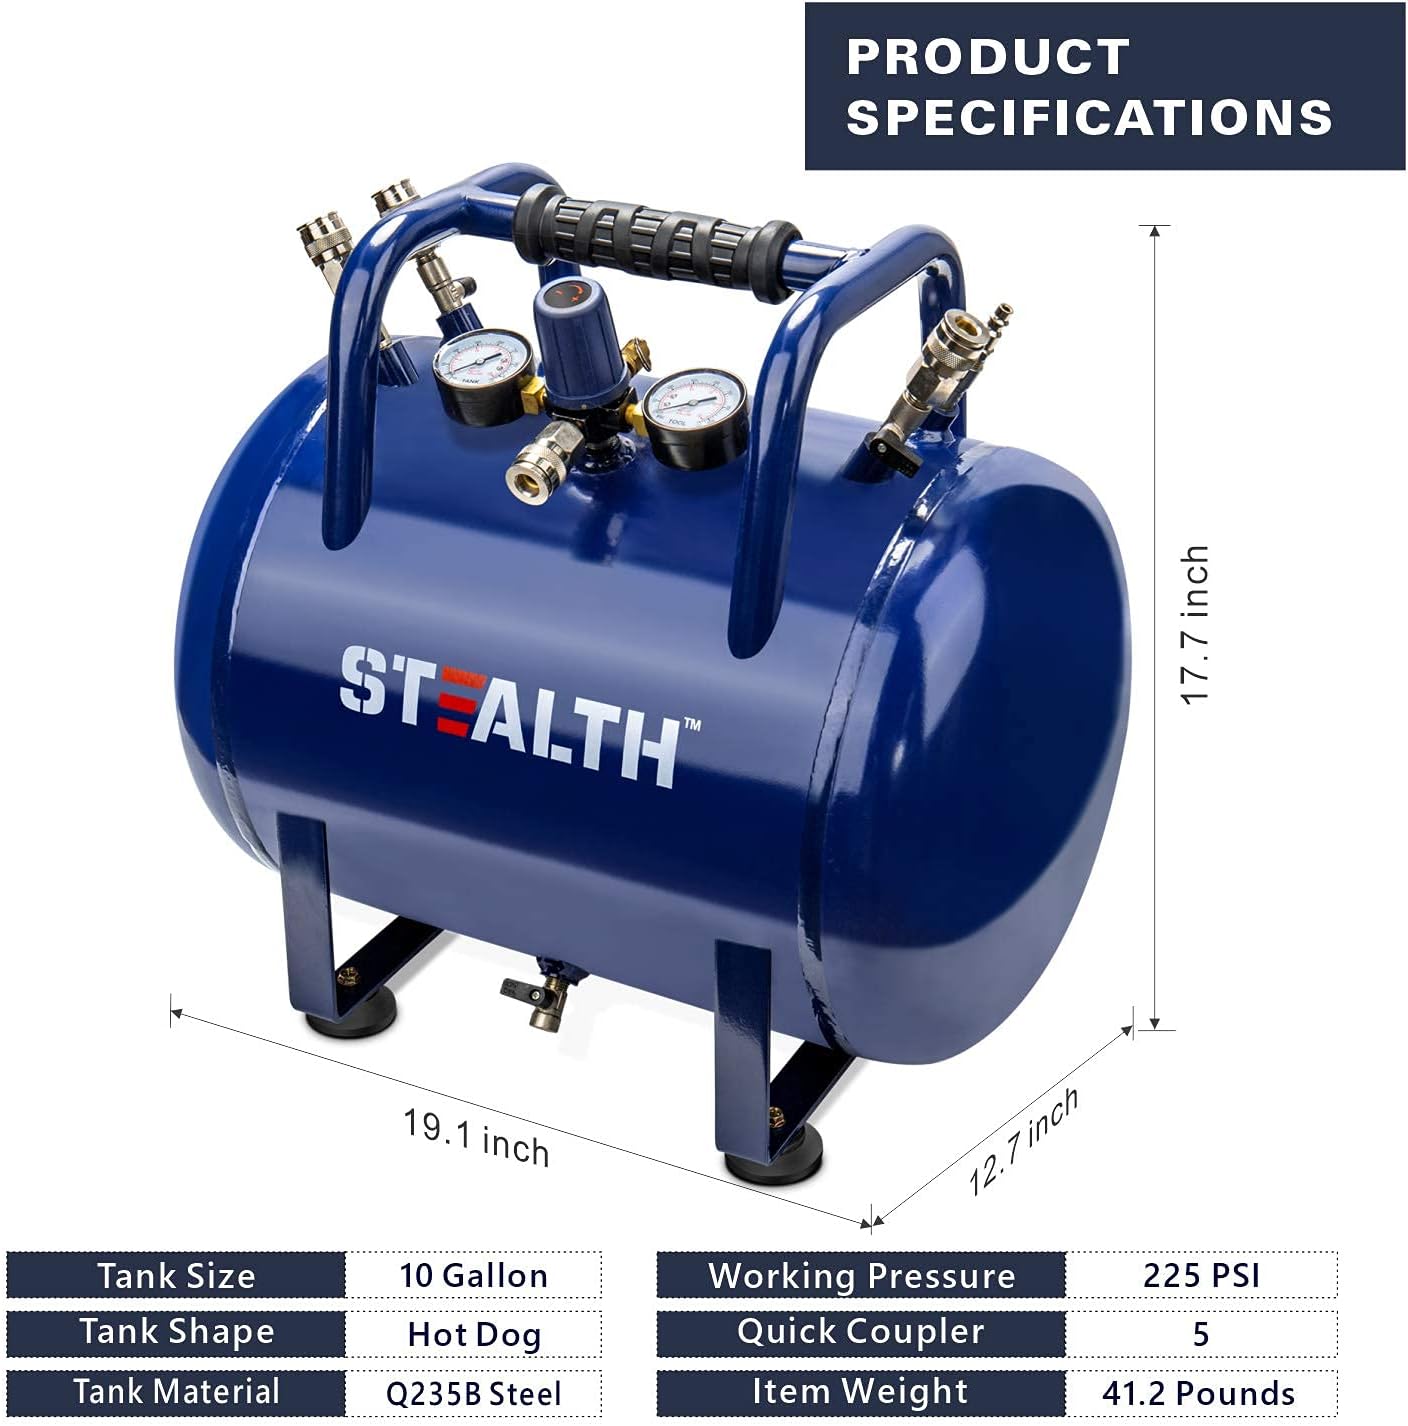
Figure 5: Dimensions and key specifications of the SAA-110T Air Tank.
- Mudell: SAA-110T
- Kapaċità tat-Tank: 10 Galun
- Pressjoni Operattiva Massima: 225 PSI
- Materjal tat-Tank: Azzar Q235B
- Number of Quick Couplers: 5
- Piż tal-oġġett: 41.2 lbs
- Dimensjonijiet tal-Prodott (L x W x H): 20" x 13" x 18"
- Kulur: Blu
- Livell ta' Storbju: 65 Decibels (when filling from a compressor, tank itself is passive)
- Użi Rakkomandati: Inflation, powering pneumatic tools
9. Garanzija u Appoġġ
The STEALTH SAA-110T Air Tank comes with a Garanzija Limitata tul il-Ħajja. For warranty claims, technical support, or customer service inquiries, please refer to the contact information provided with your purchase documentation or visit the official Stealth websit.
Jekk jogħġbok żomm il-prova tax-xiri tiegħek għall-validazzjoni tal-garanzija.


