1. Introduzzjoni
This manual provides detailed instructions for the installation, operation, and maintenance of your Anlapus 8 Channel 720P DVR Security Camera System Recorder. Please read this manual thoroughly before using the product to ensure proper setup and optimal performance. Keep this manual for future reference.
2. Informazzjoni dwar is-Sigurtà
To prevent injury to yourself or others, or damage to your device, read all safety information before using the device. Failure to follow these instructions may result in electric shock, fire, or other hazards.
- Uża biss l-adapter tal-enerġija fornut mal-apparat.
- Do not expose the DVR to water, moisture, or extreme temperatures.
- Żgura ventilazzjoni xierqa biex tevita sħana żejda.
- Tippruvax tiftaħ jew issewwi l-apparat int stess. Irreferi għal kull manutenzjoni f'idejn persunal kwalifikat.
- Żomm l-apparat 'il bogħod minn kampi manjetiċi qawwija.
3. Kontenut tal-Pakkett
Jekk jogħġbok iċċekkja l-kontenut tal-pakkett malli tiftaħ. Jekk xi oġġetti huma nieqsa jew bil-ħsara, ikkuntattja lis-servizz tal-konsumatur immedjatament.
- Anlapus 8 Channel 720P DVR Recorder (with pre-installed 1TB Hard Drive)
- Adapter tal-Enerġija
- Ġurdien USB
- Gwida Quick Start
- Screws for HDD (if applicable)
4. Prodott Aktarview
The Anlapus 8 Channel 720P DVR is a versatile security recording solution supporting multiple camera types including 960H Analog, 720P/1080P AHD, 720P/1080P TVI, and CVI cameras. It comes with a pre-installed 1TB hard drive for continuous recording.
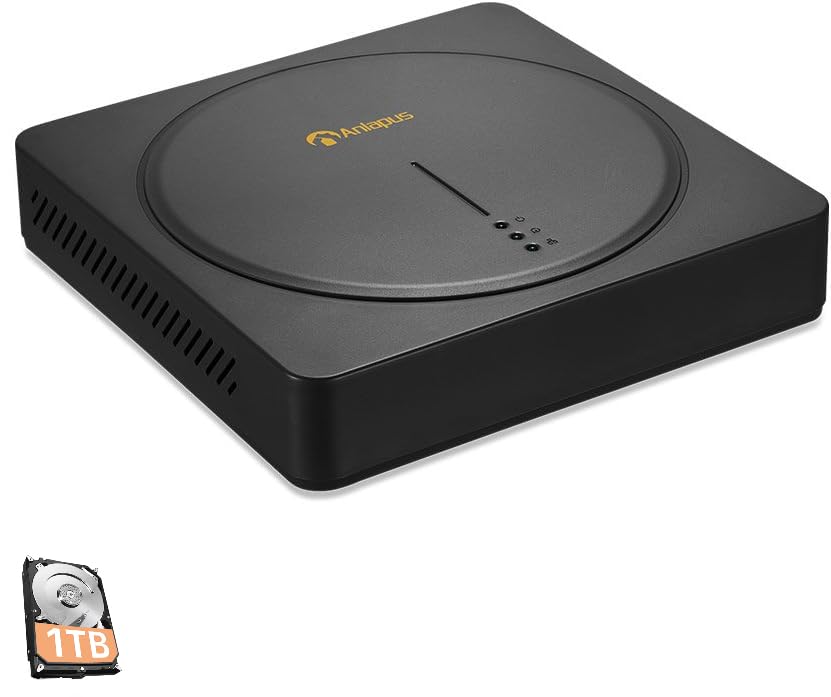
An image showing the Anlapus 8 Channel 720P DVR unit, a black square device with a circular indentation on top, featuring the Anlapus logo and indicator lights. A small icon of a 1TB hard drive is also visible in the bottom left corner.
Front Panel
- Dwal indikaturi: Power, HDD activity, Network status.
Panel ta' wara
- Inputs tal-Vidjo: 8 BNC ports for camera connections.
- Outputs tal-Vidjo: HDMI, VGA for monitor connection.
- Inputs/Ħruġ Awdjo: RCA ports for audio.
- Port tan-Netwerk: RJ45 Ethernet port for internet connection.
- Portijiet USB: For mouse, USB backup, or Wi-Fi adapter (if supported).
- Input ta' Enerġija: DC 12V power jack.
5. Gwida ta' Setup
5.1 Konnessjoni tal-Ħardwer
- Qabbad il-Kameras: Connect your security cameras to the BNC video input ports on the rear of the DVR.
- Qabbad il-Monitor: Qabbad monitor mad-DVR billi tuża l-port HDMI jew VGA.
- Qabbad il-ġurdien: Plug the USB mouse into one of the USB ports.
- Connect Network (Optional but Recommended): Connect an Ethernet cable from the DVR's network port to your router or network switch for remote access and email alerts.
- Qabbad l-Enerġija: Plug the power adapter into the DVR's power input and then into a power outlet. The DVR will power on automatically.
5.2 Konfigurazzjoni Inizjali
Upon first boot, the system will guide you through an initial setup wizard. Follow the on-screen prompts to:
- Issettja password b'saħħitha għall-kont tal-amministratur.
- Ikkonfigura s-settings tad-data u l-ħin.
- Adjust network settings (DHCP is usually sufficient).
- Format the pre-installed 1TB hard drive if prompted (this will erase any existing data).
5.3 Konfigurazzjoni tal-App Mobbli
Għal remoti viewing and alerts, download the free Anlapus mobile application (available for Android and iOS devices).
- Download the app from your device's app store by searching for "Anlapus" or by scanning the QR code displayed on the DVR's monitor under the network settings or P2P menu.
- Oħloq kont jew idħol.
- Add your DVR device by scanning the device's QR code (usually found on a sticker on the DVR or in the network settings menu) or by manually entering the device ID.
- Ladarba żżidha, tista' view foo ħajtage, play back recordings, and receive alerts from your smartphone or tablet.
6. Istruzzjonijiet Operattivi
6.1 Ħaj View
After successful setup, the DVR will display live video feeds from all connected cameras on the monitor. You can switch between single-camera view u grilja b'ħafna kameras view bl-użu tal-kontrolli fuq l-iskrin jew il-maws.
6.2 Modi ta' Reġistrazzjoni
Id-DVR jappoġġja diversi modi ta' reġistrazzjoni:
- Reġistrazzjoni Kontinwa: Rekords 24/7.
- Reġistrazzjoni ta 'Sejbien tal-Moviment: Records only when motion is detected, saving hard drive space.
- Reġistrazzjoni Skedata: Records during specific time periods.
- Reġistrazzjoni manwali: Start/stop recording manually.
Configure recording schedules and settings via the DVR's main menu (right-click with mouse).
6.3 Daqq
Biex terġa 'view irreġistrat footage:
- From the main menu, select "Playback".
- Agħżel id-data u l-kanal tal-kamera li tixtieq tirrekordjaview.
- Uża l-linja taż-żmien biex tinnaviga fir-reġistrazzjonijiet. Kuluri differenti fuq il-linja taż-żmien jindikaw tipi differenti ta' reġistrazzjoni (eż., kontinwu, moviment).
6.4 Motion Detection and Email Alerts
The DVR features customizable motion detection with instant email alerts.
- Navigate to the "Alarm" or "Motion Detect" settings in the main menu.
- Enable motion detection for desired channels.
- Adjust sensitivity and define detection areas.
- Configure email settings under "Network" or "Alarm" to receive alerts with images when motion is detected. Ensure your network settings are correct for email functionality.
6.5 Backup tad-Dejta
You can back up recorded footage to a USB flash drive.
- Insert a USB flash drive into a USB port on the DVR.
- From the main menu, select "Backup".
- Choose the camera channel, time range, and file type for backup.
- Start the backup process.
7. Manutenzjoni
- Ġestjoni tal-Hard Drive: Il-hard drive ta' 1TB awtomatikament jissostitwixxi l-eqdem fajl.tage when full. Regularly check the HDD status in the system settings.
- Aġġornamenti tal-Firmware: Periodically check the Anlapus official website for firmware updates. Updates can improve performance and add new features. Follow the instructions provided with the firmware carefully.
- Tindif: Use a soft, dry cloth to clean the exterior of the DVR. Do not use liquid cleaners or aerosols. Ensure ventilation openings are free from dust.
- Sigurtà tal-Password: Regularly change your DVR and app passwords to maintain security.
8 Issolvi l-problemi
Din it-taqsima tindirizza kwistjonijiet komuni li tista’ tiltaqa’ magħhom.
- Ebda Output tal-Vidjo:
- Check power connection to DVR and monitor.
- Ensure HDMI/VGA cable is securely connected.
- Verify monitor input source is correctly selected.
- L-ebda Wiri tal-Kamera:
- Check camera power supply.
- Ensure BNC cables are securely connected to both camera and DVR.
- Verify camera compatibility with the DVR (960H Analog, 720P/1080P AHD, TVI, CVI).
- Remote ViewMhux qed jaħdem:
- Ensure DVR is connected to the internet (check network status light).
- Verify network settings (DHCP enabled or static IP configured correctly).
- Check if the device is added correctly in the mobile app.
- Ensure your router's firewall is not blocking the connection (port forwarding may be required for advanced setups).
- Ebda Reġistrazzjoni:
- Check if the hard drive is detected and formatted.
- Verify recording schedules are set correctly.
- Ensure motion detection is configured if using that mode.
- Email Alerts Not Received:
- Iċċekkja l-konnessjoni tan-netwerk.
- Verify email server settings (SMTP, port, encryption) are correct in the DVR.
- Iċċekkja l-folder tal-ispam tal-email tiegħek.
Għal aktar assistenza, irreferi għat-taqsima tal-Garanzija u l-Appoġġ.
9. Speċifikazzjonijiet
| Karatteristika | Speċifikazzjoni |
|---|---|
| Mudell | B07MX7VHKT |
| Inputs tal-Vidjo | 8 Channels (BNC) |
| Kompatibilità tal-vidjo | 960H Analog, 720P/1080P AHD, 720P/1080P TVI, CVI |
| Outputs tal-Vidjo | hdmi, vga |
| Hard Drive | 1TB Security Grade (Pre-installed) |
| Riżoluzzjoni ta' Reġistrazzjoni | Up to 720P on all 8 channels |
| Konnettività | Ethernet (RJ45), USB |
| Sejbien tal-Moviment | Yes, with Email Alert |
| Appoġġ għall-App mobbli | Android, iOS (via QR Code Scan) |
| Provvista tal-Enerġija | DC 12V |
| Dimensjonijiet | 16.77 x 10.87 x 3.58 pulzieri (madwar) |
| Piż | 3.7 liri (madwar) |
10. Garanzija u Appoġġ
Anlapus provides a garanzija ta 'sena for this product from the date of purchase. This warranty covers manufacturing defects and malfunctions under normal use. It does not cover damage caused by misuse, accidents, unauthorized modifications, or natural disasters.
For technical assistance, troubleshooting, or warranty claims, please contact Anlapus customer support. We offer appoġġ tekniku tul il-ħajja to ensure your system operates smoothly.
Informazzjoni ta' Kuntatt:
Please refer to the contact details provided on the Anlapus official website or your purchase documentation for the most current support channels (e.g., email, phone, online chat).
When contacting support, please have your product model (B07MX7VHKT) and purchase information ready.


