Introduzzjoni
Thank you for choosing the POWERPLUS POWEG63703 Lawnmower. This manual provides essential information for the safe and efficient operation, maintenance, and troubleshooting of your new lawnmower. Please read this manual thoroughly before first use and keep it for future reference.

Image: The POWERPLUS POWEG63703 electric lawnmower, featuring a grey body, black wheels, and red accents on the handle. It is a compact and corded model designed for efficient lawn care.
Istruzzjonijiet tas-Sigurtà
Dejjem osserva l-prekawzjonijiet ta’ sigurtà li ġejjin biex tnaqqas ir-riskju ta’ korriment jew ħsara:
- Read all instructions carefully before operating the lawnmower.
- Wear appropriate personal protective equipment (PPE), including safety glasses and sturdy footwear.
- Kun żgur li ż-żona tax-xogħol hija ħielsa minn debris, ġebel, u oġġetti oħra li jistgħu jintefgħu mix-xfafar.
- Żomm it-tfal u l-annimali domestiċi 'l bogħod miż-żona tal-operat.
- Never operate the lawnmower in wet conditions or on steep slopes.
- Disconnect the power supply before cleaning, adjusting, or performing maintenance.
- Spezzjona l-korda tad-dawl għal ħsara qabel kull użu.
Kontenut tal-Pakkett
Ivverifika li l-oġġetti kollha huma preżenti u bla ħsara:
- POWERPLUS POWEG63703 Lawnmower Unit
- Immaniġġja l-Assemblea
- Borża għall-Ġbir tal-Ħaxix (kapaċità ta' 30L)
- Manwal għall-Utent
- Fasteners and small parts for assembly
Setup
1. Immaniġġja l-Assemblea
Attach the upper and lower handle sections to the main unit using the provided fasteners. Ensure all connections are secure.
2. Grass Collection Bag Installation
Assemble the grass collection bag according to the instructions. Hook the bag onto the rear of the lawnmower, ensuring it is securely seated to prevent grass clippings from escaping.

Image: A person demonstrating the proper attachment of the 30-liter grass collection bag to the rear of the lawnmower. The image highlights the secure fit of the bag for effective grass collection.
3. Aġġustament tal-Għoli tat-Tqattigħ
The lawnmower features an adjustable cutting height mechanism. Locate the adjustment lever or wheels and set the desired cutting height between 25mm and 65mm. Refer to the diagram for visual guidance.

Immaġni: Close-up view of the lawnmower's cutting height adjustment mechanism, showing the range of 25-65mm. The diagram indicates how to adjust the height for different grass lengths.
Istruzzjonijiet Operattivi
1. Konnessjoni mal-Enerġija
Plug the lawnmower into a suitable outdoor power outlet. Ensure the cable is managed to avoid entanglement or damage during operation. Utilize the cable relief feature to secure the cord.

Image: A person operating the lawnmower, highlighting the cable relief mechanism on the handle. This feature helps prevent accidental disconnection and reduces strain on the power cord.
2. Jibda l-Lawnmower
Press and hold the safety button, then pull the bail lever towards the handle to start the motor. Release the safety button once the motor is running.
3. Teknika tal-ħsad
Push the lawnmower forward in overlapping rows to ensure even cutting. For best results, mow when the grass is dry. The 320mm cutting width is ideal for smaller lawn areas (up to 250m²).

Image: The lawnmower in a garden setting, illustrating its 320mm cutting width and suitability for areas up to 250 square meters. This shows the mower's compact design for smaller lawns.
4. Stopping the Lawnmower
Release the bail lever to stop the motor. Wait for the blade to come to a complete stop before approaching the machine.
Manutenzjoni
1. Tindif
After each use, disconnect the power and clean the underside of the deck and the grass collection bag. Use a brush or damp cloth; do not use water jets directly on the motor or electrical components.
2. Kura tax-Xafra
Regularly inspect the blade for sharpness and damage. A dull or damaged blade can affect cutting performance. If necessary, have the blade sharpened or replaced by a qualified service technician.
3. Ħażna
Store the lawnmower in a dry, secure location, away from direct sunlight and extreme temperatures. The handle can be folded for compact storage.
Issolvi l-problemi
| Problema | Kawża Possibbli | Soluzzjoni |
|---|---|---|
| Il-magna tal-ħsad tal-ħaxix ma tibdax | No power supply; Safety switch not engaged; Damaged power cord. | Check power connection; Ensure safety button and bail lever are fully engaged; Inspect and replace damaged cord. |
| Prestazzjoni fqira tat-tqattigħ | Dull or damaged blade; Grass too long or wet; Grass collection bag full. | Sharpen or replace blade; Mow dry grass; Empty grass bag. |
| Vibrazzjoni eċċessiva | Bent or unbalanced blade; Loose fasteners. | Inspect blade for damage and replace if necessary; Tighten all fasteners. |
Speċifikazzjonijiet
- Mudell: POWEG63703
- Ditta: POWERPLUS
- Qawwa: 1000W
- Wisa' tal-Qtugħ: 320mm
- Aġġustament tal-Għoli tal-Qtugħ: 25-65mm
- Kapaċità tal-Borża tal-Ġbir tal-Ħaxix: 30 Litru
- Piż: 6.82 kg
- Dimensjonijiet: 59 x 37.5 x 29 ċm (Prodott)
- Sors tal-Enerġija: Corded Elettriku
- Materjal: Aluminju
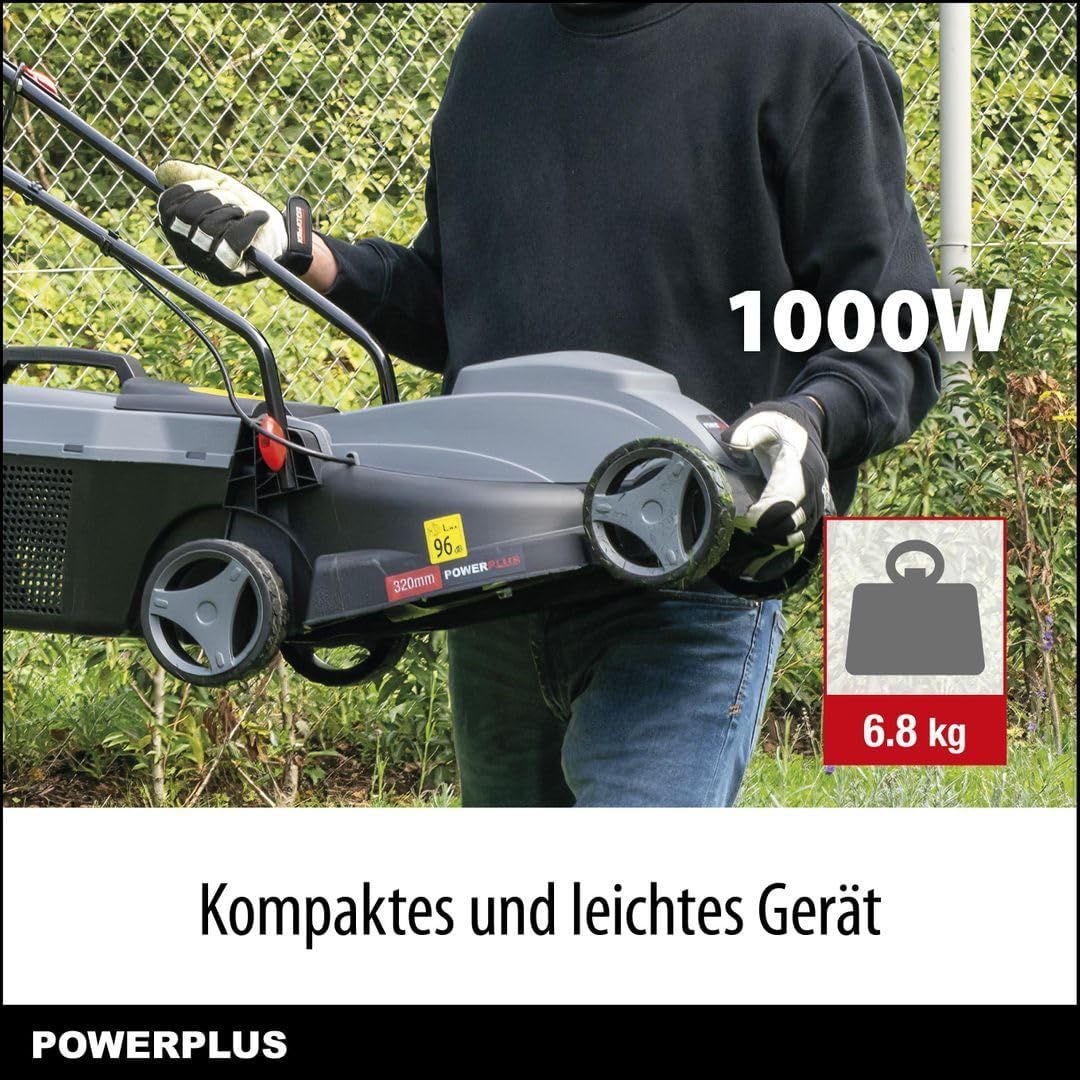
Image: A person easily lifting the lawnmower, demonstrating its compact size and light weight (6.8 kg). The image also highlights its 1000W power rating.
Garanzija u Appoġġ
This POWERPLUS product comes with a standard manufacturer's warranty. Please refer to the warranty card included in your package for specific terms and conditions. For technical support, spare parts, or warranty claims, please contact your retailer or the POWERPLUS customer service department.
For more information, visit the official POWERPLUS webis-sit jew ikkuntattja l-linja tal-appoġġ għall-klijenti tagħhom.


