Informazzjoni Importanti dwar is-Sigurtà
Please read all instructions carefully before using the MasterPro The Ultimate Pizza Maker and Oven. Failure to follow these instructions may result in electric shock, fire, or serious injury. Keep this manual for future reference.
- Dejjem kun żgur li l-apparat jitqiegħed fuq wiċċ stabbli u reżistenti għas-sħana.
- Tmissx uċuħ sħan. Uża manki jew pumi.
- Tgħaddix l-apparat, korda, jew plagg fl-ilma jew likwidi oħra.
- Superviżjoni mill-qrib hija meħtieġa meta xi apparat jintuża minn jew ħdejn it-tfal.
- Spluggja mill-iżbokk meta ma tkunx qed tuża u qabel tnaddaf. Ħallih jiksaħ qabel ma tpoġġi jew tneħħi l-partijiet.
- Tħaddim l-ebda apparat b'korda jew plagg bil-ħsara jew wara li l-apparat ma jaħdimx jew ikun ġie bil-ħsara b'xi mod.
- The ceramic baking stone becomes extremely hot. Handle with care using the provided paddles.
- Żgura ventilazzjoni xierqa waqt l-użu.
Prodott Overview
The MasterPro The Ultimate Pizza Maker and Oven is designed to cook perfectly crisp pizzas in minutes, and can also be used for toasting bread, reheating pastries, pies, sausage rolls, bagels, and croissants. It features dual heating elements, a removable ceramic baking stone, an adjustable thermostat, and a built-in timer.

Figure 1: MasterPro The Ultimate Pizza Maker and Oven with included lifting paddles.

Figure 2: Labeled diagram showing key components including lifting handles, window, top heating element, timer, control dial, heat indicator, bottom heating element, removable ceramic baking stone, and stainless steel paddles.
Komponenti:
- Unità Prinċipali: Houses heating elements, controls, and baking chamber.
- Removable Ceramic Baking Stone: Provides even heat distribution for crispy crusts.
- Lifting Paddles (2): Stainless steel tools for safely placing and removing food.
- Tieqa Trasparenti: Jippermetti l-monitoraġġ tal-progress tat-tisjir.
- Dial tal-Kontroll: Jaġġusta s-settings tat-temperatura.
- Timer: Jissettja t-tul tat-tisjir.
- Heat Indicator Light: Illuminates when the oven is heating.
Setup
- Spakkjar: Carefully remove all packaging materials from the pizza maker and its accessories. Retain packaging for storage or future transport.
- Tindif Inizjali: Qabel l-ewwel użu, imsaħ il-barra tal-unità b'adamp cloth. The ceramic baking stone should be wiped clean with a paper towel. Do not wash the stone with water or detergent. The lifting paddles can be hand washed with warm water and mild detergent, then dried thoroughly.
- Pjazzament: Place the pizza maker on a flat, stable, heat-resistant surface, ensuring adequate clearance around the unit for ventilation. Do not place it near flammable materials.
- Konnessjoni tal-Enerġija: Ensure the power cord is fully extended and plug the appliance into a grounded electrical outlet.
- Pre-heating the Stone: For optimal results, it is recommended to pre-heat the ceramic baking stone. Close the lid, set the temperature dial to the desired setting (e.g., maximum for pizza), and set the timer for 10-15 minutes. The heat indicator light will illuminate during heating.
Istruzzjonijiet Operattivi
Tisjir tal-Pizza:
- Saħħan minn qabel: Ensure the pizza maker is pre-heated to the desired temperature (up to 400°C) as described in the Setup section. The heat indicator light will turn off when the set temperature is reached, and cycle on/off during cooking to maintain temperature.
- Ipprepara l-Pizza: Place your pizza (homemade or store-bought) on one of the lifting paddles. If using homemade dough, lightly flour the stone to prevent sticking.
- Insert Pizza: Carefully open the lid. Using the lifting paddle, slide the pizza onto the hot ceramic baking stone. Close the lid immediately.
- Issettja l-Timer: Set the timer according to your pizza's requirements. For a typical pizza, cooking time is approximately 5 minutes. Monitor cooking through the transparent window.
- Monitor and Rotate (Optional): If desired, you can briefly open the lid and use the second paddle to rotate the pizza halfway through cooking for more even browning. Exercise caution as the oven is extremely hot.
- Neħħi l-Pizza: Once cooked, carefully open the lid. Use the lifting paddles to slide the pizza off the stone and onto a cutting board or plate.
- Kessaħ: After use, unplug the appliance and allow it to cool completely before cleaning or storing.
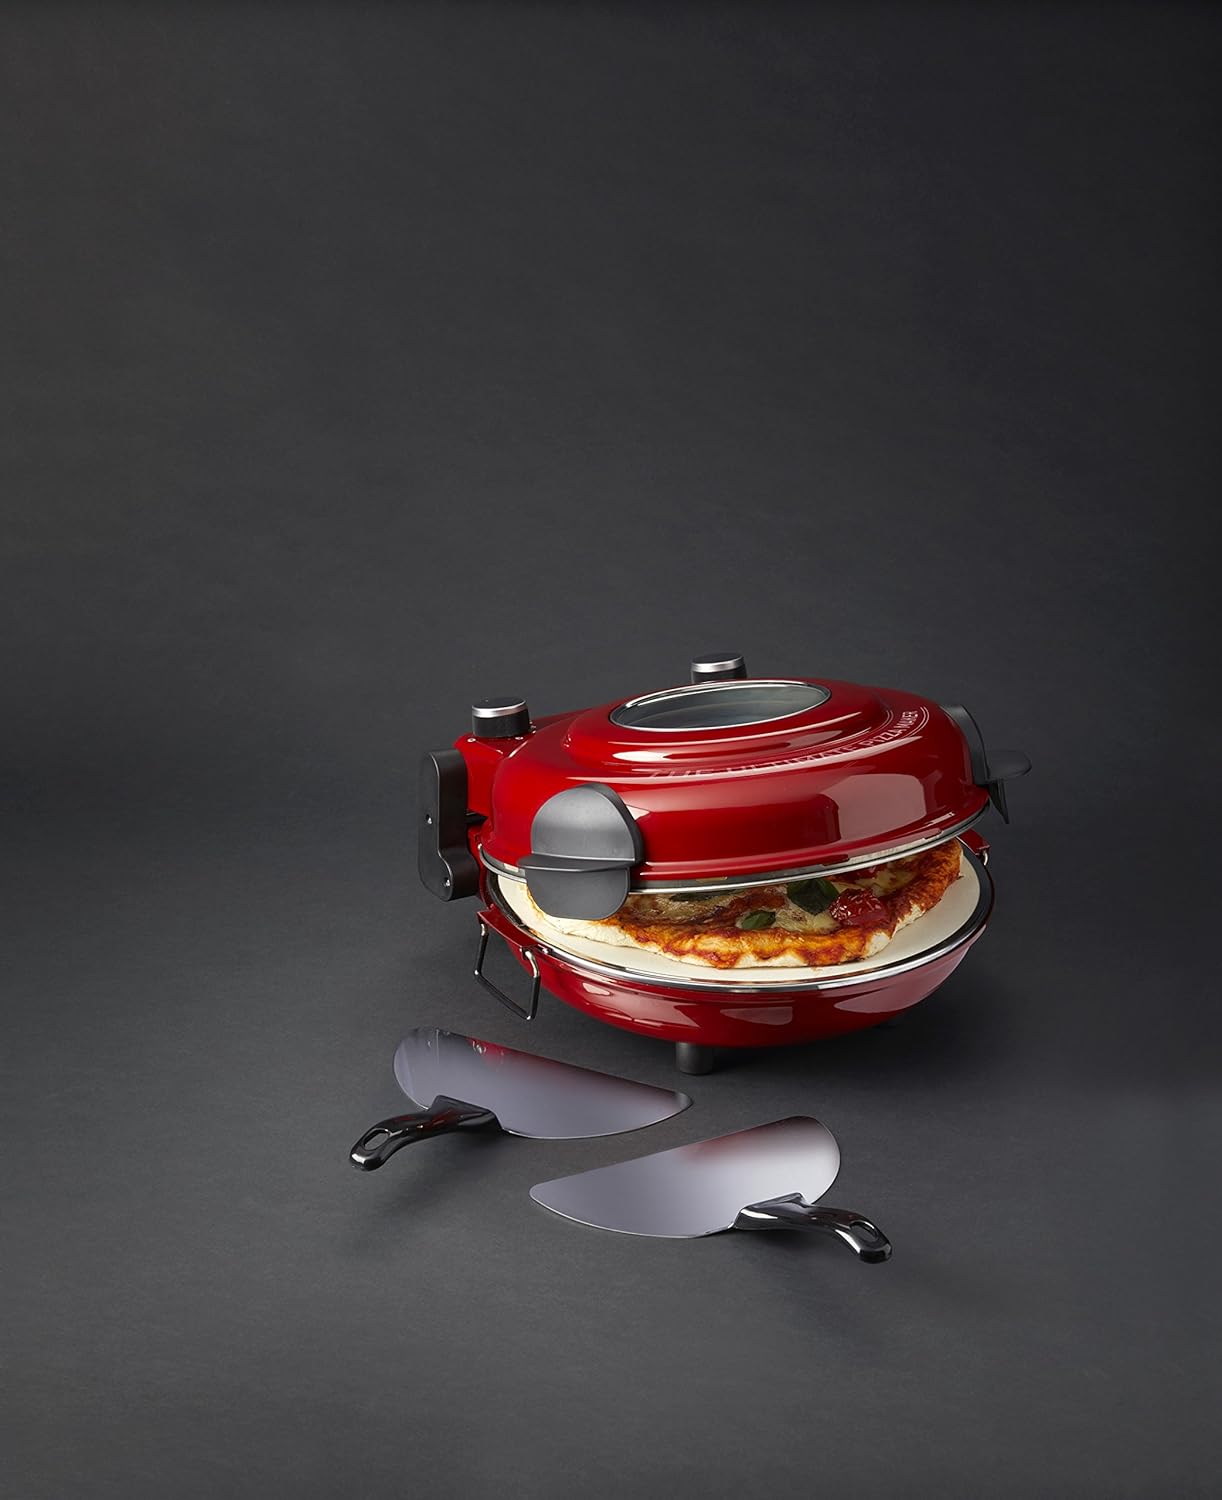
Figure 3: Pizza cooking inside the MasterPro Pizza Maker.

Figure 4: The pizza maker with its lid open, revealing a pizza on the ceramic stone.
Użi oħra:
The MasterPro Pizza Maker can also be used for:
- Ħobż tat-Toosting: Place slices directly on the stone.
- Reheating Pastries/Pies: Use a lower temperature setting and shorter cooking time.
- Heating Bagels/Croissants: Place directly on the stone.
Always monitor food closely when using for purposes other than pizza, as cooking times and temperatures may vary significantly.
Manutenzjoni u Tindif
Proper maintenance ensures the longevity and performance of your MasterPro Pizza Maker.
- Always Unplug and Cool: Qabel ma tnaddaf, dejjem aqla’ l-apparat mill-plakka tal-elettriku u ħallih jiksaħ kompletament.
- Ceramic Baking Stone:
- Scrap off any excess food residue with a spatula or stiff-bristled brush.
- Wipe the stone clean with a dry paper towel.
- MA use water, soap, or detergents on the ceramic stone. The porous nature of the stone will absorb liquids and detergents, which can affect its performance and taste of food.
- Discoloration of the stone over time is normal and does not affect performance.
- Lifting Paddles: Hand wash in warm water with mild detergent and dry thoroughly.
- Barra: Wipe the exterior of the pizza maker with a damp drapp. Tużax prodotti tat-tindif li joborxu jew spondi tal-għorik, għax jistgħu jagħmlu ħsara lill-finitura.
- Interior (Non-Stone Areas): For any spills or residue inside the oven (excluding the stone), wipe with a damp cloth once cooled. Ensure no water enters electrical components.
- Ħażna: Store the appliance in a cool, dry place. Ensure the power cord is neatly wrapped and not kinked.
Issolvi l-problemi
| Problema | Kawża Possibbli | Soluzzjoni |
|---|---|---|
| L-apparat ma jixgħelx. | Not plugged in; power outlet not active; faulty cord/plug. | Ensure plug is securely in a working outlet. Check household circuit breaker. If cord/plug is damaged, do not use; contact customer support. |
| Il-pizza mhux qed tissajjar b'mod uniformi. | Uneven heat distribution; pizza not centered; lid opened too frequently. | Rotate pizza halfway through cooking using paddles. Ensure pizza is centered on the stone. Avoid opening the lid unnecessarily during cooking. |
| Il-pizza teħel mal-ġebla. | Insufficient flour on homemade dough; stone not properly seasoned (for first use). | Lightly flour the ceramic stone before placing homemade dough. Ensure the stone is clean and dry. |
| It-tajmer ma jaħdimx. | Kwistjoni mekkanika. | If the timer is faulty, use an external timer (e.g., phone timer) to monitor cooking times. |
| Appliance causes circuit breaker to trip. | Overload on circuit; internal electrical fault. | Ensure no other high-wattage appliances are on the same circuit. If problem persists, discontinue use and contact customer support. |
If you encounter a problem not listed here, or if the suggested solutions do not resolve the issue, please contact MasterPro customer support.
Speċifikazzjonijiet
- Numru tal-Mudell: MPPIZZAWRD
- Qawwa/Wattage: 1200 watt
- Temperatura massima: Sa 400°C
- Dimensjonijiet tal-Prodott: 39 x 33 x 19 ċm (L x W x H)
- Piż tal-oġġett: 4.51 kg
- Materjal: Stainless Steel, Ċeramika, Plastik
- Kulur: Red (with white/red variations)
- Karatteristiċi Speċjali: Temperature Control, Timer, Adjustable Thermostat, Viewtieqa
- Manifattur: Albi Australia
Garanzija u Appoġġ
MasterPro products are manufactured to high-quality standards. For warranty information and customer support, please refer to the warranty card included with your purchase or visit the official MasterPro websit. Żomm il-prova tax-xiri tiegħek għal kwalunkwe talba ta' garanzija.
For further assistance, you may contact MasterPro customer service through their official channels. Details can typically be found on the product packaging or the manufacturer's websit.


