Introduzzjoni
This manual provides instructions for the safe and proper installation, operation, and maintenance of your NorStone Skye F2355-GC Wall Mount TV Support. This universal wall mount is designed for flat and curved screens, offering a discreet and robust solution for mounting your television in a living room or bedroom. It is compatible with televisions from 23 to 55 inches (58 to 140 cm diagonal) and supports a maximum weight of 40 kg (88 lbs).
Informazzjoni dwar is-Sigurtà
Read all instructions carefully before installation to prevent injury or damage.
- Ensure the wall structure can support the combined weight of the mount and the television.
- Teċċedix il-kapaċità massima tal-piż ta' 40 kg (88 lbs).
- Use appropriate tools and follow all safety precautions during installation.
- Żomm it-tfal u l-annimali domestiċi 'l bogħod miż-żona tal-installazzjoni.
- Jekk m'intix ċert dwar xi parti tal-installazzjoni, ikkonsulta professjonist kwalifikat.
Kontenut tal-Pakkett
Verify that all components are present before beginning installation. The product is delivered disassembled and includes all necessary screws, plans, and basic tools for assembly.
- NorStone Skye F2355-GC Wall Mount Assembly
- Mounting Hardware (screws, anchors, washers)
- Installation Plan/Diagram
- Basic Tools (e.g., small wrench, Allen key)
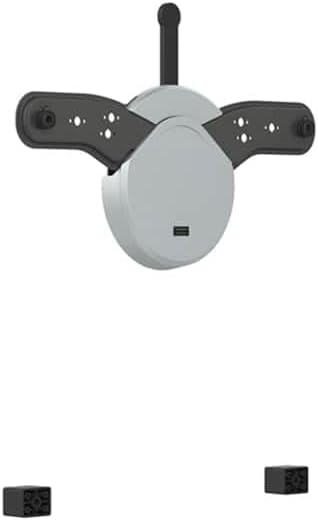
Image: The NorStone Skye F2355-GC wall mount showing its main circular body, two extending arms for TV attachment, and two small black blocks which are likely spacers or additional mounting hardware.
Setup u Installazzjoni
This section guides you through the process of mounting your TV support.
Għodod Meħtieġa (Mhux Inklużi)
- Drill
- Tornavit tar-ras Phillips
- Lapes
- Tejp tal-Kejl
- Stud Finder (recommended)
Installazzjoni pass pass
Step 1: Locate Mounting Position
Determine the desired height and position for your TV. Use a stud finder to locate wall studs for secure mounting. Mark the drilling points on the wall using a pencil.
Pass 2: Drill Pilot Holes
Drill pilot holes at the marked positions. Ensure the drill bit size matches the recommended size for your wall anchors (if applicable) or screws.
Pass 3: Waħħal il-Pjanċa tal-Ħajt
Secure the wall plate of the NorStone Skye F2355-GC mount to the wall using the provided screws and anchors. Ensure it is level using the integrated spirit level.
Pass 4: Waħħal il-Brakketti tat-TV
Attach the TV mounting brackets to the back of your television. Ensure they are securely fastened to the VESA mounting holes on your TV. The mount is compatible with TVs from 23 to 55 inches.
Pass 5: Immonta t-TV mal-Pjattaforma tal-Ħajt
Carefully lift the television with the attached brackets and hook it onto the wall plate. Ensure the TV is securely seated on the mount. Engage any safety locking mechanisms.
Step 6: Adjust Tilt (Optional)
The mount allows for an upward tilt of +3°. Adjust the tilt to your preferred viewing angle by loosening the tilt mechanism, setting the angle, and re-tightening.
Istruzzjonijiet Operattivi
Once installed, the NorStone Skye F2355-GC offers simple operation.
L-aġġustament tal-Mejjel
The mount features a fixed upward tilt of +3 degrees for optimal viewing comfort. No further adjustment is typically needed beyond the initial setup.
Integrated Spirit Level
The integrated spirit level assists in ensuring a perfectly horizontal installation of the wall plate. Verify the bubble is centered during Step 3 of installation.
Manutenzjoni
To ensure the longevity and proper function of your NorStone Skye F2355-GC wall mount, follow these simple maintenance guidelines:
- Tindif: Wipe the mount with a soft, dry cloth. Do not use abrasive cleaners or solvents, as they may damage the finish.
- Kontroll Perjodiku: Periodically check all screws and bolts to ensure they remain tight. Over time, vibrations or movement may cause them to loosen.
- Limitu tal-Piż: Qatt m'għandek taqbeż il-kapaċità massima tal-piż ta' 40 kg (88 lbs).
Issolvi l-problemi
If you encounter issues with your NorStone Skye F2355-GC wall mount, refer to the following common problems and solutions:
| Problema | Kawża Possibbli | Soluzzjoni |
|---|---|---|
| It-TV mhux livellat | Wall plate not installed level | Re-check the wall plate with the integrated spirit level and adjust if necessary. |
| Il-muntatura tħossha instabbli | Screws are loose or improper wall anchors used | Tighten all mounting screws. Ensure appropriate anchors were used for your wall type (e.g., concrete, drywall with studs). |
| TV does not fit | TV size or VESA pattern incompatible | Verify your TV's size is between 23 and 55 inches and its VESA mounting pattern is compatible with the mount. |
Speċifikazzjonijiet
- Ditta: NorStone
- Mudell: Skye F2355-GC (NORSSKYEF2355GC)
- Daqsijiet tat-TV Kompatibbli: 23 to 55 inches (58 to 140 cm diagonal)
- Kapaċità massima tal-piż: 40 kg (88 lbs)
- Angolu ta 'l-inklinazzjoni: +3° (upward)
- Tip ta' Muntaġġ: Mount Wall
- Tip ta' Moviment: Inklinazzjoni
- Karatteristiċi Speċjali: Integrated Spirit Level
- Materjal: Struttura tal-azzar
Garanzija u Appoġġ
For warranty information or technical support regarding your NorStone Skye F2355-GC Wall Mount TV Support, please contact NorStone customer service. Refer to the product packaging or the official NorStone websit għad-dettalji tal-kuntatt.
Nota: Availability of spare parts is not guaranteed. Software updates are not applicable to this product.


