Introduzzjoni
This manual provides essential information for the safe and efficient operation, installation, and maintenance of your Utilitech 2-Sone 70-CFM White Bathroom Fan. Please read all instructions carefully before installation and use. Keep this manual for future reference.
Informazzjoni dwar is-Sigurtà
TWISSIJA:
- Dejjem skonnettja l-enerġija mill-pannell tas-servizz qabel ma tagħmel manutenzjoni jew tnaddaf l-unità.
- L-installazzjoni għandha titwettaq minn elettriċista kwalifikat skont il-kodiċijiet elettriċi lokali u nazzjonali kollha.
- Do not use this fan in a kitchen. This fan is designed for bathroom ventilation only.
- Żgura ertjar xieraq biex jitnaqqas ir-riskju ta 'xokk elettriku.
- Never insert objects into the fan grille while the fan is operating.
- This product is designed for general ventilating use only. Do not use to exhaust hazardous or explosive materials and vapors.
Kontenut tal-Pakkett
Iċċekkja li l-komponenti kollha huma preżenti qabel tibda l-installazzjoni:
- Utilitech 2-Sone 70-CFM Bathroom Fan Unit
- Qoxra tal-Gradilja
- Installation Hardware (screws, wire nuts)
- Manwal għall-Utent (dan id-dokument)
Setup u Installazzjoni
Follow these steps for proper installation of your bathroom fan. It is recommended to have a second person assist during installation.
Għodod Meħtieġa:
- Tornavit (Phillips u Flathead)
- Strippers tal-Wajer
- Drill (if creating new opening)
- Tejp tal-Kejl
- Sikkina ta 'Utilità jew Serratura Drywall
- Nuċċalijiet u Ingwanti tas-Sigurtà
Passi ta' Installazzjoni:
1. Skonnettja l-Enerġija:
Before starting any work, turn off the power to the circuit at the main service panel. Verify power is off using a voltagtester.
2. Prepare Opening:
If replacing an existing fan, remove the old unit. If installing in a new location, cut an opening in the ceiling that matches the fan housing dimensions (7.5 x 7.2 inches). Ensure there is sufficient clearance above the ceiling for the fan housing and ductwork.
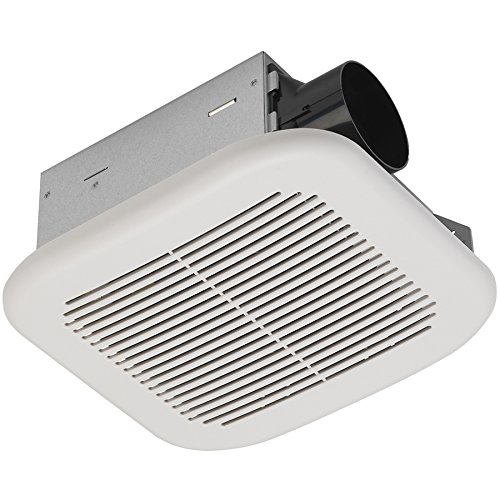
Image: The Utilitech 2-Sone 70-CFM Bathroom Fan unit, showing the white grille cover, the metal housing, and the circular duct connection port on the side.
3. Mount Fan Housing:
Insert the fan housing into the ceiling opening. Secure the housing to the ceiling joists using the provided mounting brackets and screws. Ensure the fan is level and securely fastened.
4. Connect Ductwork:
Connect appropriate ductwork (typically 4-inch round duct) to the fan's exhaust port. Secure the duct with duct tape or clamps to ensure an airtight seal. Route the ductwork to an exterior vent cap.
5. Wiring Elettriku:
Remove the wiring cover plate on the fan housing. Connect the household electrical wires to the fan's wires according to the wiring diagram provided inside the fan's junction box. Typically, this involves connecting black to black (hot), white to white (neutral), and green/bare copper to green (ground). Use wire nuts to secure connections. Replace the wiring cover plate.
6. Install Grille Cover:
Once the fan is wired and secured, attach the grille cover. The grille typically has spring clips that fit into slots on the fan housing. Push the grille firmly until it snaps into place.
7. Irrestawra l-Qawwa:
Turn the power back on at the main service panel. Test the fan to ensure it operates correctly.
Istruzzjonijiet Operattivi
The Utilitech 2-Sone 70-CFM Bathroom Fan is designed for simple operation. Once installed and wired to a wall switch (not included), simply toggle the switch to turn the fan ON or OFF. For optimal performance, operate the fan during and after showering or bathing to effectively remove moisture and odors from the bathroom.
Manutenzjoni
Regular maintenance ensures the longevity and efficiency of your fan.
Cleaning the Grille and Fan Housing:
1. Skonnettja l-Enerġija:
Always turn off power to the fan at the circuit breaker before cleaning.
2. Remove Grille:
Gently pull down the grille cover to disengage the spring clips. Remove the grille from the fan housing.
3. Clean Grille:
Wash the grille cover with mild soap and water. Rinse thoroughly and allow it to dry completely before reattaching.
4. Clean Fan Housing and Blades:
Using a soft cloth or a vacuum cleaner with a brush attachment, carefully remove dust and debris from the fan motor, fan blades, and interior of the housing. Do not use abrasive cleaners or solvents.
5. Reattach Grille:
Once clean and dry, reattach the grille cover by aligning the spring clips with the slots and pushing it firmly into place.
6. Irrestawra l-Qawwa:
Ixgħel il-qawwa lura fis-circuit breaker.
No lubrication is required for the fan motor. The motor is permanently lubricated.
Issolvi l-problemi
If you experience issues with your fan, consult the following table before contacting customer support.
| Problema | Kawża Possibbli | Soluzzjoni |
|---|---|---|
| Il-fann ma jaħdimx | Ebda enerġija għall-fann | Check circuit breaker or fuse. Ensure wall switch is ON. Verify wiring connections. |
| Il-fann huwa storbjuż | Loose mounting screws or ductwork; debris in fan blades; motor issue | Ensure fan housing is securely mounted. Check ductwork for obstructions or loose connections. Clean fan blades. If noise persists, motor may need replacement. |
| Moviment ħażin tal-arja | Blocked ductwork; dirty fan blades/grille; fan too small for room | Check ductwork for obstructions. Clean fan blades and grille. Ensure fan CFM rating is appropriate for bathroom size. |
| Il-fann jivvibraw b'mod eċċessiv | Improper mounting; unbalanced fan blade | Re-check mounting screws for tightness. Inspect fan blade for damage or debris causing imbalance. |
Speċifikazzjonijiet
| Karatteristika | Speċifikazzjoni |
|---|---|
| Brand | Utilitech |
| Numru tal-Mudell | 7111-04-L |
| Dimensjonijiet tal-Prodott | 7.5 x 7.2 x 3.9 pulzieri |
| Piż tal-oġġett | 4.7 Liri |
| Kapaċità tal-Fluss tal-Ajru | 70 pied kubu fil-minuta (CFM) |
| Livell ta' Storbju | 2.0 Sones (equivalent to 70 dB) |
| Voltage | 120 Volts |
| Kulur | Abjad |
| Tip ta' Kamra | Kamra tal-banju |
| Użu Rakkomandat | Ventilazzjoni |
Garanzija u Appoġġ
Utilitech products are manufactured to high-quality standards. For warranty information or technical support, please refer to the warranty card included with your purchase or contact Utilitech customer service. Keep your proof of purchase for warranty claims.
Għal aktar assistenza, jekk jogħġbok żur is-sit uffiċjali ta' Utilitech website or contact their customer support line. Contact information can typically be found on the product packaging or the manufacturer's websit.


