1. Introduzzjoni
The SYMA X22W Mini Drone is a compact quadcopter designed for beginners and enthusiasts. It features a built-in camera for live video streaming, altitude hold for stable flight, and various control modes for an engaging flying experience. This manual provides essential information for safe operation and maintenance of your drone.
2. Kontenut tal-Pakkett
Kun żgur li l-oġġetti kollha huma preżenti fil-pakkett tiegħek:
- SYMA X22W Mini Drone
- Kontrollur mill-bogħod
- Rechargeable LiPo Battery (2 included)
- Cable tal-Iċċarġjar tal-USB
- Spare Propellers (4 pieces)
- Tornavit
- Manwal għall-Utent
3. Gwida ta' Setup
3.1. Iċċarġjar tal-Batterija tad-Drone
The drone is powered by a rechargeable LiPo battery. Before first use, fully charge the battery.
- Qabbad il-kejbil tal-iċċarġjar tal-USB mal-batterija.
- Plug the USB end into a compatible USB power source (e.g., computer USB port, USB wall adapter).
- The indicator light on the charging cable will show the charging status. Refer to the charging cable's specific instructions for light indications (usually red for charging, off or green for fully charged).
- L-iċċarġjar tipikament jieħu madwar 90 minuta. Tiċċarġjax iżżejjed.
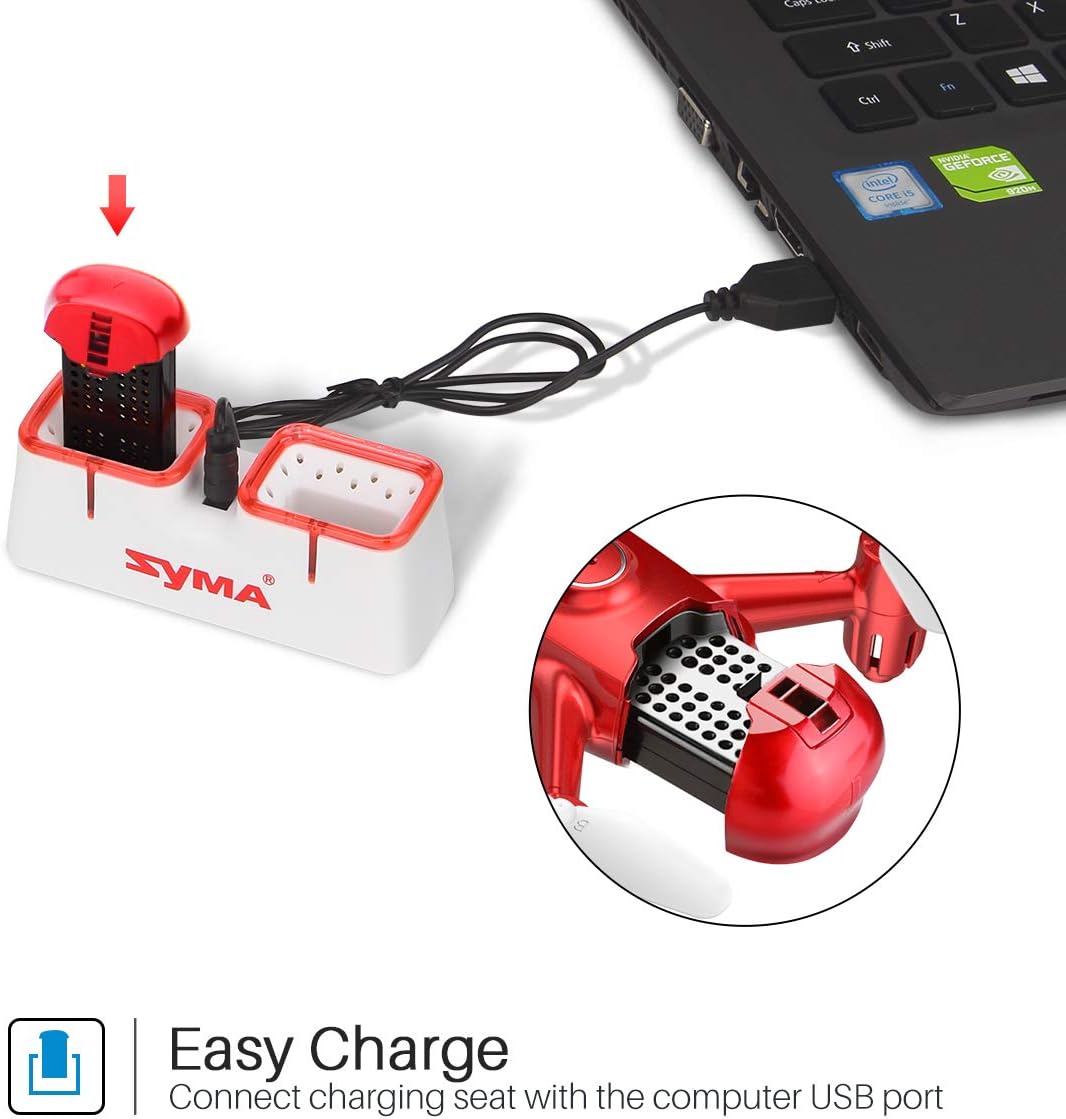
Figure 1: Drone battery charging via USB.
3.2. Installazzjoni tal-Batterija tad-Drone
Once charged, install the battery into the drone.
- Sib il-kompartiment tal-batterija fuq id-drone.
- Carefully insert the charged battery into the compartment.
- Waħħal sew l-għatu tal-kompartiment tal-batterija.

Figure 2: Drone battery installation. The drone comes with two batteries for extended flight time.
3.3. Setup tal-Kontrollur Remot
The remote controller requires 4 AA batteries (not included).
- Iftaħ il-kompartiment tal-batterija fuq wara tal-kontrollur remot.
- Daħħal 4 batteriji AA, filwaqt li tiżgura polarità korretta.
- Agħlaq il-kompartiment tal-batterija.
3.4. Propeller Installation/Replacement
If propellers need to be replaced, ensure they are installed correctly.
- Each propeller is marked with 'A' or 'B'. Match the propeller type to the corresponding motor shaft on the drone.
- Gently push the propeller onto the motor shaft until it is secure.
4. Istruzzjonijiet Operattivi
4.1. Pairing the Drone and Remote Controller
- Poġġi d-drone fuq wiċċ ċatt u livell.
- Ixgħel is-swiċċ tal-enerġija tad-drone. Id-dwal indikatur tad-drone se jteptpu.
- Ixgħel il-kontrollur remot.
- Imbotta l-joystick tax-xellug (throttle) 'il fuq kollu, imbagħad 'l isfel kollu. Id-dwal tad-drone jieqfu jteptipu u jibqgħu mixgħula fiss, u dan jindika tqabbil b'suċċess.
4.2. Tluq u Inżul b'Ċavetta Waħda
This feature allows for simplified take-off and landing.
- After pairing, press the One-Key Take-off button on the remote controller. The drone will automatically ascend to a stable hovering height.
- To land, press the One-Key Landing button. The drone will slowly descend and land automatically.

Figure 3: One-Key Take-off/Landing functionality.
4.3. Funzjoni taż-Żamma tal-Altitudni
The Altitude Hold feature allows the drone to maintain a consistent altitude, making it easier to control and capture stable photos/videos.
- Once the drone is airborne, release the throttle joystick. The drone will automatically hold its current altitude.
- Use the throttle joystick to adjust the altitude as needed.

Figure 4: Altitude Hold for stable flight and photography.
4.4. Modalità bla ras
Headless Mode simplifies flying by eliminating the need to distinguish the drone's front from its rear. The drone's orientation will be relative to the pilot.
- Before taking off, ensure the drone is facing forward relative to the pilot.
- Press the Headless Mode button on the remote controller. The drone's lights will flash to confirm activation.
- In Headless Mode, pushing the right joystick forward will always make the drone fly away from the pilot, regardless of the drone's actual orientation.
- Press the Headless Mode button again to exit this mode.

Figure 5: Headless Mode for easier drone control.
4.5. Flips 3D
Perform exciting aerial stunts with the 3D Flip function.
- Fly the drone to a height of at least 3 meters (10 feet).
- Press the 3D Flip button on the remote controller.
- Immediately push the right joystick in any direction (forward, backward, left, or right). The drone will perform a 360-degree flip in that direction.
4.6. App Control and FPV Live Video
Download the SYMA GO app to your smartphone for advanced control and live video streaming.
- Download and install the SYMA GO app from your smartphone's app store.
- Turn on the drone and connect your smartphone to the drone's Wi-Fi network (usually named 'SYMA-X22W-XXXX').
- Open the SYMA GO app. You should see the live video feed from the drone's camera.
- The app allows for touch control, gravity control, and flight-track drawing.
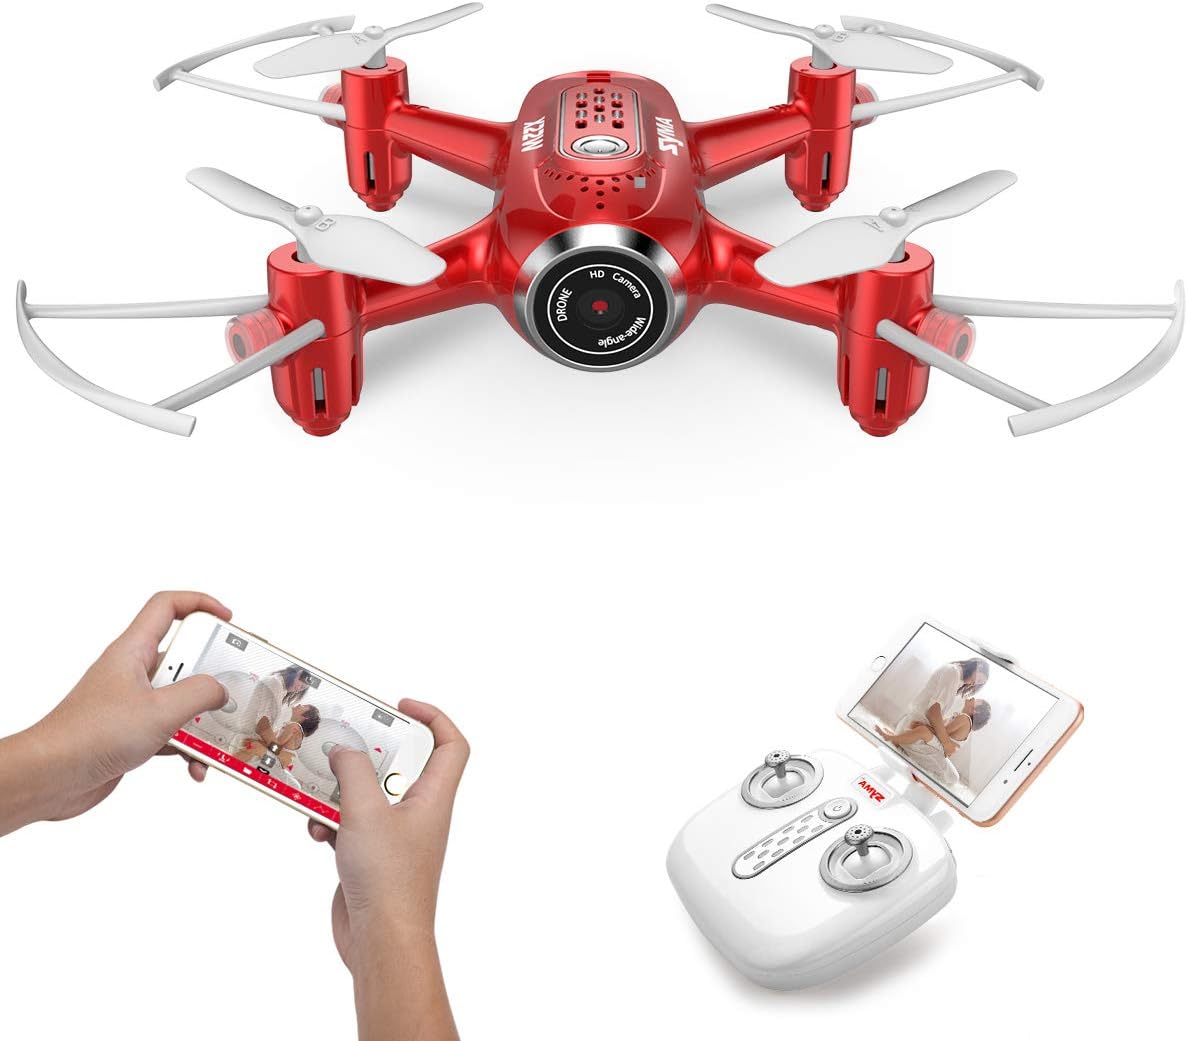
Figure 6: App control and FPV live video functionality.

Figure 7: Drone with finger flight path control via app.
4.7. Kamera HD
The drone is equipped with a 720p HD camera for capturing photos and videos directly to your smartphone via the SYMA GO app.

Figure 8: Drone's HD camera.
5. Manutenzjoni
- Tindif: Use a soft, dry cloth to clean the drone. Do not use solvents or harsh chemicals.
- Skrejjen: Regularly check propellers for damage. Replace any bent or broken propellers immediately.
- Kura tal-batterija: Store batteries in a cool, dry place. Do not expose to extreme temperatures. Fully charge before storage and periodically during long storage periods.
- Ħażna: When not in use, store the drone and remote controller in a safe, dry environment away from direct sunlight.
6 Issolvi l-problemi
| Problema | Kawża Possibbli | Soluzzjoni |
|---|---|---|
| Id-drone ma jirrispondix għall-kontroll mill-bogħod. | Not paired; low battery (drone/remote). | Erġa' qabbad id-drone u r-remote. Iċċarġja/ibdel il-batteriji. |
| Id-drone jittajjar waqt it-titjira. | Not calibrated; uneven surface during startup. | Ensure drone is on a flat surface during pairing. Perform gyroscope calibration (refer to app/manual for specific steps). |
| Poor video quality/no live feed. | Weak Wi-Fi signal; app not connected. | Ensure strong Wi-Fi connection to drone. Reconnect app. Fly closer to the drone. |
| Ħin qasir tat-titjira. | Il-batterija mhix iċċarġjata għalkollox; batterija qadima. | Iċċarġja l-batterija kompletament. Ikkunsidra li tissostitwixxi l-batteriji qodma. |
7. Speċifikazzjonijiet
| Karatteristika | Dettall |
|---|---|
| Brand | SYMA |
| Isem tal-Mudell | X22W |
| Kulur | Aħmar |
| Riżoluzzjoni tal-Qbid tal-Vidjo | 720p |
| Teknoloġija tal-Konnettività | Wi-Fi |
| Livell ta' Ħiliet | Bidu |
| Piż tal-oġġett | 7 uqija |
| Kapaċità tal-batterija | 3000 Milliamp Hours (total for both batteries, assuming 1500mAh each or similar) |
| Tip ta' Kontroll | App Control |
| Materjal | Plastic ABS |
| Dimensjonijiet tal-Prodott | 12.6 x 7.48 x 2.76 pulzieri |
| Età Rakkomandata | 14 snin 'il fuq |
8. Garanzija u Appoġġ
For warranty information and technical support, please refer to the official SYMA webis-sit jew ikkuntattja lill-bejjiegħ tiegħek. Żomm l-irċevuta tax-xiri tiegħek bħala prova tax-xiri.


