Introduzzjoni
This manual provides detailed instructions for the installation, operation, and maintenance of your TMEZON Wireless Security Camera Network System. Please read this manual thoroughly before use to ensure proper functionality and safety.
Kontenut tal-Pakkett
Please verify that all items are present in your package. If any items are missing or damaged, contact customer support.
- 1 x 8-Channel 1080P HD WiFi NVR (with 2TB HDD pre-installed)
- Wireless IP Cameras (Quantity may vary, typically 4 or 8 for an 8-channel system)
- Adapters tal-Enerġija għal NVR u Kameras
- Ġurdien USB
- Cable Ethernet
- Cable HDMI
- Viti u Plakek tal-Immuntar
- Manwal għall-Utent (Dan id-dokument)
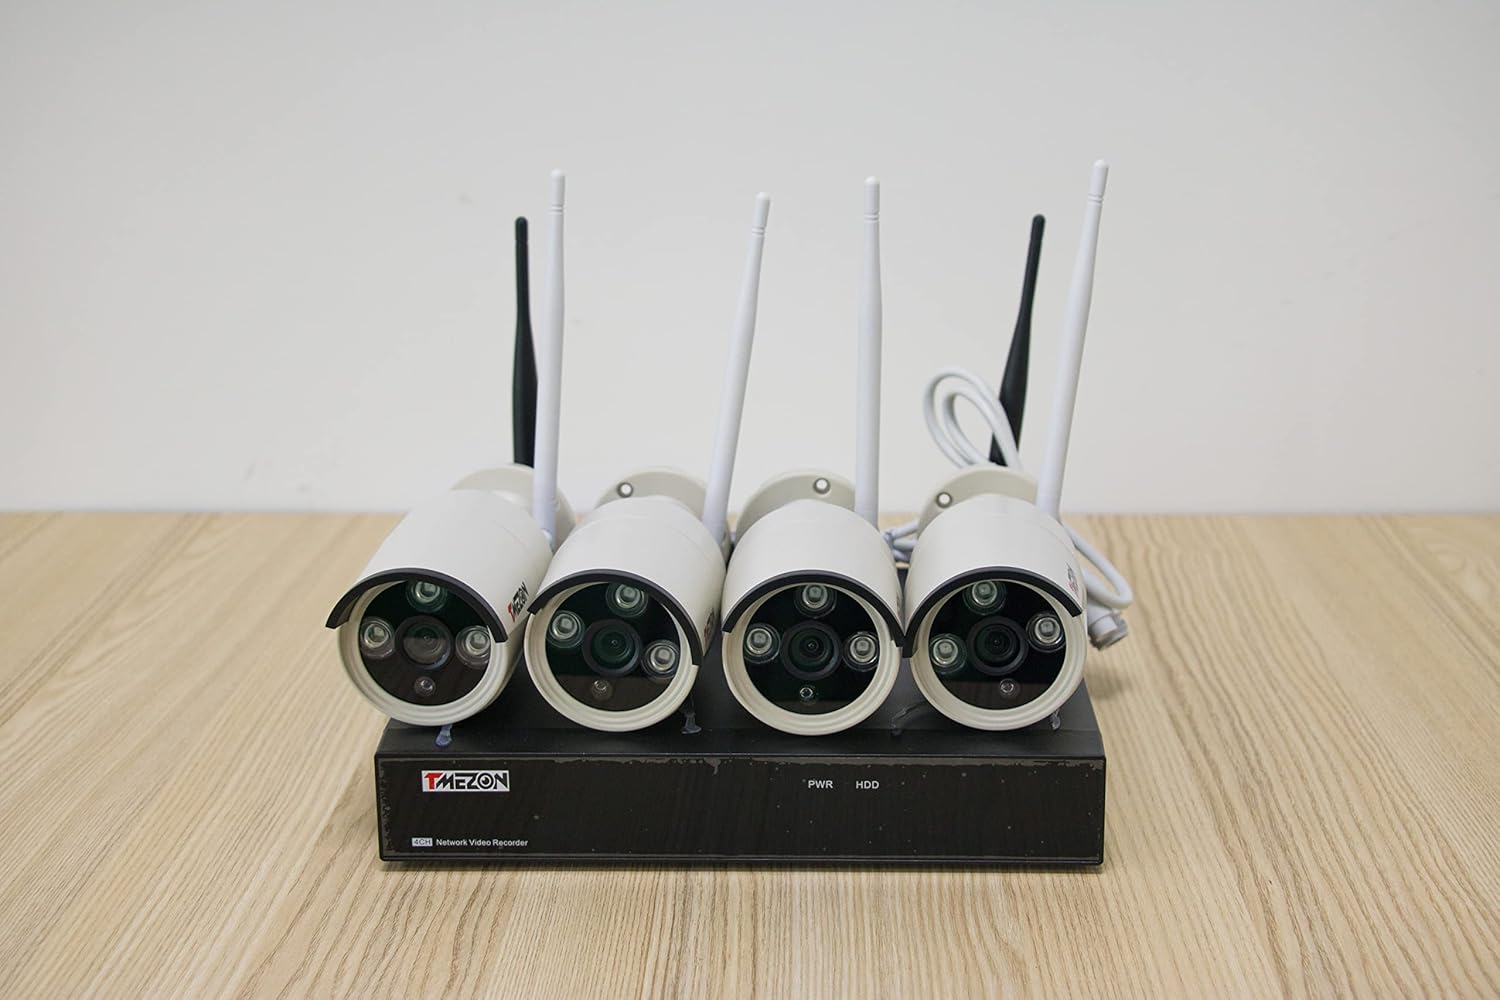
Deskrizzjoni tal-Immaġni: A minn fuq għal isfel view of the TMEZON NVR unit with four wireless security cameras connected. The NVR has "TMEZON" branding and indicators for PWR and HDD. Each camera has two antennas and a lens assembly.
Setup tas-Sistema
1. Konnessjoni tal-NVR
Qabbad l-NVR ma' sors ta' enerġija billi tuża l-adapter tal-enerġija pprovdut.
Connect the NVR to a monitor or TV using an HDMI or VGA cable.
Connect the USB mouse to the NVR's USB port for navigation.
Għal remoti viewing, connect the NVR to your router using the Ethernet cable.

Deskrizzjoni tal-Immaġni: A diagram illustrating the rear panel connections of the TMEZON NVR. Labels indicate ports for VGA, HDMI, WAN (Ethernet), USB (for mouse), and DC 12V power input. Corresponding icons show connections to a 1080P monitor, an Ethernet router, a USB mouse, and a DC power adapter.
2. Installazzjoni tal-Kamera
Mount the wireless IP cameras in desired locations. Ensure they are within range of the NVR's WiFi signal.
Connect each camera to its respective power adapter.
The cameras will automatically pair with the NVR upon power-up. If pairing issues occur, refer to the troubleshooting section.
3. Konfigurazzjoni Inizjali
Follow the on-screen prompts to set up the NVR, including language, date/time, and password.
The system comes with a 2TB HDD for continuous recording. Ensure it is recognized and formatted by the NVR.
Tħaddim tas-Sistema tas-Sigurtà Tiegħek
Live View
After setup, the NVR will display live feeds from all connected cameras on the monitor.
Reġistrazzjoni
The system is configured for continuous recording to the 2TB HDD. You can adjust recording schedules and motion detection settings via the NVR menu.
Daqq
Aċċess irreġistrat footage through the NVR's playback menu. You can search by date, time, or event.
Remote Access (Smartphone Quick View)
Download the official TMEZON app on your smartphone or tablet.
Register an account and add your NVR device by scanning the QR code or manually entering the device ID.
Ensure your NVR is connected to the internet via the Ethernet port for remote viewfunzjonalità tal-ing.
Viżjoni bil-lejl
The 2.0MP IP cameras feature night vision technology, automatically switching to infrared mode in low-light conditions to provide clear surveillance.
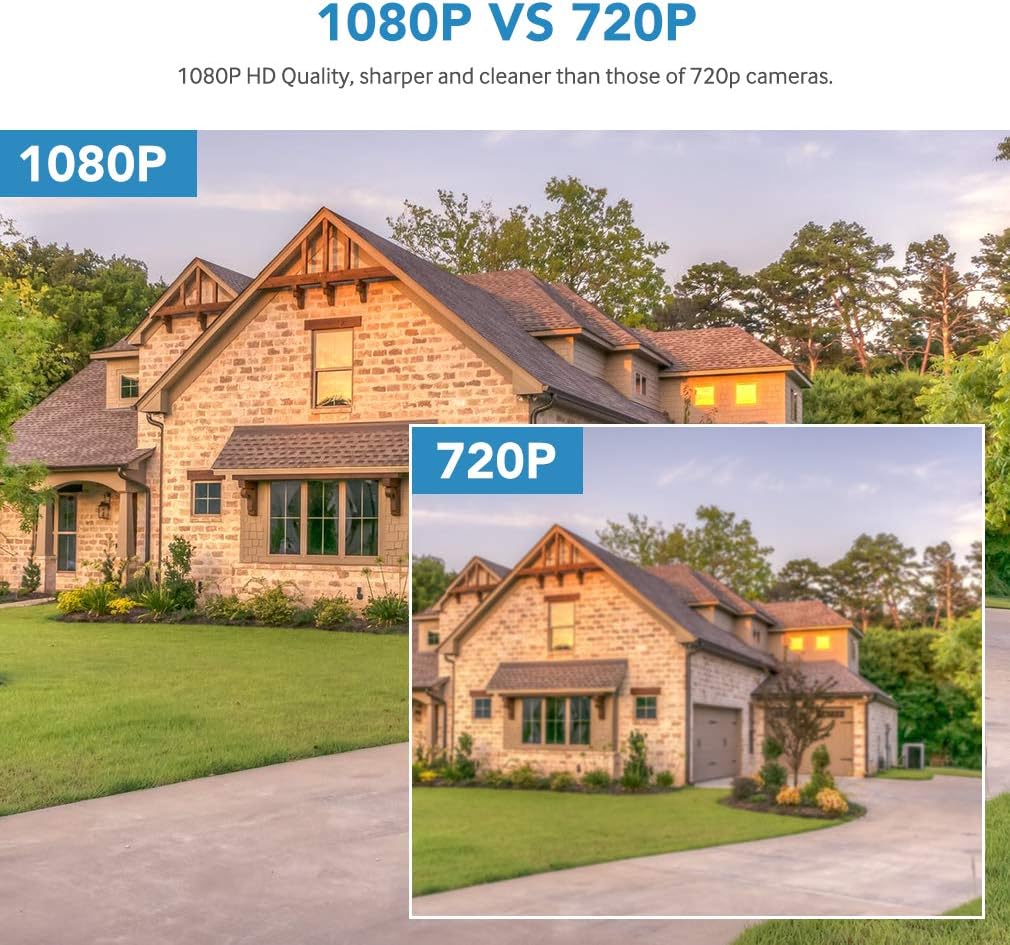
Deskrizzjoni tal-Immaġni: A visual comparison demonstrating the difference between 1080P and 720P video resolution. The 1080P image of a house appears sharper and more detailed than the 720P image, highlighting the superior clarity of the system's cameras.
Linji Gwida ta' Manutenzjoni
- Keep the NVR and cameras clean and free from dust. Use a soft, dry cloth.
- Ensure proper ventilation for the NVR to prevent overheating.
- Regularly check camera lenses for obstructions or dirt that may impair image quality.
- Perjodikament mill-ġdidview irreġistrat footage to ensure the system is functioning as expected.
- Keep the NVR firmware updated for optimal performance and security. Check the manufacturer's websit għall-aġġornamenti.
Issolvi Problemi Kwistjonijiet Komuni
No Image on Monitor
Check power connections for both NVR and monitor.
Verify HDMI/VGA cable connections.
Kun żgur li s-sors tad-dħul korrett huwa magħżul fuq il-monitor tiegħek.
Cameras Not Connecting
Ensure cameras are powered on and within range of the NVR.
Check for physical obstructions or strong interference sources.
If necessary, manually pair cameras through the NVR's menu (refer to the NVR's specific pairing instructions).
Remote Access Not Working
Confirm the NVR is connected to your router via Ethernet and has internet access.
Verify your smartphone has a stable internet connection.
Ensure the correct device ID is entered in the app.
Check firewall settings on your router if issues persist.
Kwalità Fqira tal-Immaġni
Lentijiet tal-kamera nadifa.
Ensure cameras are securely mounted and not vibrating.
Check for strong light sources directly facing the camera, which can cause glare.
Speċifikazzjonijiet tal-Prodott
| Karatteristika | Dettall |
|---|---|
| Numru tal-Mudell | MZ-WF-8013P/20-A1 |
| Konnettività | Wireless (WiFi) |
| Riżoluzzjoni tal-vidjo | 1080p, 960p |
| Numru ta 'Kanali | 8 |
| Kapaċità tal-Ħżin | 2 TB HDD (pre-installed) |
| Sors tal-Enerġija | Corded Elettriku |
| Apparati Kompatibbli | Cameras, Personal Computers, Smartphones |
| Teknoloġija tad-Dawl Baxx | Night color (Infrared Night Vision) |
| Dimensjonijiet tal-Prodott | 14.17 x 11.22 x 8.27 pulzieri |
| Piż tal-oġġett | 12.82 liri |
Garanzija u Appoġġ għall-Klijent
For warranty information, please refer to the documentation included with your purchase or visit the official TMEZON websit.
If you encounter any issues not covered in this manual or require further assistance, please contact TMEZON customer support. Contact details are typically available on the product packaging or the official websit.


