1. Introduzzjoni
Welcome to the MJX X401H FPV Quadcopter Drone User Manual. This guide provides detailed instructions for the safe operation, assembly, maintenance, and troubleshooting of your new drone. Please read this manual thoroughly before operating the drone to ensure proper function and to prevent damage or injury.
Safety Warning: Always operate the drone in open areas, away from people, animals, and obstacles. Ensure all components are correctly assembled and batteries are fully charged before each flight. Adult supervision is recommended for younger users.
2. Prodott Aktarview
2.1 Karatteristiċi ewlenin
- Altitude-Hold Technology: Integrated air pressure sensor for stable hovering, making it easier to capture high-quality photos and videos.
- FPV Real-Time Transmission: Experience first-person view flight by streaming live video directly to your mobile device via Wi-Fi.
- Easy to Fly: Equipped with One Key Return and Headless Security System for simplified control, suitable for beginners.
- Tluq u Inżul Ewlenin Wieħed: Simplifies the most challenging parts of flight with a single button press.
- 3D Flip and Roll: Perform impressive aerial stunts with ease.
- Left and Right Hand Switch Mode: Adaptable control scheme for various pilot preferences.
2.2 Kontenut tal-Pakkett
Kun żgur li l-oġġetti kollha li ġejjin huma inklużi fil-pakkett tiegħek:
- 1x MJX X401H Drone
- 1x C4005 FPV Camera
- 1x Transmitter (Remote Control)
- 1x Detentur tal-Mowbajl
- 1x 7.4V 350mAh Li-Po Battery
- 4x Spare Propellers
- 1x Mikro USB Charging Cable
- 1x Tornavit
- 1x Manwal tal-Utent (bl-Ingliż)

Figura 2.2.1: MJX X401H Drone and its included accessories, including the remote control, battery, spare propellers, and charging cable. The image also indicates the drone's approximate dimensions of 31 inches by 31 inches.
3. Gwida ta' Setup
3.1 Assemblaġġ tad-Drone
- Installa Skrejjen: Carefully attach the propellers to the motor shafts. Ensure the correct propeller (A or B) is installed on the corresponding motor as indicated in the drone's manual or markings. Secure them with the provided tiny screws using the screwdriver. Be careful not to lose the screws.
- Installa l-Gwardji tal-Iskrun: Attach the propeller guards to the drone's arms for added protection.
- Install Landing Skids: Secure the landing skids to the bottom of the drone.
- Install Camera and Mobile Phone Holder: Attach the C4005 FPV camera to the designated slot on the drone. Mount the mobile phone holder onto the transmitter.
3.2 Iċċarġjar u Installazzjoni tal-Batterija
- Charge Drone Battery: Connect the 7.4V 350mAh Li-Po battery to the Micro USB charging cable. Connect the USB cable to a USB power source (e.g., computer USB port or a USB wall adapter). The charging indicator light will show the charging status. A full charge typically takes 60-90 minutes. Do not overcharge.
- Installa l-Batterija tad-Drone: Once charged, carefully insert the battery into the battery compartment on the drone. Ensure it is securely connected and the compartment cover is closed.
- Installa l-Batteriji tat-Trasmettitur: Open the battery compartment on the back of the transmitter. Insert 4x AA batteries (not included) according to the polarity markings. Close the compartment.
4. Istruzzjonijiet Operattivi
4.1 Pairing the Drone and Transmitter
- Poġġi d-drone fuq wiċċ ċatt u livell.
- Ixgħel is-swiċċ tal-enerġija tad-drone. Id-dwal indikatur se jteptipu.
- Turn on the transmitter. The transmitter's indicator light will flash.
- Push the left throttle stick (vertical) all the way up, then all the way down. The drone and transmitter lights will become solid, indicating successful pairing.
4.2 FPV App Connection (Real-Time Transmission)
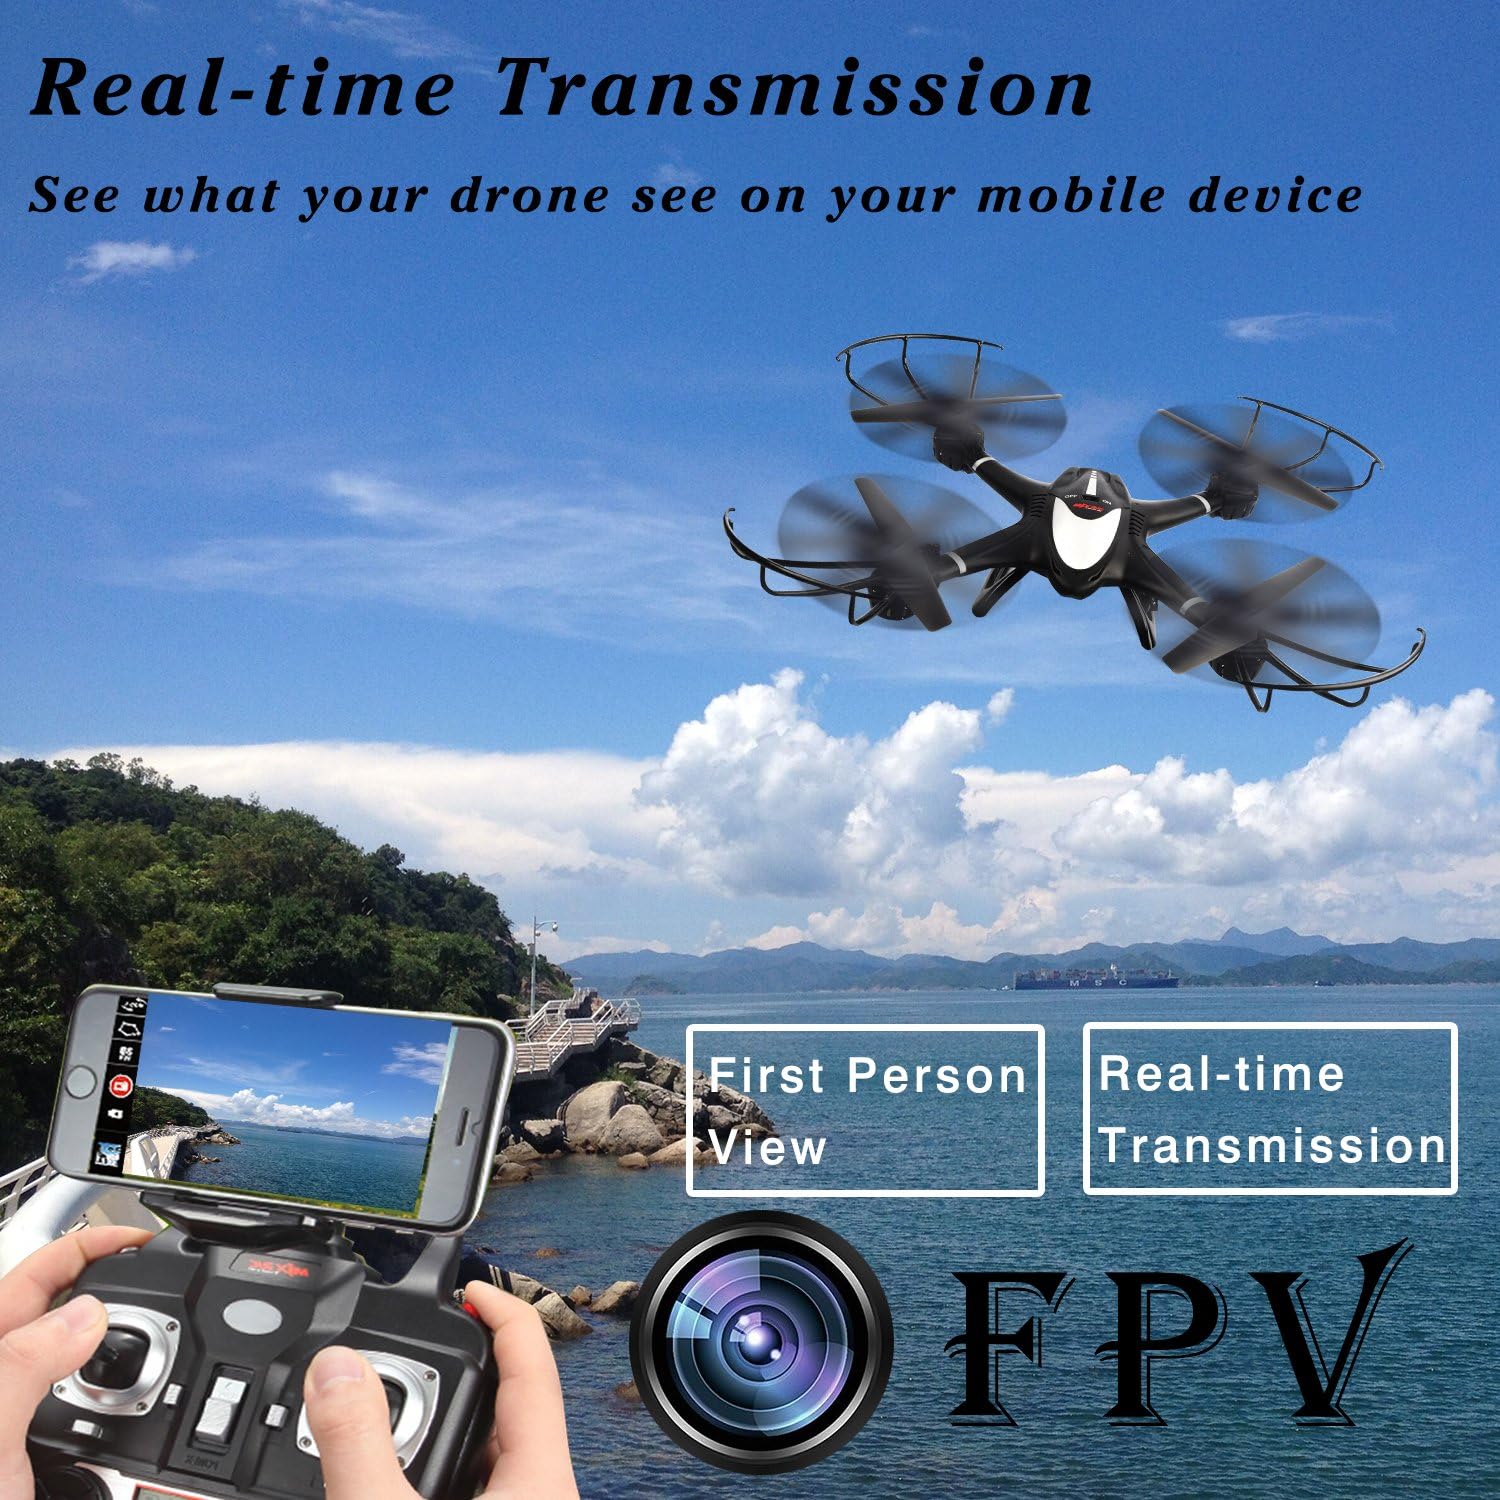
Figura 4.2.1: Illustration of the FPV (First Person View) real-time transmission feature, showing a smartphone mounted on the controller displaying the drone's live camera feed.
- Download the "MJX H" or "MJX FPV" app from your mobile device's app store (iOS or Android).
- Turn on the drone and the transmitter.
- On your mobile device, go to Wi-Fi settings and connect to the Wi-Fi network named "MJX_XXXXXX" (the specific name will be on the drone or in its packaging).
- Open the MJX app. You should see the live video feed from the drone's camera.
- You can now control the drone via the physical remote and view the FPV feed on your phone. Note: Some models may require switching between FPV mode and control mode within the app, meaning you cannot always have both simultaneously.
4.3 Kontrolli Bażiċi tat-Titjira
Iffamiljarizza ruħek mal-kontrolli tat-trasmettitur:
- Stick tax-Xellug (Throttle/Yaw):
- Push up/down: Increase/decrease altitude (Throttle).
- Push left/right: Rotate drone left/right (Yaw).
- Right Stick (Forward/Backward/Left/Right):
- Push up/down: Move drone forward/backward.
- Push left/right: Move drone left/right (Strafe).
4.4 Funzjonijiet Speċjali
4.4.1 Żamma tal-Altitudni

Figura 4.4.1: Visual representation of the Altitude Hold feature, where the drone automatically maintains a set height, indicated by a lock icon.
The drone automatically maintains its altitude once the throttle stick is released to the center position. This allows for more stable flight and easier photo/video capture.
4.4.2 Modalità mingħajr ras

Figura 4.4.2: Depiction of Headless Mode, where the drone's orientation is relative to the pilot, simplifying control regardless of the drone's front direction.
Press the Headless Mode button on the transmitter. In Headless Mode, the drone's forward direction will always be the direction the pilot is facing when Headless Mode was activated, regardless of the drone's actual orientation. This simplifies control for beginners.
4.4.3 Ritorn Ċavetta Wieħed
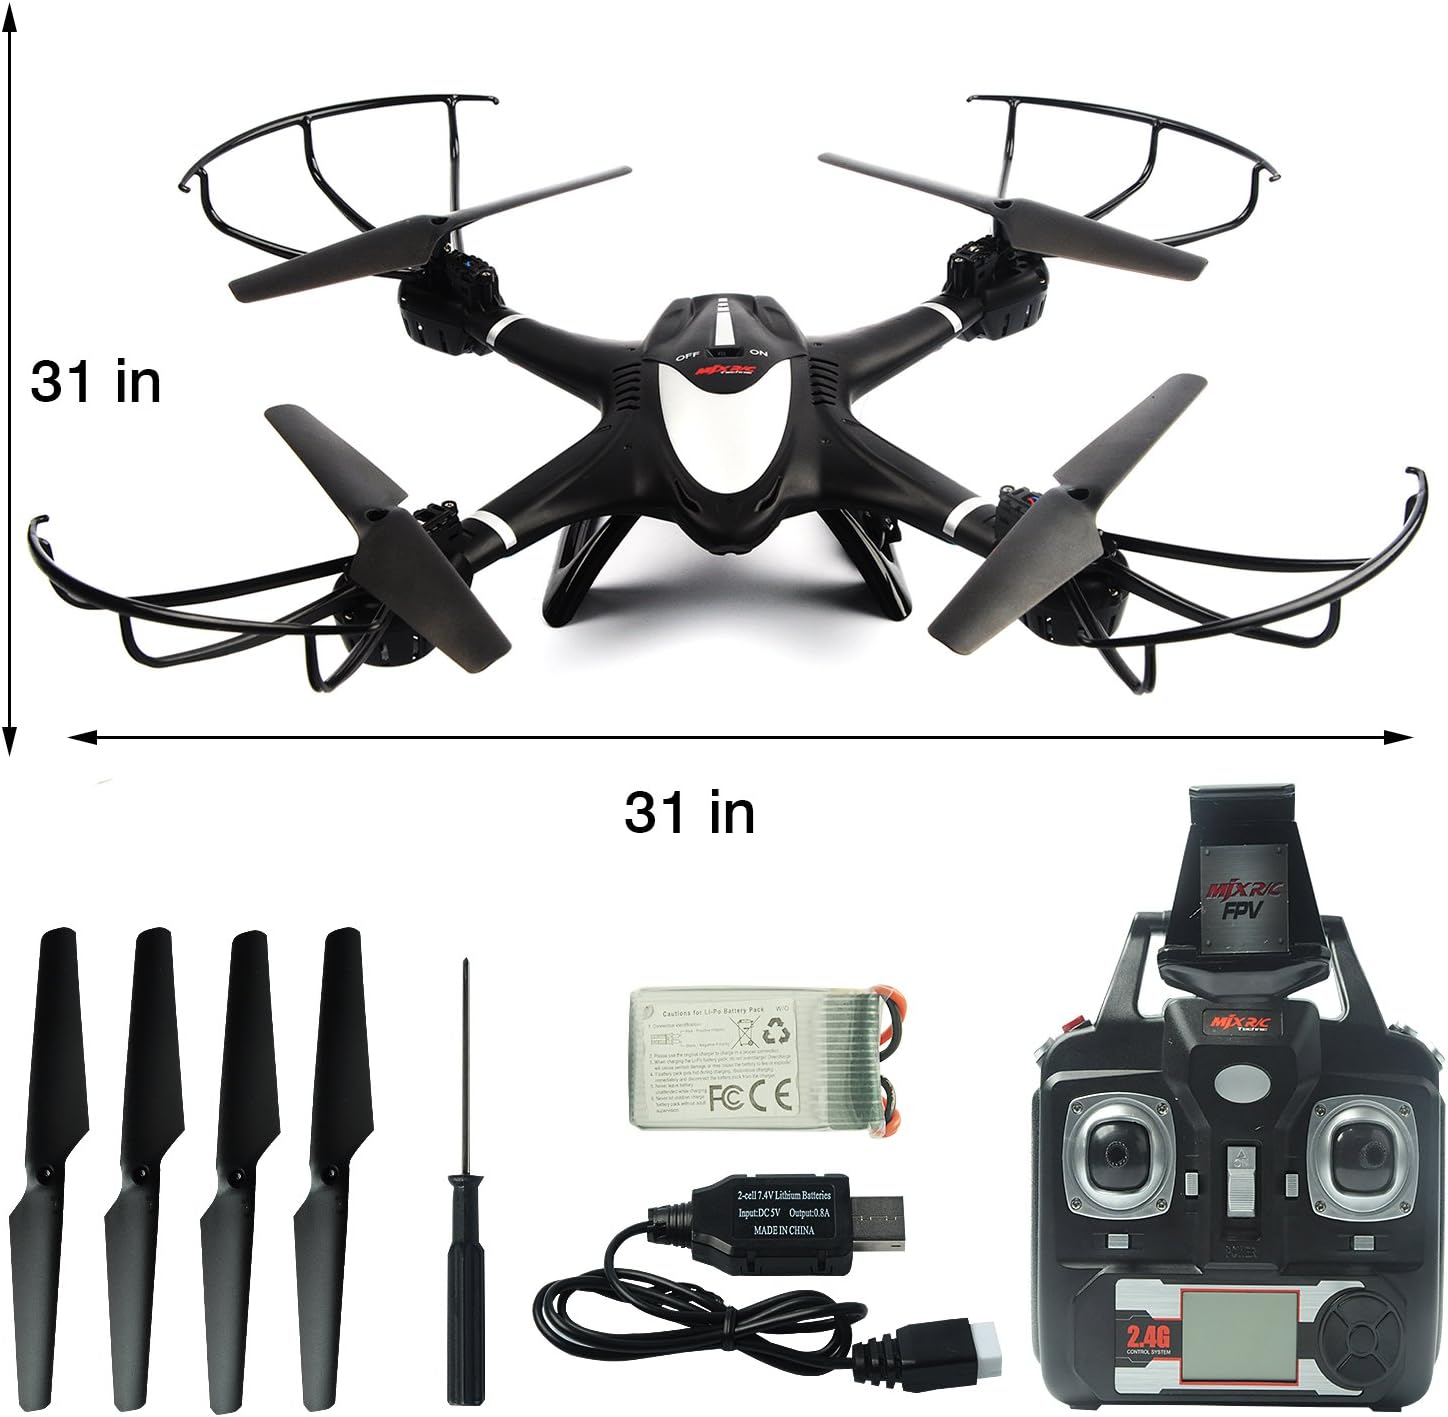
Figura 4.4.3: Illustration of the One Key Return function, showing the drone automatically flying back towards the take-off point after a button press.
Press the One Key Return button. The drone will automatically fly back towards its take-off point. Ensure there are no obstacles in its return path. This function works best when the drone is within a reasonable range and has a clear signal.
4.4.4 3D Flip and Roll
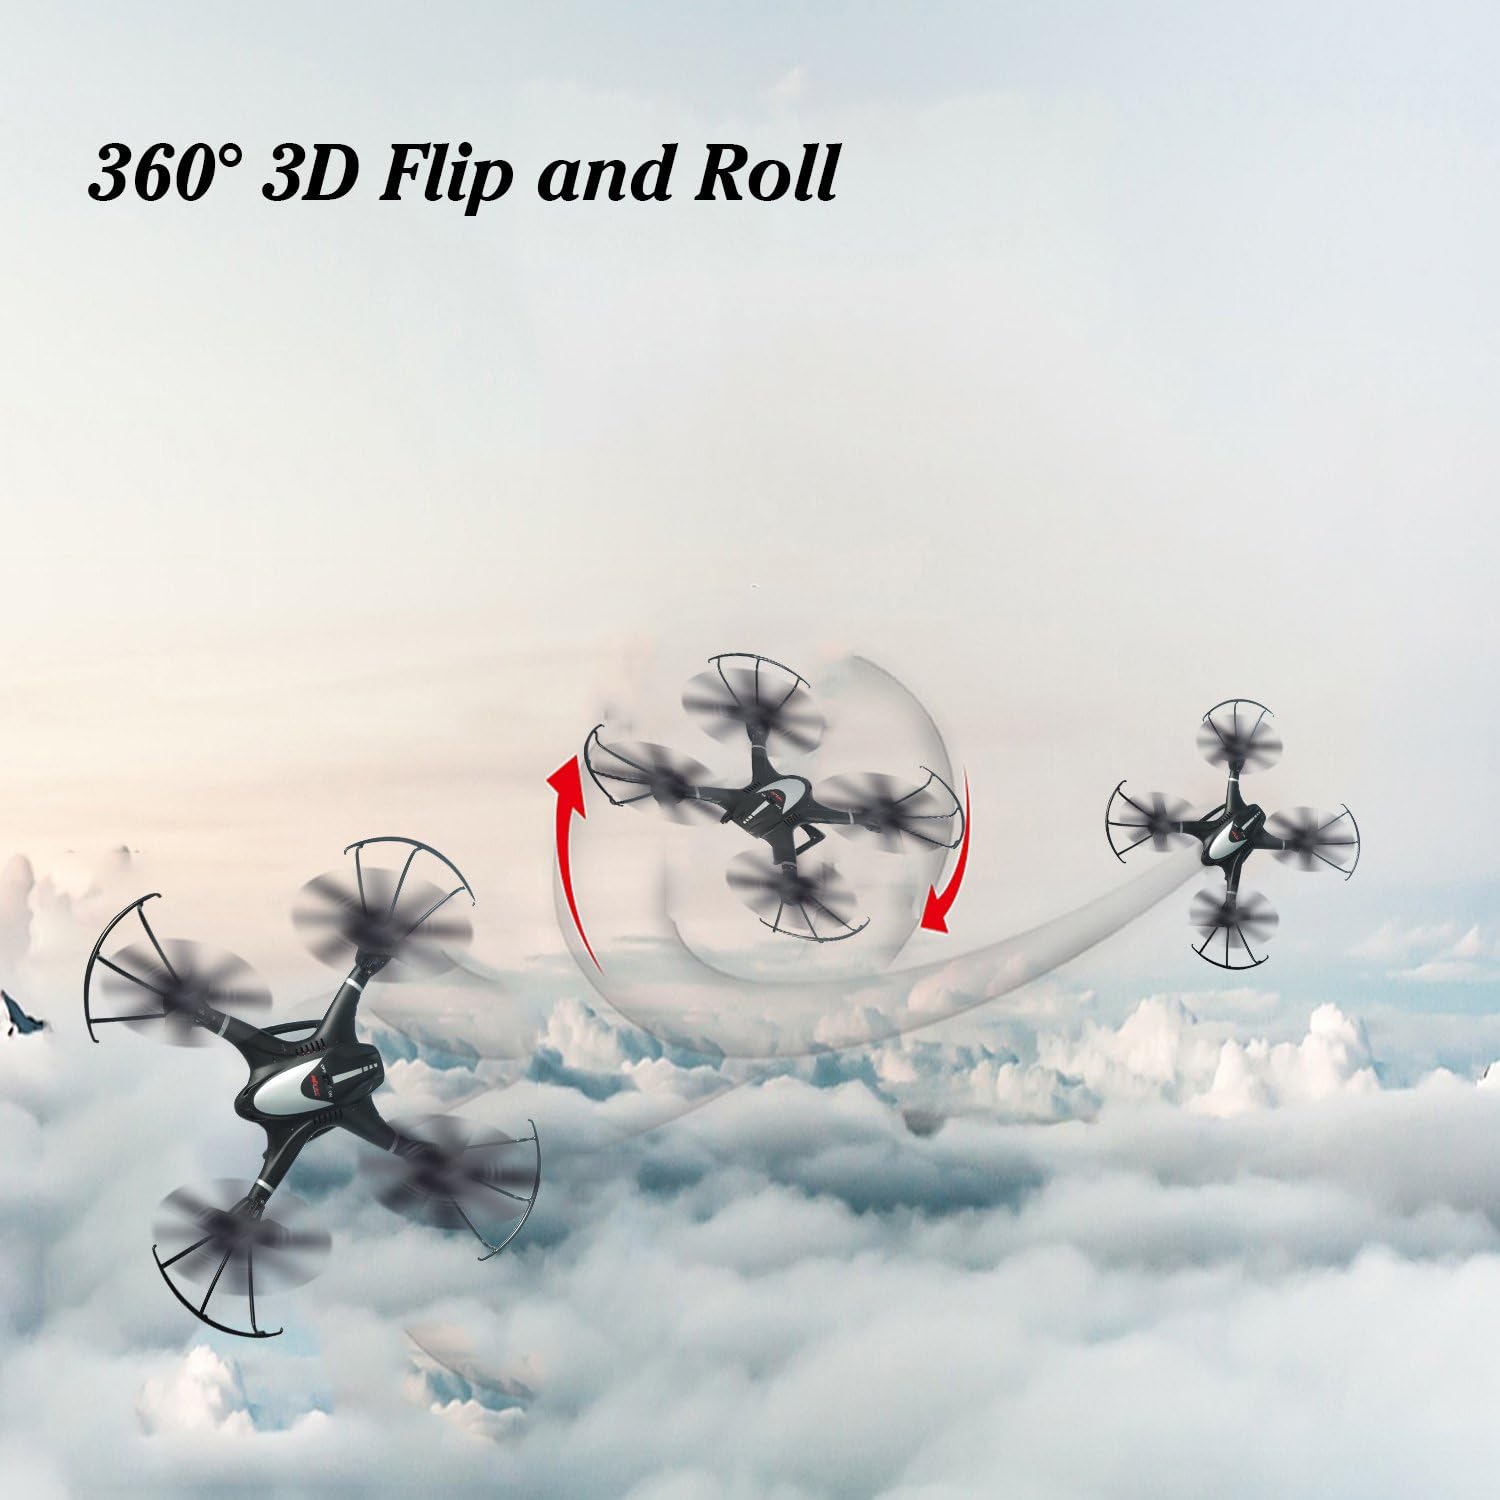
Figura 4.4.4: Dynamic image showing the drone executing a 360-degree 3D Flip and Roll maneuver in the sky.
To perform a 3D flip, fly the drone to a height of at least 3 meters (10 feet). Press the 3D Flip button (usually a dedicated button or a combination of stick presses). Then, quickly push the right control stick in the direction you want the drone to flip (forward, backward, left, or right). The drone will perform a 360-degree flip.
4.4.5 Gravity Control Mode (via App)

Figura 4.4.5: Illustrates the Gravity Control Mode, where the drone's movement (turn left, turn right, forward, backward) is controlled by tilting the connected mobile device.
Within the MJX FPV app, you can activate Gravity Control Mode. This allows you to control the drone's movement by tilting your mobile device. Tilt forward to move forward, tilt backward to move backward, and tilt left/right to turn left/right. Ensure you are in a safe, open area when using this mode.
4.5 Taking Off and Landing
- Bidu Ewlieni Wieħed: After pairing, press the One Key Take-off button. The drone will automatically ascend to a stable hovering height.
- Tlugħ manwali: After pairing, push both control sticks to the bottom-outer corners simultaneously to arm the motors. Then, slowly push the left throttle stick up to ascend.
- Inżul b'Ċavetta Waħda: Press the One Key Landing button. The drone will automatically descend and land gently.
- Inżul manwali: Slowly pull the left throttle stick down until the drone lands. Once landed, hold the throttle stick down for a few seconds until the propellers stop spinning.
5. Manutenzjoni
- Tindif: Use a soft, dry cloth to clean the drone and transmitter. Do not use water or chemical cleaners.
- Propeller Inspection and Replacement: Regularly check propellers for damage (cracks, bends). Replace any damaged propellers immediately using the spare propellers provided. Ensure correct A/B propeller placement.
- Kura tal-batterija:
- Do not overcharge or over-discharge the Li-Po battery.
- Store batteries in a cool, dry place, away from direct sunlight and heat.
- Jekk taħżinha għal perjodi twal, iċċarġja l-batterija sa madwar 50% tal-kapaċità tagħha.
- Ħażna: When not in use, store the drone and its components in a safe, dry place, away from extreme temperatures and direct sunlight.
6 Issolvi l-problemi
| Problema | Kawża Possibbli | Soluzzjoni |
|---|---|---|
| Drone does not respond to transmitter. | Not paired; low battery (drone or transmitter); out of range. | Re-pair drone and transmitter. Charge drone battery. Replace transmitter batteries. Fly within operational range. |
| Id-drone jtir b'mod erratiku jew jitbiegħed mid-drift. | Propellers damaged or incorrectly installed; motors damaged; calibration needed. | Check and replace damaged propellers. Ensure correct A/B propeller installation. Perform gyroscope calibration (refer to specific transmitter instructions for calibration sequence). |
| FPV feed is choppy or not connecting. | Weak Wi-Fi signal; too far from drone; app issues. | Ensure mobile device is close to the drone. Reconnect to the drone's Wi-Fi network. Restart the app and drone. Ensure no other Wi-Fi interference. |
| Drone crashes or loses control unexpectedly. | Interference (e.g., cell towers, power lines); low battery; critical component failure. | Fly in open areas away from potential interference. Ensure battery is fully charged. If issues persist, contact customer support. |
| One Key Return does not work as expected. | Drone too far; strong wind; signal interference. | Ensure drone is within optimal range. Avoid flying in strong winds. Maintain clear line of sight. |
7. Speċifikazzjonijiet
| Karatteristika | Dettall |
|---|---|
| Brand | Estensjoni MJ |
| Isem tal-Mudell | X401H |
| Kulur | Iswed |
| Materjal | Plastik |
| Piż tal-oġġett | 1.71 liri (madwar 0.77 kg) |
| Dimensjonijiet tal-Prodott | 16.1 x 12.1 x 3.2 pulzieri (madwar 40.9 x 30.7 x 8.1 ċm) |
| Batterija | 7.4V 350mAh Li-Po (included) |
| Riżoluzzjoni tal-Qbid tal-Vidjo | 1080p, 720p |
| Teknoloġija tal-Konnettività | Wi-Fi (for FPV) |
| Teknoloġija tal-Kontroll mill-bogħod | 2.4GHz |
| Livell ta' Ħiliet | Bidu |
| Firxa ta' Età (Deskrizzjoni) | Adulti |
8. Garanzija u Appoġġ
MJX provides customer support for their products. For any issues not covered in this manual, or for warranty inquiries, please contact MJX customer service directly. Refer to the product packaging or the official MJX webis-sit għall-aktar informazzjoni ta' kuntatt aġġornata.
Jekk jogħġbok żomm il-prova tax-xiri tiegħek għal pretensjonijiet ta' garanzija.


