1. Informazzjoni Importanti dwar is-Sigurtà
Before using the HMS Magnetic Bike M2218, please read and understand all instructions in this manual. Keep this manual for future reference.
- Ikkonsulta mat-tabib tiegħek qabel tibda xi programm ta' eżerċizzju, speċjalment jekk għandek kundizzjonijiet tas-saħħa pre-eżistenti.
- Ensure all parts are securely fastened and in good working condition before each use. Do not use the bike if any parts are damaged or missing.
- Żomm it-tfal u l-annimali domestiċi 'l bogħod mit-tagħmir waqt it-tħaddim.
- Place the bike on a flat, stable surface with adequate clearance around it.
- Ilbes ħwejjeġ u żraben xierqa għall-eżerċizzju. Evita ħwejjeġ maħlula li jistgħu jinqabdu fil-partijiet li jiċċaqalqu.
- Il-piż massimu tal-utent għal dan l-apparat huwa ta' 125 kg.
- Waqqaf l-eżerċizzju immedjatament jekk tħossok ħażin, sturdut, jew tesperjenza uġigħ.
- Dan il-prodott huwa ddisinjat għall-użu domestiku biss.
2. Istruzzjonijiet tal-Assemblea
Carefully unpack all components and ensure you have all parts listed in the packing list (not provided in this document). Assembly typically requires two people.
2.1 Base Stabilizers Installation
Attach the front and rear stabilizer bars to the main frame using the provided bolts and washers. Ensure they are tightened securely to provide a stable base for the bike.

Figura 1: Ġenb view of the assembled bike, illustrating the stable base provided by the front and rear stabilizers.
2.2 Installazzjoni tal-pedali
Identify the left (L) and right (R) pedals. The right pedal screws in clockwise, and the left pedal screws in counter-clockwise. Ensure the pedal straps are correctly oriented for foot placement.
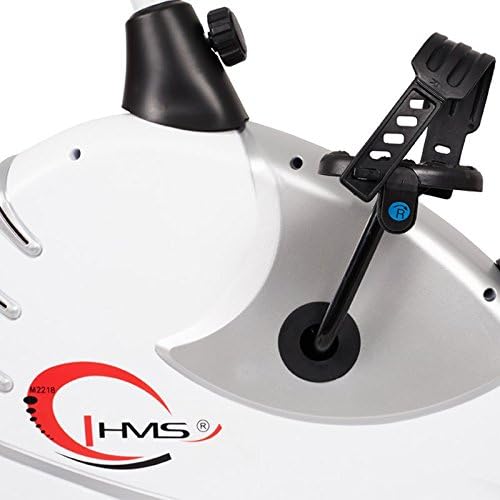
Figure 2: Detail of the pedal with adjustable strap, ensuring secure foot placement during exercise.
2.3 Seat Post and Seat Installation
Insert the seat post into the main frame. Adjust the height to your preference and secure it with the adjustment knob. Attach the ergonomic seat to the top of the seat post.
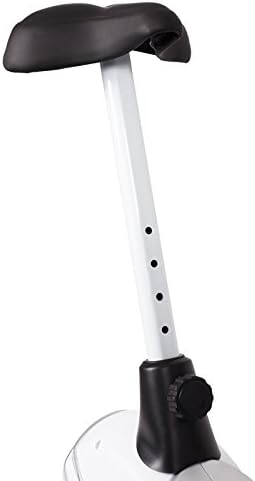
Figure 3: The seat post features multiple adjustment holes for vertical height customization, secured by a knob.

Figure 4: The comfortable, ergonomic seat designed for extended use.
2.4 Handlebar and Console Installation
Attach the handlebar post to the main frame. Secure the handlebars to the post. Finally, connect the console wires and mount the console onto the handlebar post. Ensure all connections are firm.
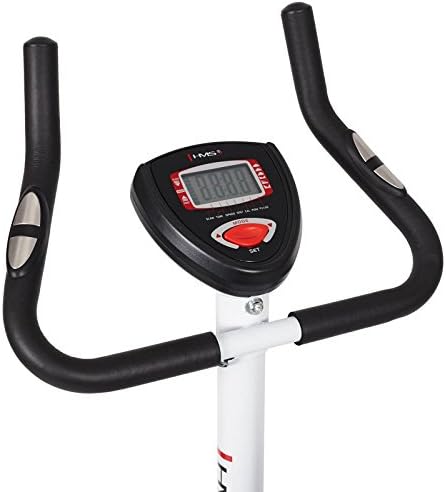
Figure 5: The handlebars provide multiple grip positions, and the central console displays workout data.

Figure 6: The console features a clear digital display and control buttons for mode and settings.
3. Istruzzjonijiet Operattivi
3.1 Adjusting Seat and Handlebars
Adjust the seat height so that your leg is slightly bent at the knee when the pedal is at its lowest point. The handlebars can also be adjusted for comfort and proper posture during your workout.
3.2 Aġġusta tar-Reżistenza
The HMS M2218 features an automatic magnetic resistance system. Use the resistance adjustment knob, typically located below the console, to increase or decrease the workout intensity. Turn clockwise to increase resistance and counter-clockwise to decrease it.
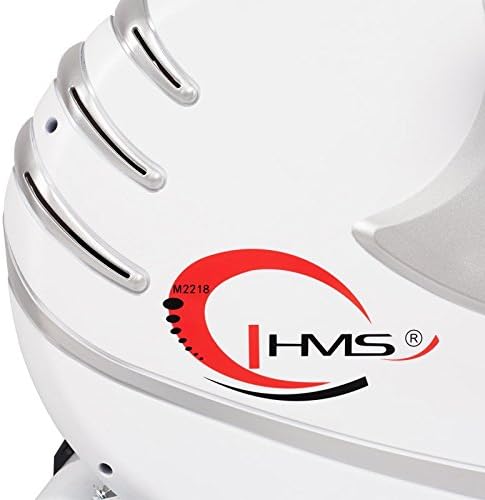
Figure 7: The main body housing the magnetic resistance system, with the HMS logo and model identifier.
3.3 L-Użu tal-Konsol
The console displays various workout metrics to help you track your progress:
- Ħin: Tul tat-taħriġ tiegħek.
- Veloċità: Veloċità taċ-ċikliżmu attwali.
- Distanza: Distanza totali koperta matul it-taħriġ.
- Kaloriji: Kaloriji stmati maħruqa.
- Polz: Heart rate reading from the integrated sensors on the handlebars.
- Skennja: Awtomatikament jiċċikla bejn il-funzjonijiet kollha tal-wiri.
Use the 'MODE' and 'SET' buttons to navigate through display options and set workout targets if available.
4. Manutenzjoni
Regular maintenance ensures the longevity and safe operation of your HMS Magnetic Bike M2218.
- Tindif: Imsaħ ir-rota bl-adamp cloth after each use to remove sweat and dust. Avoid abrasive cleaners or solvents. The plastic elements are easy to clean.
- Iċċekkja l-Konnessjonijiet: Iċċekkja perjodikament il-boltijiet, il-ġewż u l-viti kollha biex tiżgura li huma ssikkati. Issikka kwalunkwe konnessjoni maħlula.
- Spezzjona Partijiet li Jiċċaqilqu: Check pedals, crank arms, and the resistance mechanism for any signs of wear or damage.
- Sostituzzjoni tal-batterija: The console requires 4 AA batteries. Replace them when the display becomes dim or unresponsive.
5 Issolvi l-problemi
If you encounter issues with your HMS Magnetic Bike M2218, refer to the following common problems and solutions:
| Problema | Kawża Possibbli | Soluzzjoni |
|---|---|---|
| Il-konsoll mhux qed juri d-dejta | Batteriji mejta; Konnessjoni tas-sensor maħlula | Replace AA batteries; Check all console cable connections. |
| L-ebda reżistenza jew reżistenza inkonsistenti | Resistance mechanism issue; Loose adjustment knob | Ensure resistance knob is properly engaged; Inspect internal resistance mechanism (contact support if issue persists). |
| Ħsejjes mhux tas-soltu waqt it-tħaddim | Loose bolts/nuts; Worn moving parts | Check and tighten all assembly bolts; Inspect pedals and crank for wear. |
| Qari tal-polz mhux preċiż | Idejn mhux sodi fuq is-sensuri; Idejn niexfa | Ensure firm contact with both hand pulse sensors; Lightly moisten hands if too dry. |
6. Speċifikazzjonijiet tal-Prodott
Key technical details for the HMS Magnetic Bike M2218:
| Karatteristika | Dettall |
|---|---|
| Isem tal-Mudell | M2218 |
| Tip ta 'Reżistenza | Magnetic, Automatic Adjustment |
| Piż tal-Flywheel | 6.2 kg |
| Dimensjonijiet (L x W x H) | 89 x 55 x 131 cm (Product); 89 x 55 x 126 cm (Shipping) |
| Piż tal-Prodott | 26 kg |
| Tagħbija Massima tal-Utent | 125 kg |
| Funzjonijiet tal-Console | Ħin, Veloċità, Distanza, Kaloriji, Polz, Skennjar |
| Aġġustament tas-Sedil | Vertikali |
| Sors tal-Enerġija (Konsol) | 4 batteriji AA (inklużi) |
| Kulur | Abjad / Fidda |
7. Garanzija u Appoġġ
For warranty information, technical support, or to order replacement parts, please contact HMS customer service. Refer to your purchase documentation for specific warranty terms and contact details.
Żomm il-prova tax-xiri tiegħek għal kwalunkwe talba ta' garanzija.


