1. Introduzzjoni
This manual provides comprehensive instructions for the assembly, operation, and maintenance of your Yaheetech YT-424 Bike Repair Stand. Designed for both road and mountain bikes, this stand offers a stable and adjustable platform for various bicycle repair and maintenance tasks. Please read this manual thoroughly before use to ensure proper and safe operation.
2. Informazzjoni dwar is-Sigurtà
- Ensure all quick-release levers and knobs are securely tightened before placing a bicycle on the stand.
- Teċċedix il-kapaċità massima tat-tagħbija ta' 66 lbs (30 kg).
- Always position the stand on a flat, stable, and non-slip surface.
- Distribute the bicycle's weight evenly to maintain stability.
- Keep hands and clothing clear of moving parts, especially when adjusting height or rotating the clamp.
- Spezzjona l-istand regolarment għal kwalunkwe sinjal ta’ xedd jew ħsara. Tużax jekk ikun bil-ħsara.
3. Kontenut tal-Pakkett
Ivverifika li l-komponenti kollha huma preżenti qabel tibda l-assemblaġġ:
- Main Stand Assembly (with foldable legs)
- Arblu ta' Appoġġ Teleskopiku
- 360° Swivel Clamp Driegħ
- Trej tal-Għodda
- Fixed Rod (for handlebar/front wheel stabilization)
- Ħardwer tal-Assemblaġġ (viti, ċavetta Allen)
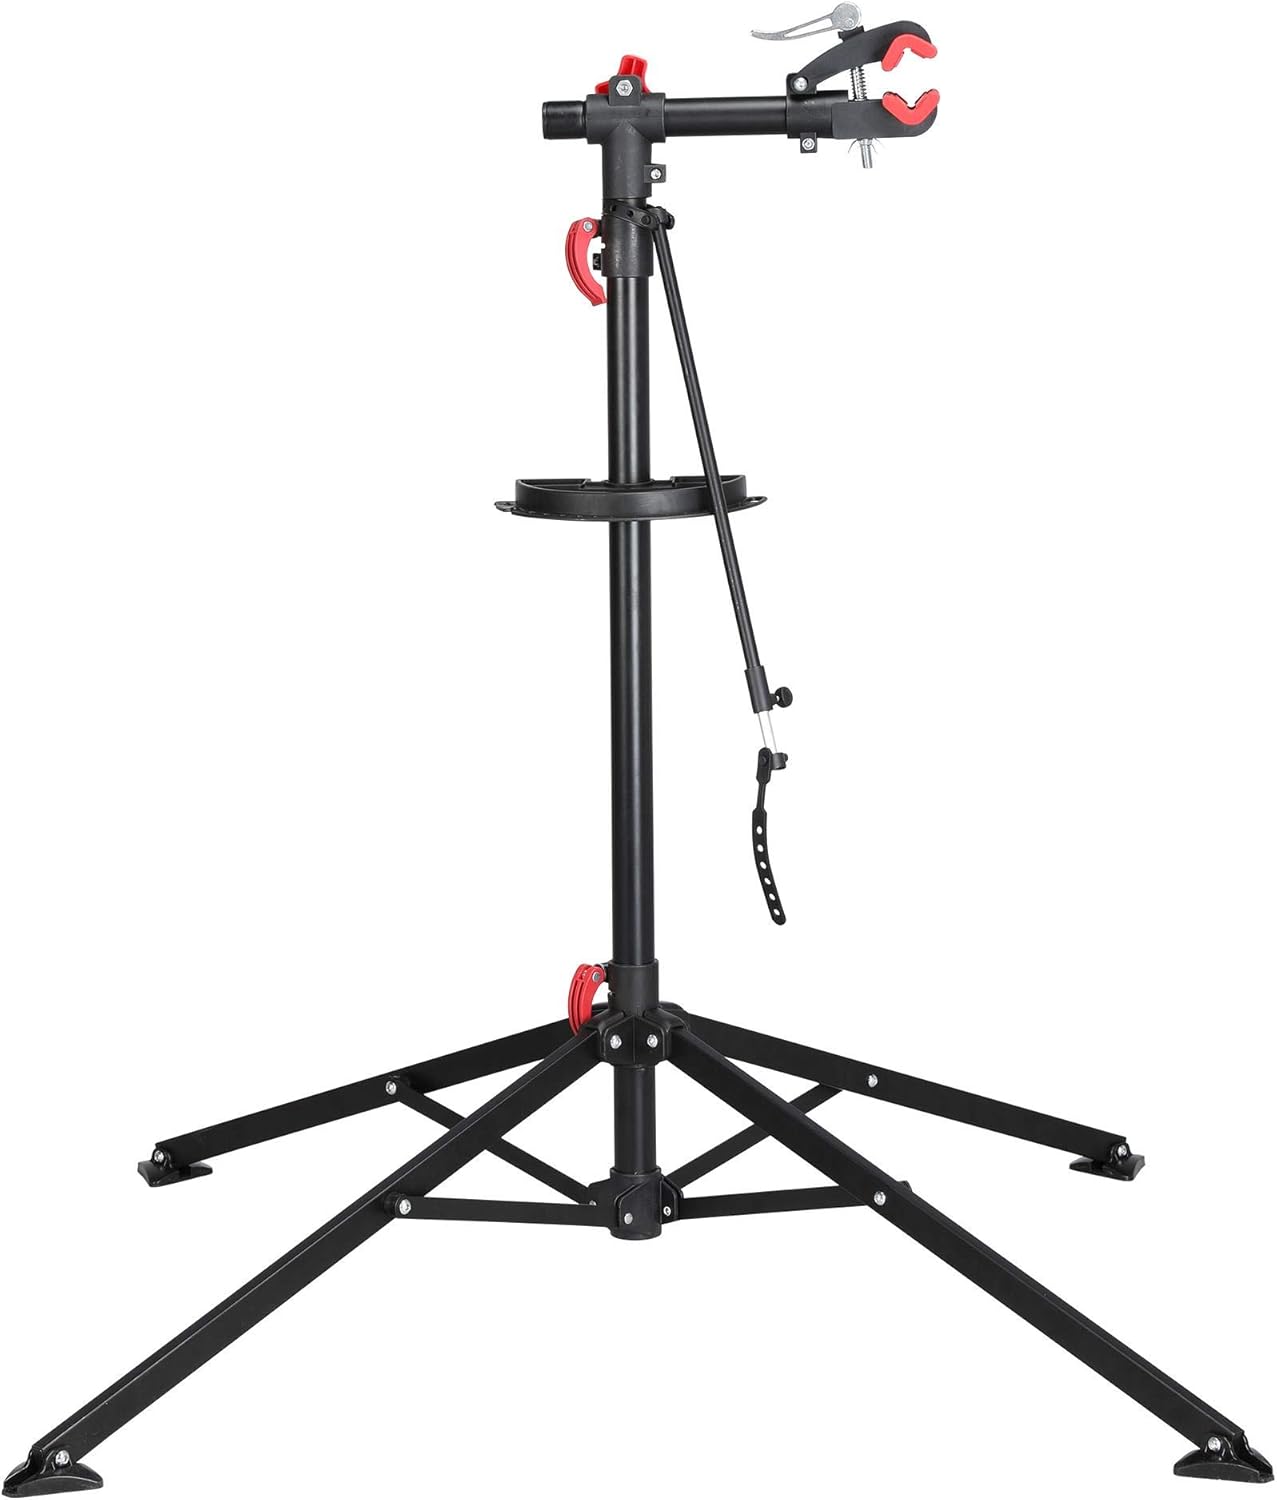
Figure 1: All main components of the Yaheetech Bike Repair Stand.
4. Setup u Assemblea
Segwi dawn il-passi biex tiġbor l-istand tat-tiswija tar-roti tiegħek:
- Iftaħ ir-Riġlejn: Place the main stand assembly on a flat surface. Release the quick-release lever at the base of the stand and carefully extend the four legs outwards until they are fully spread, forming a stable base. Secure the quick-release lever.
- Insert the Telescopic Pole: Insert the telescopic support pole into the main stand's central column. Secure it using the quick-release lever on the main stand.
- Waħħal it-Trej tal-Għodda: Slide the tool tray onto the telescopic support pole at your desired height. Secure it by tightening the provided screw.
- Immonta l-Clamp Driegħ: Insert the 360° swivel clamp arm into the top of the telescopic support pole. Tighten the red knob to secure it.
- Attach Fixed Rod: Assemble the fixed rod by connecting its two parts. Attach the rubber straps to the clamp arm and the bicycle's handlebar or front wheel for stability during repairs.
Video 1: Visual guide to assembling the Yaheetech Bike Repair Stand and its key features.

Figure 2: Detailed assembly diagram showing how components fit together.
5. Istruzzjonijiet Operattivi
5.1 Aġġustament tal-Għoli
To adjust the height of the stand, loosen the quick-release lever on the main stand's central column. Raise or lower the telescopic support pole to your desired working height (adjustable from 42.5" to 74.8"). Securely tighten the quick-release lever once the desired height is reached.

Figure 3: The stand's adjustable height range and dimensions.
5.2 Klamping Your Bicycle
The 360° swivel clamp allows you to position your bike at any angle. Loosen the red knob on the clamp arm to rotate the clamp. Open the quick-release clamp jaws to fit your bicycle's frame tube (suitable for 1"-1.6" / 25-40 mm diameter). The rubber material on the clamp protects your bike's paint. Once the bike is in place, close the quick-release clamp and tighten the red knob to secure the bicycle firmly.

Figure 4: Close-up of the 360° rotating quick-release clamp, highlighting its protective rubber pads.
5.3 L-Użu tat-Trej tal-Għodda
The integrated tool tray provides convenient storage for your tools and small parts during maintenance. It features various compartments and a magnetic strip to prevent screws and other metal components from getting lost.

Figure 5: The magnetic tool tray for organizing tools and small parts.
5.4 Stabilizing the Front Wheel
Use the included fixed rod to prevent the front wheel or handlebar from turning during repairs. Attach one end to the clamp arm and the other to the handlebar or front wheel, securing it with the rubber straps.

Figure 6: The fixed rod used to stabilize the front wheel or handlebar.
6. Manutenzjoni
- Clean the stand regularly with a damp drapp biex tneħħi l-ħmieġ u l-ħmieġ.
- Periodically check all bolts, screws, and quick-release mechanisms for tightness. Tighten as necessary.
- Store the stand in a dry place when not in use. The foldable design allows for compact storage.

Figure 7: The stand's foldable design for convenient storage and transport.
7 Issolvi l-problemi
- L-istand mhux stabbli: Ensure all four legs are fully extended and the quick-release lever at the base is securely tightened. Verify the stand is on a flat surface.
- Bicycle slips from clamp: Żgura li l-quick-release clamp is fully closed and the red knob is tightened. Check that the frame tube diameter is within the specified range (1"-1.6").
- Height adjustment slips: Confirm the quick-release lever on the telescopic pole is fully tightened after adjusting the height.
8. Speċifikazzjonijiet
| Karatteristika | Dettall |
|---|---|
| Materjal | Alloy Steel, PA Plastic |
| Aġġustament Għoli | 52 - 75 pulzier (madwar 132 - 190 ċm) |
| Kapaċità tat-Tagħbija | 66 lbs (30 kg) |
| Clamp Rotazzjoni | 360 grad |
| Dijametru tat-Tubu tal-Qafas | 1" - 1.6" (25 - 40 mm) |
| Tip ta' Bażi | Four-leg tripod with foldable footpads |
| Komponenti Inklużi | Workstand, Tool Tray, Fixed Rod |

Figure 8: The stand securely holding a bicycle, demonstrating its stability and load capacity.
9. Garanzija u Appoġġ
This Yaheetech Bike Repair Stand comes with a Quality Guaranteed warranty. For any product inquiries, technical support, or warranty claims, please refer to the contact information provided with your purchase or visit the official Yaheetech websit.


