1. Introduzzjoni
This instruction manual provides essential information for the proper setup, operation, and maintenance of your Sure Electronics WONDOM 2 x 50W Class D Audio Amplifier Board, Model AA-AB32178. Please read this manual thoroughly before using the product to ensure optimal performance and safety. This amplifier board is designed for audio amplification applications, delivering 2 channels of 50 watts each using TPA3116/TPA3116D2 technology.
2. Istruzzjonijiet tas-Sigurtà
- Provvista tal-Enerġija: Use only a power supply within the specified voltage range (e.g., 21 Volts as per specifications). Exceeding the maximum voltagNistgħu nagħmlu ħsara lill-bord.
- Polarità: Always observe correct power polarity (VCC and GND) to prevent damage.
- Immaniġġjar: Handle the board by its edges to avoid touching components, especially when powered. Static electricity can damage sensitive electronic components.
- Ambjent: Do not expose the board to moisture, extreme temperatures, or corrosive environments. Ensure adequate ventilation to prevent overheating.
- Installazzjoni: Ensure all connections are secure before applying power. Incorrect wiring can lead to short circuits or component failure.
- Modifiki: Do not attempt to modify the board unless you are a qualified electronics technician. Unauthorized modifications can void the warranty and pose safety risks.
3. Prodott Aktarview
The Sure Electronics WONDOM AA-AB32178 is a compact and efficient Class D audio amplifier board. It features two independent channels, each capable of delivering up to 50 watts of audio power. The board utilizes TPA3116/TPA3116D2 amplifier chips, known for their high efficiency and sound quality. It is designed for integration into various audio projects requiring stereo amplifikazzjoni.

4. Setup
4.1 Components Required
- Sure Electronics WONDOM AA-AB32178 AmpBord aktar ħaj
- DC Power Supply (e.g., 21V, sufficient current for 100W total output)
- Audio Source (e.g., smartphone, MP3 player, preampaktar ħaj)
- Speakers (2x, 4-8 Ohm impedance, rated for 50W or more)
- Wajer tal-Ispeaker
- Audio Input Cable (e.g., RCA to 3.5mm jack, or bare wire)
4.2 Connection Diagram and Steps

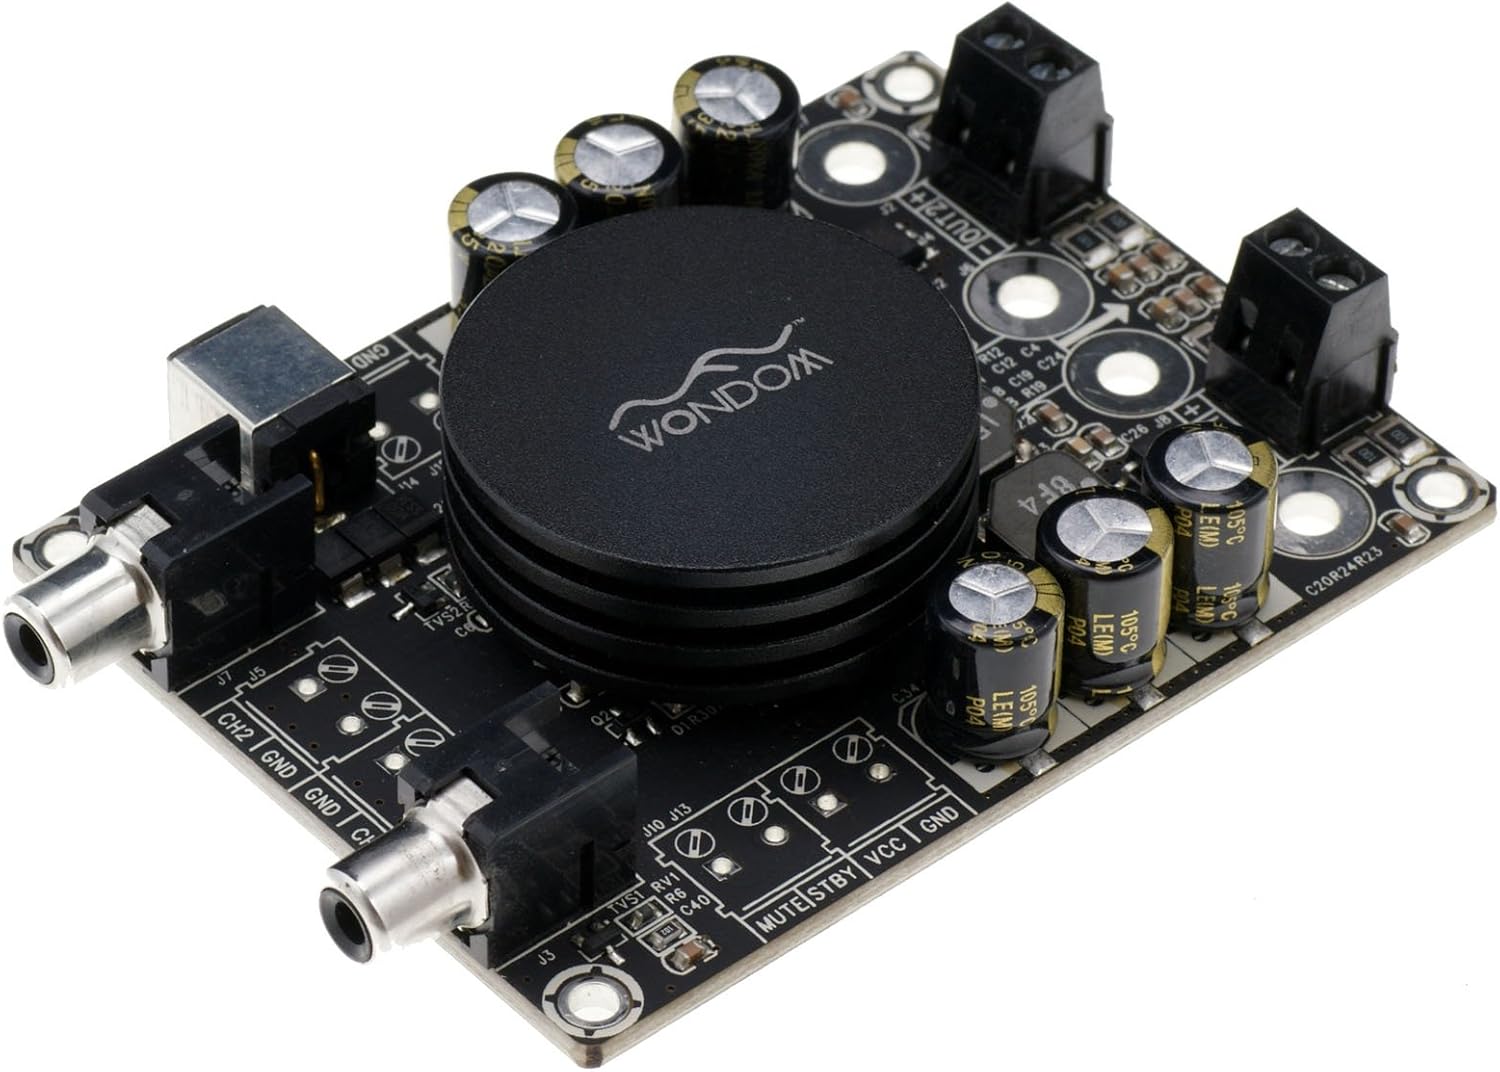
- Qabbad l-Ispeakers: Identify the speaker output terminals (OUT1 and OUT2, typically screw terminals). Connect your left speaker to OUT1 and your right speaker to OUT2. Ensure correct polarity (+ to + and - to -) for each speaker.
- Qabbad l-Input tal-Awdjo: The board features RCA input jacks (CH1 and CH2). Connect your audio source (e.g., preamplifier, media player) to these inputs using appropriate RCA cables. CH1 typically corresponds to the left channel, and CH2 to the right.
- Qabbad il-Provvista tal-Enerġija: Locate the power input terminals (VCC and GND, typically screw terminals). Connect the positive (+) terminal of your DC power supply to VCC and the negative (-) terminal to GND. Iċċekkja l-polarità darbtejn qabel ma tapplika l-enerġija.
- Optional MUTE/STBY Control: The board may include MUTE and STBY (Standby) pins. These are typically used for external control. Refer to the detailed schematic (if provided separately) for specific usage. For basic operation, these pins can often be left unconnected.
- Qawwa Inizjali: After all connections are securely made and verified, connect your DC power supply to a power outlet. The amplifier board should power on.
5. Istruzzjonijiet Operattivi
5.1 Tixgħel/Jitfi
Biex titħaddem il- amplifier board, ensure all connections are correct and then apply power from your DC power supply. To power off, disconnect the power supply. It is recommended to turn down the volume on your audio source before powering on or off to prevent sudden loud noises.
5.2 Daqq tal-Awdjo
Once powered, play audio from your connected source. Adjust the volume level using the controls on your audio source device. The amplifier board will amplify the incoming audio signal and output it to the connected speakers.
6. Manutenzjoni
- Tindif: Keep the board free from dust and debris. Use a soft, dry brush or compressed air to gently clean the surface. Do not use liquid cleaners.
- Ħażna: When not in use, store the board in a dry, cool environment, away from direct sunlight and moisture.
- Spezzjoni: Periodically inspect the board for any signs of damage, loose connections, or overheating components.
7 Issolvi l-problemi
7.1 L-ebda Ħruġ tal-Ħoss
- Iċċekkja l-Enerġija: Ensure the power supply is connected correctly and providing the specified voltage.
- Check Audio Input: Verify that the audio source is playing and connected correctly to the RCA inputs. Test with a different audio source if possible.
- Check Speaker Connections: Ensure speaker wires are securely connected to the output terminals and to the speakers, with correct polarity.
- Livell tal-Volum: Confirm the volume on your audio source is turned up.
7.2 Ħoss Mgħawġ
- Livell ta' Input: The audio input level might be too high, causing clipping. Reduce the volume from your audio source.
- Provvista tal-Enerġija: An insufficient or unstable power supply can cause distortion. Ensure your power supply can deliver enough current for the ampoutput tal-lifier.
- Impedenza tal-Ispeaker: Verify that your speakers' impedance matches the amplifier's requirements (typically 4-8 Ohms).
7.3 Is-sħana żejda
- Ventilazzjoni: Ensure the board has adequate airflow. Do not operate in an enclosed space without ventilation.
- Tagħbija: Operating at very high volumes for extended periods or with incorrect speaker impedance can cause overheating.
8. Speċifikazzjonijiet
| Karatteristika | Speċifikazzjoni |
|---|---|
| Brand | Sure Electronics |
| Numru tal-Mudell | AA-AB32178 |
| Numru ta 'Kanali | 2 |
| Qawwa tal-Ħruġ | 2 x 50 Watts |
| Voltage | 21 Volts (DC) |
| Dimensjonijiet tal-oġġett (L x W x H) | 3.54 x 2.76 x 0.79 pulzieri |
| Piż tal-oġġett | 1.76 uqija |
| Materjal | Plastik |
| Tip ta 'Immuntar | Immonta fil-wiċċ |
9. Garanzija u Appoġġ
For warranty information or technical support, please refer to the documentation provided at the time of purchase or contact Sure Electronics directly through their official website or customer service channels. Keep your purchase receipt as proof of purchase for any warranty claims.


