1. Introduzzjoni
The Weintek MT8100iE is a 10.2-inch Human Machine Interface (HMI) designed for industrial automation applications. It features an 800 x 480 TFT industrial-grade LCD and is built to fully support major PLCs such as Rockwell, Siemens, Mitsubishi, and Omron. This manual provides essential information for the proper installation, operation, and maintenance of your MT8100iE HMI.
2. Informazzjoni dwar is-Sigurtà
Please read and understand all safety instructions before operating the device. Failure to comply may result in injury or damage to the equipment.
- Kun żgur li l-provvista tal-enerġija hija skonnettjata qabel ma twettaq kwalunkwe installazzjoni jew manutenzjoni.
- Persunal kwalifikat biss għandu jinstalla u jagħmel manutenzjoni fuq dan it-tagħmir.
- Do not expose the device to excessive moisture, dust, or extreme temperatures.
- Verify correct wiring and connections to prevent electrical hazards.
- The front panel is NEMA4/IP65 compliant, but ensure proper sealing during installation to maintain this rating.
3. Kontenut tal-Pakkett
Ivverifika li l-oġġetti kollha huma preżenti fil-pakkett:
- MT8100iE HMI Unit
- Mounting Brackets (4x)
- Konnettur tal-Enerġija
- Manwal għall-Utent (dan id-dokument)
- CD-ROM with EasyBuilder Pro Software (or download link)
4. Prodott Aktarview
Familiarize yourself with the components and interfaces of the MT8100iE HMI.
4.1 Quddiem View

Figura 4.1: Quddiem view of the MT8100iE HMI, showing the 10.2-inch TFT LCD touchscreen and the power indicator LED at the top left.
4.2 Ġenb View
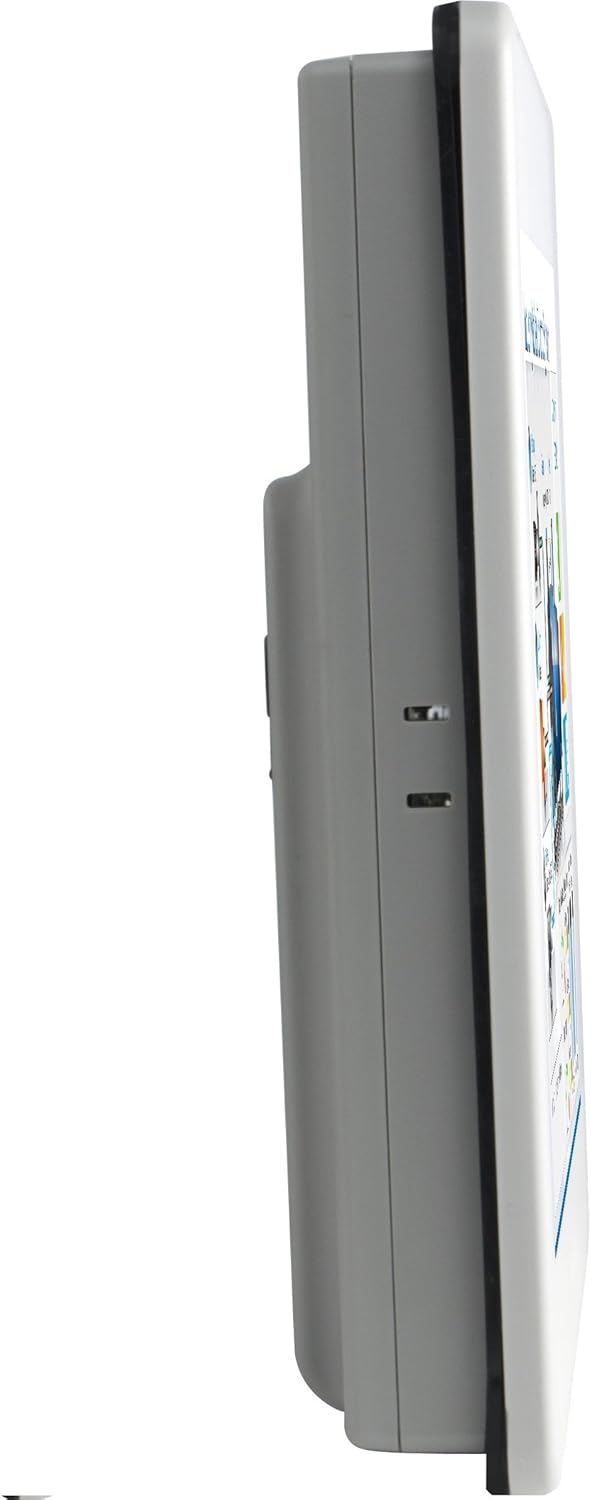
Figura 4.2: Proġett tal-ġenbfile of the MT8100iE, illustrating its compact form factor suitable for panel mounting.
4.3 Wara View

Figura 4.3: Wara view of the MT8100iE, highlighting the mounting holes for panel installation, the fuse holder for power protection, and the system reset button.
4.4 Portijiet tal-Komunikazzjoni

Figura 4.4: Qiegħ view of the MT8100iE, detailing the various communication ports including USB, Ethernet, COM1 (RS-232), and COM2 (RS-485 2W/4W).
5. Setup
5.1 Immuntar tal-Panew
- Cut an opening in the control panel according to the dimensions provided in the installation guide (refer to the separate installation template for precise measurements).
- Insert the MT8100iE HMI into the cutout from the front.
- From the rear of the panel, insert the four mounting brackets into the slots on the HMI unit.
- Tighten the screws on the mounting brackets evenly until the HMI is securely fastened to the panel. Do not overtighten.
5.2 Konnessjoni tal-Enerġija
- Connect a 24V DC power supply to the power input terminal block on the rear of the HMI.
- Kun żgur li l-polarità hija korretta (+ u -).
- Secure the connection firmly.
5.3 Konnessjonijiet ta' Komunikazzjoni
- Portijiet Serjali: Use the COM1 (RS-232) and COM2 (RS-485 2W/4W) ports to connect to PLCs or other serial devices. Refer to your PLC's documentation for specific wiring diagrams.
- Port Ethernet: Connect an Ethernet cable to the RJ45 port for network communication with PLCs or for remote access.
- Portijiet USB: Use the USB host ports for connecting USB flash drives for project transfers or other peripherals.
6. Istruzzjonijiet Operattivi
6.1 Tixgħel
Once all connections are secure, apply power to the HMI. The power indicator LED will illuminate, and the HMI will boot up, displaying the configured project.
6.2 Project Download
To load a new project or update an existing one:
- Create or modify your HMI project using the EasyBuilder Pro software on a PC.
- Connect the PC to the HMI via Ethernet or USB.
- In EasyBuilder Pro, use the 'Download' function to transfer the project to the HMI.
- The HMI will restart with the new project loaded.
6.3 Tħaddim tat-Touchscreen
The MT8100iE features a resistive touchscreen. Use your finger or a non-sharp stylus to interact with the on-screen elements such as buttons, input fields, and displays.
6.4 PLC Communication
The HMI is designed to communicate with various PLCs. Ensure the communication settings (protocol, baud rate, station ID, etc.) configured in your EasyBuilder Pro project match those of your connected PLC.
7. Manutenzjoni
Regular maintenance ensures optimal performance and longevity of your HMI.
- Tindif: Uża artab, damp drapp biex tnaddaf l-iskrin u ċasing. Do not use abrasive cleaners or solvents. Ensure no liquid enters the device.
- Aġġornamenti tal-Firmware: Periodically check the Weintek website for firmware updates to ensure your HMI has the latest features and bug fixes.
- Sostituzzjoni tal-fjus: If the HMI does not power on, check the fuse located on the rear panel. Replace it with a fuse of the same type and rating if necessary. Always disconnect power before replacing the fuse.
- Kundizzjonijiet Ambjentali: Kun żgur li l-ambjent operattiv jibqa' fil-firxiet speċifikati tat-temperatura u l-umdità biex tevita l-ħsara.
8 Issolvi l-problemi
Din it-taqsima tipprovdi soluzzjonijiet għal kwistjonijiet komuni li tista’ tiltaqa’ magħhom.
| Problema | Kawża Possibbli | Soluzzjoni |
|---|---|---|
| HMI does not power on. | Ebda provvista tal-enerġija, wajers mhux korretti, fjus maħruq. | Check power connection, verify wiring polarity, replace fuse if blown. |
| It-touchscreen ma jirrispondix. | Screen calibration issue, hardware fault. | Perform screen calibration (refer to EasyBuilder Pro documentation), contact support if issue persists. |
| Cannot communicate with PLC. | Incorrect communication settings, wrong cable, PLC offline. | Verify communication protocol, baud rate, and station ID in EasyBuilder Pro. Check cable connections. Ensure PLC is powered on and running. |
| Project download fails. | Network issue, incorrect IP address, firewall blocking. | Check network cable, verify HMI and PC IP addresses are in the same subnet. Temporarily disable firewalls for testing. |
9. Speċifikazzjonijiet
| Karatteristika | Deskrizzjoni |
|---|---|
| Numru tal-Mudell | eMT3070A1WK |
| Daqs tal-Iskrin | 10.2 Pulzier |
| Riżoluzzjoni | 800 x 480 |
| Proporzjon ta' l-aspett | 1.66:1 |
| Wiċċ tal-Iskrin | Tleqq |
| Memorja | Memorja Flash ta' 128 MB integrata |
| Arloġġ f'ħin reali (RTC) | Iva |
| Rating tal-Panew ta 'quddiem | NEMA4/IP65 Compliant |
| Portijiet Serjali | COM1 RS-232 / COM2 RS-485 (2W/4W) |
| Notifika bl-Email | Status e-Mail notification feature |
10. Garanzija u Appoġġ
Weintek products are manufactured to high quality standards. For warranty information and technical support, please refer to the official Weintek website or contact your authorized distributor. Keep your purchase receipt as proof of purchase for warranty claims.
For software downloads, drivers, and additional resources, visit the official Weintek support portal.


