1. Introduzzjoni
This manual provides detailed instructions for the installation, operation, and maintenance of your REXING F9US Dash Camera. Please read this manual thoroughly before using the device to ensure proper functionality and to maximize your user experience.
2. Kontenut tal-Pakkett
Jekk jogħġbok ivverifika li l-oġġetti kollha elenkati hawn taħt huma inklużi fil-pakkett tiegħek:
- REXING F9US Dash Camera
- Kejbil tal-iċċarġjar fil-karozza
- Windshield Suction Cup mount
- Kejbil USB
- Manwal għall-Utent
Nota: A Micro SD Card (Class 10 or higher, up to 128GB) is required for operation and is not included in the package.
3. Prodott Aktarview
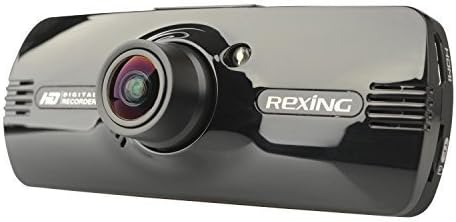
Image: REXING F9US Dash Camera
The REXING F9US Dash Camera is a compact, high-definition car dashboard camera designed to record your driving. It features a 170-degree wide-angle lens, a 2.7-inch 16:9 TFT LCD screen, and supports Full HD 1080p video recording. Key features include G-Sensor for automatic accident detection, Wide Dynamic Range (WDR) technology for optimal video quality in varying light conditions, and motion detection for recording when the vehicle is parked.
4. Setup
4.1 Installing the Micro SD Card
- Ensure the dash camera is powered off.
- Sib is-slott tal-kard Micro SD fuq il-ġenb tal-kamera.
- Insert a Class 10 or higher Micro SD card (up to 128GB) into the slot until it clicks into place.
- Biex tneħħiha, imbotta l-karta bil-mod 'il ġewwa sakemm toħroġ 'il barra.
4.2 Immuntar tal-Kamera tad-Dash
- Naddaf sewwa ż-żona mixtieqa fuq il-windskrin tiegħek.
- Waħħal il-muntatura tat-tazza tal-ġbid mal-kamera.
- Agħfas it-tazza tal-ġbid sew mal-windskrin u aqleb il-lieva biex twaħħalha.
- Aġġusta l-angolu tal-kamera biex tiżgura viżjoni ċara view tat-triq.
4.3 Qawwa tal-Konnessjoni
- Connect the in-car charging cable to the camera's power input port.
- Plug the other end of the cable into your vehicle's 12V power outlet (cigarette lighter socket).
- Il-kamera tipikament tixgħel awtomatikament meta l-ignition tal-vettura tinxtegħel.
4.4 Settings Inizjali
Upon first use, or after a reset, you may need to set the date, time, and language. Navigate through the menu using the camera's buttons.
5. Istruzzjonijiet Operattivi
5.1 Reġistrazzjoni Bażika
- Once powered on and connected to power, the camera will automatically begin loop recording. A flashing red record indicator will confirm recording is active.
- To manually start/stop recording, press the REC buttuna.
5.2 Navigazzjoni tal-Menu
The camera features several buttons for navigation and control:
- Buttuna MENU (bottom left): Press once to enter video settings, press twice to enter tool settings.
- EVENT Button (top right, with a triangle): Functions as an 'Up' button in menus. When held for 3 seconds during recording, it locks the current video file.
- Buttuna MIC: Functions as a 'Down' button in menus.
- Buttuna REC: Functions as 'Select' or 'OK' in menus.
- Buttuna Stampa (bottom right): When held, enters review mod biex view irreġistrat files.
5.3 Daqq u File Ġestjoni
- Biex view recordings on the camera, enter review mode using the Picture button.
- Biex tittrasferixxi files to a computer, connect the camera via the USB cable. The camera will appear as a removable disk.
- The camera also supports HDMI output for viewing fuq display akbar.
6. Spjegazzjoni tal-Karatteristiċi
6.1 Loop Recording
The camera continuously records video in segments (e.g., 2, 3, or 5 minutes). When the memory card is full, the oldest unlocked video file is automatically overwritten by the newest recording. This ensures continuous recording without manual intervention.
6.2 G-Sensor (Accident Auto Detection Feature)
The built-in G-Sensor detects sudden movements or impacts (e.g., in case of a collision). When triggered, the current video segment is automatically locked and saved to prevent it from being overwritten by loop recording. These files are stored in a protected folder.
6.3 Wide Dynamic Range (WDR) Technology
WDR technology enhances video quality by balancing exposure in scenes with high contrast, such as driving from a dark tunnel into bright sunlight. This ensures clearer images with more detail in both bright and dark areas.
6.4 Sejbien tal-Moviment
When enabled, the camera will automatically start recording if it detects motion in front of the lens while the vehicle is parked. This feature is useful for monitoring your vehicle when it's unattended.
6.5 Viżjoni bil-lejl
The camera supports night vision capabilities to improve recording quality in low-light conditions. Note that the built-in LED light is primarily for use when the camera is outside the car in battery mode, acting as a flashlight. For in-car recording, it's generally recommended to keep it off to avoid windshield reflections.
7. Manutenzjoni
- Tindif: Use a soft, dry cloth to clean the camera lens and screen. Avoid using abrasive cleaners or solvents.
- Formattjar tal-Kard SD: It is recommended to format the Micro SD card periodically (e.g., once a month) within the camera's settings to ensure optimal performance and prevent data corruption. Back up any important files qabel l-ifformattjar.
- Ħażna: Aħżen il-kamera f'post frisk u niexef 'il bogħod mix-xemx diretta u minn temperaturi estremi meta ma tkunx qed tużaha.
8 Issolvi l-problemi
| Problema | Soluzzjoni Possibbli |
|---|---|
| Il-kamera ma tixgħelx. | Ensure the power cable is securely connected to both the camera and the vehicle's 12V outlet. Check the vehicle's power outlet for functionality. |
| Camera powers off unexpectedly or stops recording. | Verify the power connection is stable. Ensure the Micro SD card is Class 10 or higher and formatted correctly. Try a different Micro SD card. |
| Il-kwalità tal-vidjow hija fqira jew imċajpra. | Clean the camera lens. Ensure the protective film (if any) has been removed from the lens. Check if the windshield is clean. |
| Żball tal-karta Micro SD. | Format the Micro SD card within the camera's settings. Ensure the card is Class 10 or higher. Try a different, reputable brand Micro SD card. |
| Id-data u l-ħin mhumiex korretti. | Adjust the date and time settings in the camera's menu. |
9. Speċifikazzjonijiet
| Karatteristika | Dettall |
|---|---|
| Riżoluzzjoni tal-vidjo | 1080FHD (1920x1080), 1080P (1440x1080), 720P (1280x720), WVGA (848x480), VGA (640x480), QVGA (320x240) |
| Lenti | 170 degree 6-layers glass lens |
| Daqs tal-Iskrin | 2.7 inch 16:9 TFT LCD |
| Video File Format | MOV |
| Immaġni File Format | JPG |
| Appoġġ tal-Kard tal-Memorja | Up to 128GB Class10 or upper Micro SD/TF Card (not included) |
| Konnettività | HDMI, AV-OUT, USB |
| Reġistrazzjoni Awdjo | Appoġġjati |
| Sistema Lingwistika | Ingliż, Franċiż, Spanjol, Portugiż, Ġermaniż, Taljan, Ċiniż Simplifikat, Ċiniż Tradizzjonali, Russu, Ġappuniż |
| Dimensjonijiet tal-Prodott | 7 x 5 x 3 pulzieri |
| Piż tal-oġġett | 12.1 uqija |
| Batterija | Meħtieġa batterija waħda tal-Lithium Polymer (interna) |
10. Garanzija u Appoġġ
For information regarding product warranty, technical support, or service inquiries, please visit the official REXING website or contact REXING customer service directly. Please have your product model number (F9US) and purchase details available when contacting support.


