1. Introduzzjoni
This manual provides essential information for the safe and effective operation, setup, and maintenance of your Einhell TC-MS 2112 T Miter and Table Saw. Please read all instructions carefully before using the tool to ensure personal safety and optimal performance. Keep this manual in a safe place for future reference.
2. Istruzzjonijiet tas-Sigurtà
Twissijiet Ġenerali dwar is-Sigurtà tal-Għodda tal-Enerġija:
- Dejjem ilbes tagħmir protettiv personali xieraq, inklużi nuċċalijiet tas-sigurtà, protezzjoni għas-smigħ, u maskra tat-trab.
- Kun żgur li ż-żona tax-xogħol tkun nadifa, imdawwal sew, u ħielsa minn ostakli.
- Żomm lit-tfal u lil dawk li jkunu fil-qrib 'il bogħod miż-żona tal-operat.
- Tħaddimx għodod elettriċi f'atmosferi splussivi, bħal fil-preżenza ta' likwidi, gassijiet jew trab li jaqbdu.
- Evita li tibda l-għodda aċċidentalment. Kun żgur li s-swiċċ ikun fil-pożizzjoni mitfija qabel ma tikkonnettjaha mal-elettriku, tiġborha, jew iġġorrha.
- Żomm livell tajjeb u bilanċ f'kull ħin.
- Skonnettja l-plagg mis-sors tal-enerġija qabel ma tagħmel xi aġġustamenti, tbiddel l-aċċessorji, jew taħżen għodda tal-enerġija.
Specific Miter and Table Saw Safety Warnings:
- Always use the push stick when operating in table saw mode, especially for narrow workpieces.
- Ensure the blade guard is in place and functioning correctly before each use.
- Never reach into the blade area while the saw is running or connected to power.
- Secure the workpiece firmly before cutting. Do not attempt to hand-hold small pieces.
- Use only sharp, correctly sized saw blades suitable for the material being cut.
- Ħalli x-xafra tilħaq il-veloċità sħiħa qabel tibda qatgħa.
- Never remove cut-off pieces or other parts of the workpiece from the cutting area while the blade is running.
3. Prodott Aktarview
The Einhell TC-MS 2112 T is a versatile 2-in-1 tool, functioning as both a miter saw and a table saw, designed for precise cutting of wood and similar materials.

Figura 3.1: B'mod ġenerali view of the Einhell TC-MS 2112 T Miter and Table Saw.

Figure 3.2: Close-up of the miter scale and model designation on the saw base.
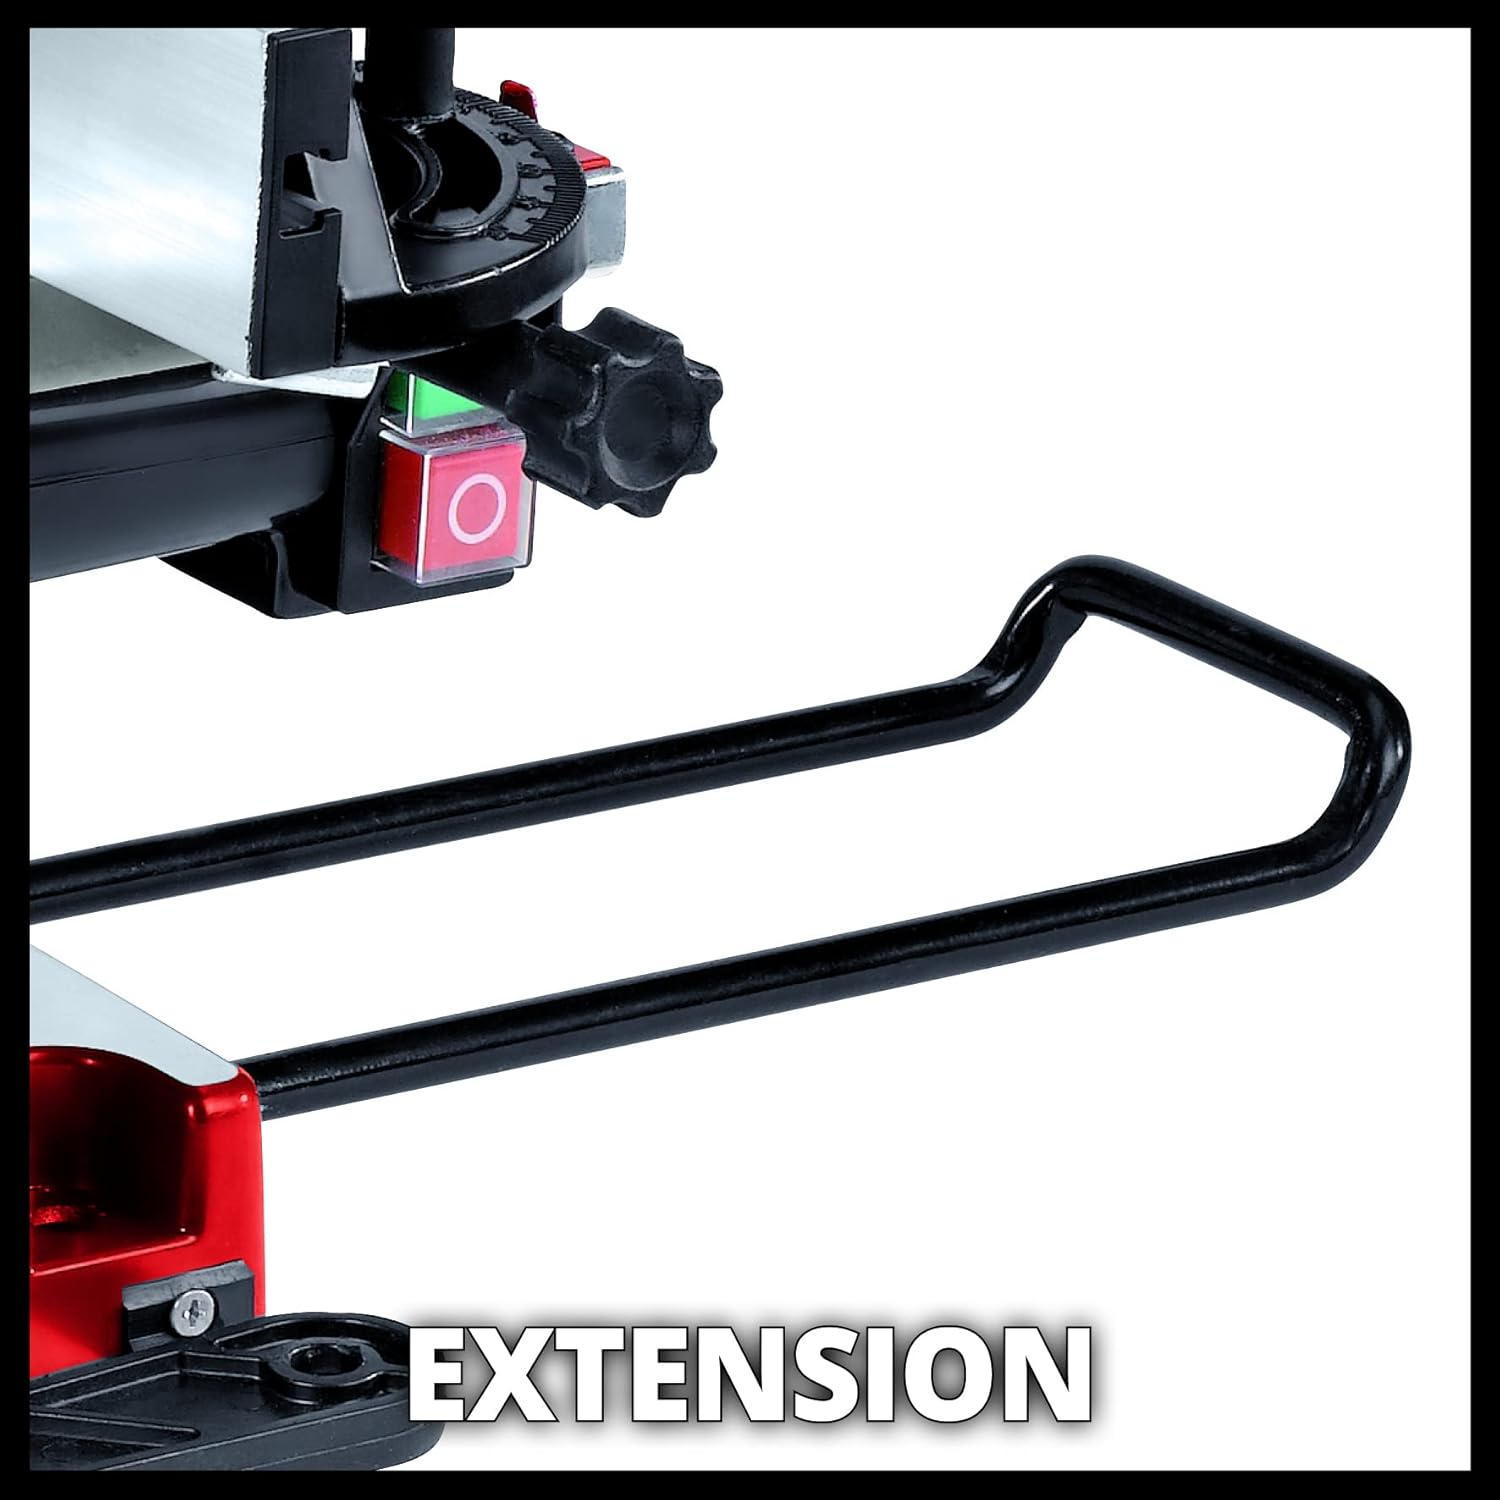
Figura 3.3: View of the integrated table extension for supporting longer workpieces.

Figure 3.4: The parallel guide, used for consistent rip cuts in table saw mode.
4. Setup u Assemblea
Before initial use, ensure all components are present and undamaged. Refer to the packing list for verification.
- Spakkjar: Carefully remove the saw and all accessories from the packaging. Retain packaging for potential future transport or storage.
- Stabbiltà tal-Bażi: Place the saw on a stable, level workbench. Secure the saw to the workbench using appropriate fasteners through the mounting holes in the base to prevent movement during operation.
- Installazzjoni tax-Xafra (jekk mhux installata minn qabel): Ensure the saw is unplugged. Follow the instructions for safely installing the 210mm saw blade, ensuring the rotation direction matches the arrow on the saw.
- Kontroll tal-Gwardja: Verify that all blade guards move freely and return to their protective positions automatically.
- Table Extensions: Extend the workpiece supports (extensions) as needed for longer materials.
5. Istruzzjonijiet Operattivi
The Einhell TC-MS 2112 T offers both miter saw and table saw functionalities. Always select the appropriate mode for your cutting task.
5.1. Miter Saw Function
For cross-cutting and angle cuts on workpieces.
- Adjusting Miter Angle: Loosen the locking knob for the turntable. Rotate the turntable to the desired angle (up to 45° left or right). Securely tighten the locking knob.
- Adjusting Bevel Angle: Loosen the locking mechanism for the saw head. Tilt the saw head to the desired bevel angle (up to 45° to the left). Securely tighten the locking mechanism.
- Positioning Workpiece: Place the workpiece firmly against the fence and the turntable. Use clamps jekk meħtieġ.
- Nagħmlu l-Qatgħa: Depress the safety switch and then the main power switch. Allow the blade to reach full speed. Slowly lower the saw head through the workpiece. Once the cut is complete, release the power switch and allow the blade to stop before raising the saw head.

Figure 5.1: Demonstrating the miter saw function for angled cuts.

Figure 5.2: Illustration of a 90° x 90° cross-cut (max. 120 x 55 mm).

Figure 5.3: Illustration of a 90° x 45° miter cut (max. 65 x 55 mm).
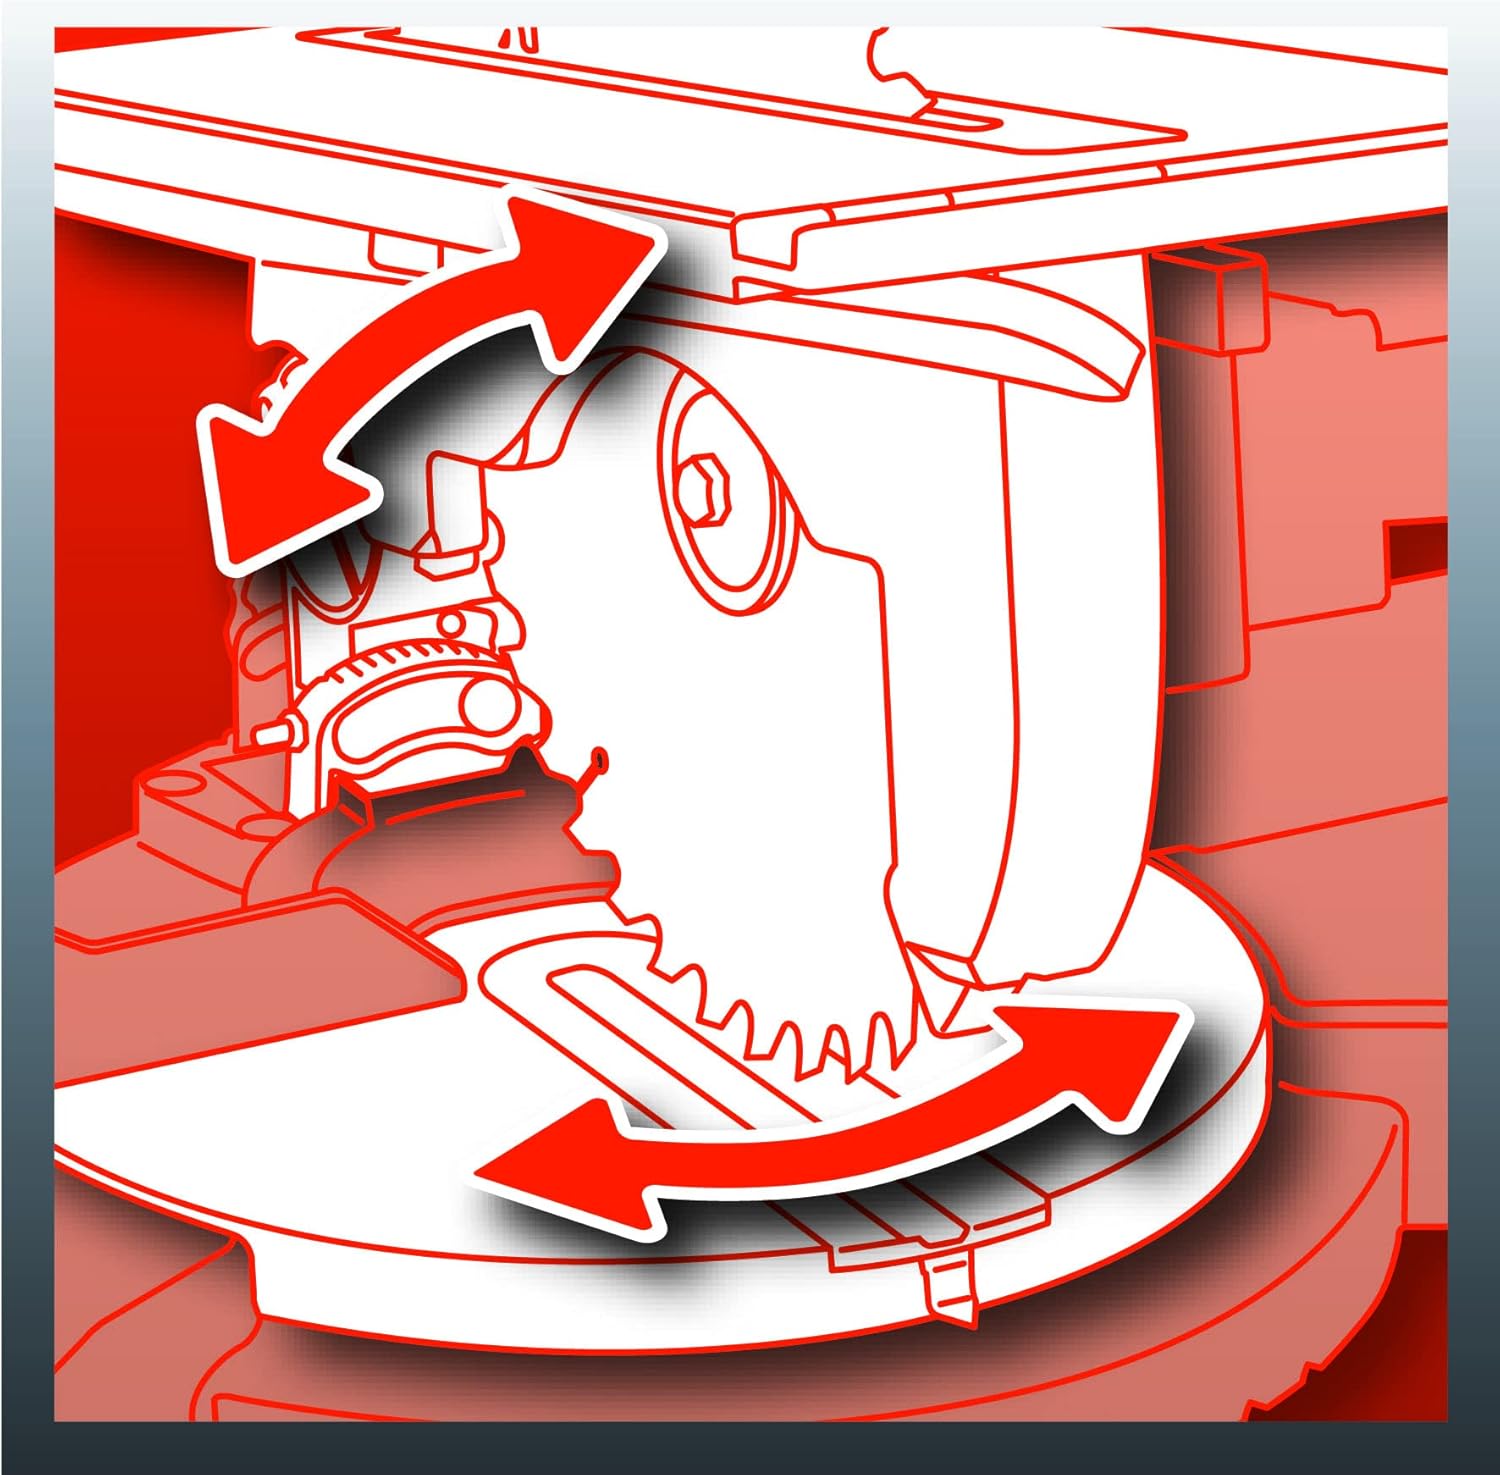
Figure 5.4: Illustration of a 45° x 45° compound miter cut (max. 40 x 23 mm).
5.2. Table Saw Function
For ripping and sizing workpieces.
- Converting to Table Saw: Ensure the saw head is locked in the upright position. Adjust the blade height using the appropriate mechanism.
- Aġġustament tal-Għoli tax-Xafra: Use the height adjustment knob to set the desired blade exposure above the table (0-33 mm).
- Using Parallel Guide: Position the parallel guide to achieve the desired cutting width. Securely lock the guide in place.
- Positioning Workpiece: Place the workpiece on the table, ensuring it is flat and against the parallel guide.
- Nagħmlu l-Qatgħa: Depress the safety switch and then the main power switch. Allow the blade to reach full speed. Using the push stick, slowly feed the workpiece through the blade. Never use your hands to push the workpiece directly into the blade.

Figure 5.5: Demonstrating the table saw function for rip cuts.

Figure 5.6: Close-up of the blade height adjustment for table saw mode.

Figure 5.7: The included push stick, essential for safe table saw operation.
5.3. Estrazzjoni tat-Trab
The saw is equipped with a dust extraction port to connect to a vacuum cleaner or dust extractor, helping to keep the work area clean and reduce airborne dust.

Figure 5.8: The dust extraction port for connecting a vacuum system.
6. Manutenzjoni
Regular maintenance ensures the longevity and safe operation of your saw.
- Tindif: After each use, disconnect the saw from power and clean off dust and debris using a brush or compressed air. Do not use harsh chemicals.
- Sostituzzjoni tax-xafra: When the saw blade becomes dull or damaged, replace it with a new, sharp blade of the correct size (210mm diameter, 30mm bore). Always unplug the saw and use appropriate tools for safe blade removal and installation.
- Lubrikazzjoni: Applika żejt ħafif tal-magna perjodikament fuq il-partijiet li jiċċaqalqu u l-punti tal-pern biex tiżgura tħaddim bla xkiel.
- Spezzjoni: Regularly inspect the power cord, plug, switches, and guards for any signs of damage or wear. Replace damaged parts immediately.
- Ħażna: Aħżen is-serrieq f'post niexef u sigur, fejn ma jintlaħaqx mit-tfal.
7 Issolvi l-problemi
Din it-taqsima tindirizza kwistjonijiet komuni li tista’ tiltaqa’ magħhom.
| Problema | Kawża Possibbli | Soluzzjoni |
|---|---|---|
| Saw ma jibda | No power supply; Faulty switch; Thermal overload activated | Check power connection; Test switch; Allow motor to cool down |
| Ix-xafra ma taqtax b'mod nadif | Dull or damaged blade; Incorrect blade for material; Improper feed rate | Replace blade; Use correct blade type; Adjust feed rate |
| Vibrazzjoni eċċessiva | Loose blade; Damaged blade; Unstable mounting | Tighten blade; Replace blade; Secure saw to workbench |
| L-estrazzjoni tat-trab mhix effettiva | Clogged port/hose; Dust bag full; Insufficient vacuum power | Clear blockages; Empty dust bag; Use a more powerful vacuum |
8. Speċifikazzjonijiet
Technical data for the Einhell TC-MS 2112 T Miter and Table Saw.
| Karatteristika | Speċifikazzjoni |
|---|---|
| Mudell | TC-MS 2112 T (Reference: TH-MS 2112 T) |
| Input tal-Enerġija | 1200 Watts |
| Voltage | 230 Volts |
| Veloċità Bla Tagħbija | 4500 RPM |
| Saw Xafra Dijametru | 210 mm |
| Saw Blade Bore | 30 mm |
| Numru ta 'Snien | 24 |
| Max. Cross Cut (90°x90°) | 120 x 55 mm |
| Max. Miter Cut (90°x45°) | 65 x 55 mm |
| Max. Compound Miter Cut (45°x45°) | 40 x 23 mm |
| Table Saw Blade Height Adjustment | 0 - 33 mm |
| Dimensjonijiet tal-Prodott (L x W x H) | 42.5 x 40.5 x 30.5 ċm |
| Piż tal-Prodott | 12.18 kg |
| Tul tal-kurdun | 3 Meters |
| Materjal | Metal (body), Acrylonitrile Butadiene Styrene (handle/lever) |
| Karatteristika Speċjali | Saw head inclinable to the left |

Figure 8.1: Blade specifications.

Figure 8.2: Max cut depth.

Figure 8.3: Height adjustment range.

Figure 8.4: Product weight.
9. Garanzija
This Einhell product is covered by a manufacturer's warranty. Please refer to the warranty card included with your purchase or visit the official Einhell website for detailed terms and conditions regarding warranty coverage and claims.
10. Appoġġ għall-Klijent
For technical assistance, spare parts, or further information, please contact Einhell customer service or visit their official websit:
- Websit: www.einhell.com
- Informazzjoni ta' Kuntatt: Irreferi għat-taqsima tal-kuntatt fuq il-paġna uffiċjali websit għal dettalji ta' appoġġ reġjonali.


