1. Istruzzjonijiet Importanti dwar is-Sigurtà
Please read these instructions carefully before operating the unit and retain them for future reference. Following these guidelines will ensure safe and proper use of your GPX R602B radio.
- Ilma u Umdità: Do not use this apparatus near water. Avoid exposure to rain or moisture.
- Sorsi tas-Sħana: Tinstallax ħdejn xi sorsi tas-sħana bħal radjaturi, reġistri tas-sħana, stufi, jew apparat ieħor (inkluż amplifiers) li jipproduċu sħana.
- Ventilazzjoni: Aċċerta ruħek li jkun hemm ventilazzjoni xierqa. Timblokkax xi fetħiet tal-ventilazzjoni.
- Sorsi ta' enerġija: Operate only from the type of power source indicated on the marking label.
- Tindif: Naddaf biss b'ċarruta niexfa.
- Annessi: Uża biss aċċessorji/aċċessorji speċifikati mill-manifattur.
- Servizzi: Irreferi l-manutenzjoni kollha lil persunal tas-servizz kwalifikat. Is-servizz huwa meħtieġ meta l-apparat ikun ġie bil-ħsara b'xi mod, bħal korda tal-provvista tal-enerġija jew plagg ikun bil-ħsara, likwidu jkun inxtered jew oġġetti jkunu waqgħu fl-apparat, l-apparat ikun ġie espost għax-xita jew umdità, ma jaħdimx b'mod normali , jew twaqqgħet.
Sigurtà tal-batterija
- Tħallatx batteriji qodma u ġodda.
- Tħallatx batteriji alkalini, standard (karbonju-żingu), jew rikarikabbli (nikil-kadmju).
- Insert batteries correctly, observing the + and - polarities.
- Neħħi l-batteriji eżawriti fil-pront.
- Armi l-batteriji kif suppost. Taħraqx.
2. Karatteristiċi
The GPX R602B Portable AM/FM Radio offers a range of features designed for convenience and versatility:
- Portable AM/FM radio with a built-in handle for easy transport.
- Integrated speakers with analog volume control and durable metal grills.
- Digital clock with user-friendly setting buttons.
- Operates using the built-in AC power cable.
- Can also be powered by 3 C batteries (sold separately) for portable use.
- 3.5mm audio line input jack for connecting external audio devices.
- Telescopic antenna for improved FM reception.
- Stereo headphone jack for private listening.

Figure 2.1: Key features and connection points of the GPX R602B radio.
3. Kontenut tal-Pakkett
Upon unpacking your GPX R602B radio, please ensure all the following items are present:
- GPX R602B Portable AM/FM Radio Unit
- Manwal tas-Sid
- Built-in AC Power Adapter
4. Kontrolli u Indikaturi
Familiarize yourself with the controls and indicators on your radio for optimal operation.
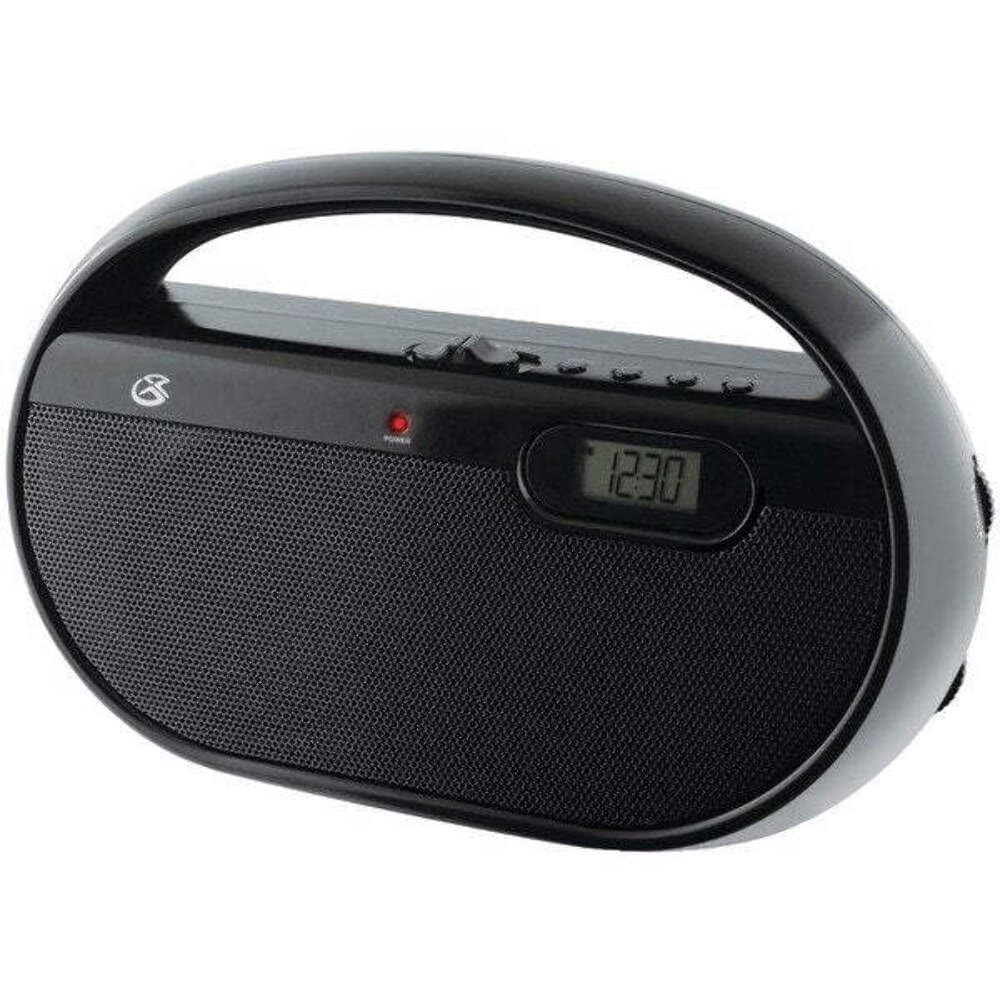
Figura 4.1: Quddiem view of the GPX R602B radio.
Control Layout (Refer to Figure 4.1)
- Pum tal-Qawwa/Volum: Rotates to turn the unit ON/OFF and adjust the volume level.
- Pum tal-irfinar: Rotates to select AM or FM radio stations.
- Swiċċ tas-Selettur tal-Banda: Slides to select between AM and FM radio bands.
- Wirja Diġitali: Shows the current time or radio frequency.
- Set Time Button: Used in conjunction with H/M buttons to set the clock.
- H/M Buttons: Used to adjust hours and minutes when setting the clock.
- Display Time Button: Briefly shows the time when the radio is playing.
- Aux In Jack (3.5mm): Qabbad apparati awdjo esterni.
- Jack tal-headphone (3.5mm): Qabbad headphones għal smigħ privat.
- Antenna Teleskopika tal-FM: Estendi u aġġusta għal riċeviment FM ottimali.
5. It-tħaddim tal-Unità
The GPX R602B radio can be powered by either AC power or batteries.
Operazzjoni tal-Enerġija AC
- Locate the built-in AC power cord. This cord is typically stored in the battery compartment when not in use.
- Plug the AC power cord into a standard wall outlet (120V AC, 60Hz).
- L-unità issa hija lesta għat-tħaddim.
Operazzjoni tal-Enerġija tal-Batterija
For portable use, the radio requires 3 'C' size batteries (not included).
- Iftaħ l-għatu tal-kompartiment tal-batterija li jinsab fuq wara tal-unità.
- Insert 3 'C' size batteries, ensuring the correct polarity (+ and -) as indicated inside the compartment.
- Agħlaq l-għatu tal-kompartiment tal-batterija sew.
- The unit is now ready for battery-powered operation.

Figure 5.1: Power options for the GPX R602B radio.
6. Twaqqif u Tħaddim Bażiku
Setup Inizjali
- Konnessjoni tal-Enerġija: Connect the radio to AC power or insert batteries as described in Section 5.
- Aġġustament tal-Antenna: For FM reception, extend the telescopic antenna fully. For AM reception, the unit has a built-in antenna, so no external adjustment is needed. Position the unit for best AM reception.
It-tħaddim tar-Radju
- Ixgħel: Rotate the Power/Volume knob clockwise until it clicks and the unit powers on.
- Agħżel il-Banda: Slide the Band Selector switch to either AM or FM.
- Stazzjon tas-Sintonizzazzjoni: Rotate the Tuning knob to find your desired radio station. The frequency will be displayed on the digital screen.
- Aġġusta Volum: Rotate the Power/Volume knob to adjust the sound level.
- Itfi: Rotate the Power/Volume knob counter-clockwise until it clicks and the unit powers off.
Using the Line Input (Aux In)
You can connect external audio devices, such as smartphones or MP3 players, to play audio through the radio's speakers.
- Connect a 3.5mm audio cable (not included) from the headphone jack or line-out jack of your external device to the Aux In jack on the radio.
- Turn on the radio and your external device.
- Adjust the volume on both the radio and your external device for optimal sound.

Figure 6.1: Devices compatible with the Aux In feature.
Użu ta' Headphones
For private listening, plug standard 3.5mm headphones (not included) into the Headphone Jack. The internal speakers will automatically mute.
L-issettjar tal-Arloġġ Diġitali
The digital clock can be set when the radio is turned off.
- Ensure the radio is turned OFF using the Power/Volume knob.
- Agħfas u żomm it-tnejn Issettja l-Ħin buttuna u l- H/M buttuna fl-istess ħin.
- Waqt li żżomm il- Issettja l-Ħin button, repeatedly press the H/M button to adjust the hour and then the minutes.
- Irrilaxxa l- Issettja l-Ħin button once the desired time is set.
- Biex view the time while the radio is playing, press the Ħin tal-Wiri button. The time will appear briefly on the digital display.
7. Manutenzjoni
Proper care and maintenance will ensure the longevity of your GPX R602B radio.
- Tindif: Imsaħ il-barra tal-unità b'ċarruta ratba u niexfa. Tużax prodotti tat-tindif, xama' jew solventi li joborxu.
- Sostituzzjoni tal-batterija: If using batteries, replace all three 'C' batteries when the unit's performance diminishes. Always replace with new batteries of the same type.
- Ħażna: If storing the unit for an extended period, remove the batteries to prevent leakage and corrosion.
8 Issolvi l-problemi
If you encounter issues with your GPX R602B radio, refer to the following common problems and solutions:
| Problema | Kawża Possibbli | Soluzzjoni |
|---|---|---|
| Ebda qawwa | AC cord not plugged in; Batteries exhausted or incorrectly inserted. | Ensure AC cord is securely plugged into a live outlet. Replace batteries with new ones, checking polarity. |
| Riċeviment ħażin tar-radju | Antenna not extended (FM); Unit poorly positioned (AM); Weak signal. | Extend and adjust the telescopic FM antenna. For AM, rotate the unit for better reception. Try moving the radio to a different location. |
| L-ebda ħoss mill-kelliema | Volum baxx wisq; Headphones imqabbda. | Increase the volume using the Power/Volume knob. Disconnect headphones if not desired. |
| Clock not setting correctly | Sekwenza tal-buttuni mhux korretta. | Ensure the radio is OFF. Press and hold both 'Set Time' and 'H/M' buttons simultaneously, then repeatedly press 'H/M' to adjust. Release 'Set Time' when done. |
| Ħoss distort jew mhux ċar | Volume too high; Poor reception; External device volume too high. | Lower the volume. Adjust antenna or unit position for better reception. If using Aux In, adjust volume on the external device. |
9. Speċifikazzjonijiet
Detailed technical specifications for the GPX R602B Portable AM/FM Radio:
- Numru tal-Mudell: R602B
- Dimensjonijiet tal-Prodott (L x W x H): 9.62 x 3.74 x 6.3 pulzieri (24.43 x 9.50 x 16.00 ċm)
- Piż tal-oġġett: 1.76 liri (0.80 kg)
- Sors tal-Enerġija: AC 120V, 60Hz or 3 x 'C' size batteries (not included)
- Teknoloġija tuner: AM/FM
- Bands tar-Radju Appoġġjati: 2-Band (AM/FM)
- Teknoloġija tal-Konnettività: Radio, 3.5mm Aux In
- Karatteristiċi Speċjali: Built-In AM Antenna, Built-In Clock, Portable, Telescopic FM Antenna, 3.5mm Headphone Jack
- Kulur: Iswed
- Manifattur: Digital Products International, Inc.
- Data L-Ewwel Disponibbli: 5 ta’ Ġunju 2012
10. Garanzija u Appoġġ
For warranty information and customer support regarding your GPX R602B radio, please refer to the warranty card included with your purchase or visit the official GPX websit. Żomm l-irċevuta tax-xiri tiegħek bħala prova tax-xiri għal kwalunkwe talba ta' garanzija.
If you require technical assistance or have questions not covered in this manual, please contact GPX customer service directly. Contact details are typically available on the manufacturer's websit jew fl-ippakkjar tal-prodott.


