Introduzzjoni
This manual provides comprehensive instructions for the setup, operation, and maintenance of your AT&T 1040 Corded Four-Line Expandable Telephone. This device is designed for small business environments, offering multi-line capabilities, conferencing, and intercom features to enhance communication efficiency.
Il-karatteristiċi ewlenin jinkludu:
- Four-line operation for managing multiple calls simultaneously.
- Integrated speakerphone for hands-free communication.
- 3-party conferencing capability.
- 32-number speed dial for quick access to frequently called numbers.
- Intercom functionality for internal communication.
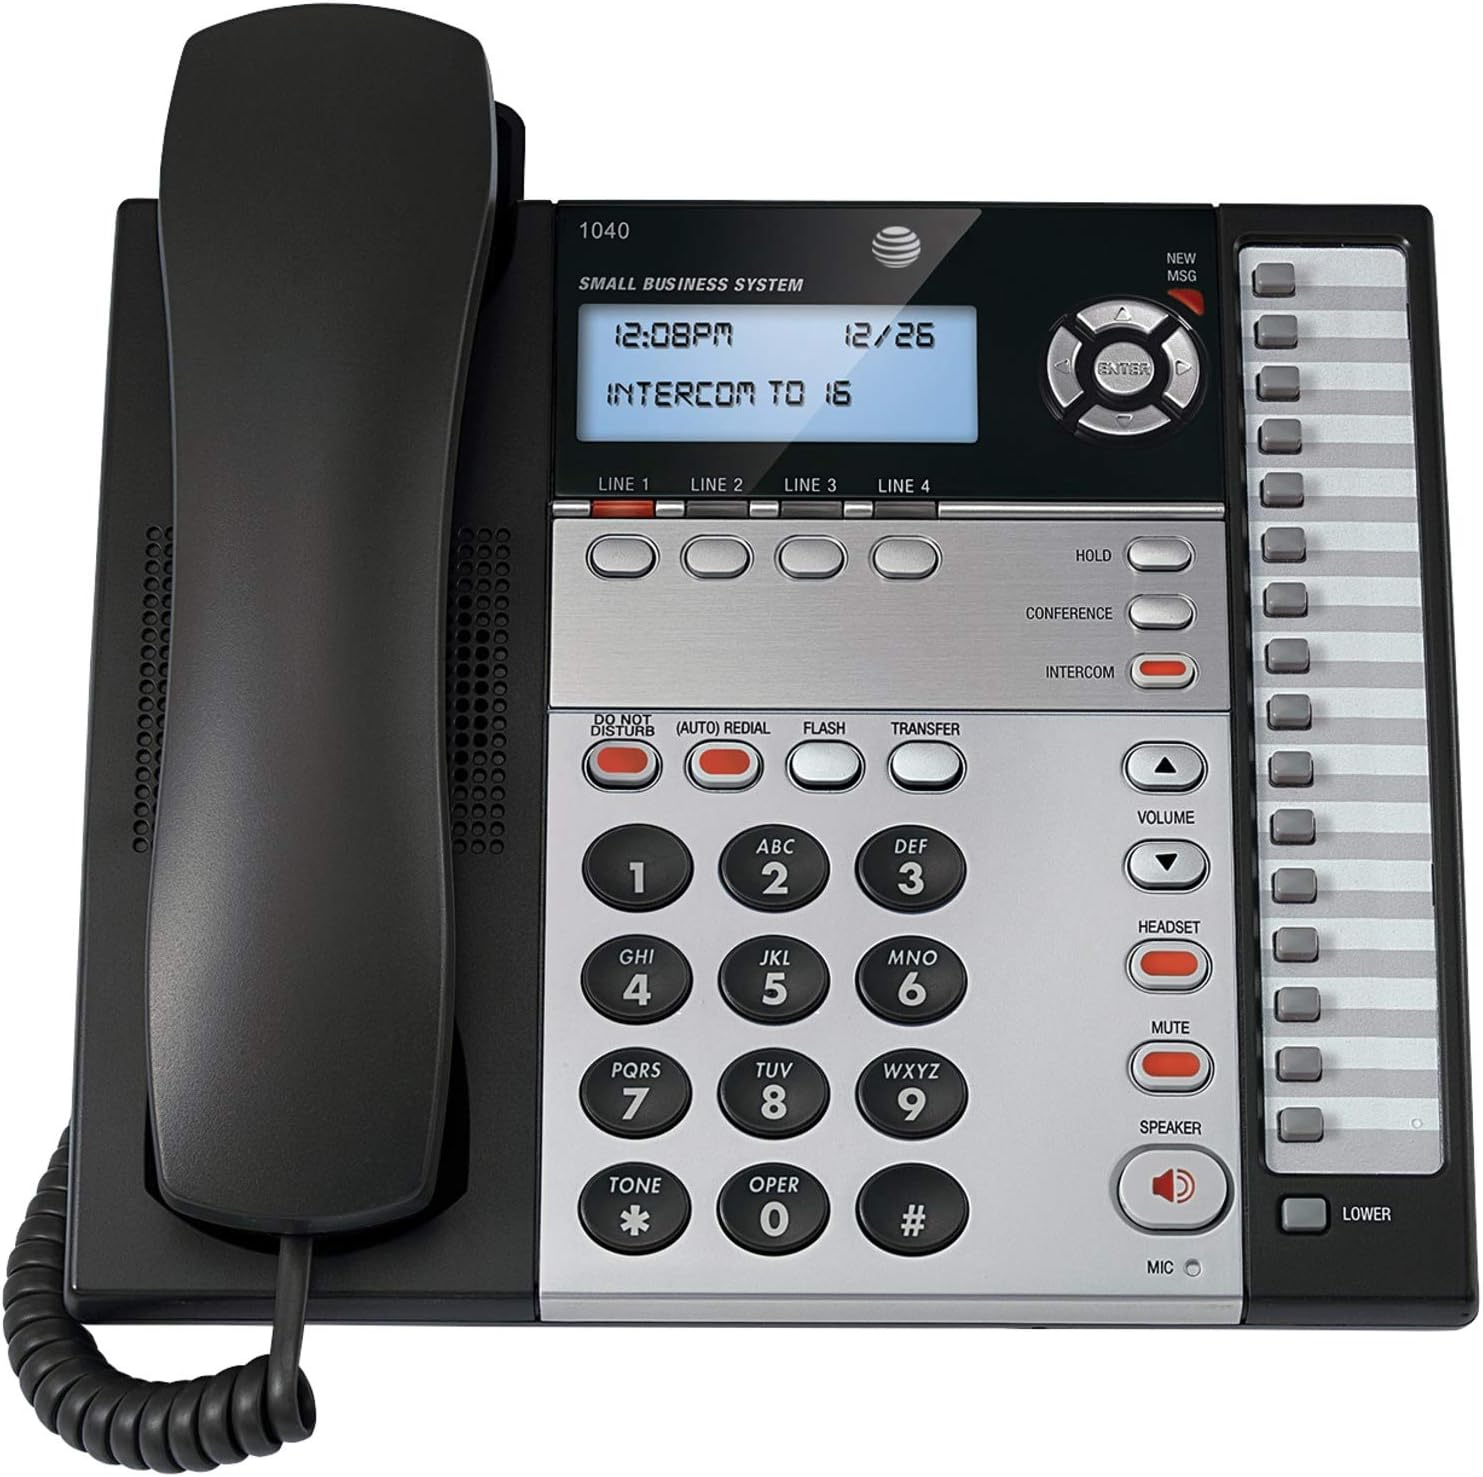
Figura 1: The AT&T 1040 Corded Four-Line Expandable Telephone. This image displays the main unit with its handset resting on the cradle, the digital display showing time and intercom status, the four line buttons, and the full keypad with function buttons like HOLD, CONFERENCE, INTERCOM, VOLUME, HEADSET, MUTE, and SPEAKER.
Setup
1. Spakkjar u Kontroll tal-Komponent
Qabel tibda l-installazzjoni, kun żgur li l-komponenti kollha huma preżenti:
- AT&T 1040 Base Unit
- Handset
- Kurdun ta' l-idejn f'koljaturi
- Line Cords (up to 4, depending on configuration)
- Adapter tal-Qawwa AC
- 9V Battery (for backup, typically included or purchased separately)
2. Konnessjoni tat-Telefon
- Qabbad il-Handset: Ipplaggja tarf wieħed tal-korda mkebba tal-handset fil-handset u t-tarf l-ieħor fil-jack immarkat IDEJN fuq il-ġenb tal-bażi tat-telefon.
- Connect the Line Cords: For each telephone line you wish to use, plug one end of a line cord into the jack labeled LINJA 1, LINJA 2, LINJA 3, jew LINJA 4 on the back of the telephone base. Plug the other end of each line cord into a modular wall jack.
- Installa l-Batterija ta' 9V: Open the battery compartment on the bottom of the telephone base. Insert a 9V battery, observing the correct polarity (+/-). This battery provides backup power for settings during power outagAgħlaq il-kompartiment.
- Connect the AC Power Adapter: Plug the small end of the AC power adapter into the QAWWA jack on the back of the telephone base. Plug the larger end into a standard electrical outlet.
3. Initial Configuration (Date and Time)
Mal-ewwel tixgħel jew wara li tintefa' l-enerġijatage (if battery backup is not present or depleted), you may need to set the date and time. Refer to the display and use the navigation buttons (up/down arrows and ENTER) to adjust the settings. Press DĦUL biex tikkonferma kull setting.
Istruzzjonijiet Operattivi
1. Funzjonijiet Bażiċi ta' Sejħiet
- Tagħmel Sejħa:
- Neħħi l-idejn jew agħfas il- Kelliem buttuna.
- Select an available line by pressing one of the LINJA 1-4 buttuni.
- Ċempel in-numru tat-telefon mixtieq.
- Tweġiba għal Sejħa:
- Meta jdoqq it-telefon, erfa’ l-handset jew agħfas il-buttuna Kelliem button. The corresponding line button will flash.
- Tmiem Sejħa:
- Place the handset back in the cradle or press the Kelliem Agħfas il-buttuna mill-ġdid jekk qed tuża l-ispikerphone.
2. Multi-Line Operation
- Selecting a Line: Agħfas dak mixtieq LINJA 1-4 button to select an available line for making or receiving calls.
- Switching Between Lines: During an active call on one line, press another LINJA button to switch to that line or answer an incoming call on it. The first call will automatically be placed on hold.
3. Speakerphone
Biex tuża l-ispikerphone, agħfas il-buttuna Kelliem button. The indicator light will illuminate. You can then dial or speak hands-free. Press the Kelliem button again to end the call or switch to the handset by lifting it.
4. Intercom
The intercom feature allows internal communication between connected AT&T 1040 units. To initiate an intercom call:
- Agħfas il- INTERCOM buttuna.
- Dial the extension number of the desired internal unit (e.g., "16" as shown on the display).
- The other unit will ring, and you can speak when answered.
5. Funzjoni ta' Żamma
Biex tpoġġi sejħa attiva fuq hold, agħfas il- ŻOMM button. The line indicator light will flash slowly. To retrieve the call, press the flashing LINJA buttuna.
6. Sejħa Konferenza
To establish a 3-party conference call:
- Establish a call on LINJA 1.
- Agħfas il- ŻOMM button to place the first call on hold.
- Select an available line (e.g., LINJA 2) and dial the second party.
- Ladarba t-tieni parti twieġeb, agħfas il-buttuna KONFERENZA button. All three parties will now be connected.
7. Speed Dial
The AT&T 1040 supports 32-number speed dial entries.
- Programming Speed Dial: Consult the full manual for detailed programming steps, typically involving a PROGRAMM or AĦŻEN button followed by a memory location and the number.
- Bl-użu ta' Speed Dial: Neħħi l-idejn jew agħfas Kelliem, select a line, then press the speed dial memory location button.
8. Kontroll tal-Volum
Uża l- VOLUM 'il fuq (▲) u 'l isfel (▼) buttons to adjust the listening volume during a call (handset or speakerphone). Ringer volume can typically be adjusted via a switch or menu setting on the base unit.
9. Mute
Waqt sejħa, agħfas MUTE buttuna biex tiddiżattiva temporanjament il-mikrofonu tiegħek. Il-parti l-oħra mhux se tismagħek, imma xorta tista' tismagħhom. Agħfas MUTE għal darb'oħra biex tkompli titkellem.
10. Tfixkilx
Agħfas il- TISTURBAX button to silence incoming calls. The indicator light will illuminate. Press it again to deactivate.
11. Issejjaħ mill-ġdid
Agħfas il- (AUTO) REDIAL buttuna biex terġa' ċċempel awtomatikament l-aħħar numru msejjaħ.
12. Flash / Transfer
Il- FLASH button is used for accessing network features such as call waiting or transferring calls, depending on your telephone service provider. The TRASFERIMENT button is typically used in conjunction with intercom or other system features to transfer an external call to another internal extension.
13. Headset Operation
To use a headset (not included), plug it into the KUDDIJA jack on the side of the telephone base. Press the KUDDIJA button to activate headset mode. The indicator light will illuminate. Press it again to deactivate or switch to handset/speakerphone.
Manutenzjoni
1. Tindif
Wipe the telephone's exterior with a soft, slightly damp cloth. Do not use cleaning sprays or abrasive cleaners, as these can damage the finish or internal components. Ensure the phone is unplugged from power before cleaning.
2. Sostituzzjoni tal-batterija
The 9V battery provides backup for settings. If the display shows incorrect time/date after a power outage, the battery may need replacement. Open the battery compartment on the bottom of the unit, remove the old battery, and insert a new 9V alkaline battery, observing polarity. Dispose of old batteries responsibly.
3. Kura Ġenerali
Avoid exposing the telephone to extreme temperatures, direct sunlight, or moisture. Do not drop the unit or subject it to strong impacts. Keep it away from sources of electrical noise, such as motors or fluorescent lighting fixtures.
Issolvi l-problemi
| Problema | Soluzzjoni |
|---|---|
| L-ebda ton tal-arloġġ. |
|
| Ma nistax nagħmel jew nirċievi telefonati. |
|
| Id-displej huwa vojt jew ma jistax jinqara. |
|
| L-interkom mhux qed jaħdem. |
|
Speċifikazzjonijiet
- Dimensjonijiet tal-Prodott: 10.2 x 11.5 x 4.5 pulzieri
- Piż tal-oġġett: 0.16 uqija (4.54 g)
- Tip tat-Telefon: Corded
- Sors tal-Enerġija: Corded Elettriku
- Tip ta' Dialer: Tastiera Unika
- Tip ta' Sistema ta' Tweġiba: Diġitali
- Kapaċità ta' Sejħa ta' Konferenza: 3-mod
- Operazzjoni Multiline: Multi-Line Operation (Four-Line)
- Speed Dial Capacity: 32 numri
- Intercom: Iva
Garanzija u Appoġġ
For warranty information and technical support, please refer to the official AT&T product webis-sit jew ikkuntattja lis-servizz tal-klijenti ta' AT&T. Żomm l-irċevuta tax-xiri tiegħek bħala prova tax-xiri għal talbiet ta' garanzija.
Online resources may include FAQs, additional troubleshooting guides, and contact information for support.


