1. Introduzzjoni
This manual provides detailed instructions for the proper installation, operation, and maintenance of the Gerber GH-301 Rough-In Valve. Please read this manual thoroughly before beginning installation to ensure safe and correct usage. Retain this manual for future reference.
2. Prodott Aktarview
The Gerber GH-301 is a durable brass rough-in valve designed for plumbing applications. It features sweat-type inlet and outlet connections, providing a secure and reliable interface within your plumbing system. This valve is intended to be installed behind the finished wall and serves as the foundational component for a complete shower or bath fixture, controlling water flow and temperature when paired with a compatible trim kit (sold separately).
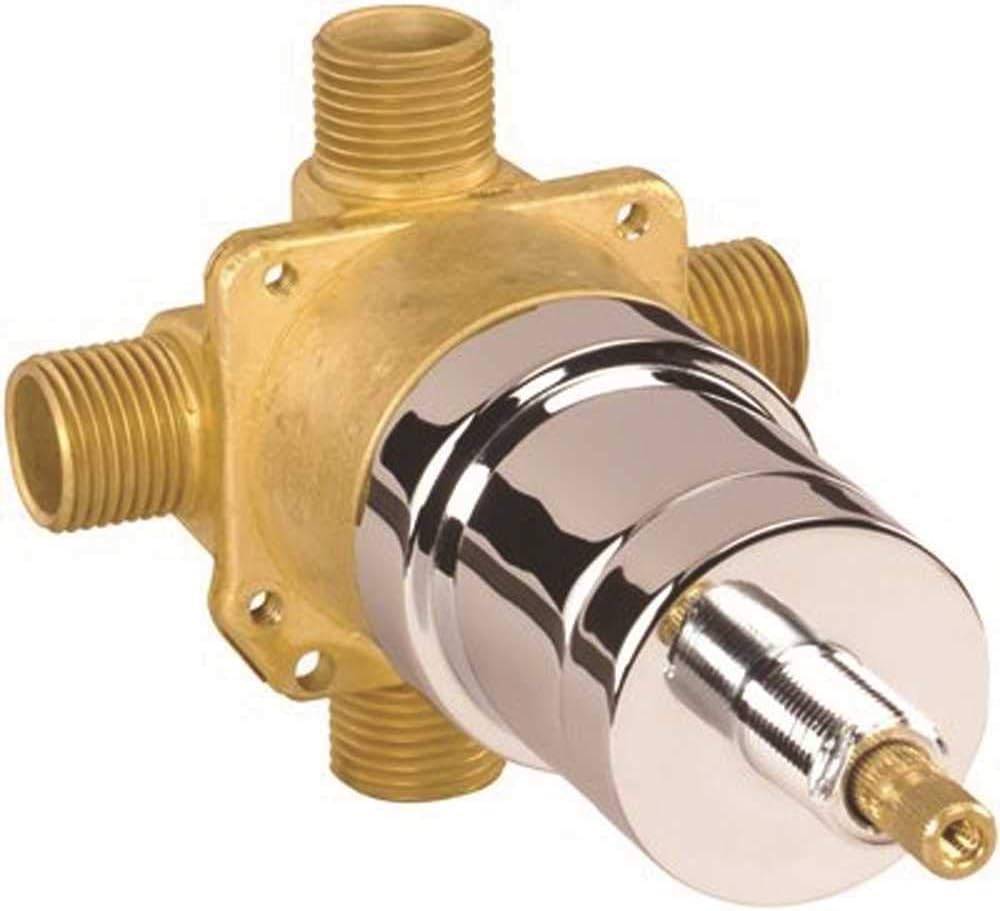
Figura 1: Quddiem view of the Gerber GH-301 Rough-In Valve, showcasing its brass body and chrome-plated control mechanism.
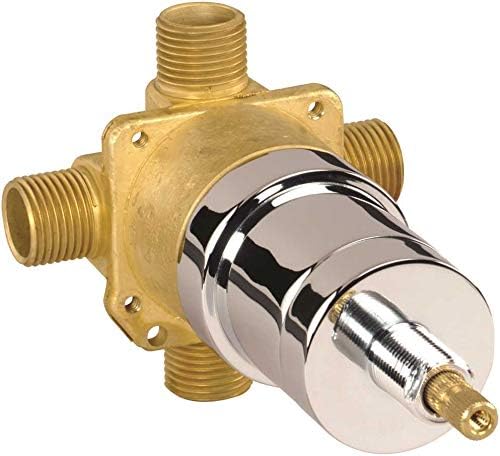
Figura 2: Angolat view of the Gerber GH-301 Rough-In Valve, highlighting the various connection points for water lines.
3. Informazzjoni dwar is-Sigurtà
TWISSIJA:
- Dejjem itfi l-provvista prinċipali tal-ilma qabel ma tipprova xi installazzjoni jew tiswija tal-plaming.
- Ilbes tagħmir protettiv personali (PPE) xieraq, bħal nuċċalijiet u ingwanti tas-sigurtà, waqt l-installazzjoni.
- Jekk m'intix ċert dwar xi parti tal-proċess tal-installazzjoni, ikkonsulta plamer kwalifikat.
- Kun żgur li l-konnessjonijiet kollha huma ssiġillati sew biex tevita t-tnixxijiet.
- Comply with all local plumbing codes and regulations.
4. Installazzjoni (Setup)
4.1 Tools and Materials Required (Not Included):
- Qtugħ tal-pajpijiet
- Soldering torch and solder
- Fluss
- Emery cloth or wire brush
- Wrench aġġustabbli
- Tejp tal-kejl
- Livell
- Mounting hardware (screws, anchors, if not provided with trim kit)
4.2 Passi ta' qabel l-installazzjoni:
- Turn off the main water supply to the building.
- Drain the water lines by opening nearby faucets.
- Carefully unpack the valve and inspect it for any damage. Do not install damaged components.
- Familiarize yourself with the valve's inlet and outlet ports. The GH-301 features sweat connections for both inlet and outlet.
4.3 Mounting and Connecting the Valve:
- Pożizzjonament: Determine the desired height and depth for the valve within the wall cavity. Ensure the valve is securely mounted to a stud or blocking using appropriate fasteners. The valve body must be flush with the finished wall surface once the trim kit is installed.
- Ipprepara l-Pajpijiet: Cut the hot and cold water supply pipes and the outlet pipe(s) to the correct length. Clean the ends of the pipes and the valve's sweat ports thoroughly with emery cloth or a wire brush.
- Apply Flux: Apply a thin, even coat of flux to the cleaned surfaces of both the pipes and the valve ports.
- Konnessjonijiet tal-istann: Insert the pipes into the corresponding valve ports. Heat the joint evenly with a soldering torch and apply solder until it flows smoothly into the joint, creating a watertight seal. Allow the joints to cool completely.
- Test għal Tnixxijiet: Once all connections are cool, slowly turn on the main water supply. Carefully inspect all soldered joints for any signs of leaks. Address any leaks immediately by draining the system, reheating, and re-soldering the joint.
- Installa l-Kit tat-Trim: After confirming no leaks, the wall can be finished. The final trim kit (handle, escutcheon, etc.) can then be installed according to its specific instructions.
5. Operazzjoni
The Gerber GH-301 is a rough-in valve, meaning it is the internal mechanism that controls water flow and temperature. Its operation is entirely dependent on the trim kit (handle and escutcheon) that is installed over it. Once the trim kit is in place, the valve will function as a standard shower or bath valve, allowing you to turn water on/off and adjust temperature and flow as designed by the specific trim kit.
Refer to the instruction manual provided with your chosen Gerber trim kit for detailed operating procedures.
6. Manutenzjoni
The Gerber GH-301 rough-in valve is designed for long-term, maintenance-free operation once properly installed. Regular maintenance primarily involves ensuring the integrity of the plumbing system around the valve.
- Verifiki tat-Tnixxijiet: Periodically check for any signs of water leaks around the valve area, especially if there is access to the wall cavity.
- Kwalità tal-Ilma: In areas with hard water, mineral deposits can accumulate over time. If you experience reduced flow or difficulty in operating the trim kit, it may indicate a need for professional inspection or cartridge replacement (part of the trim kit, not the rough-in valve itself).
- Tindif: The exposed parts of the trim kit should be cleaned regularly with a soft cloth and mild soap. Avoid abrasive cleaners or chemicals that could damage the finish.
7 Issolvi l-problemi
Most issues related to a shower or bath valve are often associated with the trim kit or external plumbing, rather than the rough-in valve itself. However, here are some general troubleshooting tips:
| Problema | Kawża Possibbli | Soluzzjoni |
|---|---|---|
| L-ebda fluss ta' ilma jew pressjoni baxxa |
|
|
| Tnixxija ta' ilma miż-żona tal-valv |
|
|
| Kwistjonijiet ta 'kontroll tat-temperatura |
|
|
If troubleshooting steps do not resolve the issue, it is recommended to contact a qualified plumbing professional.
8. Speċifikazzjonijiet
| Karatteristika | Dettall |
|---|---|
| Numru tal-Mudell | GH-301 |
| Materjal | Ram |
| Dimensjonijiet tal-oġġett (L x W x H) | 4 x 4 x 6 pulzieri |
| Daqs tal-Konnessjoni tad-Dħul | 1.75 Pulzier |
| Tip ta' Konnessjoni tad-Dħul | Għaraq |
| Tip ta' Konnessjoni tal-Ħut | Għaraq |
| Numru ta' Portijiet | 2 |
| Daqs tal-Konnessjoni tal-Ħutlet | 4 Pulzier |
| Piż tal-oġġett | 3 liri |
| UPC | 671052606887 |
9. Garanzija u Appoġġ
Specific warranty information for the Gerber GH-301 Rough-In Valve was not provided in the product data. For details regarding warranty coverage, terms, and conditions, please refer to the official Gerber website or contact Gerber customer support directly.
Għal assistenza teknika jew aktar mistoqsijiet, jekk jogħġbok żur il- Gerber Brand Store jew il-kumpanija uffiċjali tagħhom websit.
10. Vidjows Uffiċjali tal-Prodott
No official product videos from the seller were provided in the available product data for the Gerber GH-301 Rough-In Valve.


