1. Prodott Aktarview
The NZXT Phantom ATX Full Tower Case (PHAN-001WT) is designed to accommodate high-performance computer components, offering extensive cooling capabilities and ample space for system builds. This full tower chassis supports ATX motherboards and provides features for efficient cable management and component installation.
Key features include multiple fan mounting options for optimized airflow, an integrated fan controller, and spacious interior design to support large graphics cards and cooling solutions.
2. Informazzjoni dwar is-Sigurtà
- Dejjem skonnettja l-provvista tal-enerġija mis-sokit tal-ħajt qabel ma twettaq kwalunkwe installazzjoni jew manutenzjoni.
- Handle all components with care to prevent damage from electrostatic discharge. Consider using an anti-static wrist strap.
- Kun żgur li jkun hemm ventilazzjoni xierqa madwar il-kaxxa biex tevita li tissaħħan iżżejjed.
- Żomm il-partijiet żgħar u l-viti 'l bogħod mit-tfal.
3. Kontenut tal-Pakkett
Ivverifika li l-oġġetti kollha huma preżenti fil-pakkett:
- NZXT Phantom ATX Full Tower Case (PHAN-001WT)
- Accessory box (containing screws, standoffs, cable ties, etc.)
- Manwal għall-Utent (dan id-dokument)
4. Setup u Installazzjoni
4.1. Tħejjija tal-Każ
- Poġġi l-kaxxa fuq wiċċ stabbli u ċatt.
- Locate the six thumb screws on the rear of the case. Loosen and remove the top two and bottom two thumb screws. The middle two screws are spring-loaded; loosen them slightly and push downwards to release the side panels.
- Carefully remove both side panels.
- Open the front panel by swinging it outwards. It can be removed completely by swinging it all the way out until it detaches.
- Locate the accessory box inside the bottom front right SSD slot. Open it and familiarize yourself with the included screws and components.
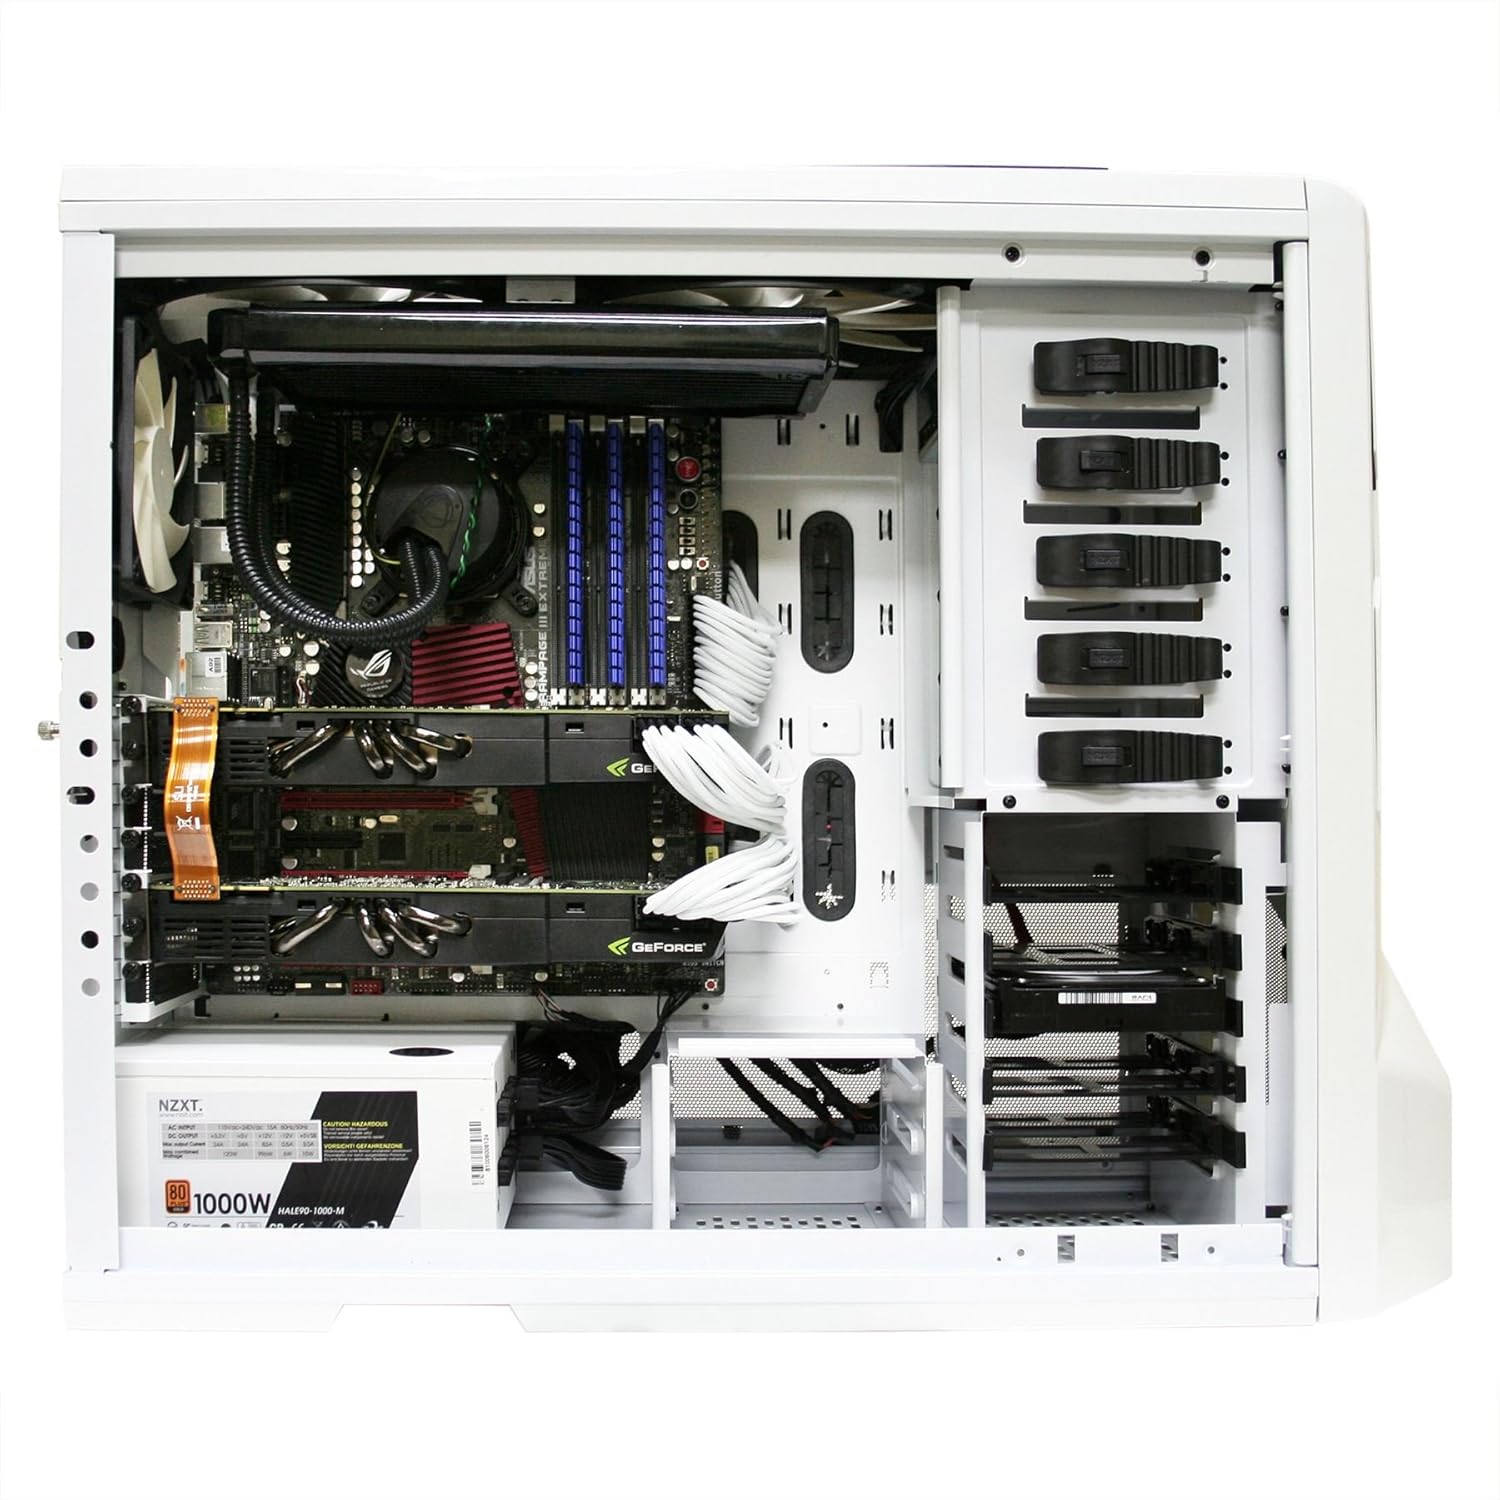
Figura 1: Intern view of the NZXT Phantom case, showing motherboard, graphics cards, power supply, and drive bays.
4.2. Installazzjoni tal-Motherboard
- Identify the correct standoff locations for your motherboard size (e.g., ATX) by referring to the etched notations on the motherboard tray.
- Install the appropriate standoffs into the designated holes.
- Carefully place your motherboard onto the installed standoffs, aligning the screw holes.
- Secure the motherboard with the hexagonal screws provided in the accessory box.
4.3. Installazzjoni tal-Unità tal-Provvista tal-Enerġija (PSU)
- Position your PSU in the designated bottom mount area.
- Secure the PSU to the rear of the case using screws.
- Route the PSU cables (PCI-E, main motherboard power, SATA power) through the cable management holes and grommets to the back side of the motherboard tray. This helps maintain a clean interior and improves airflow.
4.4. Drive Installation (HDD/SSD/Optical Drives)
- For 3.5" HDDs and 2.5" SSDs, utilize the tool-less drive bays. Slide the drive into the bay until it clicks into place.
- For 5.25" optical drives, remove the front panel cover, slide the drive into the bay, and secure it using the quick-release latches or screws.
- Qabbad il-kejbils tad-dejta u tal-enerġija SATA mad-drajvs installati tiegħek.
4.5. Installazzjoni tal-Karta tal-Espansjoni
- Remove the necessary PCI slot mesh bars from the rear of the case to match your expansion card (e.g., graphics card, sound card).
- Insert the expansion card into the appropriate PCI-E slot on your motherboard.
- Secure the card with a screw or the provided latch mechanism.
4.6. Connecting Case Cables
- Connect the front panel headers (Power SW, Reset SW, HDD LED, Power LED, USB, Audio) to their corresponding pins on your motherboard. Refer to your motherboard manual for pin assignments.
- Connect the case fans to the integrated fan controller cables. Each cable is labeled for its corresponding fan.
- Connect the standard Molex connector from your PSU to the fan controller to provide power to the fan system.

Figura 2: Ġenb view of the NZXT Phantom case, highlighting the mesh panels for fan mounting locations.
5. Operazzjoni
5.1. Tixgħel
- Once all components are installed and cables connected, replace the side panels and secure them with the thumb screws.
- Connect your monitor, keyboard, mouse, and other peripherals.
- Connect the power cable to your PSU and a wall outlet.
- Press the power button on the top panel of the case to start your system.
5.2. Kontroll tal-fann
The NZXT Phantom case features an integrated fan controller located on the top panel. Use the sliders to adjust the speed of the connected case fans. Adjusting fan speed will also dim the LEDs on fans that support this feature.

Figure 3: Integrated fan controller on the top panel, allowing adjustment of fan speeds.
5.3. Portijiet tal-Panel ta' Quddiem
The top panel of the case provides convenient access to:
- Portijiet USB 2.0 (2x)
- USB 3.0 port (1x, depending on model revision)
- Jack tal-headphone
- Jack tal-mikrofonu
6. Manutenzjoni
6.1. Tindif
- Barra: Uża artab, damp drapp biex timsaħ l-uċuħ ta’ barra. Evita prodotti tat-tindif li joborxu.
- Intern: Periodically open the case and use compressed air to remove dust buildup from components and fan blades. Ensure the system is powered off and unplugged before cleaning.
- Filtri tat-Trab: The case features mesh panels that act as dust filters. Regularly remove and clean these filters to maintain optimal airflow and cooling performance.
7 Issolvi l-problemi
7.1. Is-Sistema Mhux Qed Tixgħel
- Ivverifika li l-kejbil tal-enerġija huwa konness sew kemm mal-PSU kif ukoll mas-sokit tal-ħajt.
- Kun żgur li s-swiċċ tal-PSU jkun fil-pożizzjoni 'ON'.
- Check that the front panel 'Power SW' header is correctly connected to the motherboard.
- Confirm all major power cables (24-pin ATX, CPU, GPU) are securely seated.
7.2. Fan Issues
- If fans are not spinning, check their connections to the integrated fan controller and ensure the Molex power connector for the controller is plugged into the PSU.
- Adjust fan speeds using the top panel sliders.
- Excessive fan noise may indicate dust buildup or a faulty fan. Clean fans or consider replacement if noise persists.
7.3. Side Panel Latch Issues
- If the side panel latches are difficult to secure or frequently dislodge, ensure they are properly aligned. As an alternative, the side panels can be secured solely with the thumb screws.
7.4. Component Fitment
- When installing large CPU air coolers or liquid cooling radiators, verify clearance with the side panel fan mounts. In some configurations, it may be necessary to adjust or remove certain side panel fans to accommodate oversized components.
8. Speċifikazzjonijiet
| Karatteristika | Speċifikazzjoni |
|---|---|
| Brand | NZXT |
| Serje | PHAN-001WT |
| Isem tal-Mudell | PHAN-001WT |
| Tip ta' Każ | Torri sħiħ |
| Kompatibbiltà tal-motherboard | ATX |
| Kulur | Abjad |
| Materjal | Azzar Liga, plastik |
| Piż tal-oġġett | 24.2 liri |
| Dimensjonijiet tal-Prodott (LxWxH) | 24.6 x 8.7 x 21.35 pulzieri |
| Tip ta' Immuntar tal-Provvista tal-Enerġija | Mount tal-qiegħ |
| Metodu tat-tkessiħ | Arja |
| Daqs tal-fann | 200 Millimeters (various fan sizes supported) |
| Numru ta 'USB 2.0 Ports | 2 |
| Audio-out Ports | 1 |
9. Garanzija u Appoġġ
For detailed warranty information and technical support, please visit the official NZXT website. The warranty period and terms may vary by region and product. Ensure you retain your proof of purchase for warranty claims.
Riżorsi onlajn:
- NZXT Official Websit: www.nzxt.com
- Support Portal: Refer to the NZXT website for their dedicated support section.


