
1. Introduzzjoni
This manual provides essential information for the safe and efficient use of your Kyocera ECOSYS MZ3201ix A3 Laser Multifunction Printer. Please read this manual thoroughly before operating the device and keep it for future reference.
Prodott Overview
The Kyocera ECOSYS MZ3201ix is a versatile A3 laser multifunction printer designed for both office and home office environments. It offers high-resolution printing, copying, scanning, and faxing capabilities, ensuring efficient document management.
Karatteristiċi ewlenin:
- Print resolution up to 1200 dpi.
- Print speed up to 32/17 pages A4/A3 per minute in black and white.
- 100-sheet universal feeder and 500-sheet cassette.
- Duplex unit for double-sided printing (DIN A5 - DIN A3).
- Integrated high-level security features.
- Automatic Document Feeder (ADF).
- Network-ready with Ethernet and USB connectivity.
- Scan to email functionality.
- Intuitive touch screen interface.
2. Informazzjoni dwar is-Sigurtà
Dejjem osserva l-prekawzjonijiet ta' sigurtà li ġejjin biex tevita korriment jew ħsara lill-apparat.
- Provvista tal-Enerġija: Connect the printer only to a grounded power outlet with the correct voltage. Tgħabbix iżżejjed is-sokits tal-elettriku.
- Pjazzament: Place the printer on a stable, level surface. Ensure adequate ventilation around the device. Avoid placing it near water or heat sources.
- Immaniġġjar: Tippruvax tiżżarma jew timmodifika l-istampatur. Irreferi kull servizz lil persunal kwalifikat.
- Konsumabbli: Use only genuine Kyocera toner and parts. Keep toner cartridges out of reach of children.
- Ċaqliq tal-Apparat: The printer is heavy (49 kg). Use appropriate lifting techniques or assistance when moving it to prevent injury.
3. X'hemm fil-Kaxxa
Iftaħ il-kaxxa bir-reqqa u kun żgur li l-oġġetti kollha huma preżenti:
- Kyocera ECOSYS MZ3201ix Multifunction System
- Skartoċċ tal-linka
- Kontenitur tal-iskart tal-linka
- Kejbil tal-enerġija
- Istruzzjonijiet tas-sigurtà
- Gwida tal-bidu ta 'malajr
If any items are missing or damaged, please contact your vendor or Kyocera support.
4. Setup
4.1 Spakkjar u Tqegħid
- Neħħi l-materjali tal-ippakkjar, it-tejps, u l-films protettivi kollha mill-istampatur.
- Place the printer on a sturdy, level surface capable of supporting its weight (approximately 49 kg). Ensure there is sufficient space around the printer for ventilation and access to trays and covers.
4.2 Konnessjoni tal-Kable tal-Enerġija
- Connect the power cable to the power input on the rear of the printer.
- Ipplaggja t-tarf l-ieħor tal-kejbil tal-enerġija f'sokit elettriku ertjat.
4.3 Installing Toner and Waste Toner Container
- Iftaħ il-qoxra ta' quddiem tal-istampatur.
- Insert the toner cartridge according to the instructions provided on the cartridge and inside the printer.
- Insert the waste toner container into its designated slot.
- Agħlaq il-qoxra ta' quddiem sew.
4.4 Tagħbija tal-Karta
- Pull out the paper cassette (standard 500-sheet tray or 100-sheet universal feeder).
- Aġġusta l-gwidi tal-karta għad-daqs tal-karta li qed tgħabbi (jappoġġja minn A5 sa A3).
- Għabba l-munzell tal-karti, waqt li tiżgura li ma jaqbiżx il-linja massima tal-mili.
- Imbotta l-kasett tal-karta bil-mod lura fil-printer.
4.5 Konnessjoni tan-Netwerk u tal-USB
- For Network Connection (Ethernet): Connect an Ethernet cable from your network router/switch to the LAN port on the printer.
- For Direct Connection (USB): Connect a USB 2.0 cable from your computer to the USB port on the printer.
4.6 Installazzjoni tas-Softwer
- Ixgħel l-istampatur billi tuża l-buttuna tal-enerġija.
- Follow the on-screen instructions on the printer's touch screen for initial setup, including language and network settings.
- On your computer, insert the driver CD (if provided) or download the latest drivers and utility software from the official Kyocera websit.
- Run the installer and follow the prompts to install the printer drivers and software.
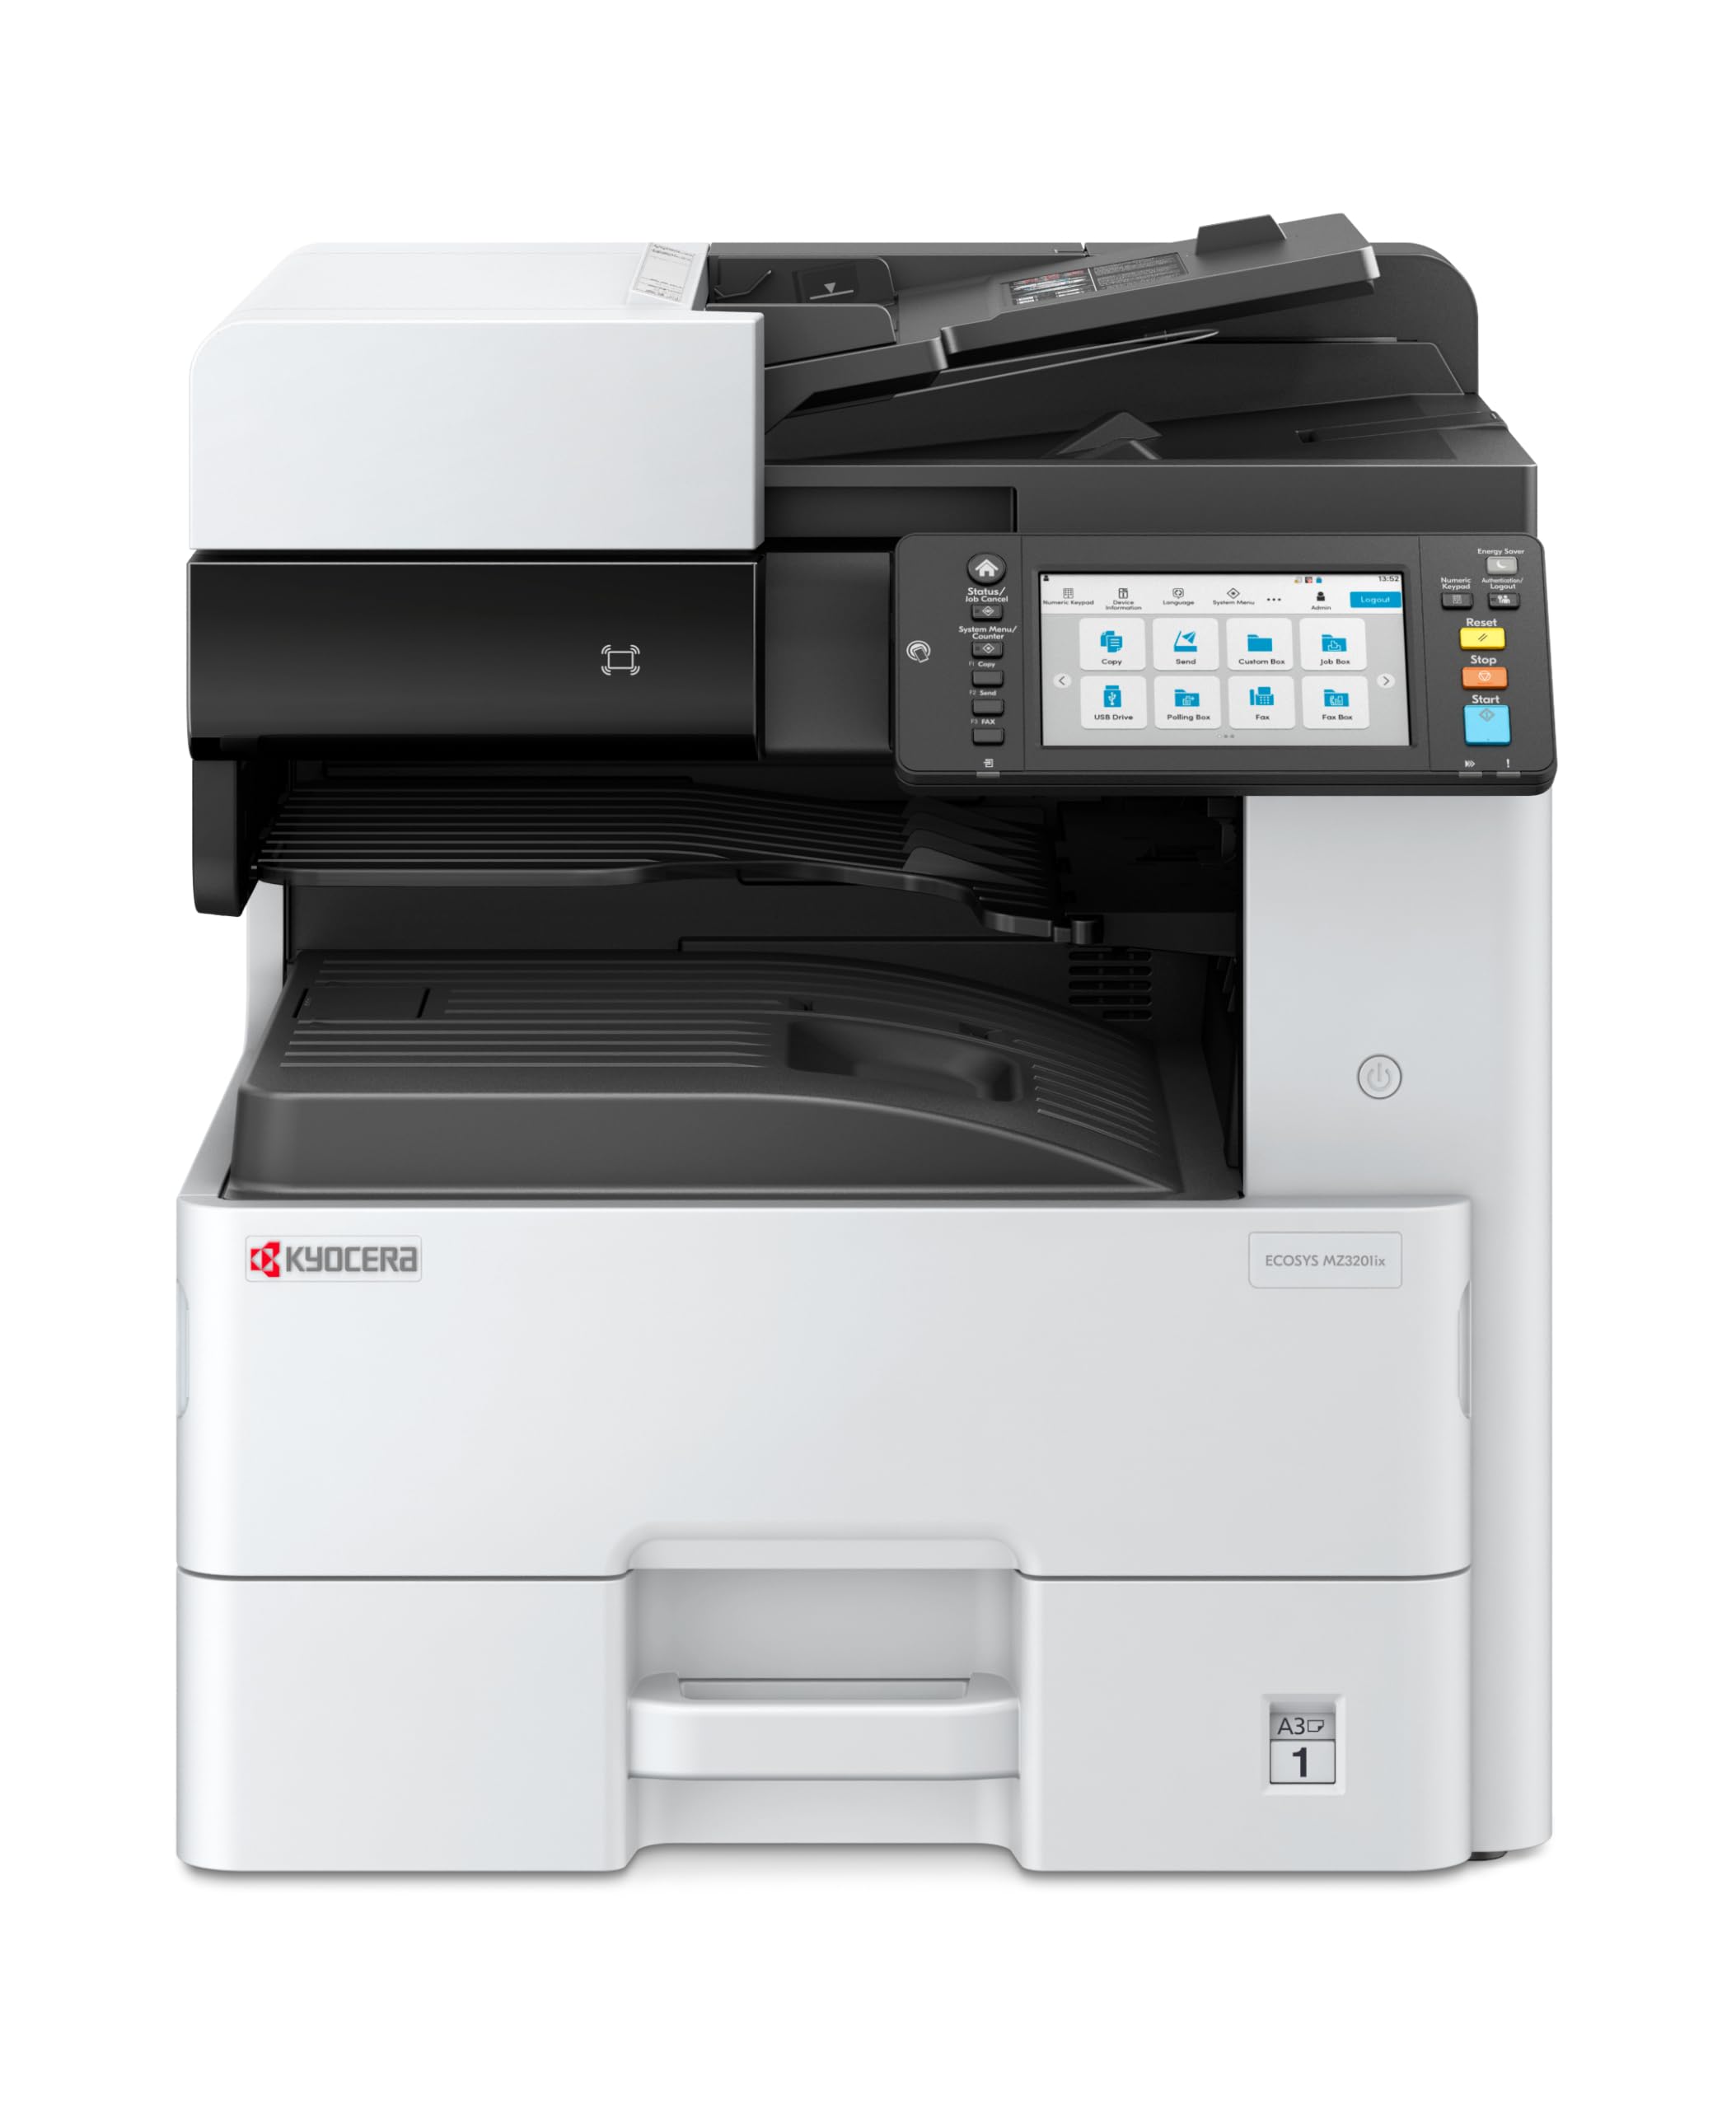
Image 1: Kyocera ECOSYS MZ3201ix A3 Laser Multifunction Printer. This image shows the front view of the printer, highlighting its compact design and the integrated touch screen panel.
5. Istruzzjonijiet Operattivi
5.1 Stampar Bażiku
- Iftaħ id-dokument li tixtieq tipprintja fuq il-kompjuter tiegħek.
- Agħżel File > Stampa.
- Choose the Kyocera ECOSYS MZ3201ix from the list of available printers.
- Aġġusta s-settings tal-istampar (eż., numru ta' kopji, daqs tal-karta, stampar duplex) kif meħtieġ.
- Ikklikkja Stampa.
5.2 Ikkupjar ta' Dokumenti
- Poġġi d-dokument wiċċu 'l isfel fuq il-ħġieġa tal-iskaner jew wiċċu 'l fuq fl-Awtomatiku tad-Dokumenti Feeder (ADF).
- On the printer's touch screen, select the Kopja funzjoni.
- Adjust settings such as number of copies (up to 999), zoom, and paper type.
- Agħfas il- Ibda buttuna biex tibda tikkopja.
5.3 Skennjar ta' Dokumenti
- Poġġi d-dokument fuq il-ħġieġa tal-iskaner jew fl-ADF.
- On the printer's touch screen, select the Skennja funzjoni.
- Choose your desired scan destination (e.g., Scan to PC, Scan to Email, Scan to USB).
- Configure scan settings such as resolution (up to 1200 x 1200 dpi), color mode, and file format.
- Agħfas il- Ibda buttuna biex tibda tiskennja.
5.4 Ibgħat Dokumenti bil-Faks
(Note: Fax functionality requires a telephone line connection, not detailed in this manual.)
- Poġġi d-dokument fuq il-ħġieġa tal-iskaner jew fl-ADF.
- On the printer's touch screen, select the Fax funzjoni.
- Daħħal in-numru tal-faks tar-riċevitur billi tuża t-tastiera.
- Aġġusta kwalunkwe settings tal-faks meħtieġa.
- Agħfas il- Ibda buttuna biex tibgħat il-faks.
6. Manutenzjoni
Manutenzjoni regolari tiżgura prestazzjoni ottimali u testendi l-ħajja tal-istampatur tiegħek.
6.1 Tindif tal-Istampatur
- Barra: Imsaħ l-uċuħ ta 'barra b'artab, damp, drapp mingħajr suf. Tużax prodotti tat-tindif jew solventi li joborxu.
- Ħġieġ tal-iskaner: Gently clean the scanner glass with a soft cloth and a non-abrasive glass cleaner.
- Rombli tal-ADF: Naddaf ir-rombli tal-ADF perjodikament b'ċarruta mingħajr sufampImxarrab bl-alkoħol isopropiliku biex jipprevjeni l-imblukkar tal-karta.
6.2 Sostituzzjoni tal-Kartriġ tat-Toner
- When the printer indicates low toner, order a new Kyocera toner cartridge.
- Iftaħ il-qoxra ta' quddiem tal-istampatur.
- Neħħi l-iskartoċċ tat-toner vojt billi tiġbdu 'l barra.
- Iftaħ il-kartriġ il-ġdid tat-toner mill-pakkett u ħawdu bil-mod biex tqassam it-toner.
- Insert the new toner cartridge firmly into its slot until it clicks into place.
- Agħlaq il-qoxra ta' quddiem.
6.3 Replacing Waste Toner Container
- When the printer indicates the waste toner container is full, prepare a new one.
- Open the cover that provides access to the waste toner container.
- Carefully remove the full waste toner container. Seal it in a plastic bag for proper disposal.
- Insert the new waste toner container into its slot.
- Agħlaq il-qoxra.
7 Issolvi l-problemi
Din it-taqsima tindirizza kwistjonijiet komuni li tista' tiltaqa' magħhom mal-istampatur tiegħek.
7.1 Ġammijiet tal-karti
- Sintomu: Printer stops, and an error message indicates a paper jam.
- Soluzzjoni: Turn off the printer. Open all covers and trays. Carefully remove any jammed paper, pulling in the direction of the paper path. Ensure no small pieces of paper remain. Close all covers and restart the printer.
7.2 Kwalità tal-Istampar Fqira
- Sintomu: Faded prints, streaks, or spots on pages.
- Soluzzjoni: Check toner level and replace if low. Perform a print head cleaning or calibration from the printer's maintenance menu. Ensure you are using appropriate paper for your print job.
7.3 Il-Printer Mhux Jirrispondi
- Sintomu: Printer is online but does not print documents sent from the computer.
- Soluzzjoni: Check all cable connections (USB/Ethernet). Restart both the printer and your computer. Verify that the correct printer driver is installed and selected. Check the printer's network settings if connected via Ethernet.
7.4 Kodiċi ta' Żball
If an error code appears on the touch screen, refer to the comprehensive user manual (available on the Kyocera website) for specific instructions related to that code. Many codes indicate specific issues like open covers, paper jams, or consumable replacement needs.
8. Speċifikazzjonijiet
| Karatteristika | Speċifikazzjoni |
|---|---|
| Brand | Kyocera |
| Isem tal-Mudell | ECOSYS MZ3201ix |
| Numru tal-Mudell | 110C2V3NL0 |
| Teknoloġija tal-Konnettività | Ethernet, USB 2.0 |
| Teknoloġija tal-Istampar | Laser |
| Karatteristiċi Speċjali | Automatic Document Feeder, Auto-Duplex, Network Ready, Scan to Email, Touch Screen |
| Output Printer | Monokromu |
| Max Print Speed Black & White | 32 Pages per minute (A4) |
| Piż tal-oġġett | 49 Kilogrammi |
| Dimensjonijiet tal-Prodott (DxWxH) | 58.5P x 59L x 68.8H ċm |
| Max Print Resolution Black & White | 1200 x 1200 dpi |
| Riżoluzzjoni tal-Iskaner | 1200 x 1200 dpi |
| Stampar Duplex | Awtomatiku |
| Max Copy Count | 999 |
| Ħin tal-Ewwel Page Out | 5.2 Sekondi |
| Max Supported Paper Size | A3 |
| Kapaċità Massima tal-Folja tal-Input | 1600 |
| Tip ta' Midja tal-Istampar | Karta sempliċi |
| Funzjonijiet | Copy, Fax, Scan, Print |
9. Garanzija u Appoġġ
Your Kyocera ECOSYS MZ3201ix printer comes with a standard manufacturer's warranty. For detailed information regarding warranty terms, duration, and coverage, please refer to the warranty card included with your product or visit the official Kyocera websit.
Appoġġ għall-Klijent:
If you encounter any issues that cannot be resolved using this manual or require technical assistance, please contact Kyocera customer support. You can find contact information on the Kyocera webis-sit jew fid-dokumentazzjoni pprovduta mal-istampatur tiegħek.
When contacting support, please have your printer's model name (ECOSYS MZ3201ix) and serial number ready. The serial number is typically located on a label on the back or bottom of the printer.